Basin And Range Trail Thru Hike Guide
Basin and Range Trail Introduction
The Basin and Range Trail (BRT) is a 1,090-mile hiking route through Nevada’s Basin and Range country, more commonly referred to simply as the Great Basin. Nevada is home to more than 310 mountain ranges, second only to Alaska. Most of these mountain ranges are tall, narrow and run parallel to each other in a north-south configuration. In between these mountain ranges lies vast arid valleys, or basins. The Basin and Range Trail was created to explore this unsung landscape, a region with few established hiking trails and very little information on what is even out there. In short, the allure of the unknown inspired this route.
The BRT offers a different kind of thru hiking adventure, more raw and rugged than those within the National Scenic Trail system. The BRT is not a blazed trail, a beaten path or even a 100% fully ground-truthed route. Routes of this nature are constantly evolving, seeking the best scenery and most interesting hiking, the optimal route. As more hikers take on the Basin and Range Trail, various alternate routes are explored and feedback is gathered, the future will see many updates to the current route. Thru-hiking the Basin and Range Trail means off-trail hiking and bushwhacking, and hikers setting foot here should understand that this is part of the adventure.
The Basin and Range Trail is split up into 10 sections, and could end up being anywhere from 900-1100+ miles, depending on the route you take. There are many options for alternates and cutoffs. It begins in Ely and forms a large “loop” through the state, nearly ending in Ely but actually ending in Baker. The BRT is best suited for a clockwise hike. Late spring/early summer is the optimal window. Expect 45-55 days of hiking. There is a lot of rugged cross-country terrain with a lot of bushwhacking, so the pace is slower than a normal thru hike.
Read the Las Vegas Review Journals’ story on the Basin and Range Trail
BRT 1.0 vs BRT 2.0
The version of the Basin and Range Trail I hiked could be considered 1.0. Since my first attempt of this route, it has undergone major revisions to take advantage of the first-hand knowledge I gained by getting my feet on the ground and actually hiking the route. Large portions of my original route have become the standard route, some portions of the original route are now alternate routes, and some portions of the original route have been scrapped and re-routed all together. Keep in mind that the Basin and Range Trail experience presented in my journal only partially represents the standard Basin and Range Trail route presented in the Official Guidebook and Map Set, which could be referred to as BRT 2.0.
Basin and Range Trail Thru Hike Journal And Photos
1 – Ely to Preston: 94 Miles (87 Miles)
2 – Preston to Tonopah: 120 Miles (110 Miles)
3 – Tonopah to Carvers: 116 Miles (124 Miles)
4 – Carvers to Austin: 95 Miles (94 Miles)
5 – Austin to Eureka: 106 Miles (59 Miles)
6 – Eureka to Lamoille: 131 Miles (123 Miles)
7 – Lamoille to Wells: 80 Miles (70 Miles)
8 – Wells to Wendover: 113 Miles (83 Miles)
9 – Wendover to Ely: 125 Miles (105 Miles)
10 – Ely to Baker: 111 Miles (96 Miles)
BRT 2.0 Total: 1091 miles My Total: 951 Miles
*Note: I want to present both my actual mileage hiked, but also, the mileage of the standard route for future BRT thru hikers. Read the above mileages as follows: “1 – Ely to Preston: 94 Miles (87 miles)”… the 94 miles represents standard BRT route presented in the guidebook (BRT 2.0), while the 87 miles represents the actual miles I hiked on my version of this section (BRT 1.0). Basically, this is a quick way of understanding how many miles I hiked that section, compared to what the total is for that section moving forward in BRT 2.0.
Basin and Range Trail Thru Hike Videos
I filmed carried 6lbs of electronics and camera gear to film my Basin and Range Trail thru hike. After the hike, I then spent well over 1,000 hours editing and producing a 10 part series documenting my Great Basin thru hike experience, as well as a feature film that condenses the Basin and Range Trail thru hike adventure down to 60 minutes. Watching these videos is the best way to get a feel for a Great Basin thru hike, to see the beauty of Nevada but also the difficulty of the route.
10 Part Basin and Range Trail Thru Hike Vlog Series
Basin and Range Trail Thru Hike Documentary Film
Basin and Range Trail Thru Hike Documentary Film on Streaming Services
You can watch the 60 minute Basin and Range Trail Documentary Film for free on youtube, but if you’d prefer, you can also watch it on the following streaming services:
- Amazon Prime
- Xumo
- Tubi
- Filmocracy
- Telus
- Overdrive
Basin and Range Trail Guide
Now that you’ve read the BRT Journals and watched the Basin and Range Trail movie/vlog series, you may be interested in the more technical aspects of the hike. Perhaps to plan a thru hike, or section hike, of the Basin and Range trail yourself. The information below is meant to be a condensed guide to give the potential BRT hiker a quick look at the basic logistical aspects of planning your own hike.
The Official Guidebook and Map Set is the most complete, detailed Basin and Range Trail planning resource available for those who are serious about thru hiking their own version of the Basin and Range Trail. The route is well documented in the available 120 page guidebook, GPX file of the route, PDF map sets, water chart and more. The Basin and Range Trail planning resources are detailed and thorough, everything you need to hit the ground. The complete BRT planning guide and GPX kit is available for free to those who join the Basin and Range Trail Facebook group , which is the best way to get in touch with other past, present and future BRT thru hikers, trail angels etc.
Start and End Points
The Basin and Range Trail starts in Ely and ends in Baker. The route nearly forms a loop, but doesn’t actually end in Ely, although a hiker could if he/she so chooses. Getting to and from the start and end points of the BRT is a challenge. Ely doesn’t offer the hiker much in terms of transportation options. There are no airports, trains, bus routes, uber, taxi services or shuttles that operate out of Ely (population 4,000). Therefore, ending the hike in Baker (population 58) puts the hiker in a roughly similar situation, the need to find a ride to a larger town for transportation back home. If you don’t have a friend willing to drive you to and from the terminus points, your best bet is rideshare listings on facebook or craigslist. And of course, thumbing it as a last resort. Remember, the trial provides. If you can get to it.
Direction of Travel
The route is best hiked in a clockwise direction. The route ends at Wheeler Peak (13,065′) in Great Basin National Park, so you aren’t going to want t be at that elevation too early in the season. The Snake Range, encompassing Mt Moriah and Great Basin National Park, is best hiked last along the BRT. In general, the southern leg of the BRT is lower in elevation, as well as latitude, and so it can be hiked earlier in the season. For these reasons, it’s best to hike clockwise. A counter-clockwise hike of the BRT would likely require different start and end points.
Seasonality
The BRT could be hiked in the spring, summer and fall. However, most hikers will prefer this hike in May to July timeframe. The southern portion of the route is the warmest/lowest elevation, and that is why it is hiked first. In many years (snow has been low in recent years) the Toiyabes hold significant snow into June. The Rubies, Schell Creek Range and the Snake Range can all hold snow into July. In the southern portion, the Egans and Grant ranges both spend time over 10k feet, and reach 11k feet, so these can hold snow later into the season as well. Those who don’t mind the snow, or don’t mind bailing and walking around if high snow is encountered, can start earlier in the season, say, April. Those looking for a snow-free hike should wait until around 1st or second week of May at least, potentially later depending on the year. Start too late and the heat is an issue from mid July on, and water sources start to dry up. The ideal start date is based off the snowpack for the current year. Your goal is to have snow melt to draw water from while hiking the crest of the Toiyabes and Diamonds, in sections 4 and 6.
Time on Trail
The miles here are MUCH slower than a typical thru hike, because of the frequent bushwhacking and cross-country hiking across rough terrain. The hike will take much longer if you stick with the bushwhacking, not bailing out and taking alternates. The route variables could mean a total mileage of 900-1100+, which also has a big effect on your time to complete the route. Not counting zero days, figure 45-55 days for a “typical” thru hike of about 1000 miles.
Type of Hiking
Approximate breakdown of surface types along the Basin and Range Trail and their estimated percentages:
Single Track Trail – 10%
Cross-Country Hiking – 35%
4×4 Roads – 35%
Dirt Roads – 15%
Paved Roads – 5%
The majority of the hiking along the Basin and Range Trail is either cross-country or on a 4×4 road, many of
which are very old and faded. There are practically no hiking trails along the route, except in the Toiyabes,
Rubies, Mt. Moriah and Great Basin National Park. If you see a hiking trail marked anywhere else on the map,
chances are, it doesn’t actually exist on the ground. Sometimes, the same is true for 4×4 roads. If you do
encounter a trail, it likely needs some maintenance as most are overgrown. Many of the trails encountered are actually horse trails,
which quickly fade in and out.
Maps
Download the Basin and Range Trail GPX file & PDF Map Set. The GPX file and PDF maps are FREE for those who join the Basin and Range Trail facebook group, or available for purchase using the first link. You can can use the GPX file with the mapping platform of your choice (I recommend caltopo). The GPX file includes all of the water sources as waypoints as well.
Water
Water is perhaps the biggest concern a potential Basin and Range Trail thru hiker has when considering this trail. To those unfamiliar with Nevada, the prospect of finding reliable water in Nevada sounds daunting, and downright dangerous. However, this is not the case. Nevada is the driest state in the country, and even during an exceptional drought, in the middle of summer in 2020, I generally had no problem finding water.
The water availability along the BRT could be considered comparable to that of New Mexico on the Continental Divide Trail. There are plenty of days where you will have multiple water sources, and there are many days where you will only have one. It’s a dry and arid climate, but there is almost always water, when you know where to find it. They key is pre-hike planning.
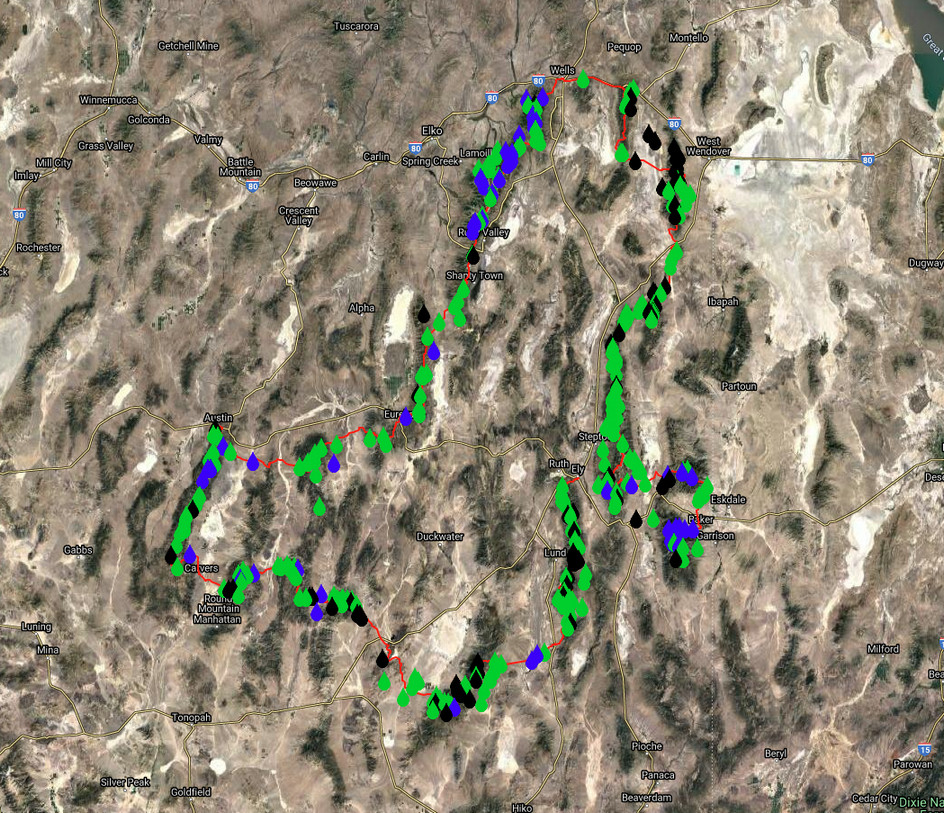
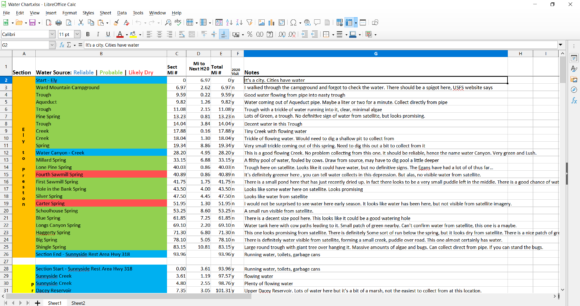
Water sources plotted along the route, color coded for ease of visibility and understanding: Blue = Reliable, Green = Probably/Maybe, Black = Dry
The longest distance in between water sources for me was roughly 25 miles. The standard BRT route as presented in this guidebook has a water carry of up to 38 miles, but potentially as low as 25 depending on the route taken. In total, the BRT has 4 water carries over 20 miles. In general, water is pretty easy to come by, for such an arid climate. In short, water is not as big of a deal as you might think in Nevada.
Most of Nevada’s precipitation falls in the form of snow, and after snowmelt is when water is most abundant. Snow remains longer into the spring and summer season in some ranges than others. The taller the mountains, generally, the wetter they are. In most ranges, the large canyons have water. Many of these water sources in the mountains are flowing creeks.
Water Chart
Besides the GPX file of the route, here’s perhaps the single most important piece of planning info available for a thru hike of the Basin and Range Trail: the Water Chart. All of these water sources are plotted along the GPX file as well, so you can view these water sources along an interactive map.
*This chart is set to View Only, so if you have any updates to this chart, contact me directly and I will add your notes/updates here to the Basin and Range Trail Master Water Chart.
Bushwhacking
To be blunt, there is a shitload of bushwhacking along the Basin and Range Trail. This route was never meant to be conservative, ensuring easy passage or safety. It was meant to be the next-level adventure I was looking for after completing the CDT. For me personally, that meant mapping my own route, going off-trail, and dealing with whatever it was I got myself into. I knew I would be bushwhacking, and I accepted this going into it. I wanted to reach places that looked intriguing to me via satellite, or perhaps, simply connect segments of the route that would not otherwise be possible if one were not willing to put forth the extra effort in bushwhacking. If you don’t want to do any bushwhacking, I don’t blame you. But unless you are willing to do what others won’t, your adventures will be confined to the path more frequently traveled.
The worst bushwhacking along the BRT was in the East Humboldt Range, and the Goshute Range. The East Humboldt Range is notorious for being overgrown, and as wet as it is, can be thicker than anything else you’ve encountered along the BRT. The supple new growth aspens bend easily, but grow so thick that you’ll feel like you’re swimming in them above the ground. The Goshute Range, on the other hand, is much drier. Here, Mahogany Trees are the main obstacle. They grow thick too, but are stiff and brittle. In other words, it hurts more.
One option to consider is having a pair of gloves to protect your hands. They will become torn up without them as you constantly grab and snap branches on some of these bushwhacks. I didn’t have them at the time, but I am now wearing these Fish Monkey Fingerless Gloves. The inside of the palm is a soft flexible leather, and the outside is like a thin neoprene material. The gloves feel light and flexible, yet provide good protection for the hands while bushwhacking.
Weather & Climate
Those unfamiliar with Nevada often think of the state as a giant extension of Las Vegas, one big hot desert. Many are surprised to realize that the rest of the state varies as much as it does. Las Vegas sits in a valley at around 1800’ elevation, while the lowest point along the BRT is 4800’. Only once does it dip below 5000’. Most basins are around 5500’, with some as high as 6500’. Those are the LOW points along the route. Sure, it can be hot on the BRT, but nowhere near as hot as Las Vegas, due to higher elevations. Central and northern Nevada is a different environment. The rest of the state does not see the 115 degree temps that Las Vegas does.
See the Koppen climate classification map of Nevada below, with the BRT route overlaid:

You can see in southern Nevada, the red, which indicates “hot desert”. This is the desert most people think of when they think of deserts. In the southern portion of the route, along sections 2 and 3, you will encounter “cold desert” environments, but the rest of the low valleys along the route are mostly “cold semi-arid”. The mountain ranges are mostly “warm-summer Mediterranean continental” and to a lesser extent, “warm-summer Mediterranean”.
Expect bluebird skies nearly every day in June with mild temps. The low valleys aren’t too hot this time of year, and can actually be quite cold still on occasion throughout June. There is still the possibility of snow storms in June, expect a dusting or two at high elevations. The temps heat up around the beginning or July, and getting uncomfortable by mid July. Afternoon thunderstorms were sparse during my 2020 thru hike, only occurring within a one week window in late July. July and August will routinely see temps of the 90s and during a heat wave, the low 100s in the valleys along the BRT. It’s almost always windy in Nevada, and the winds are often high. The good news is that the winds generally die down at night. There are very few overcast days, so be prepared to be exposed to direct sunlight for the majority of your hike.
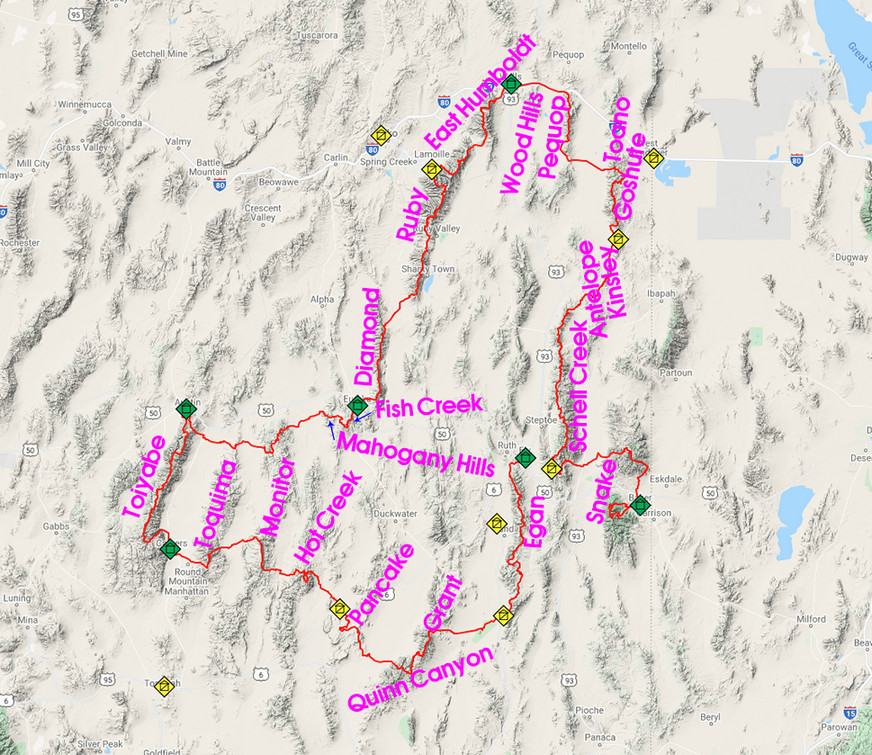
Mountain Ranges of the Basin and Range Trail
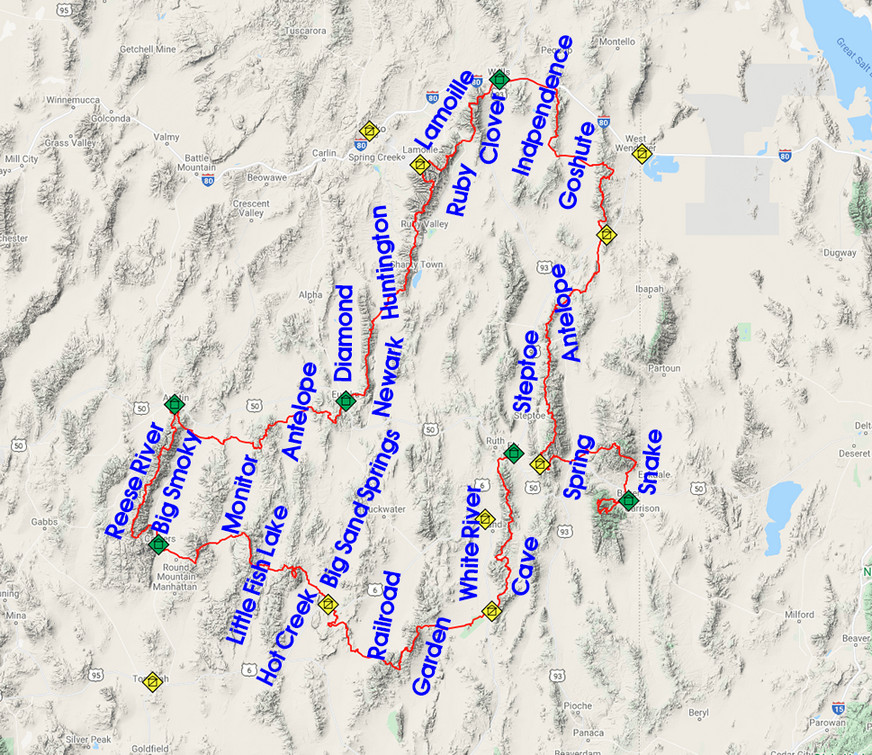
Valleys (Basins) of the Basin and Range Trail
Town Stops & Resupply
The Basin and Range Trail was created with as many walk-in town stops for resupply as possible, as opposed to hitching. Even so, half of the town stops require hitching. The towns are small and extremely isolated along most of the route. Besides the I-80 corridor along the northern end of the route, the biggest towns are Ely with 4,000 and Tonopah with 2,000. The other towns have little to offer. Preston, Carvers and Austin do not have grocery stores, so you’ll need to send a food box to these towns.
With the need to charge electronics and dump media from my cameras, I generally stay in a hotel in town. If I am sending myself a package, I’ll send it to the motel I plan on staying at. This is preferred over sending to a post office, because then you are not tied to their hours when you get into town. For example, get into town Saturday afternoon, and you’ll need to wait until Monday to get your box from the post office. Mailing to a motel eliminates that problem.
For a detailed Town Guide, check out the Basin and Range Trail Guidebook
Caching
It is not necessary to cache food or water anywhere along the Basin and Range Trail, unless you wish to do so. I did not employ this strategy as I rely on towns to recharge my electronics, dump media from my cameras and backup data.
If I were to cache, I would do so in place of the towns that require a hitch. So, I would cache at the end of section 1 (Sunnyside), section 2 (Lunar Crater), section 6 (Lamoille Canyon), section 8 (US 93 Alt) and section 9 (Cave Lake State Park). Of course, anywhere your route crosses a road will work, and selecting exact cache locations is up to you.
Pinto Valley Wilderness, NV (LMNRA) – 3 Day 25 Mile Loop Hike March 2017
Backpacking The Pinto Valley Wilderness, Nevada (Lake Mead National Recreation Area)
View All Pinto Valley Wilderness Photos | Watch the Pinto Valley Wilderness Hike Video On Youtube
- Park Administration – National Park Service (Lake Mead National Recreation Area)
- Fees & Permits – No fees or permits to access the Pinto Valley Wilderness, but there IS a fee to enter the Lake Mead National Recreation Area (in which the Pinto Valley Wilderness is located)
- Trailhead – Northshore Summit Trail parking lot off Northshore Rd.
- Length Of Time Hiked – 3 days, 2 nights
- Miles Hiked – 25
- Route Difficulty – 6.5, except where on descent into Pinto Valley near the “choke point” on my GPS file where it’s an 8.5
- Fires Allowed – Yes, but only if you bring your own, or use driftwood below the high water line of Lake Mead (which is not nearby)
- Scenic Beauty – 9
- Solitude – 8
Pinto Valley Wilderness Pre-Hike Planning Notes
The Pinto Valley Wilderness is relatively new, only being designated a wilderness in 2002. Therefore there are not a whole lot of references to this wilderness online. Many people just refer to the area as the Lake Mead National Recreation Area, which is technically also correct since the Pinto Valley Wilderness is located within the LMNRA.
The northern boundary of the Pinto Valley Wilderness is Northshore Rd, and this is pretty much the only place to park unless you have a 4×4. Here, there are several pull-offs along the road where you can park for a day hike. But what about overnight hikes? Well, you aren’t supposed to park in the pull-offs overnight, and even that was OK with the park service, would you want to leave your car there? Probably not. For me, the only real option was parking in the Northshore Summit Trail parking lot. It’s located approximately a half mile east of mile marker 20 on Northshore Rd. The southern boundary of the wilderness is Lake Mead, the western border is Callville Wash Rd and the eastern boundary is Boathouse Cove Rd. Also not that Boathouse Cove Rd separates the Pinto Valley Wilderness (39,173 acres) from the Jimbilnan Wilderness (18,879 acres) to the east. You can access the Pinto Valley Wilderness from the east, west and southern boundaries, but by far the easiest is Northshore Rd.
Water sources in the Pinto Valley Wilderness are limited. While there are likely other water sources located in the Pinto Valley Wilderness, the two most prominent sources (from my pre-hike research) are Sandstone Spring and Cottonwood Spring. I did not make it to Sandstone Spring to check if it was flowing. I passed by Cottonwood Spring, but did not search for the source. I did see that an animal had dug down into the wash near Cottonwood Spring and there was a pool of water about 6 inches down. Neither one of these springs are reliable enough to count on as a easy water source (you might have to dig for water). Pack in all water you will need for this hike and assume you will not find any!
It does not appear that backcountry camping is very popular in the Pinto Valley Wilderness. The lack of trail heads with overnight parking, marked trails and water sources seem to indicate that most people use the area for day hikes. However, the off-trail enthusiast will find that the Pinto Valley Wilderness provides some excellent 2-3 day hikes to those willing to haul their own water.
Pinto Valley Wilderness Backpacking Maps
[sgpx gpx=”/wp-content/uploads/gpx/PintoValleyMar17RouteHiked.gpx”]Download GPX file of this hike
Here’s my caltopo map I used to plan my route:
Day 1 – Saturday March 25th, 2017
Miles Hiked – 8.26
Elevation Gain – 1228′
Route Hiked – Northshore Summit Trail parking lot to Pinto Valley near Sentinel Peak
Dan and I spent the previous day in the nearby Valley of Fire State Park, and camped in the Arch Rock campground. From here, it was about a 30 minute drive to the Northshore Summit trail head. It was cloudy this morning and was sprinkling when we were packing up our gear, but that quickly faded away. The drive along Northshore Rd was very scenic, and worthy of spending some time here by itself. However, we did not have the extra time, and drove directly to the parking lot.
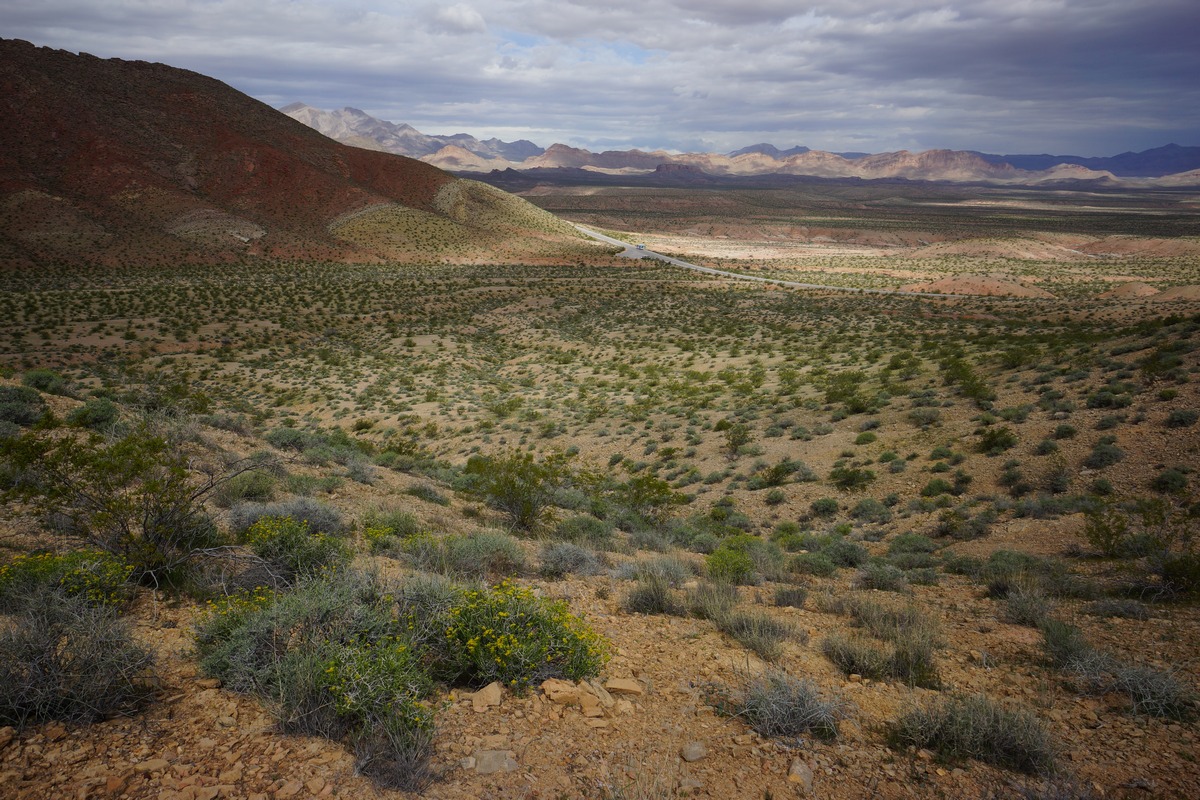
When we arrived at the Northshore Summit Trail parking lot, we were the only ones there. Good sign. Yesterday, Valley of Fire State Park was packed. There’s a bathroom and garbage cans here, but that’s it. We left the parking lot around 9:30am and started walking east on Northshore Rd. While road walks are never ideal, this was the best route I could come up with that fit together a starting point, the destinations I wanted to hit and the time frame. Despite walking this paved road for 2 miles, it was beautiful country. Big views to the north, looking across Bitter Spring Valley.
After 2 miles, we reached a pull-off where another vehicle was parked. Here, we leave the road and head south towards the Pinto Ridge. We hiked up over a small ridge to start the climb up. The terrain is pretty jagged here, with lots of sharp rocks. As we climbed up the ridge, I came across a turtle shell. The turtle itself was long gone, but the shell was an interesting find. A few hundred feet farther and I saw a second shell.
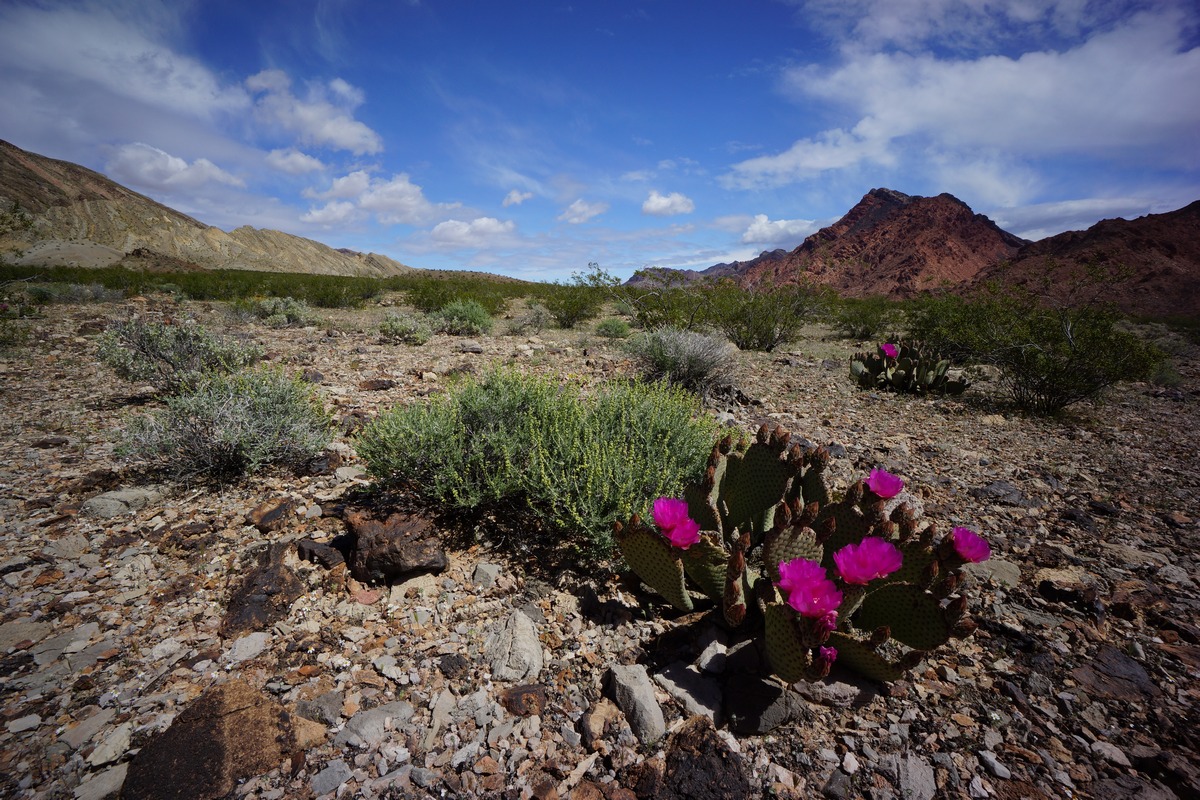
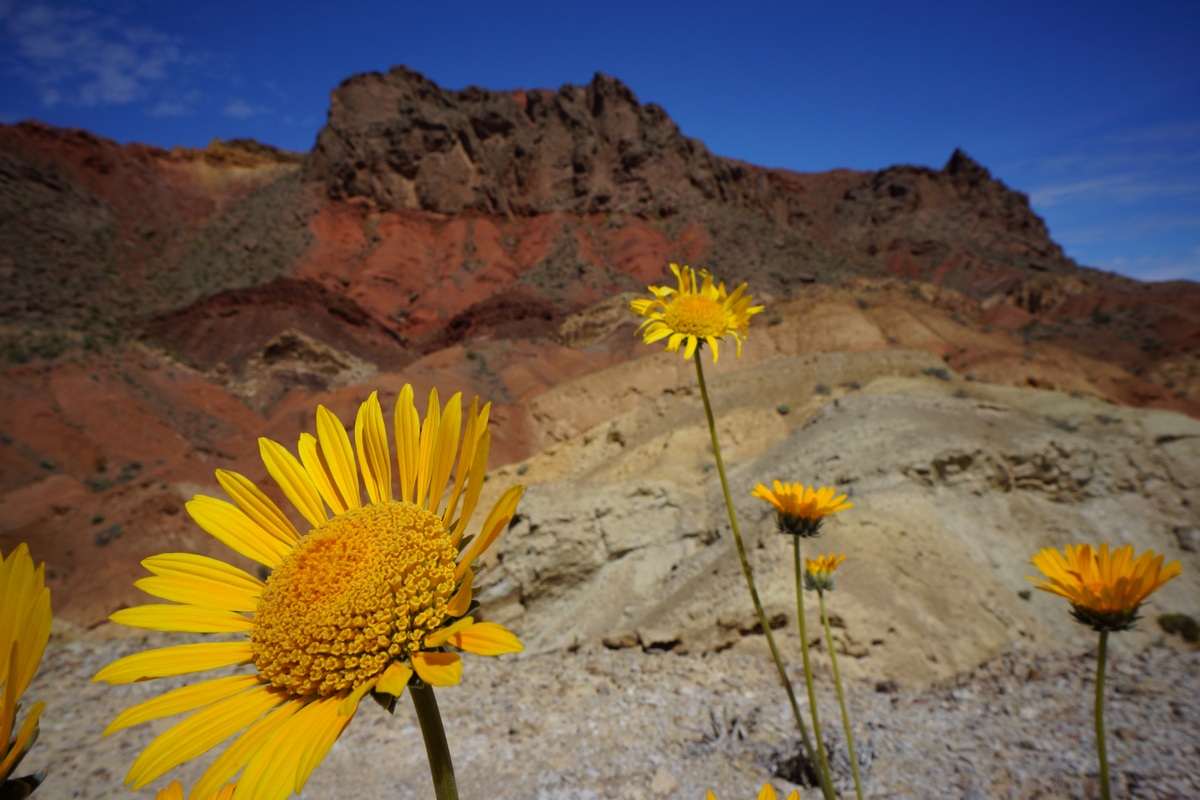
Farther up the ridge, the path narrows as we reached the top of the “pass”. The vegetation was a little greener, thicker, and thornier here. Lots of wildflowers in bloom, and some of the cacti as well. There’s not much of a view form the high point, but this changes as you descend into Pinto Valley.
The descent from the top is pretty gradual at first. We could tell there was a steeper section ahead, which I anticipated. Now the views of Pinto Valley were materializing, and they were impressive. However, the immediate problem was the terrain that lies between us and the valley below. The steepness would have been enough to worry about, but of course, loose rocks and debris compounded the difficulty. The angle was such that you could grip decently walking down slowly, but only just. Any steeper and this would have been questionable. I crab crawled in a few spots after watching Dan fall a couple of times.
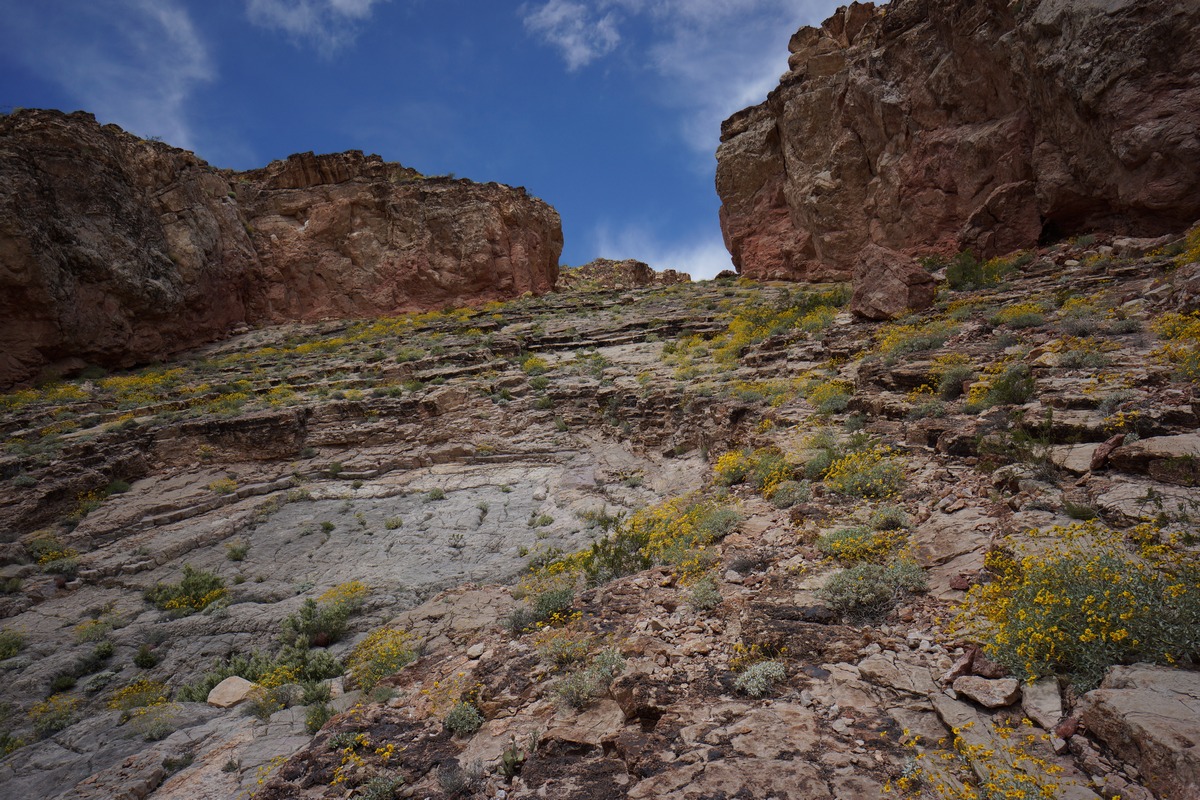
It took a good amount of time to safely work our way down this steep slab, only to be led to a choke point… a couple of boulders wedged between the steep, narrow canyon walls. There’s no easy way to climb down it, but there’s a route around it. Backtrack about 50 feet from the boulders and go up a ridge on your left (to the east). Here, there’s a more manageable route down and the rest of the way is less frightening.
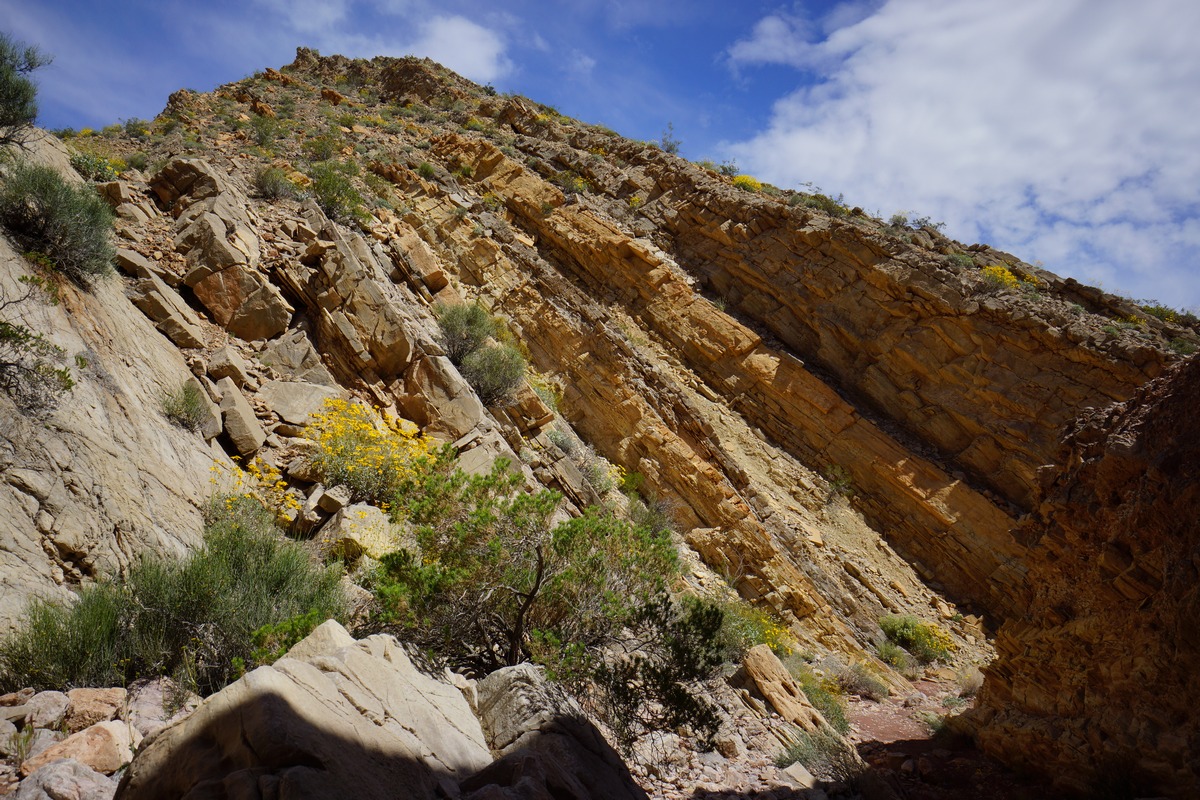
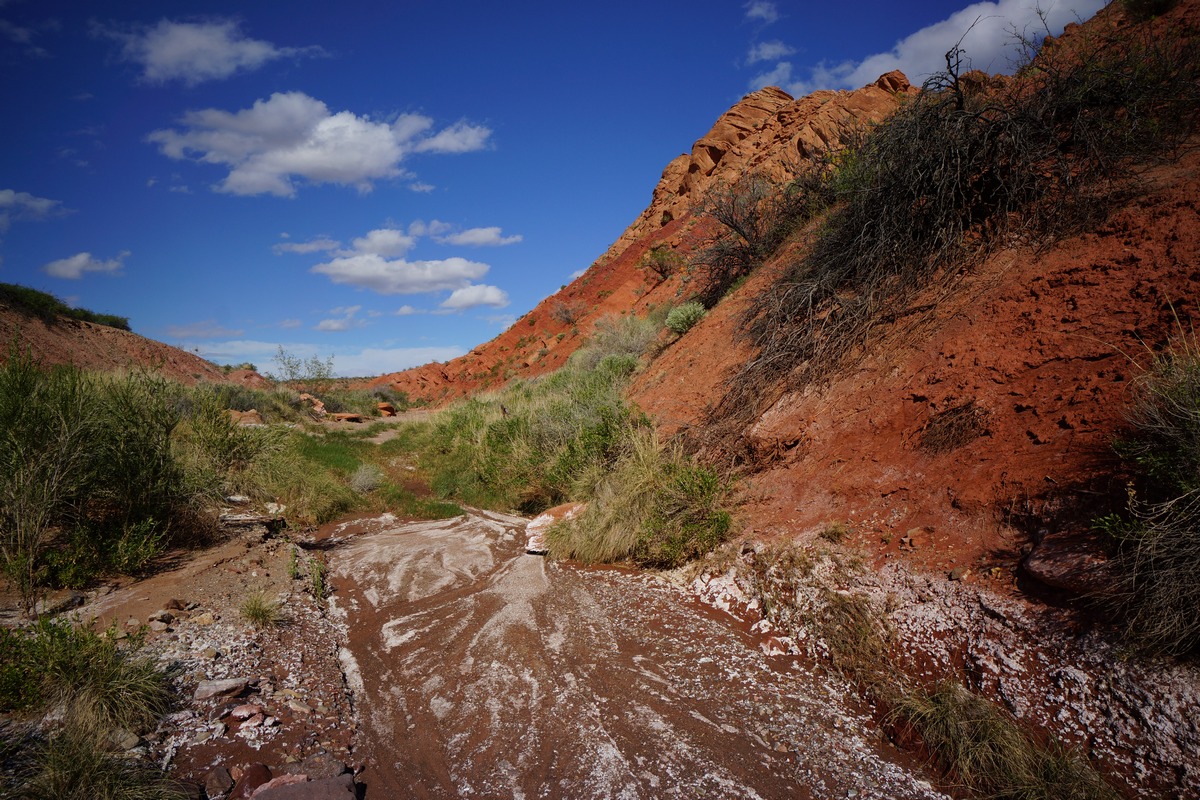
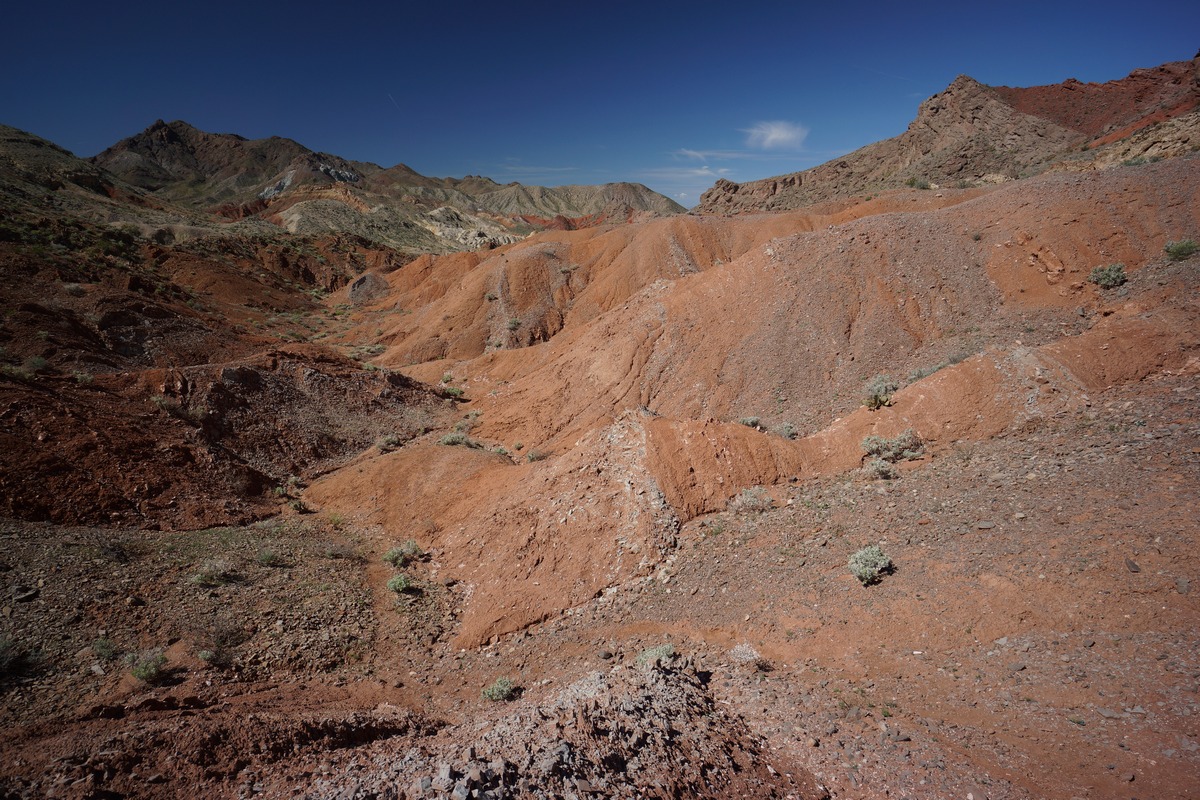
Now down off the worst of Pinto Ridge, jumped down into one of the two washes, which merge, and headed out into the valley. It’s a whole new landscape here. In the wash we could see chunk of earth pushed upright, with a variety of layers visible. This isn’t solid rock like granite, though. It’s made up of compacted, crumbly dirt and smaller rocks.
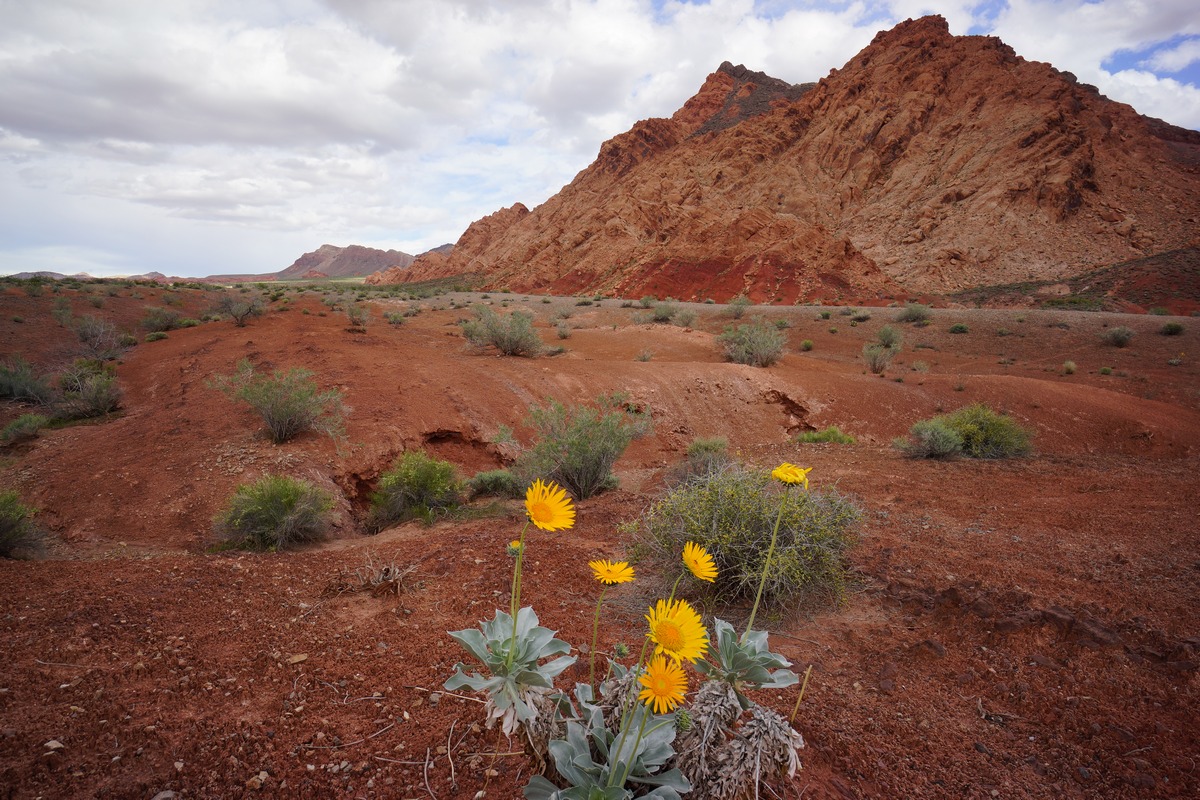
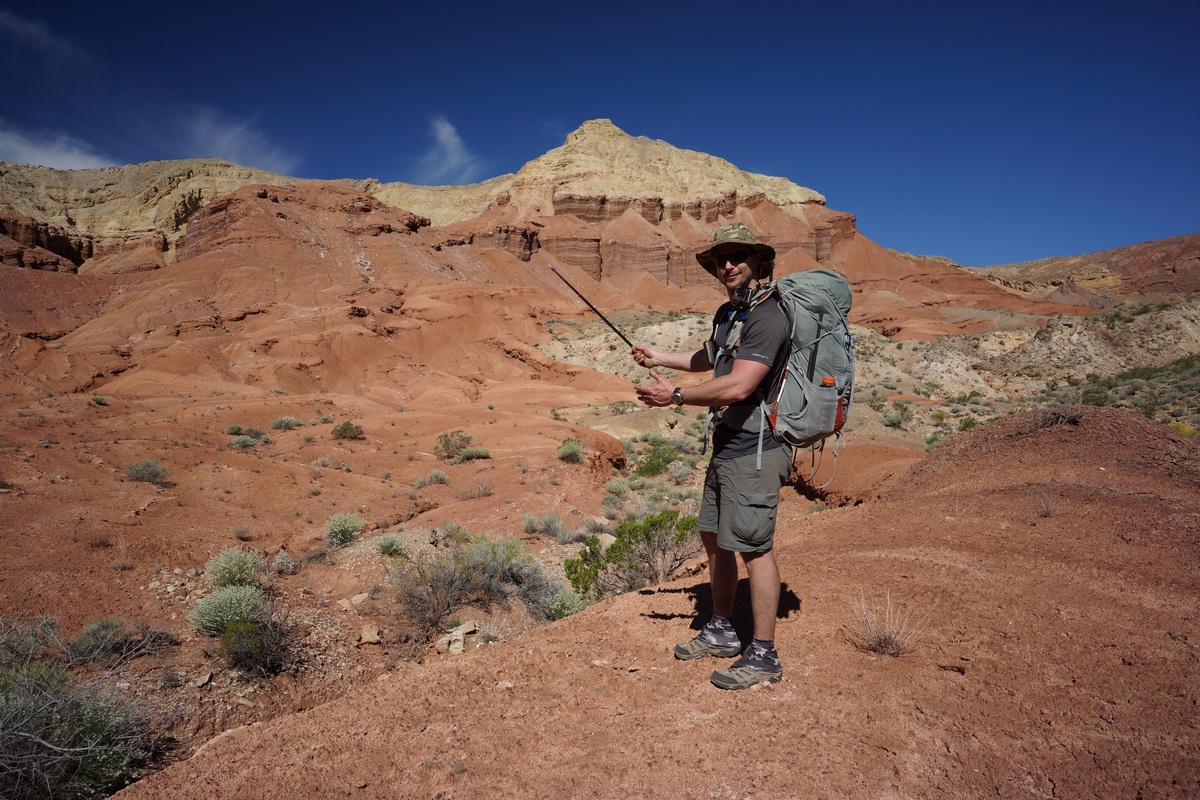
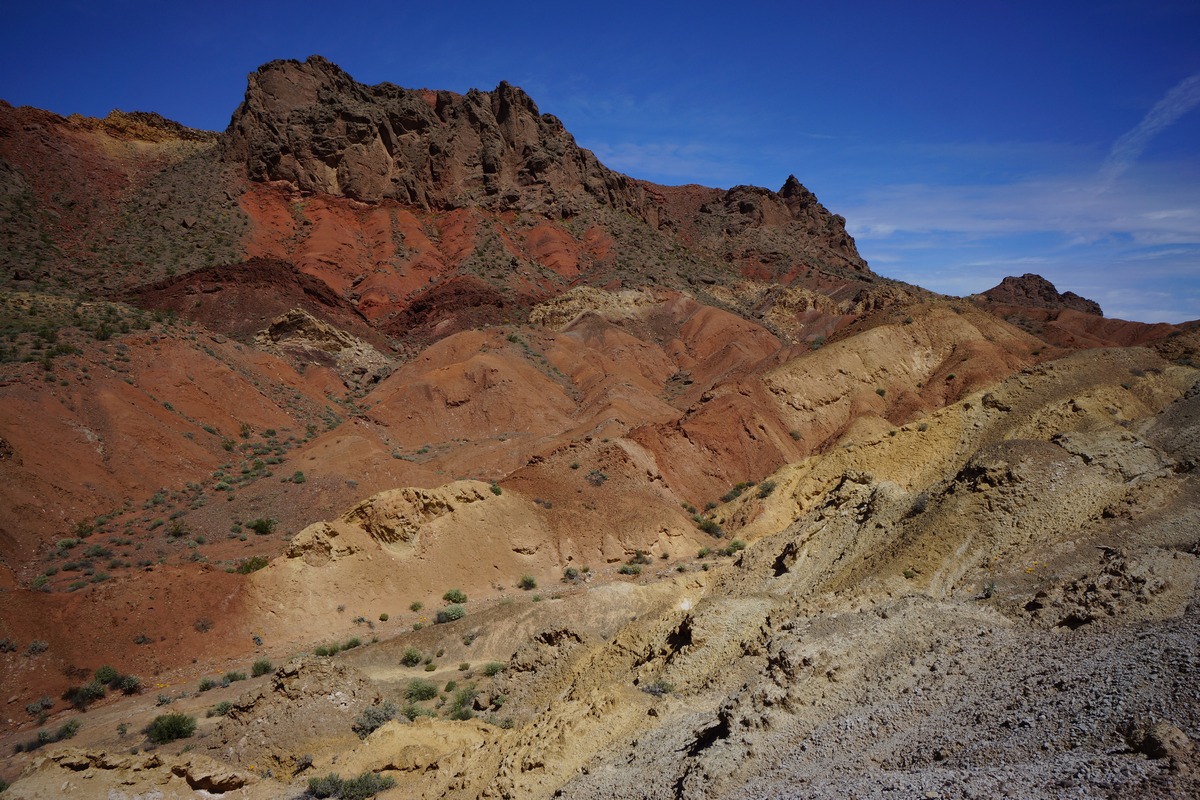
After emerging from the wash, we found ourselves in the expansive Pinto Valley. Sentinel Peak was in front of us, dominating the view with shades of orange and red. We decided to camp here, on the north side of the valley, so we could have a good view of Sentinel.
We found a couple of flati-ish spots and cleared the sharp rocks to make way for our tents. The view was great, but there’s no shade anywhere nearby. After setting up camp, we took a break for lunch. Afterwards, Dan rested while I took some pictures.
After our break, we headed over towards Sentinel in an attempt to climb to it’s summit at around 2:30pm. The path to Sentinel from our camp involved dropping down into and climbing out of several washes along the way, before finding the main wash that runs through Pinto Valley. We took this to the Base of Sentinel where the route I had planned begins. The path up to the top was not very obvious from here, so I was hoping the track I created in Caltopo, based off someone else’s route up Sentinel, was accurate.
We started climbing up Sentinel, and quickly found the most promising route to be blocked by a huge boulder. We moved farther east and started uphill here. Dan wanted to go right up the mountainside whichever place looked easiest from his point of view, while I wanted to try and stick to the GPS route I created ahead of time. We both pursued various route options but keep finding ourselves in tough spots. I ended up breaking one of my Gossamer Gear LT4 trekking poles, again. Looking back, I think I’ve broken more of these poles than I have completed hikes with them. I don’t think I can use those poles anymore, need something beefier.
The climb was a lot harder than we anticipated. While we probably could have made it to the top and back to camp if we continued, we decided that it was getting late in the afternoon and didn’t really want to be getting back right at dark or after if the route continued to be as challenging. We turned around and headed back to camp, somewhat defeated. At least there’s Hamblin Mountain tomorrow, which should have an easier route up.
While we walked back to camp in one of the washes, we saw what looked to be bobcat tracks and poop. We saw lots of similar tracks throughout our hike, but of course, never saw anything.
When we got back to camp we still had no shade. Dan set up his emergency blanket (he was using it as a footprint under his tent) as a lean-to, and we had a nice shaded spot to escape the sun for a while.
There was a TON of plane and helicopter traffic overhead in this region. Commercial planes I understand as we’re not that far from Las Vegas. The helicopter though, I don’t understand why there were so many. Throughout the day we saw a couple per hour. Right before nightfall, I saw 6 in row, flying the same flight path spaced about 1 minute apart. Maybe some sort of training exercise?
Looking to the east, the views of Sentinel and the mountains beyond were colorfully illuminated by the sun now. To the west, the distant landscape looked lush and green as the sun shined on it, although it in reality the vegetation is much more sparse up close. Dan said it looked like Jurassic Park. I watched the sun set and headed to bed shortly after.
Day 2 – Sunday March 26th, 2017
Miles Hiked – 9.88
Elevation Gain – 2173′
Route Hiked – Pinto Valley near Sentinel Peak to Pinto Valley Castle
It was a calm night with no animal sounds or high winds. The only sound I could hear was Dan snoring, as we set up our tents a little too close together. I got up around 6:30 to watch the sunrise, and tried to wake Dan. Of course, Dan continued to sleep and didn’t get up until 7:30 or later.
While Dan wrestled with the agony of leaving his tent, I sat on a small hill near camp and took some pictures. The sunrise was not very impressive from this spot though as it was so high in the sky by the time it peaked out over the top of Sentinel Peak. I was already packed and ready to go by the time the sun rose and Dan finally left his tent.
We broke camp around 8:30, following the nearest wash to the main wash running through Pinto Valley. Walking in the washes is the easiest route through Pinto Valley. This is not because the terrain outside of the washes is difficult, but because the washes are cut steeply and often deep into the surrounding earth. Hiking in and out of them gets old after a while.
Hiking the main wash was very easy. We made good time as we traveled west through Pinto Valley. We passed an outcrop of rocks and boulders that people have been signing their names on for years, dating back to the 1920s. Even though some of the writing is nearly 100 years old, it still looks brand new. Is is really that old then? Surely they would have been weathered somewhat in 100 years, right?
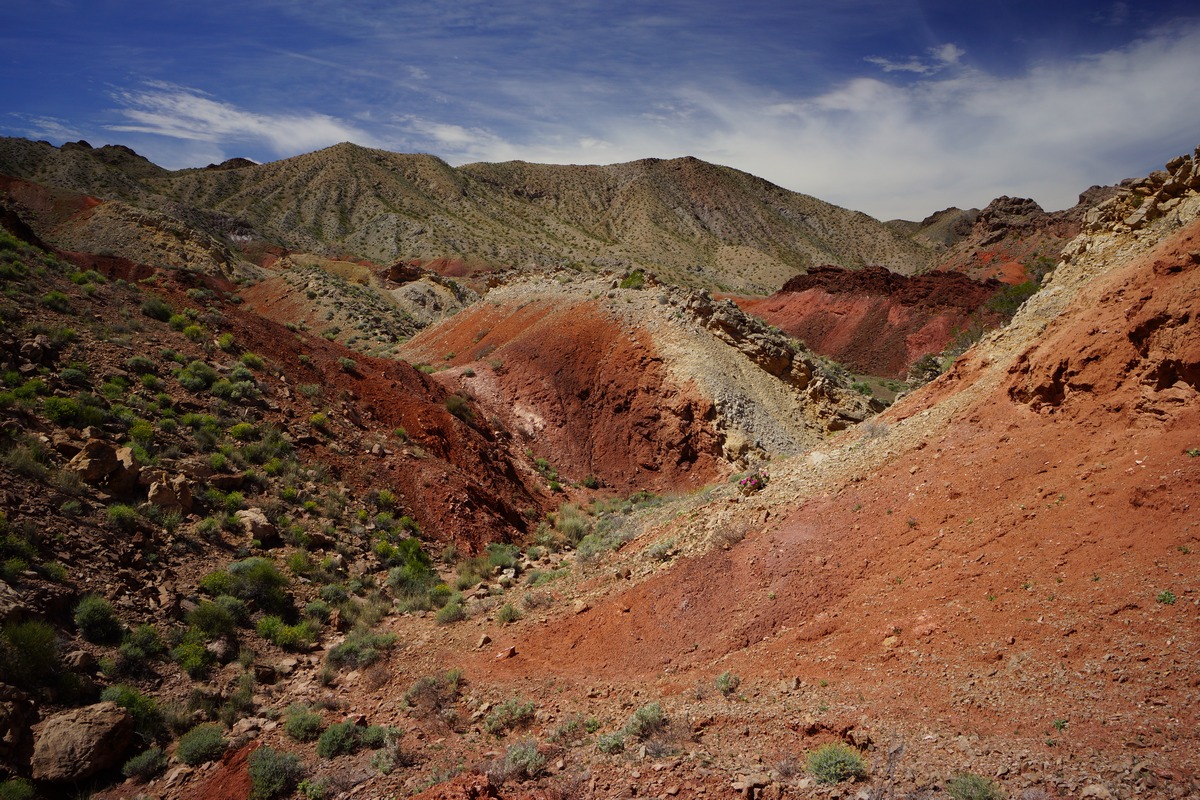
West of the rocks with writing along the main wash, we could start to see the colors of Pinto Valley Castle in the distance. Soon we left the main wash, and headed up another wash towards Pinto Valley Castle. This is a really interesting area, visually and geologically. Lots of upheaval going on, exposing many different layers of sediment. Small patches of “badlands” can be found all over here too.
Pinto Valley Castle was impressive. Erosion has shaped the walls of PVC in an unusual way, with sharp edges and symmetry. The top is made up of some lighter colored sediment, while the bottom is comprised of a contrasting red color.
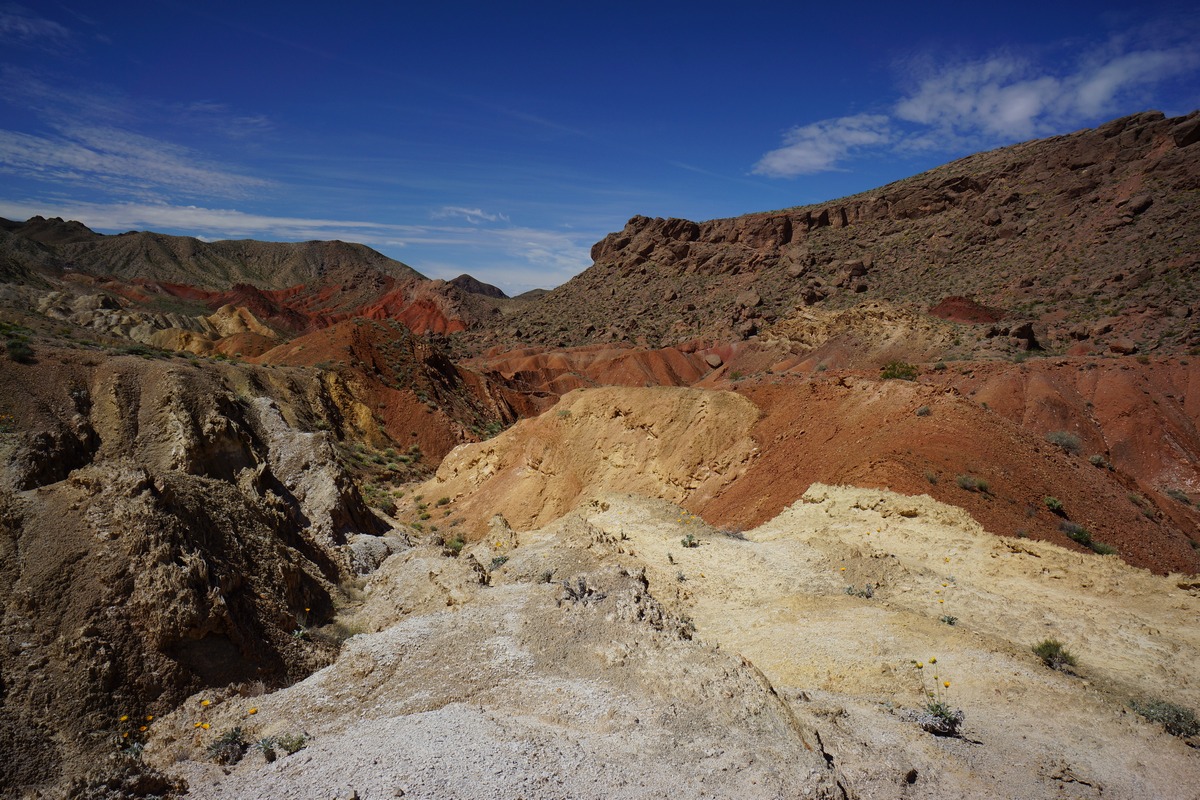
After heading general north for a while through the Pinto Valley Castle area, we abruptly turned west after passing by PVC. After hiking through a small patch of badlands, we noticed an obvious path up one of the ridges, which led us to the top of a small pass. This is the general area I wanted to camp, since it looked so colorful from the satellite maps I studied before coming out here. It certainly lived up to the hype I had in my mind. Now, we just needed to find a place to set up camp.
Coming down from the little pass, we followed an obvious path down and along the side of the high ground. This path appeared to be an old mining road or something. We followed it a short ways before find a couple of small flat areas for our tents. Excellent views, and enough space to spread out more than we did last night.
After setting up camp and eating lunch, we headed out to climb Hamblin Mountain. From camp, it appeared that there was a high and low path to take. We opted to take the high ground since we were already up here. This path led us generally where we wanted to go, but then started curving south. We backtracked a little and realized we had to go over a ridge to get to where we wanted to go. We should have taken the low ground from camp as it would have gone around this ridge, but I didn’t realize that at the time.
We followed the ridge for a while looking for a weakness. After a short but steep climb over it, we still didn’t see an obvious route to follow. We headed down hill and along the top of a very deep cut wash below. On the other side we could see a trail, but we needed to cross this wash. We found a spot to descend, and even saw a cairn in the wash. We figured we were on the right path now.
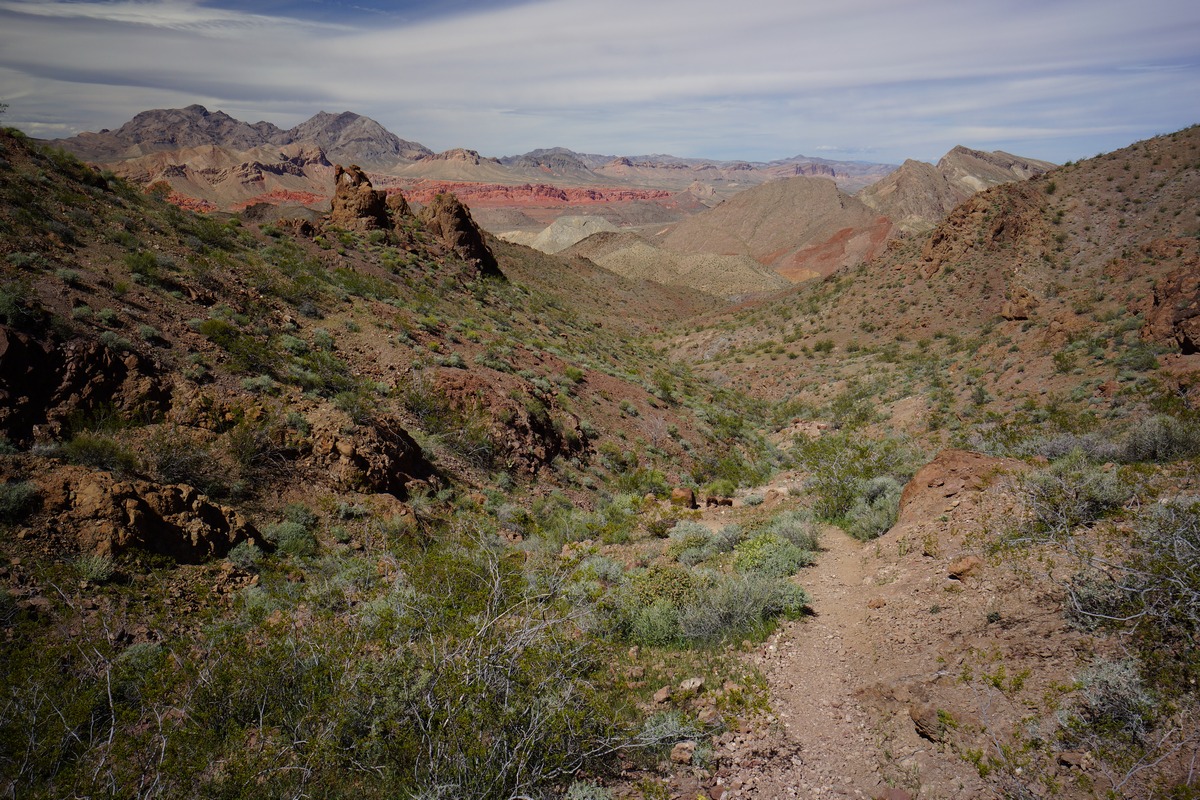
The land was changing from red washes and badlands to green, rocky mountainous terrain. We followed our new trail up a ridge and along the mountainside. The path was very narrow and barely cut into the steep slopes. Eventually this path merged with a larger one, and it was much easier to follow from here on out. We hiked a short ways before seeing a path that led down into the wash below, which looked easier and more direct than the route we took up here. We noted this and decided to go this was on the descent.
Next we encountered are first humans of the trip, a couple from Henderson, NV who a had just left the summit of Hamblin Mountain. We chatted for a few minutes and parted ways, knowing they had only been hiking 25 minutes from the top. I was really looking forward to this view!
The hike up was not technically challenging or particularly steep, but there were a few false summits. Really great views as your near the top. Not far from the summit, we passed an older couple from Colorado making their way down. The woman seemed bewildered that we had “large” backpacks on, and asked if we were camping at the top. Ha, nope. Just carrying our water, snacks, camera gear, etc.
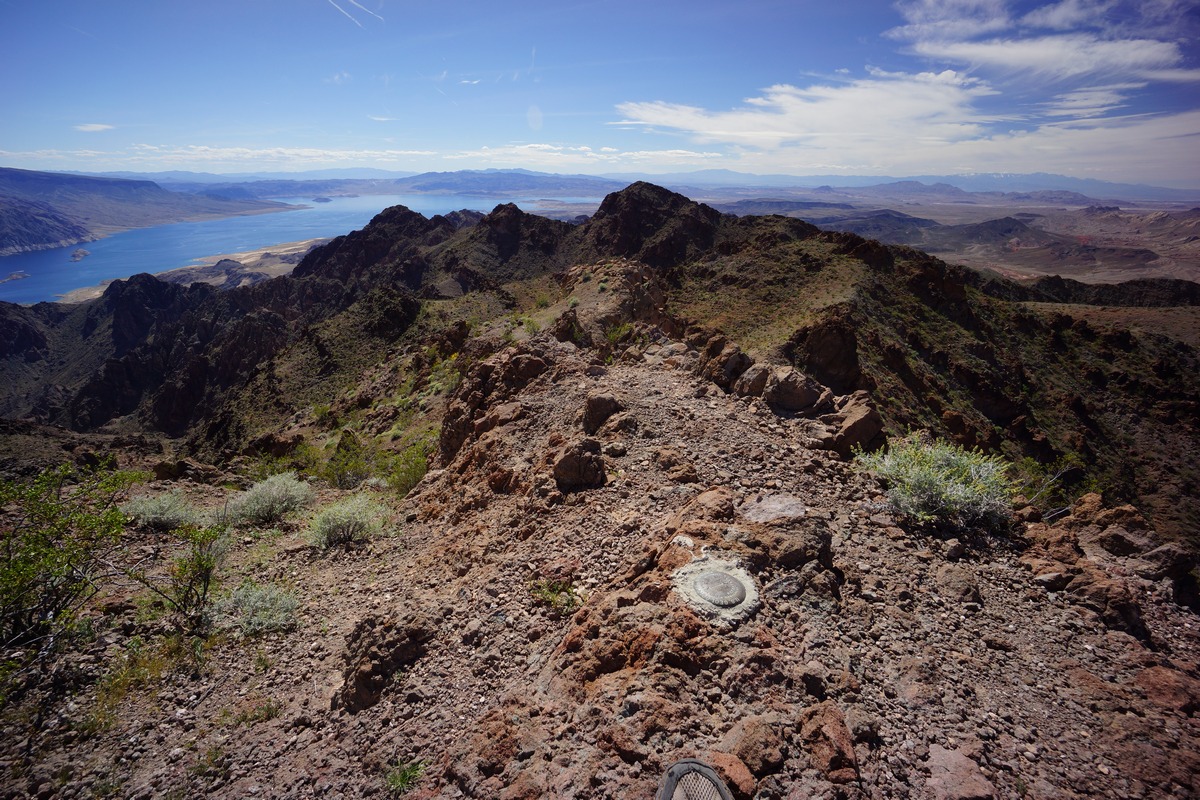
We had the summit of Hamblin Mountain to ourselves when we made it up here at 2:30. It had taken us 2 hours from camp. From the top I could see Lake Mead, Bowl of Fire, Sentinel Peak, Pinto Valley and all the other landmarks for many miles. Las Vegas lies hidden from view in a valley, but beyond that the snow-capped peaks of Mt. Charleston can been seen. Several USGS markers dot the summit as well as a summit log/register.
We stayed on the summit for about an hour taking pictures and soaking in the view. However, we were also soaking in quite a bit of sun, and with no shade, it was time to head back to camp.
Dan went ahead of me as I snapped a bunch of pictures on the way down. For some reason, I enjoyed the view better going down than up.
Before we knew it, we reached the path that leads down into the wash that we noted on the way up. We headed down here and found this route to be quite obvious, and in fact, the actual route. The first trail we found on our way up was actually an alternate route the just happened to meet up with this main trail. This was confirmed by passing the same cairn that we passed in the wash on our way up. We originally thought the cairn marked the way to the main path that we took, instead, it marks the main path which we crossed right over without realizing.
Our path in the wash was leading us directly back to camp now. We passed the junction of the old 4×4 road that passes by Cottonwood Spring and heads out to Northshore Rd. This would be the route the day hikers would have taken, parking at a pull-off along the highway. We walked past this junction and the path led us right back to camp in a very direct way, much more so than the way we took up the mountain. We made it back to camp in only 1 hour from the top of Hamblin, half the time it took to reach the top.
Back at camp, we sought out the only shade around and exploited it for a while. Having not eaten anything since noon, which was just some snacks, I devoured my bacon & cheese wrap for dinner. Dan was running lower on water than I, so I gave him a half liter. That’s about all I had left myself when I went to bed.
Dan was whooped and went to bed at 6pm. With another hour and a half of daylight left, I couldn’t do that. I found a decent spot to sit and wait for sundown. Several bats were out at dusk, and flying closely overhead too.
Day 3 – Monday March 27th, 2017
Miles Hiked – 4.99
Elevation Gain – 531′
Route Hiked – Pinto Valley Castle to Northshore Summit Trail parking lot
I woke up at 5:45 this morning. From my tent I yelled, “Hey Dan, time to get up”. To my surprise, he actually did get up without any additional prodding. That’s good, because I have a plane to catch at 12:45pm this afternoon, and we need to hike back to the car, drive back to Vegas, get some food and clean up. Originally I planned to hike an off-trail route back to the car, but worried about time, we opted to take the route the Hamblin Mountain day hikers use to get to Northshore Rd, then road walk a few miles back to the car. This would be the safest route from a time perspective.
We packed up quickly this morning and were moving by 6:30. We took the low ground this time for a direct route to the junction with the old 4×4 road, now called the Cottonwood Wash Trail.
Hiking the Cottonwood Wash trail was easy. Some spots were more narrow than others, and made you wonder how a vehicle passed through. Much of it is wider though. This road would have been in use up until 2002 or prior, when the area was designated as the Pinto Valley Wilderness.
A lone Cottonwood tree stands in the middle of the wash at Cottonwood Spring, hence the name. I did not see an obvious source, but I didn’t look around much either. There were lots of thick, green shrubs and bushes in some areas, an indicator of water, but I had no desire to wade through them looking for water. We did see a small hole dug in the middle of the wash with water about 6 inches down, but no natural emergence of water to the surface.
After leaving Cottonwood Spring, we headed down the home stretch. This was offered the same interesting geological features as others, a variety of rock and sediment layers exposed by upheaval.
When we reached Northshore Rd, we headed east. We still had about 3 miles to cover before getting back to the parking lot. I didn’t even mind walking the road so much since the views were so great. It was a steady incline the rest of the hike back.
We reached the Northshore Summit trailhead at 8:30, plenty of time to take care of my pre-flight needs. Another successful adventure under the belt.
Final Thoughts About Hiking The Pinto Valley Wilderness
This place exceeded my expectations. It’s uniquely colorful, and an all around cool place. Access is tough and some of the off trail segments can be challenging. Lots of aerial traffic remind you of how close this place is to civilization, yet we still felt solitude. Especially at night. The nights were calm and silent, with no animal sounds. We saw few animals the entire trip, just a couple of chipmunks and birds. The vegetation wasn’t too thick or thorny overall, only a few short spots where we encountered that. We saw no snakes or spiders, just a couple of butterflies and a beetle. I was expecting wildlife to be a little more active this time of year.
Camp on our second night was my favorite. You can’t go wrong pitching your tent anywhere near Pinto Valley Castle in my opinion. Hamblin Mountain is an easy hike with a great view, and would make a great day hike (as the two couples we passed had done).


