How Much Did It Cost?? Complete Camper Van Build Parts & Materials Spreadsheet

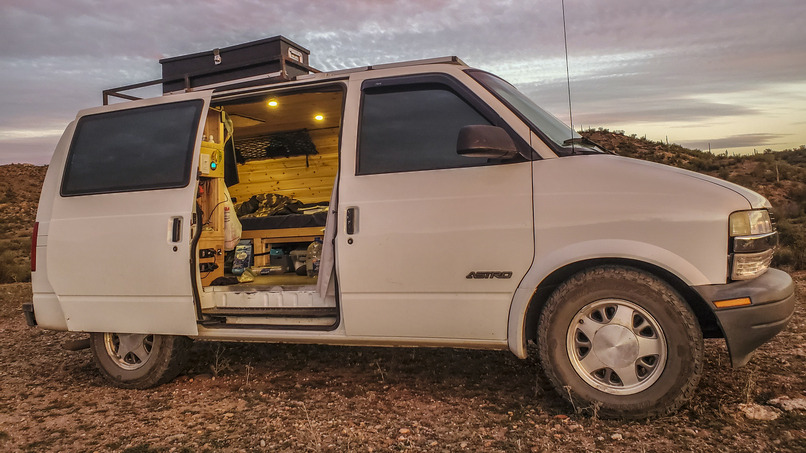

One of the first questions people ask me about my Chevy Astro camper van build is, “How much did your build cost”? This really depends on a few things… will you be doing all of the work yourself? Do you have all of the necessary tools already, or will you be buying some/all as you go? The easiest way to discuss the total cost of my build is probably to just list the parts & materials, and take tools out of the equation. So without further ado, here’s my complete parts & materials spreadsheet for my Chevy Astro camper van build:

All of the parts and materials used in my stealth camper van build are listed in this spreadsheet
As you can see, my total cost for all parts and materials in my Chevy Astro camper van conversion was around $7500.
- For a detailed look at my van build, check out my Chevy Astro DIY Stealth Camper Van Build video series.
- For for written instructions on the build process with photos, parts/materials/tools lists for each phase of the build, see my Astro/Safari Camper Van Conversion page.
You’ll notice I didn’t list a cost for a lot of the wood I used, and that’s because I had a lot of it on hand already. Figure around $300 for the high end of what the wood and lumber should cost in this build. Lumber prices were quite high in early 2021 when I built my van, and should be lower now. Besides the lumber, the list is pretty complete and should give you a good idea of what kind of cost is involved to build out a camper van like mine.

Other costs not calculated in this van build spreadsheet are maintenance costs. If you’re building out an Astro or Safari van, chances are, it will need some sort of mechanical work done before you hit the road… tires, tune up, suspension work… something. Or maybe your van needs a LOT of work. But that’s a cost that varies from van to van, each one will be different. If you aren’t taking care of the mechanical work upfront, before starting your build, it would be wise to set aside a generous budget for maintenance work after the conversion is complete.
Another cost to factor in is paying others to do parts of the build you can’t. Most DIY van builders try to do as much of the work as they can themselves, but you may run into projects that you need to sub out. For example, welding is something most DIY’ers aren’t going to be able to do themselves, unless you just happen to be a welder by trade. Or perhaps you aren’t comfortable with the electrical wiring aspect of your van build, and decide to pay an electrician. These jobs can quickly become expensive when you rely on others, so make sure to set realistic expectations for your van build based on your abilities, and your budget.

Building your own camper van is a huge project, but you can do it. Do your research, ask questions, watch youtube videos (like mine!) and learn all you can about what you want out of your van and what your options are for achieving that vision. Good luck with your build, get out there and make it happen!
Related Images:
Mojave Sonoran Trail: A 625 Mile Thru-Hiking Route

The Mojave-Sonoran Trail
A 625-mile cross country thru-hiking route connecting southern Nevada to Southern Arizona via the Colorado River corridor

Introduction to the Mojave-Sonoran Trail
The Mojave-Sonoran Trail is a 625-mile cross country thru-hiking route along the Colorado River corridor though southern Nevada, California and Arizona. The MST traverses two distinct desert environments; the  Mojave Desert and Sonoran Desert. This route allows the hiker to experience the transition zone from Mojave to Sonoran desert, while connecting 12 mountain ranges, 12 wilderness areas, 2 National Wildlife Refuges and the massive Lake Mead National Recreation Area in an effort to explore this remote and stunningly beautiful region. Experienced cross-country thru hikers looking for a challenging desert hike that can be done in the winter months will find the Mojave-Sonoran Trail fits the bill, with prime hiking season running from November to March.
This region of the country doesn’t get much attention from the backpacking community, but Mojave-Sonoran Trail hikers will quickly discover that they’ve stumbled upon a
hidden gem. Walk the top of massive mesas, the bottom of colorful slot canyons, along the shores of Lake Mead and across vast desert plains. Summit lonely desert peaks, walk among red rocks and sand dunes, through deep canyons and gorges, climb dry waterfalls and walk countless ridges overlooking fairytale-like desert landscapes. Explore old mines, tunnels and caves, find cool rock and minerals, visit hot springs and ghost towns, sleep in old cabins, discover petroglyphs and artifacts. The Mojave-Sonoran Trail route presented here can be hiked as-is, or better yet, used as a blueprint for your own Mojave/Sonoran Desert trek.
Quick Facts

Miles: 625
Seasonality: Nov – Mar
Time to Complete: 5-7 weeks
Highest Point: Spirit Mountain, NV: 5,642′
Lowest Point: Parker Dam, AZ/CA Border: 392′
Mountain Ranges: 12
Wilderness Areas: 12
Trail Journal/Photos & Video Series
Mojave-Sonoran Trail Journals & Photos
Section 1 – Valley of Fire to Echo Bay: 66 Miles
Section 2 – Echo Bay to Callville Bay: 50 Miles
Section 3 – Callville Bay to Boulder City: 40 Miles
Section 4 – Boulder City to Searchlight: 80 Miles
Section 5 – Searchlight to Bullhead City: 58 Miles
Section 6 – Bullhead City to Lake Havasu: 104 Miles
Section 7 – Lake Havasu to Bouse: 92 Miles
Section 8 – Bouse to Quartzsite: 37 Miles
Section 9 – Quartzsite to Kofa: 95 Miles
Mojave-Sonoran Trail Documentary Video Series

Join the Mojave-Sonoran Trail facebook group to stay on top of the latest updates and info on the trail, as well as connect with other potential MST hikers.
Type of Hiking
The Mojave Sonoran Trail is a cross country route, not an actual hiking trail. Only about 16 miles of my route was on a hiking trail. The rest was cross country, old two track roads and less frequently, larger dirt roads  and paved roads (minimal). Roughly 40% of the route is cross country (still need to calculate exact numbers). This is a desert route, with elevations ranging from 300-5,600ft. In the Mojave Desert, there is less vegetation to contend with when hiking off-trail. The Sonoran Desert is thicker, thornier and bushier. Occasional bushwhacking is needed, but nothing extensive or daunting. While the emphasis on ridge walks, high routes and peak bagging is always high, this route is also heavily geared towards exploring scenic canyons. In both the Mojave and Sonoran deserts, spectacular deep and colorful canyons are plentiful, and are a main draw to this route. Dry waterfalls are extremely common, and there are perhaps hundreds to negotiate along the way of varying difficulty. No technical gear is needed, although a length of cord to lower your pack when downclimbing is highly recommended. Distance between resupply is 100 miles or less. Big water carries are common.
Route Overview
The Mojave-Sonoran Trail is a 600 mile cross country thru-hiking route that traverses the Colorado River corridor though southern Nevada, California and Arizona. In this region of the country, the Colorado River ROUGHLY represents the border between the Mojave and Sonoran deserts. While the route begins in the Mojave desert, and ends in the Sonoran desert, the route often meanders through the transition zone between the two different desert environments, before finishing deep within the Sonoran Desert.
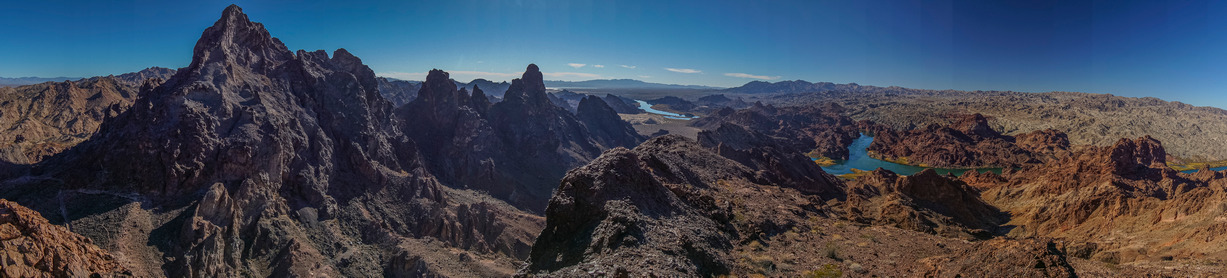
The route is mostly cross-country hiking and along old 4×4 roads, with only a few miles of marked hiking trails along the entire route. The route follows the general path of the Colorado River, but seldom does it reach the banks of the river itself. Instead, the route traverses the mountain ranges alongside the Colorado River, with open desert treks connecting these ranges as needed.
Terminus Points
The northern terminus is just outside of Valley of Fire State Park in southern Nevada, about 1 hour east of Las Vegas. The southern terminus is Palm Canyon in the Kofa Wilderness of Arizona, about 1 hour north of Yuma.

Celebrating with style at the southern terminus
Travel to the northern terminus is easy. Fly into Las Vegas, grab an uber to the Hidden Valley exit along I-15, about 45 minutes east of Las Vegas. There’s not much here, but it makes for a short route to some excellent Day 1 hiking along the spectacular Weiser Ridge, overlooking Valley of Fire State Park.
Travel to/from the southern terminus is slightly more challenging. There is ample traffic at Palm Canyon/HWY 95 to hitch south to Yuma, where one can take a plane/train/bus to your final destination. Shuttle service is also available. Call Terri at 951-390-5818 (Faithful Shuttle) to inquire about rates.
Mojave-Sonoran Trail Terminus Point GPS Locations
Northern Terminus: 36°38’10”, -114°35’54”
Southern Terminus: 33°23’19”, -114°13’01”
Pace & Time on Trail

Cross country hiking in the Pinto Valley Wilderness, Nevada
The MST is an off-trail route. Miles can be very slow at times. Additionally, there is limited daylight during the late fall and winter months, which cut into the time a hiker has to cover miles. I averaged 18 MPD, but I also spend about an hour a day filming and taking photos, recording waypoints, documenting water sources, exploring old mines etc. Strong hikers with solid cross-country experience should be able to get 20 MPD or more. Be prepared to be humbled by the occasional 12 mile day, though. I completed the route in 7 weeks, with 9 zero days. 6 weeks would be a good time frame for many hikers to shoot for.
Seasonality
The Mojave-Sonoran Trail is one of the few long distance hiking routes that can provide the hiker a warm climate to hike in the winter months. The MST is not a summer hike, the temperatures are simply too hot. The best time to hike the MST would be between November and March. Choose your state date depending on your tolerance for hot/cold temps.
This hike could easily be done in the dead of winter. Water should be more plentiful than the fall. Mild to warm daytime temps, colder nights, and the possibility of a little snow once or twice at the higher elevations (4,000+). These storms generally move through quickly and are not prolonged. The vast majority of a winter hike along this route should see excellent hiking weather.
I hiked this route from Nov 1st – Dec 18th. It was an unusually warm and dry fall in 2021. Temps reached 90 in the Vegas area during the first few days, 80s for the first two weeks or so of November, then mostly 70ish for the duration of the route. Overnight lows were generally no lower than 45 for the majority of the trip, until the last week when the weather finally turned. My coldest night was 21.
Direction of Travel
The MST could be hiked in either direction, NOBO or SOBO. Your start date will have the biggest influence on your direction of travel. Starting Nov 1st, I chose to hike SOBO. This allowed me to have the coolest possible temps for the given time of year, by starting in the north where temps are about 8 degrees cooler on average than the southern terminus. As I travel south, the temps will increase, but they are also declining at this time of year as winter approaches. This allowed me to maintain a pretty consistent climate of 70 degrees or so for the majority of the hike. The opposite would be true starting late winter, closer to spring might consider hiking NOBO to follow the weather.

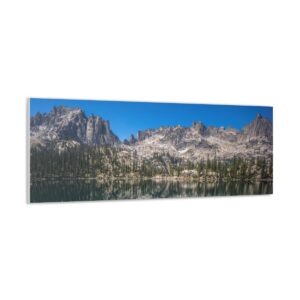
Spirit Mountain summit view over Lake Mojave
Those seeking the coolest possible temps will want to hike in December and January. Jan-Feb would be the more realistic time frame for most winter hikers (starting after the holidays), and this would still be a good time to avoid the heat. NOBO makes more sense here as the southern terminus is 12 degrees warmer than the northern terminus during the winter months.
From here on out, the information presented in this guide will be from a SOBO perspective, because that’s how I hiked it 🙂
Route Origins
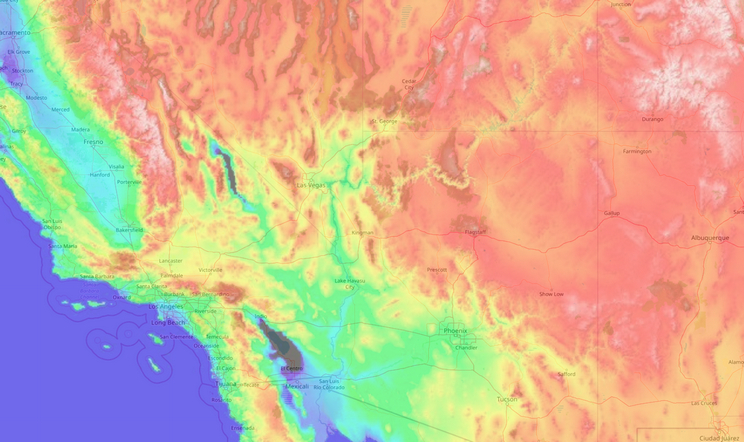
Elevation Heatmap of the Southwest
Until recently, thru hikers seeking a trail or route that could be hiked in the winter months and feature warm weather/no snow had few options. Over the last few years, Brett Tucker has been developing the Desert Winter Thru Hiking Route to fill that void. And it looks like an excellent route that I myself am looking forward to walking someday in the near future. The Mojave-Sonoran Trail is my attempt at the same idea; a warm-weather winter thru hiking route in the southwest.

Hiking the Jimbilnan Wilderness, Black Range, Nevada
I got the idea for the general path of the route one day by looking at an elevation heat map of the United States. I noticed the lower elevation along the Colorado River corridor extending as far north as St. George, UT and all the way down to Mexico. Having hiked in the Las Vegas area before, I was familiar with its beauty and ruggedness, and surprised by its remoteness. However, I hadn’t spent much time exploring south of Vegas yet, along the Colorado River. There are practically zero backpacking reports from this part of the country, but the occasional peak bagger’s report gave a glimpse at the potential of the ranges that run alongside the Colorado River. Impressive, indeed. The climate fit my requirements, the terrain looks to be beautiful, and the region is lightly traveled. After mapping the most interesting route I could string together and plotting water sources, it all came together to become the route I present here; the Mojave-Sonoran Trail.
Mojave-Sonoran Trail Map
The Mojave-Sonoran Trail map is the main planning resource. Here, nearly everything you need to know about hiking the MST is presented in the map. Unfortunately, when linking to the map, the default view has all of the waypoint labels visible on the map, making it too cluttered to really view. You can download your own copy to work with. Read on to learn more.
How to use the Mojave-Sonoran Trail Map
To ensure you have the most up-to-date version of the map, view the Mojave Sonoran Trail Map in Caltopo and click “export” to download your own copy. Export the GPX format to use in a garmin device or on your phone, but if you plan on editing your own copy of the MST map, I recommend exporting the map in the JSON format. This retains all of the waypoint info that is useful… color-coding of water sources, different icons for campsites, water caches etc, different track colors for the main route vs alternate routes, and more. Next, upload your JSON (or GPX) file to caltopo (or Gaia, etc) and edit away! You can later export a GPX file from caltopo for your device when ready.
You can also download the Mojave Sonoran Trail GPX file. However, keep in mind that the GPX file here will not be as up-to-date as visiting the caltopo link above and exporting your own copy. Changes made to the Mojave-Sonoran Trail caltopo map will instantly be pushed out to anyone visiting the caltopo link. Updating a downloadable GPX file (like the one above) requires manually replacing the GPX file every time a small change is made, and that is not an efficient way to bring you the latest updates.
Here’s a breakdown of the caltopo map “categories” to help you make sense of the information presented on the map:
- MST 2.0 – This is the current suggested MST route, with revisions from the first passage
- Resupply, Terminus – View Resupply points, hitching locations, terminus points, etc. Resupply points/town are green, hitching points are yellow
- ALTs – Alternate routes. Mostly untested
- POIs – Points of interest… peaks, arches, caves, etc
- Water – Color coded by probability of having water. Blue = Definitely, Green = Maybe, Black = Dry
- Markers – Various waypoints to be aware of
- Mines & Rocks – Info on abandoned mines and old prospects along the way, for rockhounds 😎
- Cache – Suggested cache locations
- Boundaries – A waypoint to mark when you enter/exit a new land administration type
Land Administration
Land Administration along the route falls into two main categories: BLM land and National Recreation Areas/National Wildlife Refuges. Both of these can include wilderness areas. Much of the route through Nevada traverses the Lake Mead National Recreation Area, making up the first half of the MST. South of the Nevada section, the second half of the MST is mostly on BLM land, and much of this is through wilderness areas.
Land Administration Breakdown

- Wilderness Areas: 12
- Wilderness Study Areas: 1
- National Wildlife Refuges: 2
- National Recreation Areas: 1
- National Monuments: 1
- State Parks: 1
- BLM Land
- Arizona State Trust Land
Permits
The majority of the first 300 miles or so are through the Lake Mead National Recreation Area. The $80 annual National Parks pass gives you entry to Lake Mead. You won’t need to show the pass to enter the park on foot, because you won’t be stopping at a booth along the road, but if you get stopped for any reason, this pass is what you need to have to be legal. You can buy this in person at the fee stations at the entrance to the Lake Mead NRA. Not all locations are manned, though. The stations on Lakeshore Rd (east of Boulder City) and on E Lake Mead Parkway/Lakeshore Rd just east of Lake Las Vegas were both manned when I passed through the area, but the stations near Moapa Valley might be open and unmanned.
Additionally, there are small sections (a few miles) of Arizona State Trust Land that require a $15 annual permit, which can be purchased online HERE. Law enforcement on Arizona State Trust land is, to the best of my knowledge, not limited to one agency. Instead, the local sheriff, BLM or whoever has the authority to cite a person for not having the necessary permit. With that said, there are only a few miles of hiking on AZ state land, and it’s highly unlikely that you’d see another human along any of it. Just know that to be legal, you need the Arizona State Trust Land permit.
Water Availability

Sandstone Spring, Pinto Valley Wilderness, NV
The Mojave-Sonoran Trail is the driest route I’ve ever hiked. 2021 was an unusually warm and dry fall, which definitely impacted water availability for me. Many springs and guzzlers that would probably be reliable, were not because it was such a dry year. Still, the route presented here has been hiked successfully, thus proving its viability for sustaining a thru-hiker even in the driest of times. While the Mojave-Sonoran Trail will always be a dry route, experienced hikers should have no problem making the water sources along the MST work for them with proper planning. 160+ water sources have been identified along the route, with notes of field observations.
Water can generally be acquired once a day. The biggest carries span two days. Although the route follows the Colorado River, it’s usually not close enough to be used as a water source. Along the first half of the route, the river can be used as a lifeline in case you get into trouble… if you can get down to the water, that is.

Small game guzzler with limited access to water

Extracting Water From Small Game Guzzler in Nevada
Water along the Mojave-Sonoran trail comes from a variety of sources. Lake Mead and the Colorado River are only occasional water sources. Water can be found in springs, troughs, wells, guzzlers, campgrounds, and strategic stops through small towns or a small business. In a few select locations, such as Valley of Fire State Park, tourists are plentiful, and you can pretty much count on being able to yogi some water. Additionally, caching water ahead of time can drastically reduce the length of water carries in some sections. Small game guzzlers in Nevada offer a potential water source, if you can get to the water. These often require crawling under an awning about 18 inches off the ground, tying a cord to a wide mouth water bottle filled with rocks for weight, and chucking the bottle into the guzzler’s underground collection tank in order to retrieve water. Slow and tedious, but a viable way to extract water from these critical water sources.
What is the longest water carry?
My longest water carry was a result of two water sources not working out for me. I hiked 50 miles on 5L of water over 2.5 days in section 5, Searchlight to Bullhead City. I would now recommend placing a water cache along this section to reduce this carry to a more reasonable 30 miles or so. And in-between that, a small game guzzler exists that could yield some water with a plan to access it (the small game guzzlers are tricky). Ultimately, how long your longest water carry will be depends on whether or not you will be caching.
If you were to cache water at all of the suggested locations, the longest water carry would be:
32 – Section 5, in between Searchlight and Christmas Tree Pass. Two small game guzzlers along the way, but water extraction could be difficult in dry years. The guzzlers would reduce the carry to 19/20 miles, and may have water in wet/normal years
31 – Last 31 miles of section 6, Lake Havasu Wilderness. Unverified Spring along the way, 1 mi off route. Option to detour to Colorado River for water (1 mile) about 10 miles into this carry. Option to end this section at 16 miles into carry
27-30 – Section 7, Whipple Mountains. Water may be found at mile 27, if not at mile 30. No option to cache along this route
25 – Section 7, final 25 miles to Bouse. Very flat, easy miles
23 – Section 9, final 25 miles to end the hike.
If you don’t cache at any of the suggested water cache locations, you longest water carries would be:
35 – Section 1, days 1 & 2. Option to yogi water from some of the only day hikers you’ll see on this route (easy) at mile 25. Caching splits this up to ~17 miles
31-40 – Section 4, Gold Strike Hot Springs to Nelson. Caching reduces the carry to ~19 miles
45+ – Section 5 is full of unreliable water sources. It could be 45-50 miles to Lake Mojave for water if you can’t get water from small game guzzlers, if Sacatone Spring is dry and potholes are dry Cache at Christmas Tree Pass to mitigate this risk.
52 – Section 6, Warm Springs to Lake Havasu City. Don’t freak out about this one. There are many options to make this carry much shorter, but you need to look at the map and pick one of the options yourself. An alternate to a truck stop, an unverified spring, detour to the Colorado River, and cutting miles off the end of this section are all options to reduce the water carry mileage. You might not want to cache here at all, but it’s an option.
Typical/most liters of water carried?
On average, I was expecting water once per day, and carried 5L… 4 for one day, plus an extra liter in case it takes a little longer. The most I carried was 8L, for two days. Future hikers can benefit from caching at a couple of locations I didn’t, as well as benefiting from having some beta on water sources along the route in the form of the Mojave-Sonoran Trail Water Chart.
Caching Water

Water cache in the North Muddy Mountains, Nevada
Caching water ahead of time at a few key places along the route is a good option. For those flying into Vegas, you can rent a car and drop off water over the course of 2-3 days. This also gives you a chance to scout the route a little, and some of the towns along the way. Not caching water would result in water carries of 2+ days in a couple of places. The route is still doable without caching, but caching water certainly makes it easier. Suggested caching locations are marked on the Mojave-Sonoran Trail map for reference.
Mojave-Sonoran Trail Water Chart
I’m working on releasing some sort of water chart for the MST, but for now, you’ll need to do the leg work yourself to determine distance between water sources. Just use the “profile” function in caltopo to read the mileage of each water waypoint, and the mileage to the next one. All of the water waypoints have notes from field observations in the waypoint descriptions. This is what the info in the water chart will eventually be populated with.

Water sources that I’ve personally visited will have notes describing what I saw. Water sources I did NOT visit will still have notes, based on what I saw from satellite when I researched them prior to my hike, and any other sources of information I could fine (water report, etc).
Resupply Strategy
Resupply on the Mojave Sonoran Trail has been broken down into 9 sections, with 8 resupply stops. Much of the Mojave-Sonoran Trail can be hiked without the need to hitch into town for resupply. It’s a 4 mile hitch into Bullhead City, if you want to. The only place it would be truly necessary is 14 miles into Quartzsite.

*Note: The “Section Miles” and “Section Days” are my actual recordings, not my estimates.
Mojave Sonoran Trail Resupply Strategy Spreadsheet Download
I use a spreadsheet to organize my plans for resupply along my long hikes. It gives me a quick way to refer to all of the information I need on the go. I just load the spreadsheet on my phone and refer to it as needed. You can download my template to get started, and modify it to fit your plans:

Resupply & Logistics Tips
Before the hike, it’s recommended to cache water (and possibly one box of food) along the route if you can. If you are driving your own vehicle to Vegas to start the hike, this will be easy for logistically, having your own vehicle. If you are flying in, you can rent a car for 2 days or so to make the drive to the cache locations. This route can be done with no caching, but that will result in longer water carries. That would mean 2 days of water vs one day in a few locations. I did two day carries in many locations, so it’s possible without caching if you aren’t able to do that pre-hike.
Sections 1-3: The most difficult sections to resupply are at the beginning of the hike, in the Lake Mead National Recreation Area. At the end of section 1 (Echo Bay) and section 2 (Callville Bay), resupply options are limited. Echo Bay used to be thriving, but the low water levels of Lake Mead have left the place largely abandoned these days. To a lesser extent, Callville Bay was also effected, but had held on more than Echo Bay. It’s 156 miles from the northern northern terminus to Boulder City over 3 sections, and there are a couple of options for resupply during this stretch:
- Leave a food box at Echo Bay. There is NO MAIL here, so you must drive here before the hike and visit in person, unfortunately. Try to leave a box with the store clerk, RV park camp

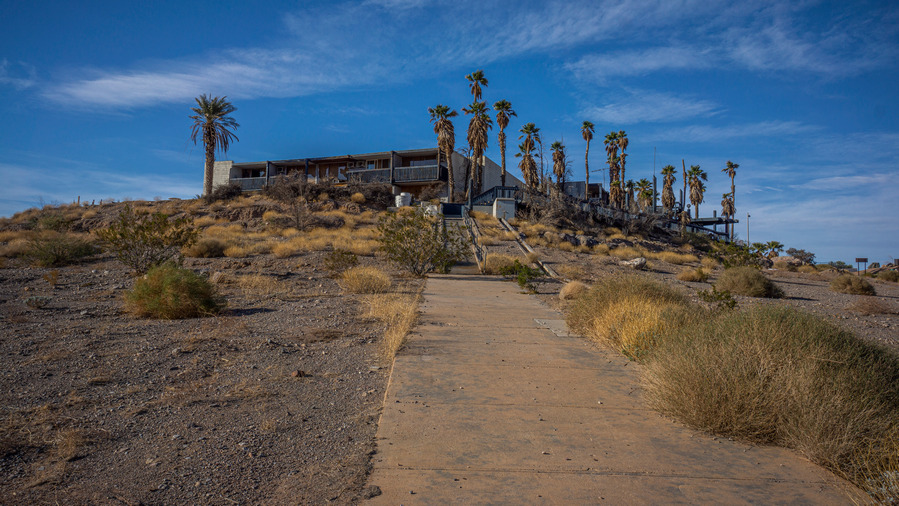
Abandoned Motel at Echo Bay
host, etc. If that fails, try stashing your food in the abandoned motel next to the c-store. Make sure to use odor proof bags if doing this. Caching food by burying it is not specifically listed as prohibited on the Lake Mead National Rec Area’s website, but because it’s federally owned, you can bet it’s not allowed. I haven’t clarified this yet, though. You will want to cache enough food to last to Boulder City for sections 2 AND 3, minus basic c-store snack items like nuts, chips, jerky and candy from Callville Bay’s Marina Store. You can also get a hot meal for lunch or dinner here at the restaurant, so factor that into your resupply plan as well.

Callville Bay
- Skip Echo Bay, and hike 111 miles from the northern terminus to Callville Bay. From there, it’s about 40 miles from Callville Bay to Boulder City, a two day walk. Callville Bay Marina Store offers chips, jerky, candy, nuts etc, not much else for food. They do have a restaurant for lunch and dinner. From the northern Terminus, you could bring enough of your staple food items (that you can’t get at Callville Bay) to last to Boulder City, and use Callville Bay to resupply basic c-store snack items, and pig out at their restaurant.
- Hitch into Overton to resupply (full grocery store). The best place to hitch into Overton would be along Northshore Drive, before hiking towards Echo Bay. This is roughly 50 miles into the hike, with about 105 to reach Boulder City, the next full resupply opportunity. Hitching is difficult here. Most people driving around here aren’t heading into Overton. Getting a hitch back out to Echo Bay is even harder. But it is possible. By hitching into Overton and resupply at 50 miles in, you could carry food for sections 2 and 3, over 105 miles, minus the food you can eat at Callville Bay’s restaurant and the snack items you can buy there at the Marina Store.

Boulder City: Once you reach Boulder City, your resupply and logistics for the rest of the hike is a little easier and more straightforward. Boulder City is a full resupply, with an Albertsons and everything you need. Since Searchlight, the next town stop, only has two c-stores (no actual grocery store or market), you might consider sending yourself food items from Boulder City… the things you can only find in larger grocery stores. Send to the PO if you think you’ll get there during operating hours/days, otherwise, call one of the two hotels and ask to send a box. I recommend starting with the El Rey motel first, and only considering the BV Motel as a last resort. That place is wild, and not in a good way.
Searchlight: This was not my favorite town stop. The town is rundown and appears to be a high crime place. Everything you need in town is within two blocks though… two C-Stores, McDonalds, Denny’s, PO, 2 motels. Full resupply is not really possible here. but it’s only 2.5 days to Bullhead City… so if you aren’t picky, you could do a combination of McDonald’s food and gas station stuff and probably make it work. However, the recommended strategy would be to send a food box from Boulder City that has anything you can’t get here. The El Rey Motel was booked, so I had to stay at the BV Motel next door. This place was cash only ($60), dirty, and full of oddities. For example, the full size mattress on a twin size box spring… the mattress hangs off the edge of the box spring. Door knobs under the bed, no shower curtain, dirty, no wifi, can see under the front door, just a weird place. In the distance, a man with the most shrill, frantic voice I’ve ever heard was screaming for hours about how he was going to kill someone. The good news, this motivated me to not take a zero, and just leave the next morning.
Bullhead City: Everything you need, but unfortunately, the layout of the town is spread apart. All the hotels are in one place, the restaurants in another, grocery and retail stores somewhere else. Uber and Lyft operate here, and there is also a bus (red route) that runs once per hour. Apparently the Post Office is pretty bad here (read the google reviews before sending anything), so it would be best to send packages to a motel instead if needed.

London Bridge, Lake Havasu
Lake Havasu City: This section has a few different alternates and options. Cold Springs Station (40 miles into this section) offers chips, jerky, a few candy and snack items, soda… maybe enough to be considered “lunch”. Around mile 60 into this section, there is an option to take a 6.6 mile alternate route to a truck stop/travel station with multiple fast food restaurants, shower and typical large c-store food items. This route would add about 4 miles to your overall distance. It would also mean that those 4 miles would be paralleling Interstate 40, so keep that in mind. Lake Havasu City is a large (55k population) and sprawling city. The ideal location to stay is near the London Bridge… this is right next to the docks for the ferry across Lake Mojave to start the next section, there are multiple grocery stores, hotels, PO, restaurant, etc. Lake Place Inn offers cheaper rates, and is 1.5 miles from the Havasu Landing Ferry.
Bouse: After crossing the Parker Dam (must hitch across, no pedestrians allowed), you’ll reach the Hez-ron gas station/C-store, around 45 miles into this section. Typical c-store food, with some microwavable items like burritos and hot pockets. The owner is not very welcoming, and will insist you remove your pack and put it behind the counter while in the store. This doesn’t stop him from staring and scowling, though. Not a pleasant man. It’s unlikely he would let you use his hose or spigot for water, but you can always just buy a gallon of water from the cooler. In Bouse, resupply options are slim. The Coachman Cafe is only open until 2:30pm, and closed Mondays. You can get a meal here, but you better hope you have the same political affiliation as the owner. Yeah, it’s one of those kind of places. The Somewhere Bar has food too, and is open to 6pm, but is a little farther away. A Family Dollar exists, and a small store called the Roadrunner Market. The Market has a small selection of grocery items, probably enough for most people to cobble together 2 days of food. If you have any doubts though, you can send a food box to the Bouse PO. The worst part about Bouse is that there is nowhere to stay the night and get a shower. The Bouse RV Park refused service to me because I was in a tent. Yup! There’s the Just For Fun RV Park across the street, but they have no shower. What’s the point, then? There’s the Bouse Community Park about 1.25 miles west of town on Plamosa Rd. but they also don’t have showers, and charge $14 a night. There is a day use area here where you can fill up water, use the bathroom, and a pavilion with electrical outlets that were OFF. The camp host was unfriendly, circling a bunch of times in her golf cart before finally approaching and saying “you know this is a day use area, right? You need to be gone by dark”. Geez. Bouse was hands down the least welcoming town stop I’ve ever had as a hiker. Fortunately, Bouse is a great town to get what you need quickly and walk out without staying the night. BLM land is right across the street from the Bouse Community Park, camp there for free and move on.
Quartzsite: Quartzsite is a weird town. This area is home to a massive influx of RV campers who spend the winter in the desert nearby, to the tune of about 250,000 people a year. The entire town is a mixture of trailer parks and flea markets. Quartzsite has everything you need, though. The Super 8 Motel is located on the far west side of town, far away from everything else. There is also the Stagecoach Inn which is much more centrally located. In addition to these two hotels, you might find a room to stay in for the night by walking the streets near the flea markets, there are signs advertising rooms, showers etc, despite not showing up on internet searches for motel rooms. The Camel Express (Quartzsite public transportation) bus provides transport across the city, anywhere you want to go, for $.50 each way. They will make multiple stops along the way for you too, while you run into a store, they will wait. Call (928) 927-4333, Option 3 to schedule a ride. There are multiple small markets, but the Roadrunner Market is probably the best stocked. Still, the selection is thin, barely meeting the threshold to be called “full resupply”. They don’t have basic things like whole wheat bread, tortillas etc. Between the Roadrunner, Family Dollar, Coyote Fresh Foods and multiple C-stores, I’m confident you will find Quartzsite to be a full resupply city, albeit just barely.
Gear List & Recommendations

Camp in the Kofa Mountains, Arizona
A link to my lighterpack gear list: https://lighterpack.com/r/4aj6eq
The Mojave-Sonoran Trail is a pretty easy hike to pack for. The weather is very consistent and generally warm to mild. Winter hikers will want a 20 degree bag, and fall/spring hikers will probably be good with a 30 degree bag. For my hike (Nov-Dec) I used a 40 degree bag, and only regretted it one night, the rogue cold night of 21 degrees. I used a Tarptent Notch Li tent, and cowboy camped maybe 1/3 nights. I was debating whether or not to bring a foam sleeping pad, but went with my thermarest neoair inflatable. I’m glad I did, because it held up pretty well. I got a couple of pinholes along the ay, likely from one or two campsites, and just patched them in town when I got to a bathtub to submerge/test it. Make sure you carry a patch kit if you bring an inflatable!
This is a desert hike, so go light on the rain gear. I carried a zpacks Vertice rain jacket, and carried no rain pants. Wind Pants like the EE Copperfield pants would work well for what little rain you would possibly encounter, if you wanted to bring a pair.
This route will have you using your hands quite a bit. Not only for climbing, but on bushes and branches, and cacti (inevitably). I recommend some type of gloves to protect your hands. I’m using the Fish Monkey fingerless gloves, which I find almost perfect for this type of thing. Fingerless is a must for me for using electronics, and these are thin and flexible enough to not be cumbersome, yet still provide plenty of protection.
I went through two pairs of Brooks Cascadia 13’s on this hike. Yup, still rocking 3 year old shoes, I buy them cheap after the new models come out. I lost like 70% of the tread on my shoes on day 1, due to some razor rock (limestone) along Weiser Ridge near Valley of Fire. There are parts of this route that will eat up your shoes, so be prepared to swap them out half way, perhaps Bullhead City or Lake Havasu.
TIP: Bring an end-of-life pair of shoes for the first day of this hike, since you’ll eat all of the tread on new shoes on Weiser Ridge (Day 1). Carry your new pair of shoes until day 2 when you get to the trailhead in Valley of Fire State Park, throw out your old ones here, and carry on in your new pair.
Some sort of pre filter is a good idea to have in your water filtration kit. I use women’s pantyhose for this. Weighs nothing and works well. Use your hand to spread apart the fabric when filtering water to allow it to seep in. You will also need to have a plan to draw water from the small game guzzlers along the route. For example, mine included a wide-mouth Gatorade/Powerade bottle and cord. I also use the cord to lower my pack on downclimbs.
Related Images:
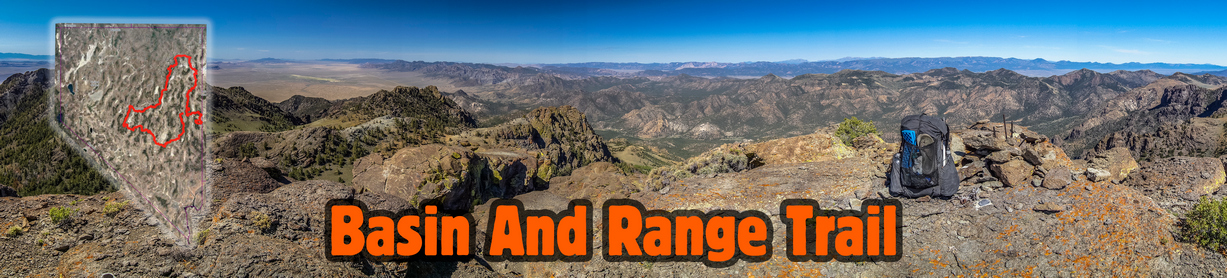
Basin And Range Trail Thru Hike Guide
Basin and Range Trail Introduction

Map of the Basin and Range Trail
The Basin and Range Trail (BRT) is a 1,090-mile hiking route through Nevada’s Basin and Range country, more commonly referred to simply as the Great Basin. Nevada is home to more than 310 mountain ranges, second only to Alaska. Most of these mountain ranges are tall, narrow and run parallel to each other in a north-south configuration. In between these mountain ranges lies vast arid valleys, or basins. The Basin and Range Trail was created to explore this unsung landscape, a region with few established hiking trails and very little information on what is even out there. In short, the allure of the unknown inspired this route.
The BRT offers a different kind of thru hiking adventure, more raw and rugged than those within the National Scenic Trail system. The BRT is not a blazed trail, a beaten path or even a 100% fully ground-truthed route. Routes of this nature are constantly evolving, seeking the best scenery and most interesting hiking, the optimal route. As more hikers take on the Basin and Range Trail, various alternate routes are explored and feedback is gathered, the future will see many updates to the current route. Thru-hiking the Basin and Range Trail means off-trail hiking and bushwhacking, and hikers setting foot here should understand that this is part of the adventure.
The Basin and Range Trail is split up into 10 sections, and could end up being anywhere from 900-1100+ miles, depending on the route you take. There are many options for alternates and cutoffs. It begins in Ely and forms a large “loop” through the state, nearly ending in Ely but actually ending in Baker. The BRT is best suited for a clockwise hike. Late spring/early summer is the optimal window. Expect 45-55 days of hiking. There is a lot of rugged cross-country terrain with a lot of bushwhacking, so the pace is slower than a normal thru hike.
Read the Las Vegas Review Journals’ story on the Basin and Range Trail
BRT 1.0 vs BRT 2.0
The version of the Basin and Range Trail I hiked could be considered 1.0. Since my first attempt of this route, it has undergone major revisions to take advantage of the first-hand knowledge I gained by getting my feet on the ground and actually hiking the route. Large portions of my original route have become the standard route, some portions of the original route are now alternate routes, and some portions of the original route have been scrapped and re-routed all together. Keep in mind that the Basin and Range Trail experience presented in my journal only partially represents the standard Basin and Range Trail route presented in the Official Guidebook and Map Set, which could be referred to as BRT 2.0.
Basin and Range Trail Thru Hike Journal And Photos

Goshute Range Traverse
1 – Ely to Preston: 94 Miles (87 Miles)
2 – Preston to Tonopah: 120 Miles (110 Miles)
3 – Tonopah to Carvers: 116 Miles (124 Miles)
4 – Carvers to Austin: 95 Miles (94 Miles)
5 – Austin to Eureka: 106 Miles (59 Miles)
6 – Eureka to Lamoille: 131 Miles (123 Miles)
7 – Lamoille to Wells: 80 Miles (70 Miles)
8 – Wells to Wendover: 113 Miles (83 Miles)
9 – Wendover to Ely: 125 Miles (105 Miles)
10 – Ely to Baker: 111 Miles (96 Miles)
BRT 2.0 Total: 1091 miles My Total: 951 Miles
*Note: I want to present both my actual mileage hiked, but also, the mileage of the standard route for future BRT thru hikers. Read the above mileages as follows: “1 – Ely to Preston: 94 Miles (87 miles)”… the 94 miles represents standard BRT route presented in the guidebook (BRT 2.0), while the 87 miles represents the actual miles I hiked on my version of this section (BRT 1.0). Basically, this is a quick way of understanding how many miles I hiked that section, compared to what the total is for that section moving forward in BRT 2.0.
Basin and Range Trail Thru Hike Videos
I filmed carried 6lbs of electronics and camera gear to film my Basin and Range Trail thru hike. After the hike, I then spent well over 1,000 hours editing and producing a 10 part series documenting my Great Basin thru hike experience, as well as a feature film that condenses the Basin and Range Trail thru hike adventure down to 60 minutes. Watching these videos is the best way to get a feel for a Great Basin thru hike, to see the beauty of Nevada but also the difficulty of the route.
10 Part Basin and Range Trail Thru Hike Vlog Series
Basin and Range Trail Thru Hike Documentary Film
Basin and Range Trail Thru Hike Documentary Film on Streaming Services
You can watch the 60 minute Basin and Range Trail Documentary Film for free on youtube, but if you’d prefer, you can also watch it on the following streaming services:
- Amazon Prime
- Xumo
- Tubi
- Filmocracy
- Telus
- Overdrive
Basin and Range Trail Guide
Toiyabe Range, Reese River Valley and the Shoshone Range viewed from the Toiyabe Crest Trail
Now that you’ve read the BRT Journals and watched the Basin and Range Trail movie/vlog series, you may be interested in the more technical aspects of the hike. Perhaps to plan a thru hike, or section hike, of the Basin and Range trail yourself. The information below is meant to be a condensed guide to give the potential BRT hiker a quick look at the basic logistical aspects of planning your own hike.
The Official Guidebook and Map Set is the most complete, detailed Basin and Range Trail planning resource available for those who are serious about thru hiking their own version of the Basin and Range Trail. The route is well documented in the available 120 page guidebook, GPX file of the route, PDF map sets, water chart and more. The Basin and Range Trail planning resources are detailed and thorough, everything you need to hit the ground. The complete BRT planning guide and GPX kit is available for free to those who join the Basin and Range Trail Facebook group , which is the best way to get in touch with other past, present and future BRT thru hikers, trail angels etc.
Start and End Points
The Basin and Range Trail starts in Ely and ends in Baker. The route nearly forms a loop, but doesn’t actually end in Ely, although a hiker could if he/she so chooses. Getting to and from the start and end points of the BRT is a challenge. Ely doesn’t offer the hiker much in terms of transportation options. There are no airports, trains, bus routes, uber, taxi services or shuttles that operate out of Ely (population 4,000). Therefore, ending the hike in Baker (population 58) puts the hiker in a roughly similar situation, the need to find a ride to a larger town for transportation back home. If you don’t have a friend willing to drive you to and from the terminus points, your best bet is rideshare listings on facebook or craigslist. And of course, thumbing it as a last resort. Remember, the trial provides. If you can get to it.
Direction of Travel
The route is best hiked in a clockwise direction. The route ends at Wheeler Peak (13,065′) in Great Basin National Park, so you aren’t going to want t be at that elevation too early in the season. The Snake Range, encompassing Mt Moriah and Great Basin National Park, is best hiked last along the BRT. In general, the southern leg of the BRT is lower in elevation, as well as latitude, and so it can be hiked earlier in the season. For these reasons, it’s best to hike clockwise. A counter-clockwise hike of the BRT would likely require different start and end points.
Seasonality
The BRT could be hiked in the spring, summer and fall. However, most hikers will prefer this hike in May to July timeframe. The southern portion of the route is the warmest/lowest elevation, and that is why it is hiked first. In many years (snow has been low in recent years) the Toiyabes hold significant snow into June. The Rubies, Schell Creek Range and the Snake Range can all hold snow into July. In the southern portion, the Egans and Grant ranges both spend time over 10k feet, and reach 11k feet, so these can hold snow later into the season as well. Those who don’t mind the snow, or don’t mind bailing and walking around if high snow is encountered, can start earlier in the season, say, April. Those looking for a snow-free hike should wait until around 1st or second week of May at least, potentially later depending on the year. Start too late and the heat is an issue from mid July on, and water sources start to dry up. The ideal start date is based off the snowpack for the current year. Your goal is to have snow melt to draw water from while hiking the crest of the Toiyabes and Diamonds, in sections 4 and 6.
Time on Trail
The miles here are MUCH slower than a typical thru hike, because of the frequent bushwhacking and cross-country hiking across rough terrain. The hike will take much longer if you stick with the bushwhacking, not bailing out and taking alternates. The route variables could mean a total mileage of 900-1100+, which also has a big effect on your time to complete the route. Not counting zero days, figure 45-55 days for a “typical” thru hike of about 1000 miles.
Type of Hiking
Approximate breakdown of surface types along the Basin and Range Trail and their estimated percentages:
Single Track Trail – 10%
Cross-Country Hiking – 35%
4×4 Roads – 35%
Dirt Roads – 15%
Paved Roads – 5%
The majority of the hiking along the Basin and Range Trail is either cross-country or on a 4×4 road, many of
which are very old and faded. There are practically no hiking trails along the route, except in the Toiyabes,
Rubies, Mt. Moriah and Great Basin National Park. If you see a hiking trail marked anywhere else on the map,
chances are, it doesn’t actually exist on the ground. Sometimes, the same is true for 4×4 roads. If you do
encounter a trail, it likely needs some maintenance as most are overgrown. Many of the trails encountered are actually horse trails,
which quickly fade in and out.
Maps
Download the Basin and Range Trail GPX file & PDF Map Set. The GPX file and PDF maps are FREE for those who join the Basin and Range Trail facebook group, or available for purchase using the first link. You can can use the GPX file with the mapping platform of your choice (I recommend caltopo). The GPX file includes all of the water sources as waypoints as well.
Water
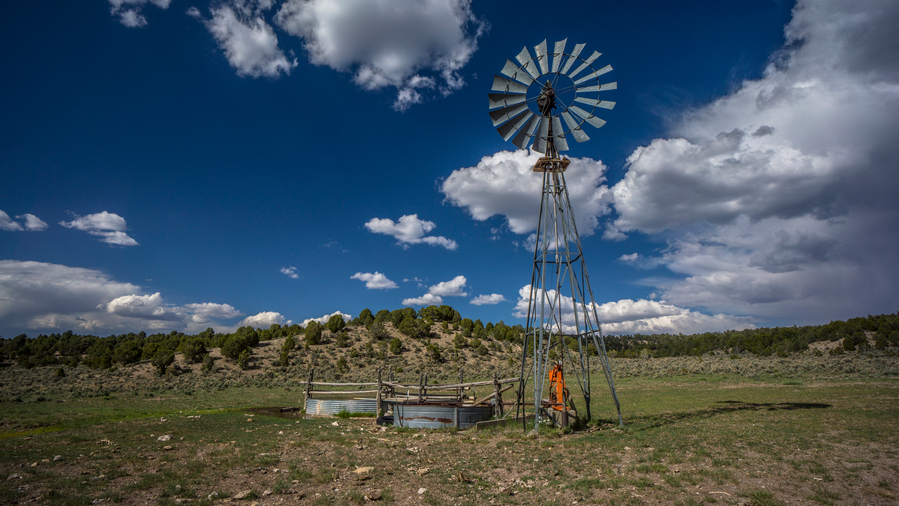
Windmill with good water in the Egan Range/Cave Valley
Water is perhaps the biggest concern a potential Basin and Range Trail thru hiker has when considering this trail. To those unfamiliar with Nevada, the prospect of finding reliable water in Nevada sounds daunting, and downright dangerous. However, this is not the case. Nevada is the driest state in the country, and even during an exceptional drought, in the middle of summer in 2020, I generally had no problem finding water.
The water availability along the BRT could be considered comparable to that of New Mexico on the Continental Divide Trail. There are plenty of days where you will have multiple water sources, and there are many days where you will only have one. It’s a dry and arid climate, but there is almost always water, when you know where to find it. They key is pre-hike planning.
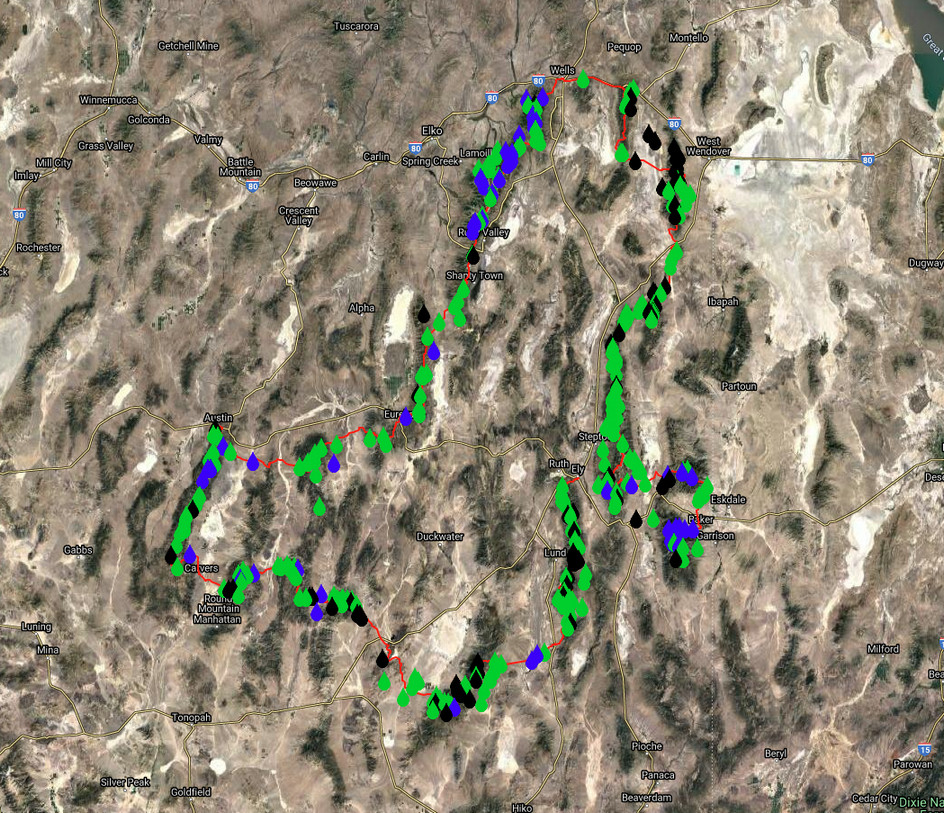
Water sources plotted along the route, color coded for ease of visibility and understanding: Blue = Reliable, Green = Probably/Maybe, Black = Dry
The longest distance in between water sources for me was roughly 25 miles. The standard BRT route as presented in this guidebook has a water carry of up to 38 miles, but potentially as low as 25 depending on the route taken. In total, the BRT has 4 water carries over 20 miles. In general, water is pretty easy to come by, for such an arid climate. In short, water is not as big of a deal as you might think in Nevada.
Most of Nevada’s precipitation falls in the form of snow, and after snowmelt is when water is most abundant. Snow remains longer into the spring and summer season in some ranges than others. The taller the mountains, generally, the wetter they are. In most ranges, the large canyons have water. Many of these water sources in the mountains are flowing creeks.
Water Chart
Besides the GPX file of the route, here’s perhaps the single most important piece of planning info available for a thru hike of the Basin and Range Trail: the Water Chart. All of these water sources are plotted along the GPX file as well, so you can view these water sources along an interactive map.
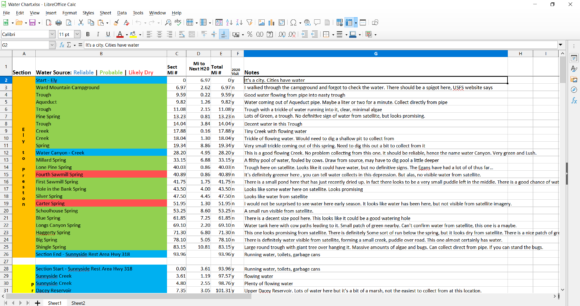
*This chart is set to View Only, so if you have any updates to this chart, contact me directly and I will add your notes/updates here to the Basin and Range Trail Master Water Chart.
Bushwhacking
To be blunt, there is a shitload of bushwhacking along the Basin and Range Trail. This route was never meant to be conservative, ensuring easy passage or safety. It was meant to be the next-level adventure I was looking for after completing the CDT. For me personally, that meant mapping my own route, going off-trail, and dealing with whatever it was I got myself into. I knew I would be bushwhacking, and I accepted this going into it. I wanted to reach places that looked intriguing to me via satellite, or perhaps, simply connect segments of the route that would not otherwise be possible if one were not willing to put forth the extra effort in bushwhacking. If you don’t want to do any bushwhacking, I don’t blame you. But unless you are willing to do what others won’t, your adventures will be confined to the path more frequently traveled.
The worst bushwhacking along the BRT was in the East Humboldt Range, and the Goshute Range. The East Humboldt Range is notorious for being overgrown, and as wet as it is, can be thicker than anything else you’ve encountered along the BRT. The supple new growth aspens bend easily, but grow so thick that you’ll feel like you’re swimming in them above the ground. The Goshute Range, on the other hand, is much drier. Here, Mahogany Trees are the main obstacle. They grow thick too, but are stiff and brittle. In other words, it hurts more.
One option to consider is having a pair of gloves to protect your hands. They will become torn up without them as you constantly grab and snap branches on some of these bushwhacks. I didn’t have them at the time, but I am now wearing these Fish Monkey Fingerless Gloves. The inside of the palm is a soft flexible leather, and the outside is like a thin neoprene material. The gloves feel light and flexible, yet provide good protection for the hands while bushwhacking.
Weather & Climate
Those unfamiliar with Nevada often think of the state as a giant extension of Las Vegas, one big hot desert. Many are surprised to realize that the rest of the state varies as much as it does. Las Vegas sits in a valley at around 1800’ elevation, while the lowest point along the BRT is 4800’. Only once does it dip below 5000’. Most basins are around 5500’, with some as high as 6500’. Those are the LOW points along the route. Sure, it can be hot on the BRT, but nowhere near as hot as Las Vegas, due to higher elevations. Central and northern Nevada is a different environment. The rest of the state does not see the 115 degree temps that Las Vegas does.
See the Koppen climate classification map of Nevada below, with the BRT route overlaid:

You can see in southern Nevada, the red, which indicates “hot desert”. This is the desert most people think of when they think of deserts. In the southern portion of the route, along sections 2 and 3, you will encounter “cold desert” environments, but the rest of the low valleys along the route are mostly “cold semi-arid”. The mountain ranges are mostly “warm-summer Mediterranean continental” and to a lesser extent, “warm-summer Mediterranean”.
Expect bluebird skies nearly every day in June with mild temps. The low valleys aren’t too hot this time of year, and can actually be quite cold still on occasion throughout June. There is still the possibility of snow storms in June, expect a dusting or two at high elevations. The temps heat up around the beginning or July, and getting uncomfortable by mid July. Afternoon thunderstorms were sparse during my 2020 thru hike, only occurring within a one week window in late July. July and August will routinely see temps of the 90s and during a heat wave, the low 100s in the valleys along the BRT. It’s almost always windy in Nevada, and the winds are often high. The good news is that the winds generally die down at night. There are very few overcast days, so be prepared to be exposed to direct sunlight for the majority of your hike.
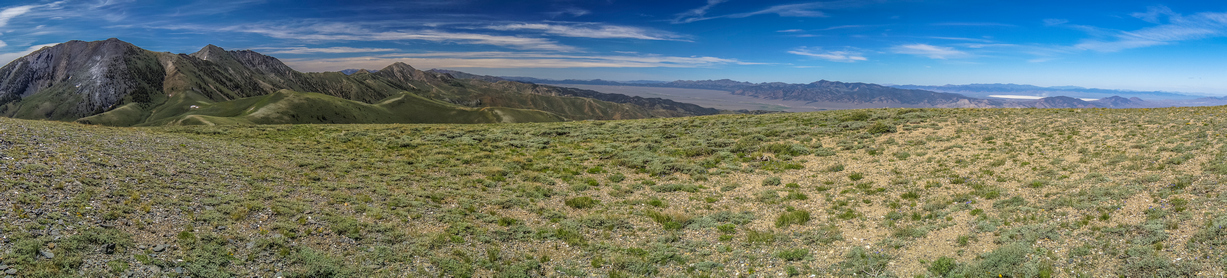
Mountain Ranges of the Basin and Range Trail
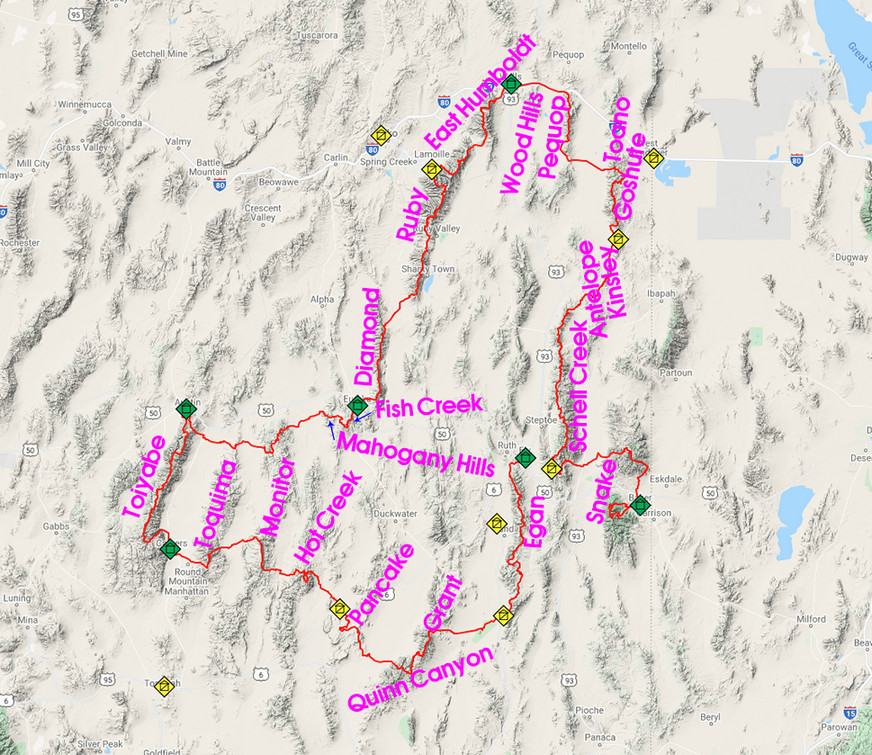
Mountain Ranges of the Basin and Range Trail
Valleys (Basins) of the Basin and Range Trail
Valleys/Basins of the Basin and Range Trail
Town Stops & Resupply

The Basin and Range Trail was created with as many walk-in town stops for resupply as possible, as opposed to hitching. Even so, half of the town stops require hitching. The towns are small and extremely isolated along most of the route. Besides the I-80 corridor along the northern end of the route, the biggest towns are Ely with 4,000 and Tonopah with 2,000. The other towns have little to offer. Preston, Carvers and Austin do not have grocery stores, so you’ll need to send a food box to these towns.
With the need to charge electronics and dump media from my cameras, I generally stay in a hotel in town. If I am sending myself a package, I’ll send it to the motel I plan on staying at. This is preferred over sending to a post office, because then you are not tied to their hours when you get into town. For example, get into town Saturday afternoon, and you’ll need to wait until Monday to get your box from the post office. Mailing to a motel eliminates that problem.
For a detailed Town Guide, check out the Basin and Range Trail Guidebook
Caching
It is not necessary to cache food or water anywhere along the Basin and Range Trail, unless you wish to do so. I did not employ this strategy as I rely on towns to recharge my electronics, dump media from my cameras and backup data.
If I were to cache, I would do so in place of the towns that require a hitch. So, I would cache at the end of section 1 (Sunnyside), section 2 (Lunar Crater), section 6 (Lamoille Canyon), section 8 (US 93 Alt) and section 9 (Cave Lake State Park). Of course, anywhere your route crosses a road will work, and selecting exact cache locations is up to you.
Related Images:
Continental Divide Trail (CDT) Thru Hike Guide & Journals
Continental Divide Trail Thru Hike Guide
Miles: 2998 Days: 165 Elevation Gain: 470,284ft Dates: NOBO, April 21st – October 2nd
Famous’ 2018 Continental Divide Trail Journal Entries By State
New Mexico
Crazy Cook to Lordsburg
Lordsburg to Silver City
Silver City to Doc Campbell’s Post
Doc Campbell’s Post to Pie Town
Pie Town to Grants
Grants to Cuba
Cuba to Ghost Ranch
Ghost Ranch to Chama
Colorado
Chama to Pagosa Springs
Pagosa Springs to Lake City
Lake City to Salida
Salida to Twin Lakes
Twin Lakes to Breckenridge
Breckenridge to I70 (Frisco)
I70 (Frisco) to Grand Lake
Grand Lake to Steamboat Springs
Steamboat Springs to Encampment
Wyoming
Encampment to Rawlins
Rawlins to Lander
Lander to Dubois
Dubois to Jackson
Jackson to Flagg Ranch
Flagg Ranch to Old Faithful
Old Faithful to Macks Inn
Idaho\Montana
Macks Inn to Lima
Lima to Leadore
Leadore to Darby
Darby to Anaconda
Anaconda to Lincoln
Lincoln to East Glacier
East Glacier to Canada
View/Hide A Descriptive Overview Of Each CDT Section Hiked The CDT starts here at Crazy Cook monument on the border of New Mexico and Mexico. There’s only a dilapidated barbed wire fence marking the border. From here, I’ll hike north through New Mexico’s Bootheel to Lordsburg. Water is scarce here… it’s dry, windy and hot! Like most desert hikes I’ve done, it has a very ancient and primitive feel to it that cannot be duplicated in any other environment. There’s also a lot more wildlife here than you’d think. Taking those first steps of a 3000 mile journey was probably the most overwhelming feeling of my life. The first part of this section, out of Lordsburg, was flat and hot. But, This is a good section because the landscape transitions from desert to rolling hills and lots of trees. It’s hard not to like that after 100+ miles of desert. Unique environment and a good sign of progress towards more interesting landscapes. After leaving Silver City, it’s a road walk up Little Walnut Creek Rd into the hills. This is the beginning of a 300+ mile stretch of no cell phone service for us AT&T customers. This stretch begins the Gila National Forest, a much anticipated section of trail. No more open desert, more trees and hills, and lots more water, towards the end of this stretch. After visiting the optional Gila Cliff Dwellings, it’s wet feet all day, hundreds of river crossings and remote country through the Middle Fork Gila River. Many deem this to be the highlight of New Mexico and a favorite section of the entire CDT. There are numerous hot springs, namely the Jordan Hot Springs. The Middle Fork Gila River ends at Snow Lake, after which the terrain resembles Wyoming briefly. The trail then wanders through what I called “The Sea of Gold”, a massive view of rolling hills and golden grasses. Then it’s a long and boring walk along Bursum Rd before climbing back up into the hills. A 40 mile road walk through seldom visited region of New Mexico finishes the final leg into Pie Town. The hike out of Pie Town is a very long road walk. Hikers have route options after reaching El Malpais… hike a roughly 55 mile semi-circle route around the lava fields or the Cibola alternate. I Chose the alternate, due to water shortages along the official El Malpais route, as most other hikers did this year. This allows one to hike the Narrows, a trail high up on a mesa overlooking El Malpais. I then hiked the northern section of El Malpais, exploring underground lava tubes and walked the rim of an old caldera volcano. This was the highlight of this section. It’s then a long road walk into Grants through Zuni Canyon. This next section includes the highest point on the CDT in New Mexico, which is Mt Taylor at 11,300ft. Having a taste of the high mountains is a bit of a tease, as the trail then heads back down into lowlands and desert scrub. The middle section of this stretch is rather boring. However, the last 2 days into Cuba were incredible. I called it “New Mexico’s monument valley”. Hoodoos, badlands, mesas, spires and all sorts of interesting formations. I also saw my only real rainstorm in New Mexico during this leg. Here hikers are given their first taste of high alpine meadows and parks in the San Pedro Parks Wilderness. No distant views, but nice scenery. The trail then descends back into the desert one last time. Approaching Ghost Ranch was some of the best desert scenery I experienced in all of New Mexico. Very colorful canyon walls line the Rio Chama, the first serious river along the CDT. Ghost Ranch itself boasts some stunningly beautiful scenery, marking the end of the desert along the CDT in New Mexico. Only a few miles out of Ghost Ranch, the last of New Mexico’s desert fades away. High mesa, rolling hills, meadows, forest and even lakes. Water is now abundant and no longer an issue. Every mile passed, New Mexico fades and Colorado grows closer. Elevation climbs to around 10k feet and stays there. The state border line, although underwhelming, is a big milestone. 25% complete with the CDT! This section has been the most difficult of the hike thusfar. More snow, highest elevation, most climbing, wettest, muddiest and all-around toughest hiking yet. But also, the most beautiful and impressive mountain scenery so far. Welcome to Colorado, snow and high mountains. Climb high, stay high! And that’s exactly what the trail does here. It follows the highest possible route without dropping down into valleys. That’s the spirit of the CDT, and this section is trial by fire. Between Pagosa Springs and Lake City, the CDT passes through the San Juan mountains and the Weminuche wilderness, Colorado’s largest. It’s a tough section with rugged mountains, alpine lakes, lots of high trail and beautiful scenery. It’s much longer than the last section, but fortunately the trail was a bit drier and less snow which allowed for slightly easier travel. But still, very challenging! The first section of trail out of Spring Creek Pass was very scenic and similar to the last stretch south of the pass. After San Luis Peak, the trail drops down and the high mountain scenery fades away. Low valleys, dirt roads, forest. Lots of climbing and no views to show for it. After about 70 miles of this, the trail finally climbs high again and hikers are rewarded with distant views once again. This too comes at a cost… dodge the mountain bikers. After about 150 miles of the CDT sharing trail with the Colorado trail, I saw my first, and 100th, mountain bikers. Watch out for these guys, they’ll run you over! The hike from Salida to Twin Lakes was tough, but a good one. Lots of great views from numerous passes and high ridges. It was very hot and the mosquitoes have really been coming out lately. Lake Ann and the pass above it was the highlight of this section for me. Highlights from the Twin Lakes to Breckenridge section of the Continental Divide Trail include Kokomo Pass, an abandoned WWII training facility, Mt Edwards and Mt Massive alternate routes, and a few scenic ridgelines overlooking the ski resorts of Copper Mountain and Breckenridge. North of Twin Lakes, the route isn’t blow-your-mind scenic, but it gradually improves and provides some excellent views. Despite the large number of roads encountered on this stretch, and the lack of a real wilderness feel to it, this one was of the more scenic sections of the CDT in Colorado in my opinion. There were lots of 4×4 vehicles and ATVs out here though. The mountains had a lot of color to them in this section… not just green, but reds and oranges too. Colorful Colorado indeed! Grays Peak and Torreys Peak are also along this route, the highest point along the Continental Divide Trail. North of I-70, the Sugarloaf Fire forced a reroute. This led me to bushwhack my own route around the closure before rejoining with the CDT. However, my return to the trail would be short lived. Thunderstorms kept me off the high ridges and forced a low route, taking me through the town of Winter Park. After rejoining the CDT yet again in the Indian Peaks Wilderness, I saw my first Moose on the CDT. This section of the CDT passes through Rocky Mountain National Park and the Never Summer Wilderness as well as the Arapaho National Forest and Routt National Forest. This area is home to lots of Moose. Some pretty good views along the way, especially from Parkview Mountain. This is the last time the official CDT route reaches 12,000′ for a northbounder. Besides a walk through the Mt. Zirkel Wilderness, gone are the days of high mountains. This section sees a transition from from the Colorado landscape to a drier and lower elevation mountain environment in Wyoming as the trail passes through the Medicine Bow-Routt National Forest. The Mt. Zirkel Wilderness is definitely the highlight of this section, which resembled the high Sierras at times. North of Encampment, the landscape abruptly changes from mountains to desert. The desert here begins as rolling hills, filled with pronghorn. It’s a long road walk into Rawlins. The views aren’t the finest, but the new landscape is interesting after so much time in the mountains. Few places to find shade and water is more scarce again. In this section I’ve decided to push for my highest mileage day on the CDT, as well as an overall push to cover the next 126 mile in as little time possible. The desert is pretty flat here and elevation gain is not much of an issue. It’s a massively vast area to be walking through. Sage brush as far as the eye can see, and not much else except an occasional wild horse or pronghorn. Much of the beauty here is in the sky… wicked looking dark clouds and vivid sunsets are common. This is some wild country. The first 30 or so miles are a lead up from the lowlands of the great divide basin desert into the high country of the Wind River Range. The next 120 miles were the most challenging, beautiful and intense hiking I’ve ever done. I had more adventure in these 10 days then the rest of the entire CDT combined. Jagged peaks, frozen lakes, glaciers, crevasses, abundant wildflowers, miles of boulders and snowfields, mountain lions, big horn sheep, steep snow traverses, scrambling and climbing, milky glacial-fed rivers, and almost NOBODY to share it with. Additionally, the majority of this route is off-trail. In my opinion, the Wind River Range easily offers the best backpacking experience in the continental US. Leaving Dubois, we had another 2.5 days of hiking to cross the northern Wind River Range. This proved to be much more difficult than anticipated, exceeding our time estimates. Road walked from Green River Lakes west to the Gros Ventre Wilderness. The Gros Ventre sees few hikers, and has few established trails as a result. Off trail adventures continued here on fields of snow and boulders, and involved some sketchy moments scrambling down steep rock faces. Once again we found ourselves low on food and hungry, only this time with a different outcome. This section was full of adventure and very scenic, among my favorites of the whole trip. After walking 2 miles into Jackson, resupplying and walking across the valley to Wilson in one day, we entered the Jedediah Smith Wilderness and Grand Teton National Park. We hiked our own version of the Teton Crest Trail winds in and out of both of these land administrations. The Tetons are pretty damn grand to say the least! North of Lake Solitude, we took a steep cross country route out of the basin and over to the west side of the divide. Lots of wildflowers, delicious berries to eat, and bushwhacking! I left Flagg Ranch and entered Yellowstone through the south entrance. The only wildlife I saw was a fox, very disappointing for a place known for it’s animals. Much of our route through Yellowstone was wet, swampy and not particularly scenic. The highlight of this section was the Bechler River and the Mr. Bubbles area. Here, we were blown away by majestic waterfalls and soaked in a natural hot spring. Back on the official CDT, the trail leaves Old Faithful via a boardwalk through some really cool geothermal features. Mostly, colorful pools and hot springs. Not the kind you soak in though, the melt your skin off kind. After leaving the boardwalk and hitting trail, we left the hoards of tourists behind for good. The trail passes by a lake and some undeveloped geothermal features just before we cross into Idaho. From here to Macks Inn, the trail is rather unremarkable. I did, however, see a bear for the first time since the Gila here. After leaving Macks Inn, the route follows roads nearly to the summit of Sawtelle Peak. It snowed up here yesterday, so it’s wet and muddy. It’s a bushwhack down a quiet little valley to rejoin with the official CDT. After this, the trail is often high on a ridgeline. The views are good but not terribly photogenic. There’s a massive valley here to the south, which was carved by past eruptions of the hotspot/super volcano presently located under Yellowstone. From here, The Tetons can be seen 60+ miles away! Lots of bear activity in this area as well. Near Lima, the fence line that represents the Idaho/Montana border becomes a frequent sight. The hike from Lima to Leadore was probably my favorite section of the CDT in Montana/Idaho. This is how I envisioned more of the state would be. The trail is often up on a ridge with a fence separating Idaho from Montana, and there’s big views all around. The vast seas of golden colored rolling hills convey a subtle yet powerful message of beauty. Other times, seemingly endless mountain ranges dominate distant views across a massive valley. Walking on the divide in the dwindling alpenglow proved to be some of the most memorable moments for me. After leaving Leadore, the CDT continued to offer some good ridgeline views, although not as frequent or quite as impressive as the Lima to Leadore section. However, it was forest fires dominated the theme of this stretch. Small and large plumes of forest fire smoke could be seen in many directions, and I was often quite close. I even walked over some active flames. Later, I found out the forest service closed the trail I was on again only hours after they gave me the go-ahead. I also encountered a momma bear and her two cubs. There was a lot of climbing in this section, with no day under 4200′. The first 30+ miles north of Chief Joseph Pass were some of my least favorite on the CDT. Partially my fault due to a crazy thick bushwhack, but mostly due to never-ending forests of dead trees and burned trees while doing lots of elevation gain. After the ugly section, the Anaconda Pintler wilderness starts and offers some redeeming views, mostly in the northern section. Bear activity was high, with lots of fresh scat. Temperatures are getting noticeably cooler now and days are getting shorter. North of Anaconda, the CDT changes from paved roads to dirt roads and finally trail. This section was not one of the most scenic on the CDT, with mundane low hills and forest dominating the views. I found the best views to be between Dana Spring and Granite Butte. Lots of hunters out in the woods at this time of year. North of Dana Spring, I ran into Hopeful. This was a great surprise and we hiked hundreds more miles together, almost to Canada. Our last day before reaching Rogers Pass, we hiked through a cloud in near zero visibility. I entered the Scapegoat Wilderness just north of Rogers Pass, where I did the most climbing I’d done in a single day on the entire CDT. However, these were the best views I’d seen in a long time. Lots of ridges with distant views. Then the trail drops down into a valley, where it’d mostly stay for the remainder of the hike to East Glacier. I picked up a package of food I had my dad send to Benchmark Ranch along the way before starting the Bob Marshall Wilderness section. Forest fires and high elevation snow forced a lower route through the Bob, so we missed the Chinese Wall and more. Winter is coming soon. With a fair amount of snow already on the ground and much more foretasted, Katie Hopeful and I set off into Glacier National Park. I was reluctant due to the weather, but Katie and Hopeful seemed optimistic. Stopped in the Two Medicine ranger station only minutes before they closed for the season. On the morning of our second day, Katie and I decided to turn back to to the weather conditions, with the idea of road walking to Canada from here. Hopeful continued to hike, alone. Katie and I regrouped in East Glacier and I ultimately set off alone the next day. A 37 mile road walk and another 11 miles in a blizzard, and I reached Port of Piegan at the Canadian border. At last, my journey on the CDT is complete! Here’s a detailed video breaking down every single item in my backpack, no matter how small. Click the link below the video to show a written gear list of every item in my pack, with weights listed and links to buy each item. The map above is a caltopo map of my completed Continental Divide Trail thru hike. It’s BIG and takes a LONG time to load, so keep waiting!! I hiked continuous footsteps from Mexico to Canada had my GPS on the whole way recording the track. That’s a lot of batteries! The route from South Pass City to Old Faithful is a 450 mile alternate route I created, so this section is NOT the official CDT nor is it a Ley alternate. You can download my entire Continental Divide Trail GPS file, or just the “Famous Alternate”, here: https://seekinglost.com/gpx-files/ I haven’t seen elevation gain discussed much the Continental Divide Trail planning guide resources I’ve read online. Not everybody takes a GPS, and almost nobody records keeps their GPS on the entire trail like I did, the only way to record a complete track and produce elevation profile like you see below. Elevation profile for my Continental Divide Trail thru hike This is the excel spreadsheet I used to plan out my resupply stops. I kept this on my phone and used it as my master reference along the hike. You can customize it to your needs, this is simply a template for you to follow. CDT thru hike Town Stop/Resupply Strategy Spreadsheet A bounce box is a box that you send from one town to the next along the trail. Since I filmed my thru hike, I needed a way to dump media and clear my memory cards. In this box I had a portable hard drive, small tablet/laptop, and a bunch of other things that are useful for the long distance hiker… gear repair items, extra sunscreen, toothpaste, opsaks (you really should be using these), and much more. I sent this box to Silver City (as a NOBO), and then every 2nd or third town from there. It’s expensive to do, but it’s a solid option if you ahve the need to dump media like I did. Thru hikers may also bounce a box as a one time (or multiple times) thing… for example, you’re hiking NOBO and you’ve sent yourself an ice axe and micro spikes to Chama. You get to Chama and realize you don’t need them, but you expect to use them north of Pagosa Spring. You “bounce” your box up to Chama. It works like this… your box is waiting for you at the PO is Chama… walk in and tell them that you have sent a box to general delivery, but you want to send it ahead to another town now. Don’t accept the package and don’t open it, if you do, you will have to pay to send it again. Tell them you want to send the box ahead to the PO at Pagosa, and it will be FREE to do this, because you haven’t accepted and opened the package. You can do this as many times as you need to. Sometimes it can be done over the phone but don’t count on it, you are usually required to be in person and show ID. I did a video on what’s in my bounce box and more of the details on this strategy: This excel spreadsheet gives you a quick overview of each day of my CDT thru hike. The spreadsheet shows the day number on trail, date, section hiked, day type (full/half/zero), miles, elevation gain, precip yes/no, where I slept, and animals seen. Post CDT thru hike stats The southern and northern terminus’ of my CDT thru hike • 2,998 Miles Miles: 750 Miles: 764 Miles: 663 Miles: 821 • Days With Any Miles Hiked: 140 • Days With 7000ft+ Elevation Gain: 1 • Backcountry Nights Tent Camped: 83 • Number Of Towns With A Bounce Box Sent: 12 • Pairs Of Shoes: 4 • Deer: 100s Lordsburg: 2464 NM Towns Total Population: 23952 Pagosa Springs: 1940 CO Towns Total Population: 35796 Riverside(Encampment): 53 WY Towns Population: 28469 Macks Inn: 272 ID/MT Towns Total Population: 12717 Total Population Of All Resupply Points: 100,267 Total Number of Resupply Points: 31 Average Resupply Point Population: 3234CDT Journal Entries – Detailed View Of Each Section Hiked

Crazy Cook to Lordsburg – 91 Miles
April 21st – April 25th, Trail Days 1-5. Total Hike Miles – 91
Lordsburg to Silver City – 55 Miles
April 26th – April 29th, Trail Days 6-9. Total Hike Miles – 146

Silver City to Doc Campbell’s Post – 65 Miles
April 30th – May 3rd, Trail Days 10-13. Total Hike Miles – 212

Doc Campbell’s Post to Pie Town – 145 Miles
May 4th – May 11th, Trail Days 14-21. Total Hike Miles – 357

Pie Town to Grants – 108 Miles
May 12th – May 17th, Trail Days 22-27. Total Hike Miles – 465

Grants to Cuba – 125 Miles
May 18th – May 23rd, Trail Days 28-33. Total Hike Miles – 589
Cuba to Ghost Ranch – 61 Miles
May 24th – May 26th, Trail Days 34-36. Total Hike Miles – 650

Ghost Ranch to Chama – 105 Miles
May 27th – June 3rd, Trail Days 37-44. Total Hike Miles – 755

Chama to Pagosa Springs – 78 Miles
June 4th – June 8th, Trail Days 45-49. Total Hike Miles – 833

Pagosa Springs to Lake City – 126 Miles
June 9th – June 16th, Trail Days 50-56. Total Hike Miles – 959

Lake City to Salida – 109 Miles
June 17th – June 23rd, Trail Days 58-63. Total Hike Miles – 1043

Salida to Twin Lakes – 82 Miles
June 24th – June 27th, Trail Days 65-68. Total Hike Miles – 1125

Twin Lakes to Breckenridge – 78 Miles
June 28th – July 2nd, Trail Days 69-73. Total Hike Miles – 1203

Breckenridge to I70 (Frisco) – 54 Miles
July 3rd – July 5th, Trail Days 74-76. Total Hike Miles – 1257

I70 (Frisco) to Grand Lake – 81 Miles
July 6th – July 10th, Trail Days 77-81. Total Hike Miles – 1338

Grand Lake to Steamboat Springs – 95 Miles
July 12th – July 15th, Trail Days 83-86. Total Hike Miles – 1429

Steamboat Springs to Encampment – 88 Miles
July 16th – July 19th, Trail Days 87-90. Total Hike Miles – 1520

Encampment to Rawlins – 65 Miles
July 20th – July 23rd , Trail Days 91-93. Total Hike Miles – 1585

Rawlins to Lander – 128 Miles
July 24th – July 28th, Trail Days 95-99. Total Hike Miles – 1713

Lander to Dubois – 151 Miles
July 29th – August 9th, Trail Days 100-111. Total Hike Miles – 1864

Dubois to Jackson – 120 Miles
August 10th – August 15th, Trail Days 112-117. Total Hike Miles – 1984

Jackson to Flagg Ranch – 106 Miles
August 16th – August 20th, Trail Days 118-122. Total Hike Miles – 2090

Flagg Ranch to Old Faithful – 55 Miles
August 22nd – August 24th, Trail Days 124-126. Total Hike Miles – 2145
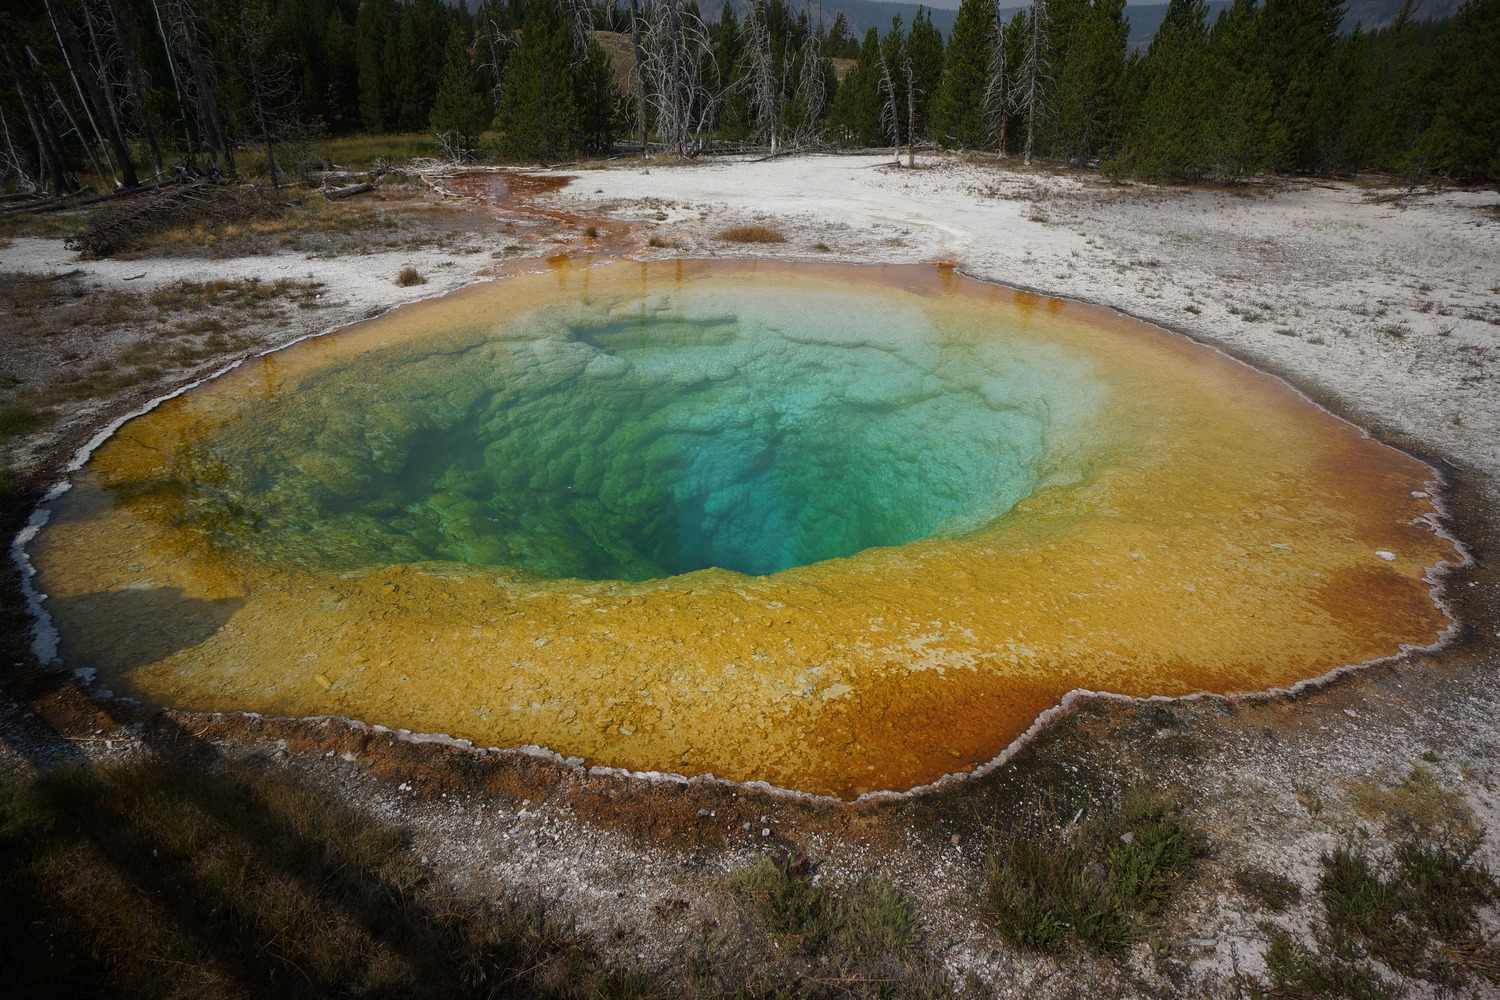
Old Faithful to Macks Inn – 43 Miles
August 25th – August 27th, Trail Days 127-129. Total Hike Miles – 2188
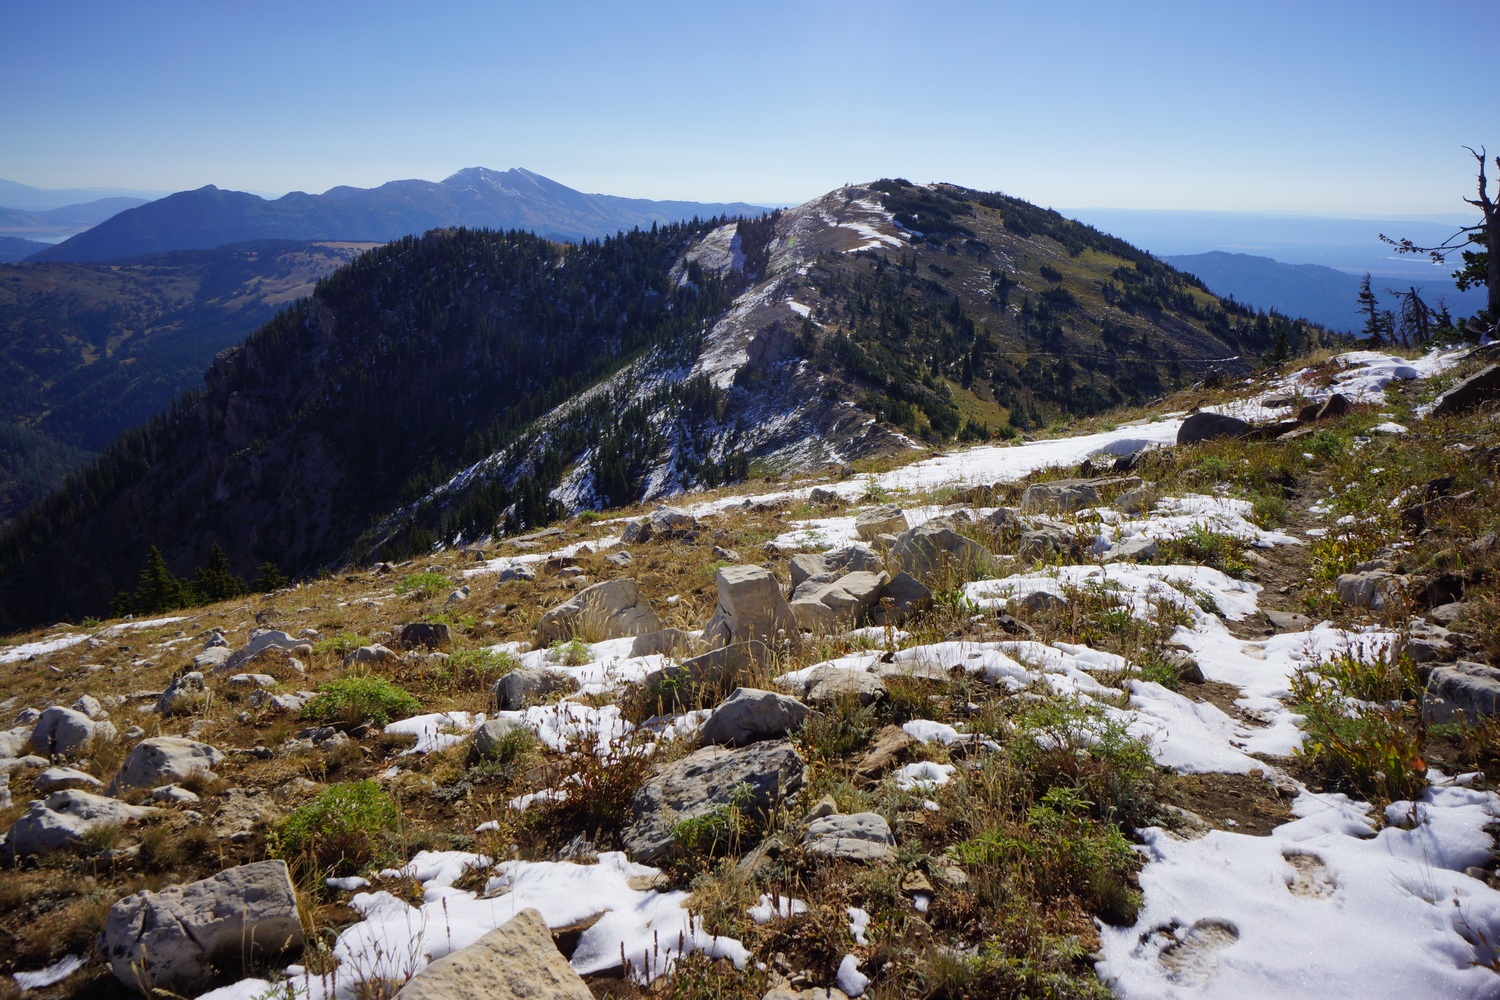
Macks Inn to Lima – 72 Miles
August 28th – August 30th, Trail Days 130-132. Total Hike Miles – 2260

Lima to Leadore – 102 Miles
August 31st – September 3rd, Trail Days 133-136. Total Hike Miles – 2362
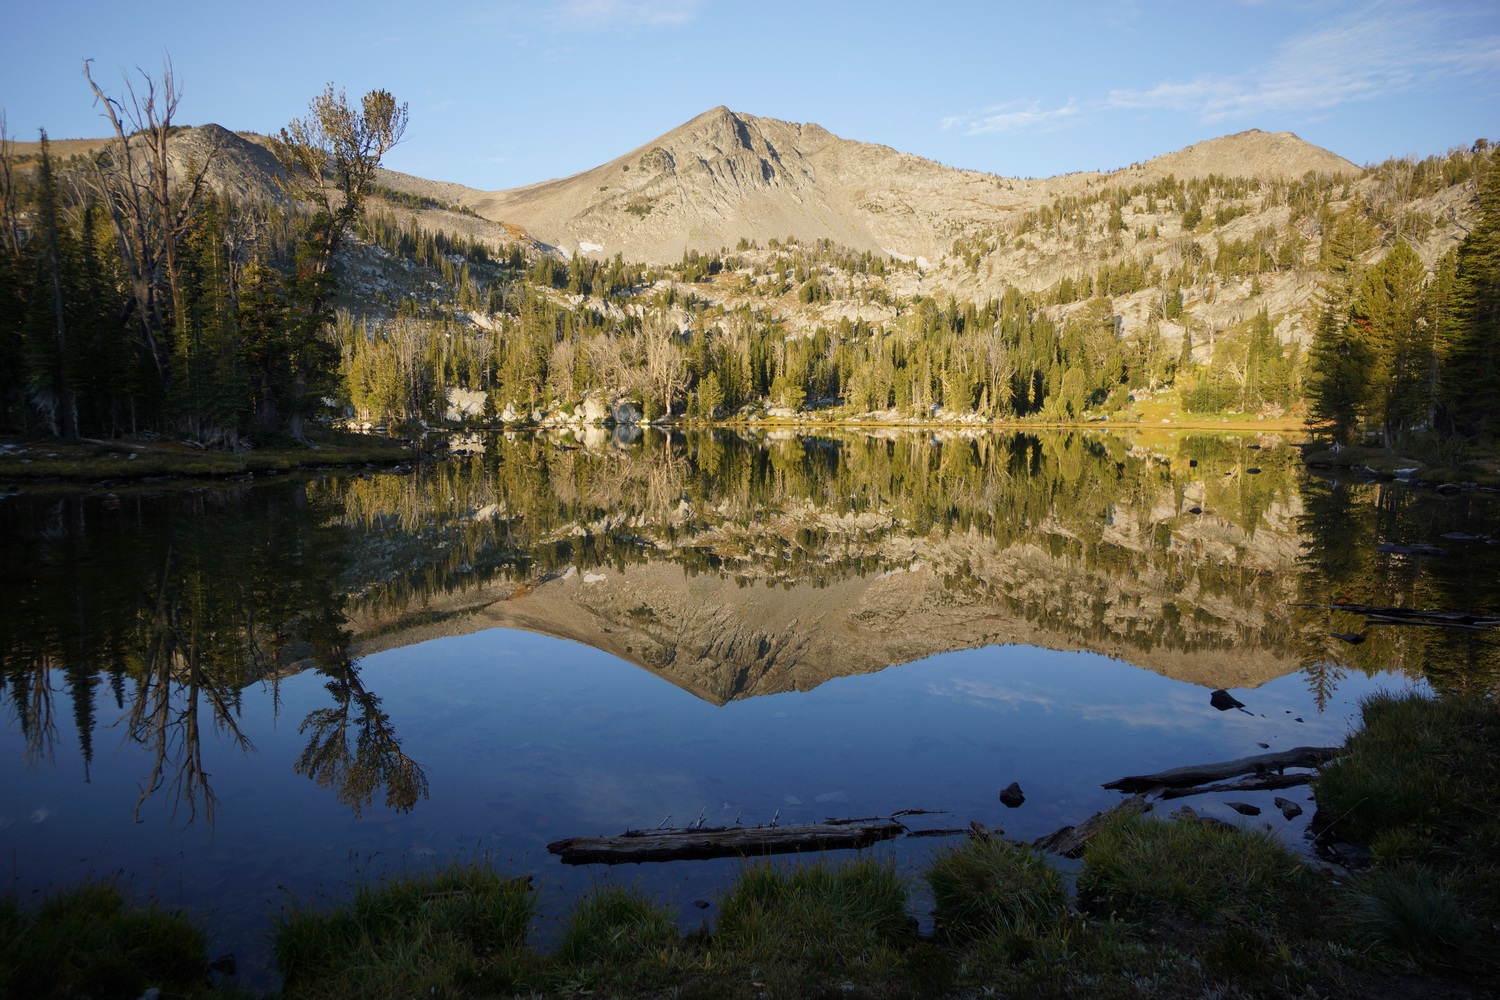
Leadore to Darby – 131 Miles
September 4th – September 9th, Trail Days 137-142. Total Hike Miles – 2493

Darby to Anaconda – 102 Miles
September 10th – September 13th, Trail Days 143-146. Total Hike Miles – 2595
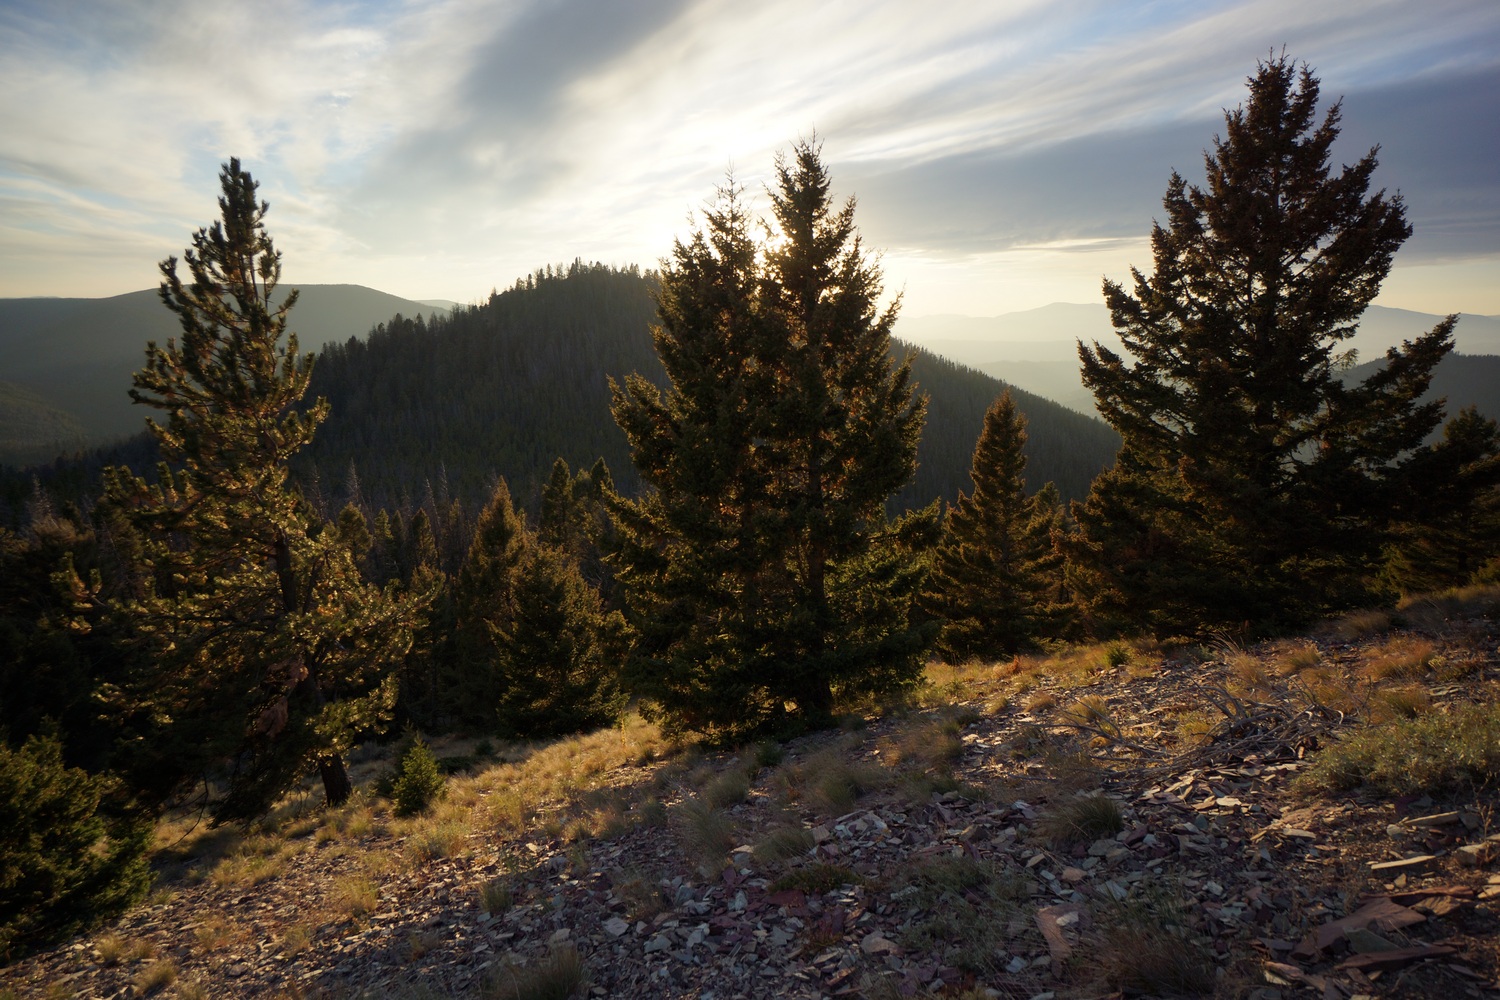
Anaconda to Lincoln – 147 Miles
September 14th – September 20th, Trail Days 147-153. Total Hike Miles – 2742

Lincoln to East Glacier – 168 Miles
September 21st – September 28th, Trail Days 154-161. Total Hike Miles – 2910

East Glacier to Canada – 64 Miles
September 29th – October 2nd, Trail Days 162-165. Total Hike Miles – 2974
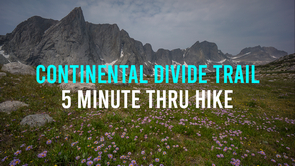
← See the CDT in 5 Minutes

Watch my 31 episode Continental Divide Trail
thru hike video series on YouTube → CDT Thru Hike Gear List
Continental Divide Trail Route & Maps
Continental Divide Trail Elevation Profile

Continental Divide Trail Town Stop & Resupply Strategy Spreadsheet
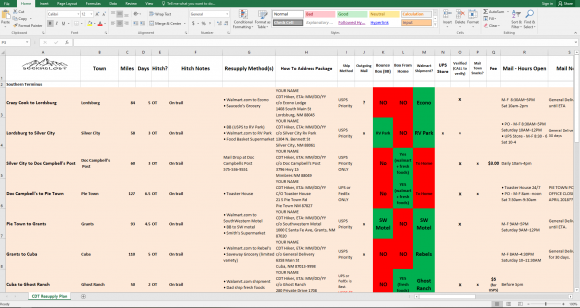
CDT Thru Hike Resupply Strategy: Using A Bounce Box
Continental Divide Trail Daily Stats Spreadsheet

Statistics From My Continental Divide Trail Thru Hike

Mexico to Canada
• 165 Days, April 21st – October 2nd
• Zero Days(no hiking): 26 days
• Avg Daily Mileage(including zeros): 18.1
• Avg Daily Mileage(excluding zeros): 20.8
• Avg Daily Mileage(full days only ): 23.9
• Avg Moving MPH: 3.1
• Highest Point: 13,862ft at Mt. Edwards, CO
• Lowest Point: 4,301ft at US/MEX Border
• Total Elevation Gain: 470,284ft
• Avg Daily Elevation Gain (full days only): 3,795ft
• Percentage of Days I Hiked Alone (Est): 75%
• Most Miles In One Day: 40
• Most Elevation Gain In One Day: 7,576ft
• Longest Hike Between Resupply: 151 miles, 10 Days – Lander to Dubois
• Fastest Section Hiked: 128 Miles in 3.5 Days (36.5 miles per day), Rawlins to LanderNew Mexico
Days: 41
Zero Days: 6
Avg Daily Mileage(including zeros): 18.3
Avg Daily Mileage(excluding zeros): 21.4
Avg Daily Mileage(full days only ): 23.7
Days With Rain/Snow: 2Colorado
Days: 48
Zero Days: 11
Avg Daily Mileage(including zeros): 15.9
Avg Daily Mileage(excluding zeros): 20.6
Avg Daily Mileage(full days only ): 24.2
Days With Rain/Snow: 7Wyoming
Days: 38
Zero Days: 5
Avg Daily Mileage(including zeros): 17.4
Avg Daily Mileage(excluding zeros): 20.1
Avg Daily Mileage(full days only ): 21.3
Days With Rain/Snow: 7Idaho/Montana
Days: 38
Zero Days: 4
Avg Daily Mileage(including zeros): 21.6
Avg Daily Mileage(excluding zeros): 24.1
Avg Daily Mileage(full days only ): 26.9
Days With Rain/Snow: 12Mileage
• Days Hiked 40+ Miles: 1
• Days Hiked 35-40 MIles: 2
• Days Hiked 30-35 Miles: 8
• Days Hiked 25-30 Miles: 34
• Days Hiked 20-25 Miles: 47
• Days Hiked 15-20 Miles: 22
• Days Hiked 10-15 Miles: 19
• Days Hiked 5-10 Miles: 5
• Days Hiked >5 Miles: 1Elevation Gain
• Days With 6000ft+ Elevation Gain: 5
• Days With 5000ft+ Elevation Gain: 25
• Days With 4000ft+ Elevation Gain: 50
• Days With 3000ft+ Elevation Gain: 81
• Days With 2000ft+ Elevation Gain: 112Sleep
• Backcountry Nights Cowboy Camped: 21
• Nights In A Motel: 35
• Nights In A Hostel: 11
• Nights In A RV Park/Campground: 11
• Nights At A Trail Angel’s Home: 2
• Nights In A Cabin: 1
• Nights In A Yurt: 1
• Total Nights In A Tent: 95
• Total Backcountry Nights: 106
• Total Front country Nights: 59Towns/Resupply
• Number Of Towns/Resupply Points, Walk In: 16
• Number Of Towns/Resupply Points, Hitch In: 15Gear
• Pairs Of Socks: 10
• Gear Lost: 1 Hat, 1 Water Bottle
Animals Seen:
• Rabbit: 100+
• Elk: 100+
• Marmot: 75+
• Pronghorn: 50+
• Wild Horses: 30+
• Big Horn Sheep: 20+
• Prairie Dog: 20+
• Moose: 10+
• Mountain Goat: 10+
• Porcupine: 7
• Black Bear: 6
• Mountain Lion: 2
• Fox: 2
• Bald Eagle: 2
• Coyote: 1
• LLama: 1
• Big Foot: 0CDT Town Stop Populations (2018)
New Mexico
Silver City: 9647
Doc Campbell’s(Mimbres): 667
Pie Town: 186
Grants: 9011
Cuba: 748
Ghost Ranch(Abiquiu): 231
Chama: 998
NM Avg Town Population: 2994Colorado
Lake City: 379
Salida: 5856
Twin Lakes: 6101
Breckenridge: 4928
Frisco: 3129
Grand Lake: 498
Steamboat Springs: 12965
CO Avg Town Population: 4474Wyoming
Rawlins: 8858
Lander: 7551
Dubois: 974
Jackson: 10532
Flagg Ranch(Moran): 501
Old Faithful: ?
WY Avg Town Population: 4067Idaho/Montana
Lima: 228
Leadore: 103
Darby: 779
Anaconda: 9106
Lincoln: 1103
Benchmark (Fairfield): 730
East Glacier: 396
ID/MT Avg Town Population: 1589Related Images:
Backpacking Without A Stove

I want to talk a little bit about backpacking without a stove. I know some of you probably think hiking without one is inconceivable, but I’m going to try and convince you that going stoveless isn’t the end of the world. In fact, there are some very appealing benefits to planning a hike without one.

Cooking on the shore of Lake Superior at pictured Rocks National Lakeshore, MI
First let’s state the obvious: not carrying a stove means less weight. You don’t have to carry the stove, fuel, and a lot of the cookware you might normally take. The stove itself isn’t much of a weight or size issue these days, but the fuel and cookware are more bulky. Now, some may argue that the food you carry to replace dehydrated foods will likely be heavier, which it is. The question then becomes if the difference in weight between the foods is less than the weight savings from dropping the stove/cookware/fuel. It would all depend on how much dehydrated and cook type foods you bring as a percentage of your total food bag, how long the hike is, and exactly which foods you bring. However, the weights savings ought to outweigh the extra weight of the additional food weight. This is especially true on shorter hikes. Let’s say you drop 2 pounds between the stove/cookware/fuel and add half a pound of food per day. As you can see, a hike of 3 days or less will see a weight savings from dropping the stove & other gear, the fourth day would be even, and anything after day 4 would mean carrying additional food weight that you wouldn’t be carrying when cooking with the stove. Of course, your numbers will be different, so the weight savings may be more or less depending on your situation.
Another huge benefit to a cookless food strategy is being less dependent on water sources. Dehydrated foods require water, and unless you are near a water source, that means that water must come from your drinking water supply. In many places this is not an issue, but for those hiking in arid environments, this can be a nuisance. For instance, when hiking in Big Bend National Park a few years ago, there was only ONE water source along my 40 mile trek. I was able to cache some water at one point along the trail before starting the hike, but I still started with a 3 day supply of water, resulting in a 60 pound pack. That’s heavy! Imagine how much extra water you’d need to carry to facilitate cooking and cleaning. For me, that’s an extra hassle that is just not worth it. By eliminating meals that require cooking, I was able to avoid using my precious drinking water for cooking and cleaning. I have even heard of some parks prohibiting the use of stoves altogether during extremely dry conditions to prevent fires, so you may be forced to go without one at some point anyways. Camping near water is always preferable, but let’s face it; sometimes it’s just not feasible. Bringing cookless meals can reduce one’s reliance on water sources near camp.
Cooking also takes time. Depending on your hiking style, time of year (daylight available), and mileage covered for the day, you might not have much time after getting to camp. Spending what little time you may be left with at camp by cooking and cleaning is not at the top of my list.
If you insist on cooking, you can still get away with leaving the stove and fuel behind by cooking over a fire, if that’s allowed and feasible where you are going. Some campsites that have the metal rings for firepits also have an area on the side to set a pot or pan for cooking. If not, you can cook in other ways. The first thing that comes to mind is foods like hot dogs, italian sausage and bratwurst… these can be cooked on sticks over the fire. If you freeze meats like italian sausage or hamburger/steak, you can eat them on the first or second night if the outside temperature is not too warm and you manage to keep them well insulated in your pack during the day. Hot dogs can manage a few days in the pack without refrigeration. Foods like pre-cooked bacon can be wrapped in aluminum foil and set over coals to cook. I’m sure most people who use a stove aren’t cooking meat though, most likely one of those nasty Mountain House meals or something. A pot could also be used over the fire, supported by a stick if you have the type of pot with the handle looped over the top and not on the side.


Cooking italian sausage in the Gila Wilderness, NM
I have read about many thru hikers who got tired of the cooking routine every night and ended up ditching their stove at some point along their hike, and became very fond of a cookless meal strategy. Going stoveless is not for everyone though. Some people cannot live without coffee or other warm drinks in the morning/evening, don’t like to eat too much “snack” foods, or simply don’t mind that extra hassles of carrying a stove and everything else that comes with cooking. Backpacking without a stove has worked great for myself and many others, but everyone is different. Just realize that it is a viable option, and not a bad one at that.
Here’s a list of food items to get you started in the right direction:
Quaker natural granola cereal (mix with milk or eat by the handful)
Sesame sticks
Metrx Big 100 meal replacement bars (protein bars)
Jerky
Hunter’s sausage
Dried fruit (apples, strawberries, pineapple, mango, cranberries, etc)
Pepperoni
Salami
Cheese (harder cheeses last longer, like sharp cheddar)
100% whole wheat bread, tortillas, flatbread, bagels
Pre-cooked bacon
Summer sausage
Hot dogs
Fresh meats (keep frozen in cooler until you get to trailhead)
Powdered milk
Whey protein powder
Peanut butter
Olive oil
Nuts (almonds, cashews, peanuts, etc)
Trail mix
Granola bars
Crackers
Chocolate or fudge
Breakfast pastries
Of course, this is just a list to get you thinking about what you can bring that you like to eat. People are often afraid of bringing things that are normally kept refrigerated, like cheese, but you’d be surprised how well some things keep as long as the temps aren’t too hot.
Don’t be a slave to your stove. Try going stoveless next time you hike, you might enjoy it!
Related Images:
20 Best Backpacking Photos For 2012
I thought it would be cool to compile a list of the best pictures from all of my backpacking trips this year. It was hard to narrow it down to 20, so many good ones! From the summit of Snowmass Mountain to the Chihuahuan Desert, 2012 was one hell of a year. Many of my favorite backpacking moments are depicted in these pictures, such as overlooking the Whitewater-Baldy Fire in the Gila Wilderness (picture 4). This fire would later grow to be the largest in New Mexico’s history at over 270,000 acres.
Enjoy the pictures, and don’t be afraid to leave comments!
1.

Snowmass Mountain viewed from Snowmass Lake
2.

Fog fills the valleys of the Dolly Sods Wilderness, WV
3.

View from Trail Rider Pass in the Maroon Bells Wilderness, CO.
4.

Me overlooking the Whitewater-Baldy Wildfire in the Gila Wilderness, NM. This would later grow to become the largest wildfire in New Mexico history!!
5.

Lead King Basin in the Maroon Bells Wilderness, CO.
6.

Chihuahuan Desert viewed from the South Rim in the Chisos Mountains of Big Bend National Park, TX
7.

Linville Gorge, NC
8.

The Chimneys, Linville Gorge, NC
9.

Exploring a cave along Blue Creek in Big Bend National Park, TX. This picture made it into the Big Bend National Park 2013 calendar!
10.

Frigid Air Pass behind me in the Maroon Bells Wilderness, CO
11.

Sunrise over the Chihuahuan Desert, Big Bend National Park, TX
12.

Panoramic view from the top of Snowmass Mountain, 14,098ft
13.

Early morning in the Linville Gorge Wilderness, NC
14.

Sunrise in the Dolly Sods Wilderness, WV
15.

Linville Gorge Wilderness, NC
16.

Big Bend National Park, TX
17.

The Chisos Mountains of Big Bend National Park, TX
18.

A very lonely stretch of road in Big Bend National Park, TX
19.

Table Rock in the distance. Linville Gorge Wilderness, NC
20.

Helicopter flying through the smoke of the Whitewater-Baldy wildfire in the Gila Wilderness of New Mexico