
Chevy Astro Camper Van Build: Maxx Fan Installation
Chevy Astro Camper Van Build Phase 2: Maxx Fan Installation

Maxx Fan installed
Tools & Materials:
Materials
Maxx Fan Deluxe
Butyl Tape
Sikaflex 715
Rubbing Alcohol
Rags, Towels
Painters Tape
Tools
Step Bit
Diamond Blade For Angle Grinder
Reciprocating Saw
Reciprocating Saw Metal Blades
1/4″ Drive Quick Release Bit Extension
Jigsaw
Dewalt Cordless Impact Driver
Dewalt Angle Grinder
Klein Tools 9″ Linemans Pliers
File Set
Caulk Gun
Drill Bit Set
Tape Measure
Video – Chevy Astro Camper Van Build: Maxx Fan Installation
Project Overview: Maxx Fan Installation
Many, if not most full-time van dwellers are using some sort of overhead fan for ventilation in their camper van. A fan is important because it can help regulate temperature and humidity inside your van, two things that are very important to have control over. So, a fan is pretty much a necessity for me and my build.
What kind of fan do I need for my camper van? It seems the two biggest competitors in the ventilation fan market are Fantastic Fan and Maxx Fan. Both offer different models and have their own pros and cons to consider. I personally went with the Maxx fan, because I could drive the van with the vent open (in case I forgot to close it, which does happen), and because it had more speeds to choose from (fine tune fan noise, power usage etc).
To install a fan for ventilation requires cutting a hole in the roof of the van. I figured this was the best time to do the fan, while the van is stripped down and before the insulation, wiring and ceiling panels get in the way.
Roof Rack Modification

This center bar needs to be cut off for the fan to fit
Before I can install my fan, I need to modify my roof rack. There’s a bar running across the roof, right in the middle of the spot I want to mount my fan. Fortunately, this bar can be cut out and removed without compromising the structural integrity of the rack itself.

Making the cut

The center bar is gone and the roof is now clean, ready for the fan
For this job I use my angle grinder with a metal cutting wheel. But because it’s such a hard steel, I am having more luck with a diamond tipped blade. I also use a reciprocating saw with a carbide tipped metal cutting blade, which also worked ok. Place another piece of sheet metal underneath the spot you make the cut, so when your blade comes down after completing the cut it won’t hit the top of the van’s roof.
Layout & Measurement

Drilling holes on the four corners

On top of the van, lining up the 4 corners and tracing the inside of the flange

Using a step bit to drill holes at the corners. This will allow me to get a jigsaw blade in there and start my cuts
Next I must consider the layout of the fan on my roof and exactly where I will install it. Once I’ve decided on a spot, I use the fan’s mounting flange to trace an outline on the ceiling inside my van. Next, I drill 4 small holes through the roof at the corners of the outline. Then, I jump up on the roof and line the flange up with the 4 holes I drilled at the corners. This allows me to trace a line out along the roof of the van, since I will make my cut up here and not from below. But now, I need a way to get my jigsaw in there and start the cut. So, I use a step bit to drill out wider holes at the corners. This worked perfectly.
Cutting The Hole
Cutting a hole in the roof using a jigsaw
Now it’s that time I’ve been dreading: time to cut a big, gaping hole in the roof of my van. It just seems wrong, but this is where you need to just ignore that instinct and go for it. Using a metal blade on my jigsaw, the cutting goes pretty smoothly. I cut it too small at first, and had to spend some time widening it later on. But I would rather cut off more later than too much the first time.

Cutting the tabs with an angle grinder
Next, there’s the ribs of the roof to deal with. These are maybe 3/8″ higher than the rest of the roof, so I have two options; build up the base of butyl tape (what goes in-between the roof and flange) with extra material in the valleys between the ribs, or cut the ribs out into little tabs, and try to bend them down lower, to be flush with the roof. I am going with the second option.

I want the tabs to be lower, and flush with the rest of the roof
I use my angle grinder to cut about 1.5 inches (measure YOUR mounting flange for this number) in from the edge of the opening along the two sides of the ribs. Then, I use a pair of lineman’s pliers to bend the tabs downward, so that the tabs are roughly even with the height of the rest of the roof. Surprisingly, this works very well. The tabs line up close enough to the rest of the roof, and now I have a fairly even surface to mount my flange to.
Surface Preparation

File them edges

Surface prep
The next step is to prepare the surface around my cut. I go around the edges of the cut with a file and try to smooth it out. Then I clean the area with rubbing alcohol, Next, I apply some painters tape around the edges of the area I’d like to paint, to protect from overspray. I’ll add some etching primer to the bare metal, and then a coat of white paint over the primer.
Installing The Flange

Laying the butyl tape
The recommended type of adhesive to use in-between the fan’s mounting flange and the roof is butyl tape. This stuff is kind of like a silly putty consistency. Or better yet, for those familiar with it, plumber’s putty. But it’s a little stickier, and comes in this two-sided roll. Lay it down around the edges of the cut, and make sure to overlap it a little at the corners. I went right over the tabs I cut with the butyl tape, and used Sikaflex-715 to lay a bead down on the underside of these tabs, from inside the van. This is one of the layers of waterproofing protection I’ll implement here around the flange.

About to place the mounting flange. Notice the layer of Sikaflex-715 caulk around the edges of the butyl tape
Next, I’ll add a bead of Sikaflex-715 around the edges of the butyl tape. I’m doing this so that there is another completely waterproof line of defense around the edges of the flange, before water even contacts the butyl tape. Basically, it can’t hurt. It would be pretty disastrous to have this leak, so I’m going all out here and making sure nothing will get in.

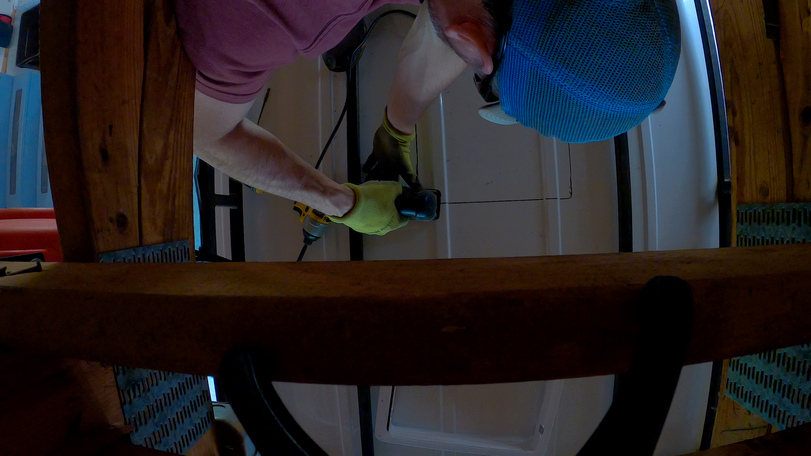
Screwing the flange down to the roof
With the adhesives in place, it’s time to screw down the flange to the roof. I’ll drill pilot holes for this, then use the supplied sheet metal screws to fasten the flange. This really brings the flange down and seals it nicely, and any doubts I had about this being waterproof are quickly fading away.

Adding Sikaflex-715 around the edges of the flange and over all the screw heads
With the flange screwed down, it’s time to go over everything with Sikaflex. I’ll lay a bead down over the outer edges of the flange, so it’s now fully sealed from below and from the top. I’ll also go over all the screw heads with some Sikaflex. No water is getting in my van.
Mounting The Max Fan
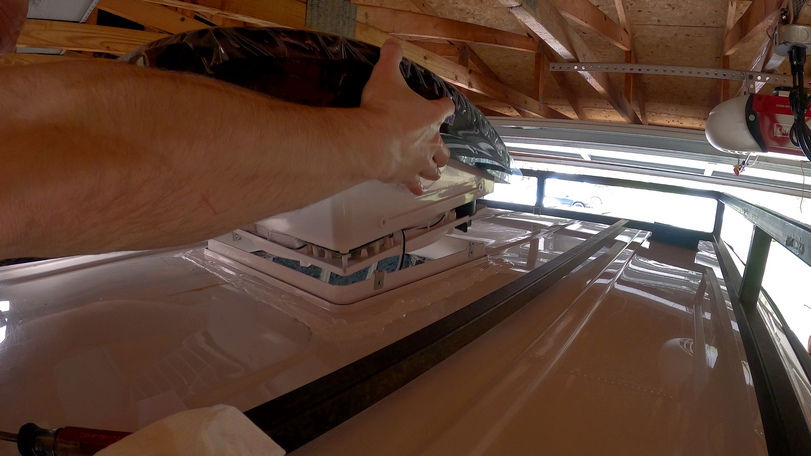
Placing the Maxx Fan in the flange
Now it’s time to place the Max Fan into it’s mounting flange. The little tabs on the the flange that accept a screw slide around easily and require some alignment. Besides that, it’s a drop-in fit.
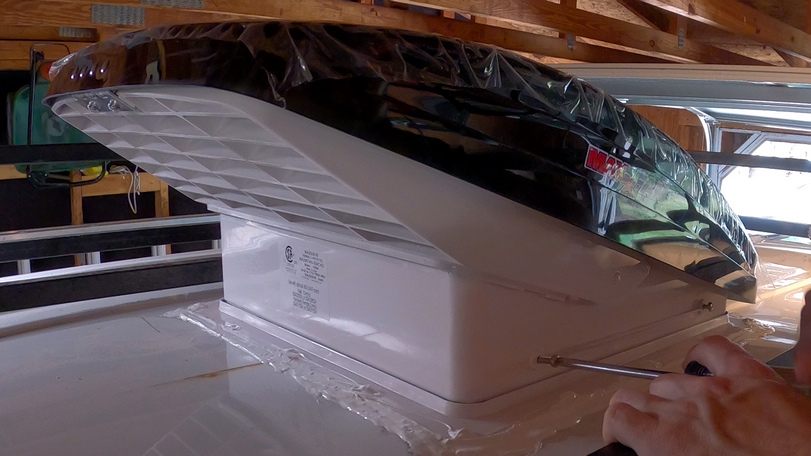
Screwing the flange to the fan. Installation complete!
It’s only four screws to attach the fan to the flange, and that’s it, installation complete! Of course, I’ll need to wire this baby up, but I can’t do that until I have power in the van, and it will be a few more weeks before I get there.
Previous Van Build Post: 1 – Strip & Clean | DIY Stealth Camper Van Build Index | Next Van Build Post: 3 – Insulation


Leave a Reply