8 Day Rockhounding & Mineral Collecting in the Santa Teresa Mountains, AZ (Nov 2022)

Rockhounding & Mineral Collecting in the Santa Teresa Mountains, AZ – Nov 2022

Trip Overview
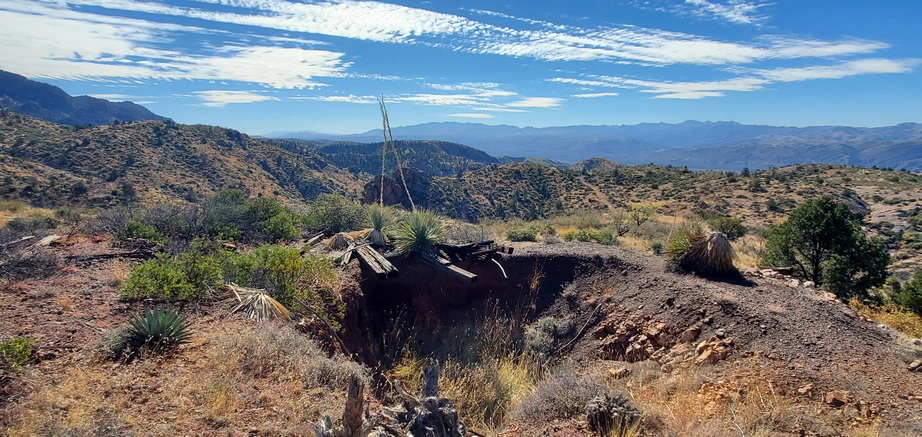
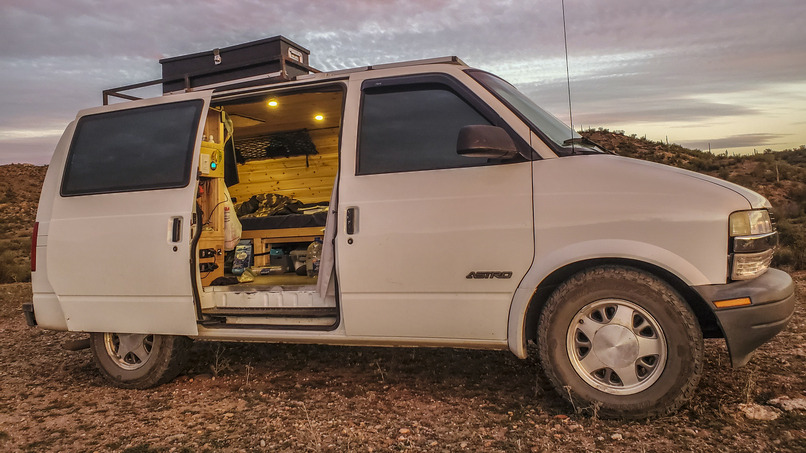
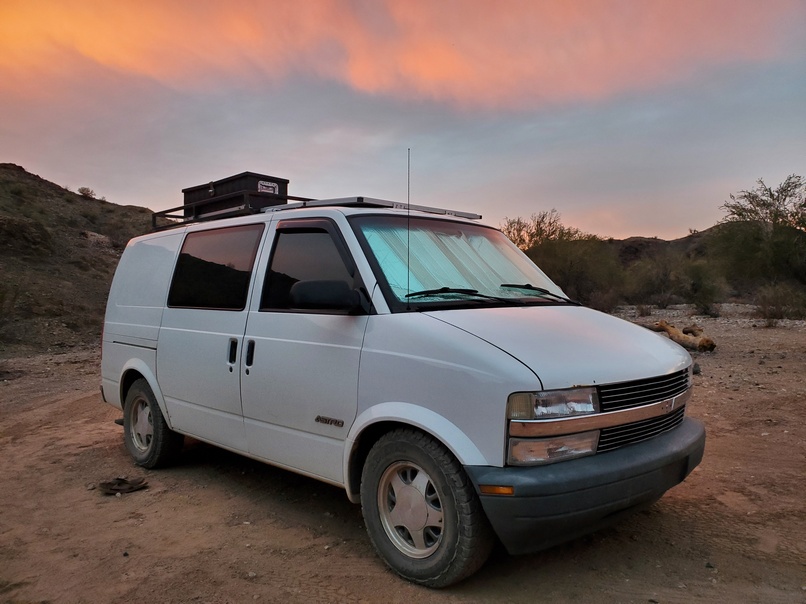
This is an 8-day solo rockhounding and mineral collecting trip in the Santa Teresa Mountains, SE Arizona. This trip took place in mid November, 2022. I’ll be using my Chevy Astro Camper Van as my home base, and do a series of 7ish-mile day hikes to various abandoned mines. I’ll also do an overnight hike to one of the mines and sleep in the tunnel. This is a beautiful and remote mountain range with the opportunity to find some interesting, beautiful and rare minerals!
Disclaimer
Rockhounding and mineral collecting requires that you research public/private land access, existing mining claims, etc. Many old mines and claims are abandoned, and you must use your judgement whether or not it’s safe and legal to access. The author shall in no way be liable for any use, misuse or omission of information presented here in this guide.
Santa Teresa Mountains Arizona Rockhounding Map

About The Area
The Santa Teresa Mountains are located within the Coronado National Forest and partially within the San Carlos Apache Indian Reservation, in Graham County, Arizona. My trip will take place just a few miles from Klondyke, a small populated place in Aravaipa Canyon. It was founded around 1900 by a group of miners, who recently returned from the Klondike Gold Rush in Alaska. They decided to name the town “Klondyke”, with a Y. Today there are only a few people living in the area. The Klondyke Country Store & Lodge is supposedly open, but in the four times I’ve driven by in multiple visits to the area now, I haven’t seen open. The Grand Enchantment Trail runs right through this area, and hikers DO use the store in Klondyke as a resupply, so you’d probably have better luck catching them open if you make prior arrangements.
Day 1: Arrive At Camp in Santa Teresa Mountains
Getting into the Santa Teresa Mountains takes some time. I approached from Safford. From US-70 near Eden, take Klondyke Rd west for 25 miles. It’s a dirt road that’s in great shape, you can drive 50 if you want to. This dead ends at a T junction in Aravaipa Canyon. Go right (Northwest). Technically this is still called Klondyke Rd here through Aravaipa Canyon. This dirt road is also in great shape. Take this 10 miles. There will be two roads on your right within a few hundred feet of each other, both with closed gates, right before you reach a cattle guard. The first gate says private property (debatable), but the second gate says nothing. The map shows BLM land here on the second gate, so your good to go. The first gate has private property on ONE side of the road, BLM land on the other. I don’t think the property owner has a right to keep people off that road since he only “owns” half.
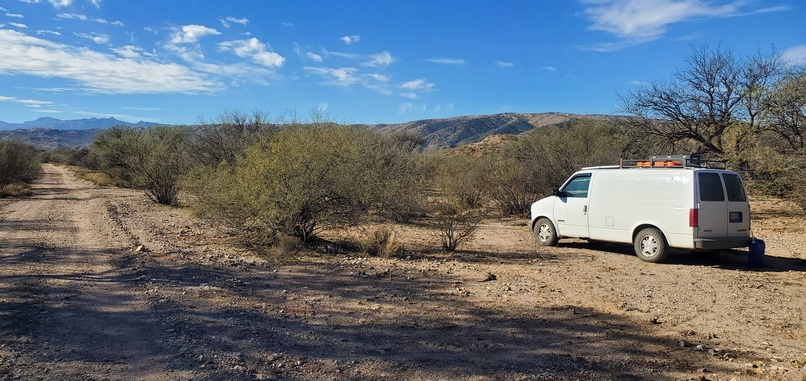
Now this Forest Service road gets rougher. I drive 1 mile to a spot where I camp, and trust me, it’s nothing special. But it’s a home base and one that’s reachable without a high clearance 4×4. I had to do a little road maintenance on my last visit, using my shovel to bridge the gap in a washed out section of road. You may have to do the same.

Not the prettiest campsite, but it’s as far as I can make it on this road!
I camped at this spot last winter on my first visit to the Santa Teresa Mountains. My van camper requires almost nothing to “make camp”, so right after I parked, I load up my backpack, grabbed my bucket and headed up the canyon to explore with the last remaining hour plus of daylight.

Nice hike this evening up this beautiful canyon
The dirt road turns and heads up over a ridge, and now it’s a walk through the wash up the canyon. I don’t usually have a ton of luck finding good rock and mineral specimens in washes like this one, but if nothing else, it’s a great time of the day to be hiking through an increasingly beautiful canyon. Suddenly, it narrows. I head up a short ways, but turn around as the daylight is fading fast. I see no interesting rocks or minerals along the way tonight, but it was still worth exploring. Tomorrow will be different!
Day 2: Overnight Hike to Laurel Canyon, Grand Reef Mine
Mines Visited: Grand Reef mine
The Grand Reef Mine is a former underground Pb-Cu-Ag-Zn-Au-Mo-V-Baryte-Fluorspar-Silica mine located in Laurel Canyon, 4.6 miles SSE of Aravaipa, and about 4 road miles NE of Klondyke in the Santa Teresa Mountains, Graham County, Arizona.

Ready for an overnight hike/mining trip

New cheapo backpack for rockhounding
It was a cold night, perhaps upper 20s. I warm up, eat breakfast and pack up for an overnight trip to the Grand Reef Mine. I’ve never done an overnight mining trip before, so I bought a new backpack just for this kind of thing. It’s a no-name cheapo backpack, but it was one of the few bags I could find that had everything I was looking for: bottom compartment for sleeping bag (will put rock/mineral finds here), heavy duty material (not thin ultralight materials), and cheap price. It was about about $85 for the 60L. I’ll carry my tools in a separate bag that I strap to the top of the backpack, carry my tent/sleeping bag/food etc in the main compartment, and have some small tubs, boxes and bags in the bottom compartment which I hope to fill with minerals later on.

I follow the canyon uphill…

The canyon narrows…

And now I shimmy my way up this crack to exit the slot
It’s about 4 miles each way to the Grand Reef Mine from my location, and some of this is off-trail. Leaving camp, I set out towards a canyon that quickly narrows into a slot. I shimmy my way up it to keep moving up, and eventually get past it. I find a nice quartz crystal point, about the size of my thumbnail. Weathered, but a good sign. Saw a lot of these last winter on my previous visit, would love to find where they are coming from.

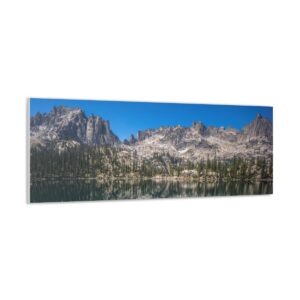
View of the Santa Teresa Mountains from the road, along the Grand Enchantment Trail

Aravaipa Canyon

Nice size quartz points in a vug
My route takes me up and over a series of ridges and drainages before reaching a dirt road. This dirt road is part of the Grand Enchantment Trail, a 770-mile hiking route from Phoenix to Albuquerque. A route that I would love to hike myself someday. But today, I’m here for the minerals. Along this road, and the nearby ridges, I found some more quartz points, more weathered than the last ones. I also found a thumb sized quartz crystal in an exposed vug in a boulder along this road on my hike up. Last winter, I found a quartz point on the ground near here almost the size of my hand! The views are also excellent, looking northeast to the Santa Teresa Mountains ridgeline.

I follow the road up past the point where there’s a faint path that leads downhill to the Grand Reef Mine. I keep going a little farther to another mine shaft and tunnel that’s marked on the map, perhaps 1/3 mile north of the Grand Reef Mine. It’s very steep here, but I follow the slopes downhill to the point where the shaft and tunnel are marked. I see neither a shaft or a tunnel, merely a few small prospecting pits with almost nothing of interest. Ah well, it was worth checking.

Laurel Canyon

Large pools of water throughout the canyon

Very scenic!
After a steep descent, I’m down to the bottom of Laurel Canyon. It was a beautiful hike with many obstacles. I found several large pools of water, some big enough to do a cannon ball into. There were many wasps about, likely commuting from the massive nest at the Grand Reef Mine, just down the canyon. I saw this on my visit last winter.

Worth poking around here for a bit
Next I came across some copper deposit staining of the rock along the creek bed. I stop here for 20 minutes to chip away at the blue/green coloring but find nothing warranting a continued effort.

It’s a 60ft drop down this mostly dry waterfall, but there is a trickle of water complicating the climb

The chute I eventually climb down
Eventually I reach a point in the canyon where I find myself along the upper edges of a bowl with a 60ft drop. The terrain above the bowl is very steep, thick and thorny. On the other side of the bowl, I thought I saw a weakness in the rock that I could climb down. So that’s where I headed. I bushwhacked across the top of the bowl for a solid 20 minutes, and nearly stepped on a rattlesnake. Eventually, I reached my chute, climbed down and reached the bottom. That was a pain, but also pretty fun.

The Grand Reef Mine

Laurel Canyon cuts right through the reef
Finally, I come to the “end” of the narrow canyon section as I reach the reef. Besides the information written about the Grand Reef Mine on Mindat, I couldn’t find any information online about the geology of the area. Presumably, the mine’s name is a reference to an ancient reef here in the area, which has been uplifted. Imagine a flat section of the Earth that is tiled 90 degrees, towards the sky. The site is marked by a vertical outcrop of rock, running perpendicular across Laurel Canyon. Mindat makes a reference to the Grand Reef Fault and block faulting trending NNW.

Mine tunnel

Grand Reef Mine

Camp for the night
On my visit to this mine last winter, the rough 8 mile round trip hike took a decent chunk of the daylight and I wasn’t left with enough time to really hound these tailings. This time, I’ll camp here for the night, and hike back to my van tomorrow. From the bottom of Laurel Canyon, looking up at the “reef”, you’ll notice a tunnel about 25ft up. About 20ft into the tunnel, there’s a locked gate preventing further entry. I dropped my stuff here in the tunnel, where the ground looks clear enough for my tent, and the tunnel appears to be just barely wide enough.

View from the climb up the tailings pile
Next I grab my bucket and head up the VERY steep slope of tailings to get to the main collecting area. I do NOT recommend doing this. There’s a “road” leading up to the mine, or there was. It’s much easier to find coming down. If you want to find it going up, walk down Laurel Canyon a short ways, past the mine tailings, and take one of the ravines on your right uphill. The road is completely gone at the bottom, washed out and overgrown, but it’s better than the tailings pile. Only near the top will the road become more obvious.

The Grand Reef Mine
At the top of the tailings pile, you’ll see a large open shaft that’s fenced off. Around the edges of this shaft is the main collecting area. As of 2022, there is a MASSIVE wasp nest about 75ft above the top of the mine shaft. The size of this nest could be roughly that of a small car. This is the nest I eluded to when I was hiking down Laurel Canyon earlier. The wasps can be heard nonstop buzzing overhead as they travel to the water in the canyon. They have not been a problem for me, but it’s worth the mention.

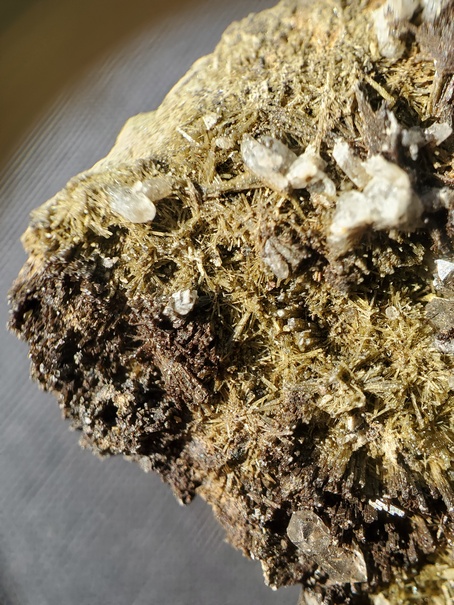
Linarite on Quartz

Some strange lumps/masses of Linarite

Deep blue Linarite on Quartz

Deep blue Linarite


Linarite
It won’t take long before you find your first pieces of linarite. The deep blue color of this mineral will easily catch your eye, but the challenge is finding worthy specimens to keep. I found most of my specimens by turning over piles of rocks and boulders, and digging small holes. The best material likely came from the various levels of the mine, and with no access to those, all that can be done is pick through the tailings. Hard rock mining can be done on the walls of the reef, I have not gone this route here.

Linarite and Brochantite

Linarite and Brochantite

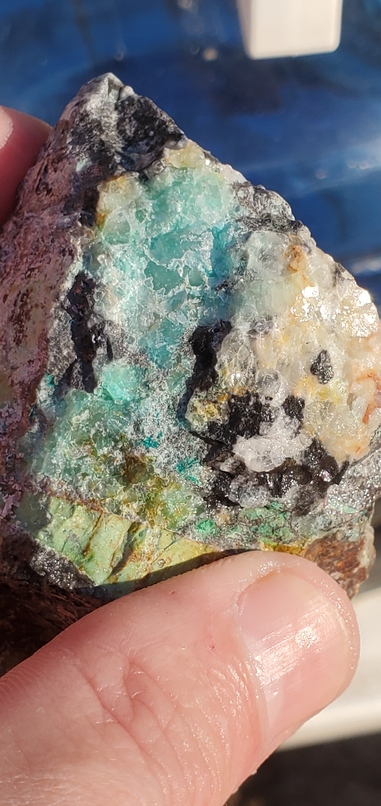
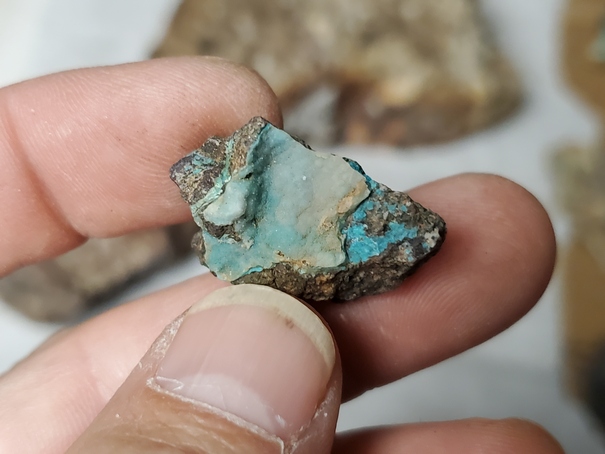
This specimen does not appear to be Chrysocolla. This color is more common to Caledonite
Along with the blue Linarite, you’ll find lots of green Brochantite. Malachite and Chrysocolla don’t seem very prominent here at all, the typical source of greens and blues at many Arizona copper mines. Caledonite is another blue mineral you may find at the Grand Reef Mine. Some really nice specimens of Caledonite have been found here in the past, but I did not find any nice crystals. Instead, I found a nice drusy piece of Caledonite, or perhaps, Chrysocolla.

Quartz with an interesting golden bronze coating

Quartz with a dusting of… something blue/green

Nice clear quartz found on the hike to the Grand Reef Mine

Found this BIG quartz point on the hike to the Grand Reef Mine. There are some really big crystals here, would love to find them before they get this weathered!
Some nice quartz crystals can also be found here. Nothing like the large sizes I found in the washes on on the ridges on the hike to the mine, but the quartz here can take on some interesting looks. For example, I found a really nice bed of quartz crystals, with a golden bronze staining. And another plate of quartz crystals that have a coating of black and light blue minerals.
Fluorite

Linarite over some iron-stained quartz druse
Blues n’ greens
There are a lot of interesting minerals to find here, but it is apparent that it’s been pretty picked over throughout the years. After several hours of collecting, I found some nice pieces, but not as nice as I was hoping for when it comes to Linarite. Same as my last trip. Trust me, I am NOT complaining. But it’s clear the highest quality specimens are gone now or are just few and far between.
With sunset approaching, I head down the old road, bushwhack my way down to the bottom of Laurel Canyon, and over to the mine tunnel. I set up my tent with the last remaining bits of daylight and settle in for a long night. A constant breeze through the old tunnel makes my tent flap in the wind all night. But after a hard day, I’m ready to rest.
Minerals I Found at the Grand Reef Mine, Day1
- Brochantite
- Linarite
- Quartz
- Galena
- Fluorite
- Caledonite?
Day 3: Leave Grand Reef Mine, Look For Dog Water Mine, Return to Van Camp
Mines Visited: Grand Reef mine, Dog Water Mine

Morning from camp
It took a long time for the sunlight to reach the canyon this morning, and with nearly freezing temps, I stay in my tent until about 9am. Once that sunlight pours into the tunnel, I’m motivated to eat breakfast and head back over to the tailings.

Purple Fluorite octahedrons on quartz
This morning, I’ll hound the bottom of the tailings pile, instead of climbing up to the top again. Fluorite can also be found at the Grand Reef Mine. There’s some nice green fluorite pieces to be found, as well as some more gemmy purple fluorite. I found a few nice purple fluorite octahedrons on a matrix of quartz crystals, a great find for me. Score! I found the nice purple fluorite pretty close to the entrance of the tunnel. The green fluorite was mostly up top near the mine shaft entrance.

Looking back at the Grand Reef Mine from Laurel Canyon
After a couple hours of leisurely mineral collecting, I pack up and begin the hike down Laurel Canyon. I’ll take a different route back than I took yesterday. There’s a halfway decent 4×4 road running down the canyon, in better shape in some places than others. There’s no public access to this canyon, since private property blocks it a few miles down the canyon. Likely the only use this road, this canyon, ever sees is from the local rancher down the canyon.
About a mile down Laurel Canyon, I reach the junction for Waterfall Canyon to the east. I follow this road a half mile or so in search of the Dog Water Mine. Supposedly there Wulfenite to be found here. However, when I reached the general area of the mine, I could only see some small workings on the hillside above. And from the road, it’d be a bushwhack through a ton of thorn bushes on a steep slope. I’m already pretty cut up from bushwhacking yesterday in Laurel Canyon, so I opted to skip this one. I keep forgetting to bring a pair of hand shears for working through the thorn bushes.

Big burly Barrel Cactus
I headed back down the dirt road, back down Laurel Canyon and reach fence line around the private ranch. I follow the fence line up hill and over the first ridge, cross the road I came in on, and continue hiking west across a series of ridges and washes. Lots of thorn bushes, cow activity and a general pain in the ass.
It was mid afternoon when I made it back to my van. This is always a great feeling, to return to the relative comfort of camp at the end of a long day of mining. Or in this case, two days of mining and hiking. I dropped my pack, cracked a beer and began to wash off the accumulated dirt and filth with my limited water supply.
After cleaning myself up, it’s time to wash my rock and mineral finds. I always like this part of rockhounding, where you can really see what your finds look like cleaned up. I just use a bucket of water and a toothbrush for most minerals, at least when I’m out in the field. Some are too fragile to risk the toothbrush though, so be wary of that. I try to wash the bulk of the dirt off these pieces before storing them. I’ll let them sit in the sun and dry off, then bust out the loupe and have a closer look. So satisfying.

Duhhhh, I can’t go backwards, but there’s something in front of me. Maybe if I stay still…
While washing my minerals, a group of cows walked through my campsite. They stopped about 20ft away, and stayed there for about 20 minutes trying to figure out what to do. I just carried on scrubbing my rocks and drinking my beer. Cheers!
Minerals I Found at the Grand Reef Mine, Day 2
- Brochantite
- Linarite
- Quartz
- Galena
- Fluorite
Day 4: 7-mile Day Hike to Tenstrike Mine
Mines Visited: Tenstrike Mine
The Tenstrike Mine is a small former surface and underground Pb-Zn-Cu-Au-Ag-V mine located 3.9 miles SSE of Aravaipa, 3 km N of NNW of the Grand Reef Mine on the western slope of the Santa Teresa Mts.
Base camp
Today, I’ll do a day hike to the Tenstrike Mine and return back to my camper van this evening. This will be about 7 miles and 1400ft elevation gain, mostly on a dirt road.

At least I have this road to walk most of the way today
After leaving camp, the road climbs out of the wash and up onto a mesa-like ridgeline. Good views of the Santa Teresa Mountains and Aravaipa Canyon. As I neared the Tenstrike Mine, a fighter jet screams over the mountains above me, perhaps 1,000ft above the terrain. He dips down into Aravaipa Canyon, banks hard and cuts back up over the Santa Teresa Mountains, a few hundred feet above the terrain. That was super cool to see. I had been hearing the jets the last few days, and even a couple of sonic booms.
Mineshaft marking the northernmost workings of the Tenstrike Mine

Some good signs

Nearby creek bed is lined with this kind of quartz
The Tenstrike Mine is a series of workings along a ravine. At the very top is an old mineshaft, collapsed and filled with dirt. This mine is supposed to yield some nice specimens of purple fluorite or quartz, and I’m not seeing anything like that up here. In the nearby wash, there’s a vein of quartz crystals embedded in the dirt along the banks. I see a few crystals on the ground and spend some time working at the vein. I pull out a few plates of quartz crystals, but nothing really exciting. I’m hoping to find them in either larger size, or with some fluorite, but after tracing the vein I’m not seeing that.

I’ll follow the mine workings down this ravine

Didn’t see much of interest here
Next, I head down the ravine. Lots of evidence of mine workings here, but again, nothing too interesting to be found. There’s some larger boulders here and there with quartz veins though to at least tell me there’s something nearby.

Old rails at the Tenstrike Mine

Let’s see what we got. Oh, flies…
My map marks several prospects and tunnels as I continue downhill. There are three tunnels marked on the USGS maps, and I had the most success at the northernmost one. I wanted to go into the tunnel to explore it, but there were swarms of thousands of flies inside and I turned back.

Above the tunnel entrance, the hillside is covered with this
No matter, there was some great collecting to be had on the tailings pile outside of the mine tunnel. I didn’t have time to climb to the very top of the hill, but on the slopes 50ft above the tunnel, there were many outcrops of rock that were just littered with cavities and vugs, with quartz and fluorite inside. The problem is, this is hard rock mining. A saw would be great, if not, a drill so you can create weaknesses in the rock when chiseling around the piece you’re looking to extract. Without these tools, it’s best to just collect on the ground, in the piles of existing rocks and boulders. It’s worth breaking some open though.

Nice purple Fluorite on Quartz

Some really nice color to the Fluorite
I found many nice pieces of Fluorite octahedrons here, usually on quartz. The Fluorite here may not have the shiny gem luster we’re all after, as they often have a bit of a rough, pitted kind of texture, but they are still nice pieces with some deep purple color that are highly attractive in their own way. As a somewhat new collector, I found my best Fluorite specimen to date here.

Bottom of the canyon, near the southernmost workings of the Tenstrike Mine

The southernmost “tunnel” at the Tenstrike Mine
It was getting late in the afternoon, but I wanted to hit up the other tunnels in the area that make up the Tenstrike Mine. I didn’t see much that interested me at these other locations. I would definitely have a second look at the area though on a subsequent visit, because I kinda rushed through the area.


I followed the unnamed canyon uphill and back to benchmark 4468, where I rejoined the road I hiked in on this morning. This is my favorite time of day to be hiking, late in the day with the sun low in the sky. Today was no exception. I walked back with the sun on my face and a bag full of some great Fluorite specimens. I knew the Grand Reef Mine had some great minerals, but my expectations for the rest of this trip were not as high. So far, so good!

Best Fluorite specimen from the Tenstrike Mine

A dark staining on these Quartz crystals, and some Galena as well
Back at the van, I cracked another celebratory beer and washed up myself and my day’s mineral finds. When the sun goes down, I eat dinner and watch a movie in the van. My body aches from the last few days of hiking and mining, but damn does it feel good to lay my head down at the end of the day. Especially, knowing I get to do it all over again tomorrow.
Minerals I Found at the Tenstrike Mine
- Quartz
- Fluorite
- Galena
Day 5: Move Camp Near Aravaipa Ghost Town. Day Hike to Lead King Mine
Mines Visited: Lead King Mine
The campsite I’ve spent the last 4 nights at gave me great access to the Grand Reef Mine and Tenstrike Mine. Today, I’ll move camp to another location, so I can do some day hikes from there to a few more mines.

The drive up Aravaipa Town Rd. Imperial Mountain is in the Background
I drive back down to Klondyke Rd, then a mile west and take a right (north) on Aravaipa Town Rd. Pass through a gate to enter some newly designated public lands and continue heading uphill. The road was surprisingly good most of the way. In fact, it was only the last mile or so where the road became more challenging. The main issue was some large berms in the road, either built to channel flowing water or in the process of an old flash flood that was never cleared out. Either way, these are large bumps in the road that my van bottomed out on a few times. Thankfully, contact with the ground was made only with the frame and not the oil pan or anything. There was a Cat parked along the road a few mile in, and it looked like some grading had been done and is perhaps currently in progress. So maybe, they will make it up to these large bumps and take care of them. Any high clearance truck with have no issues.

I’ll camp here for the next few days

View from camp
From Klondyke Rd, It was 6.6 miles to a saddle where there’s a road junction and a sign that says Aravaipa Townsite 1 mile. I just parked here at this junction and it made for a great home base. And, I actually had cell service here with 4g signal! A first for this area, I had nothing just a few air miles away.

Nice hike to the Lead King Mine
Fortunately I don’t have to do practically anything to “set up camp” when I arrive in my van, so after parking I grabbed my backpack and bucket, and headed out to do a day hike to the Lead King Mine. It’s located on the north side of Imperial mountain, at the junction of Stowe Canyon and Tule Canyon. It’s about 1800ft away as the crow flies, but to avoid bushwhacking down the steep canyon slopes, I’ll take a 1.75 mile route each way along some dirt rods.

Dropping down into the canyon

Little bit of bushwhackin’ at the end
The last half mile or so, the road fades away and becomes extremely overgrown with thorn bushes. I lose the road and drop down into a wash, where some light scrambling is needed to get down. But soon, I’m there, at the base of the mine.

Entrance to the Lead King Mine tunnel
Now, I mistakenly set out to this mine thinking it was the nearby Tule Mine, which was supposed to have some really nice Fluorite. realized something was maybe not right when I saw no evidence of Fluorite here. In fact, I didn’t see too much of interest laying around in the tailings piles. So, I had a look inside the tunnel next.

I wonder how old this is?
Upon entering the mine tunnel, I was once again greeted by a swarm of thousands of flies. I was bummed to turn back last time, only for flies. After all, the are completely harmless, just annoying. So, I pushed in anyways, displacing the flies as I entered. And luckily, they wanted little to do with me, and pretty much just left me alone, vacating the area. I’ll take it.

Nice green veins of Fluorite
The mine tunnel are in good condition and stable. Inside, I find some interesting minerals and veins. Firstly, I notice the bright green fluorite veins in a few areas. Not the gemmy stuff I’m after, but a really nice color nonetheless.

I believe this is Laurelite
I do see some lead deposits amongst the walls, along with specular Hematite, and Pyrite. Then, I notice a white mineral coating on one section of hematite. Upon closer inspection, the mineral is a series of very fine, thin bladed crystals, in a puffy fan-like configuration. I don’t have much info on this mine saved on my phone, so I’ll bag a sample and take it with me. I’m pretty sure it’s rare, that’s all I know at the moment.
I spend some time removing a chunk of hematite with the previously mentioned white mineral, and realize this section of the mine has less oxygen than I’d like. Work is much harder here, despite not being all that far from the mine entrance. I bag my sample and move back to the main shaft, and enjoy the invigorating feeling of oxygen once again.

Love this view from my campsite
It’s late in the day now and it’s time to walk back uphill and try to find the old road again. I fight the thorn bushes and get back to the better dirt road, and life gets a little easier again. Excellent views of Imperial Mountain at sunset, perhaps best viewed from my campsite.

Another shot of the Laurelite specimen
Back at the van, I don’t really have any minerals that require cleaning today. But with some phone service and a little research, I surmise that my mystery white mineral is Laurelite. The nearby Grand Reef Mine is the Type Locality for Laurelite, having being first identified there. And there are other recorded Laurelite occurrences in the Aravaipa Mining District. This is a pretty rare mineral, perhaps more rare than I first suspected. I carefully transported this piece on the way back, protecting the delicate crystals as best I could, and I believe I have a pretty nice specimen to show for it. It may not have the instant wow-factor of those beautiful Fluorite octahedrons I found the other day, but finding a mineral as rare as Laurelite has it’s own rewards. I never even found the Tule mine, which was my original intention when I set out this afternoon, but I’m sure glad I stumbled upon this mine.

Quartz/Hematite
Another noteworthy find from the Lead King Mine was this quartz/hematite combo. Not a spectacular piece, but an interesting one. Another good day.
Minerals I Found at the Lead King Mine
- Fluorite
- Pyrite
- Hematite
- Quartz
- Laurelite (my best guess)
Day 6: Ben Hur Mine, Small Prospecting Pits
Mines Visited: Unnamed Cu Prospects, Ben Hur Mine
Today was my lazy day. It was cold and windy, and I decided to stay closer to the van today.

The unnamed Cu prospect near camp

You can see my van/campsite from this prospecting pit
Across the dirt road I’m parked along, about 40ft off, were a couple of prospect pits. This unnamed Cu Prospect is shown a few hundred feet down below in the canyon, and perhaps, part of the same workings. I didn’t follow the tailings too far downhill. In either case, these turned out to have some moderately interesting material.


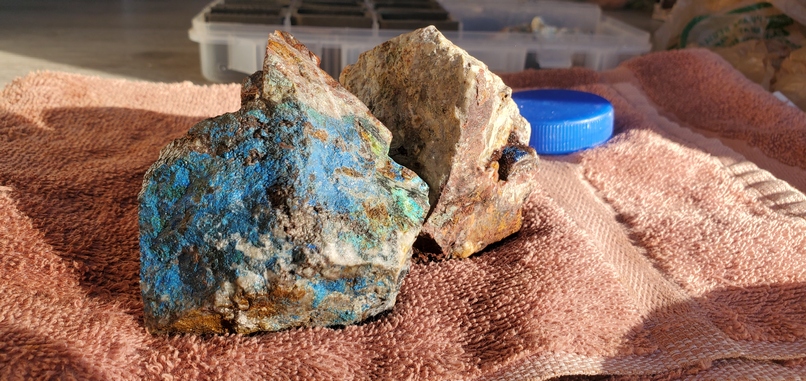
Inside the pits, I didn’t see anything in the remaining host rock that looked like it was worth digging into, so I spent my time picking through the tailings. The rocks had some really nice greens and blues that drew me in. There was some Chrysocolla and Malachite, and perhaps some sort of mix of the two. This was more of the tumble or slice kind of material though, nothing really of the cabinet specimen quality. However, there were some pieces of Smithsonite that would have been decent if not damaged.

Ben Hur Mine
Next, I wandered down the road towards Aravaipa ghost town. It’s only a mile, but I never made it to the townsite on this trip. I spent some time poking around at a few prospecting pits alongside the road and over to the Ben Hur Mine. This one was pretty devoid of anything interesting, but that’s to be expected being so close to a “main road” like this.

On my very short walk back to the van, I did manage to find a couple of chunks of a lead/zinc ore with some nice green color to it. Nothing crystalized, but it was a dense chunk of more mineralized ore that was left behind. Perhaps a window into the kind of stuff once found here. But today, slim pickings.


Minerals I Found At the Ben Hur Mine & Unnamed Prospects
- Smithsonite
- Chrysocolla
- Malachite
- Quartz
- Hematite
Day 7: 7-mile Day Hike to Iron Cap Mine
Mines Visited: Iron Cap Mine
The Iron Cap Mine is a former surface and underground Pb-Zn-Ag-Cu-Au-Fluorspar mine located 2 miles NE of Aravaipa Ghost Town, ½ mile N of Landsman Camp, and near the head of Arizona Gulch, in the foothills of the Santa Teresa Mountains, at an altitude of approximately 5,000 feet.
Today was a great day of mineral collecting. One of my all time favorites, in fact. But it does take a 7 mile round trip hike to reach from my camp. No matter, this is an easy hike up a relatively good dirt road, so this hike takes just over an hour each way.

Landsman Camp
About 2/3 the way to the Iron Cap Mine, I pass through Landsman Camp. Nothing remains of the camp today, but a hundred years ago, an eccentric prospector named Frank Landsman called this area home.

Old rails at the Iron Cap Mine


Ore chutes

Old machinery and equipment
Not far up the road from Landsman Camp is the Iron Cap Mine. This mine has many rare and interesting minerals that can be found here among the lead/zinc ores. There’s some old structures and equipment left here, which I spend a moment exploring first. There’s some ore chutes, rails, pumps and motors along the side of the road.

Iron Cap Mine


Iron Cap Mine
The mine itself is farther uphill. A weathered road leads up to the top, before fading into nothing at the base of the tailings pile. Here is a U shaped valley, and the mine is located inside the “U”.

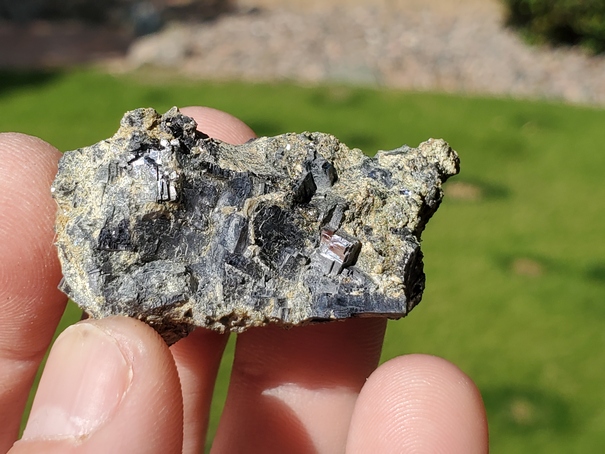
Nice gemmy green Sphalerite

Sphalerite

Sphalerite, Galena

Pieces of Sphalerite

Sphalerite
As I make my way into the main collecting area, I see a mine shaft and small adit tunnel along the wall. I stop here and drop my gear, making this my little home base for the day. There’s lots to grab my interest already, and I quickly become excited about the possibilities. In fact, I already had a handful of rocks as I walked up to this spot. Sphalerite immediately stands out, something I really haven’t seen much of, at least not this green gemmy stuff.
I had all sorts of temporary piles going as I tried to figure out what all of these new-to-me minerals are and which ones are actually worth keeping. I typically take a sample of any new mineral I find with me, even if I know it’s a crappy specimen. Until I find something better, this is what I have! And that’s the fun of mineral collecting. No matter what you have found, there is always a better, or at least equally stunning but different and unique, specimen out there to find.

Really nice Galena. Some pyrite mixed in some of these pieces as well
Galena
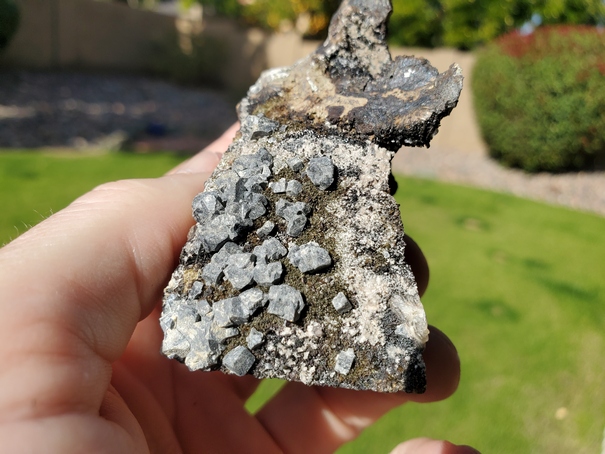
Cubes of Galena on a bed of Johannsenite

While most of these Galena cubes are oxidized and have lost their luster, these cubes still make for an attractive mineral arrangement
So, we have lead/zinc ore here in abundance. Veins of it coat the walls of rock here. I pulled off some really nice solid chunks of blocky Galena the size of my head, and broke them down to some smaller pieces to to take with me. Really excellent, blcoky Galena. Also, some cubes of Galena on a matrix of various other rare and interesting minerals. It was truly a wonder to see, for this rather amateur collector.

Large chunks of Calcite to be found
There are also large blocky chunks of Calcite strewn about in the tailings. I’ve always liked these kind of Calcite pieces on their own, but it’s also a good indicator that other minerals nearby may be “growing big”, too. There are large deposits of Calcite visible in the walls and some other minerals growing along with them. However, much of the surface area of these walls was also covered with a thick white substance. I didn’t mess with it too much, but it appears to be, perhaps, an oxidation effect, a reaction of air with the “newly” exposed, highly mineral rich Lead/Zinc walls.

This is Johannsenite

Johannsenite makes an interesting matrix for other minerals to sit upon

Many pieces like this to be found here
One of the minerals commonly found here at the Iron Cap Mine, and a new one for me, is Johannsenite. Johannsenite isn’t really a spectacular mineral on it’s own. But, a bed of these green/brown Johannsenite crystals make a cool matrix for other minerals to sit upon. It reminds me of the old retro “puke green” carpets of the 70s, for some reason.

What I think is Manganbabingtonite

Suspected Manganbabingtonite

Another close up of the Manganbabingtonite

Blades of Manganbabingtonite
The Iron Cap Mine is also known for a rare mineral called Manganbabintonite. This mineral is very similar to Babingtonite, but has a little more Manganese in the mix. I believe I found one piece with Manganbabingtonite.

Andradite

Pyrite cube among Andradite

I also found Andradite, and a few small pieces of cubic pyrite. This wasn’t as abundant as the other minerals, but there were a few pieces to be found.

Axinite
Another new mineral find for me is Axinite. I didn’t find any spectacular pieces of it, but I get the impression this is not a very attractive mineral in it’s best form anyways. Still cool to find something new.

I believe this is Hedengergite, with some Sphalerite

This one I am not sure of. It could be Hedenbergite
Another mineral I found at the Iron Cap Mine is Hedenbergite. At least, that’s what I think it is.

Combo piece containing Calcite, Quartz, and two distinct colors of Johannsenite
A closer view of the bed of Johannsenite
And finally, here’s one of my favorite pieces of the day. It’s combo of Quartz, Calcite, Johannsenite and, well, something else. I originally thought it was Manganbabingtonite, after I got it home I had a closer look under the loupe and discovered the darker mineralis Johannsenite as well. I suspect the original bed of the typical greenish-brown Johannsenite formed, and then later another round of mineralized fluids seeped in that contained a higher concentration of a darker mineral (Iron, Manganese, etc). But being the amateur I am, this is just a guess. Still, a really cool piece.
I stayed at the mine as late as I could, since the collecting was so good. When it was time to leave, I had filled up most of my containers that I use to put my finds in. My bucket was full, I had a full tupperware container, and for the first time in recent memory, I completely filled my padded fishing tackle divider box thing. That’s how you know you had a good day.

Cows…
About a mile before camp, I ran into some lazy cows on the road. It’s a steep drop on one side, and a steep hillside to climb on the other, so I pretty much herded the cows down the road all the way back to my van.
List of Minerals I Found at the Iron Cap Mine
- Axinite
- Sphalerite
- Johannsenite
- Calcite
- Quartz
- Galena
- Zinc
- Hedenbergite
- Pyrite
- Manganbabingtonite
- Andradite
Day 8: On to the Next Adventure

The drive out of the Santa Teresa Mountains


Driving down Aravaipa Town Rd
After spending my final night in the Santa Teresa Mountains, I headed down Aravaipa Town Rd towards Klondyke Rd. This has been one of my favorite mining trips of all time! Not only some rare, beautiful and interesting minerals to add to my collection, but some beautiful mountain and canyon scenery, some good hikes and lots of adventure. I couldn’t ask for more and I can’t wait to get back to the Santa Teresa Mountains again in the future!
For now, I’m headed into Phoenix to stay with a friend for a few days, plan my next move, and head out into the desert again. Stay tuned for the next adventure!
Interested in purchasing any of these mineral specimens?
Many of my rock and mineral finds are available for purchase. Contact me at if you’re interested in buying any of the minerals you see in this post.
How Much Did It Cost?? Complete Camper Van Build Parts & Materials Spreadsheet

One of the first questions people ask me about my Chevy Astro camper van build is, “How much did your build cost”? This really depends on a few things… will you be doing all of the work yourself? Do you have all of the necessary tools already, or will you be buying some/all as you go? The easiest way to discuss the total cost of my build is probably to just list the parts & materials, and take tools out of the equation. So without further ado, here’s my complete parts & materials spreadsheet for my Chevy Astro camper van build:

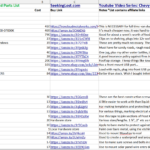
All of the parts and materials used in my stealth camper van build are listed in this spreadsheet
As you can see, my total cost for all parts and materials in my Chevy Astro camper van conversion was around $7500.
- For a detailed look at my van build, check out my Chevy Astro DIY Stealth Camper Van Build video series.
- For for written instructions on the build process with photos, parts/materials/tools lists for each phase of the build, see my Astro/Safari Camper Van Conversion page.
You’ll notice I didn’t list a cost for a lot of the wood I used, and that’s because I had a lot of it on hand already. Figure around $300 for the high end of what the wood and lumber should cost in this build. Lumber prices were quite high in early 2021 when I built my van, and should be lower now. Besides the lumber, the list is pretty complete and should give you a good idea of what kind of cost is involved to build out a camper van like mine.

Other costs not calculated in this van build spreadsheet are maintenance costs. If you’re building out an Astro or Safari van, chances are, it will need some sort of mechanical work done before you hit the road… tires, tune up, suspension work… something. Or maybe your van needs a LOT of work. But that’s a cost that varies from van to van, each one will be different. If you aren’t taking care of the mechanical work upfront, before starting your build, it would be wise to set aside a generous budget for maintenance work after the conversion is complete.
Another cost to factor in is paying others to do parts of the build you can’t. Most DIY van builders try to do as much of the work as they can themselves, but you may run into projects that you need to sub out. For example, welding is something most DIY’ers aren’t going to be able to do themselves, unless you just happen to be a welder by trade. Or perhaps you aren’t comfortable with the electrical wiring aspect of your van build, and decide to pay an electrician. These jobs can quickly become expensive when you rely on others, so make sure to set realistic expectations for your van build based on your abilities, and your budget.

Building your own camper van is a huge project, but you can do it. Do your research, ask questions, watch youtube videos (like mine!) and learn all you can about what you want out of your van and what your options are for achieving that vision. Good luck with your build, get out there and make it happen!
Chevy Astro Camper Van Build: Tool Box

Chevy Astro Camper Van Build Phase 19 – Tool Box

Tools & Materials
Materials:
Aluminum Tool Box
Angle Aluminum
Tools:
Dewalt Cordless Impact Driver
1/4″ Drive Quick Release Bit Extension
Craftsman 3/8 Drive Drill
Craftsman Socket Set
Drill Bit Set
Tape Measure
Video – Chevy Astro Camper Van Build: Tool Box
Project Overview: Tool Box
I’ll be installing an aluminum tool box on top of the van for extra storage. I came up with a mounting system that involves a single piece of angle aluminum and a couple of nuts & bolts.
Choosing The Right Size Tool Box

I wanted to keep the height of the tool box lower, and have the box fit mostly beneath the top of the roof rack. Of course, if the tool box weren’t higher than the roof rack, it would only be 5 inches tall. My van already scrapes the bottom of the garage door when pulling it into a standard garage, so no matter what size tool box I go with, the van will either need to be parked outside or I will need to remove the tool box if I want to park it inside a garage. The dimension of the tool box I bought are 39″Lx13″Wx10″H.
Tool Box Mounting System

I want to mount the tool box on top of the roof rack, but the tool box is only supported by one of the rack’s bars. There is nothing underneath the tool box where it butts up against the side of the roof rack. So, I decide to use angle aluminum for this. I’ll bolt a piece of angle aluminum to the roof rack, and the bottom part of the angle aluminum’s L shape will face towards the middle of the van. This provides the support for the tool box to sit on top of, and for the tool box to be bolted into.

Sheet metal screws through bottom of tool box into the roof rack rail below
The tool box is also mounted to the one roof rack rail that runs underneath it. I’ll just drill a hole through the tool box and into the rail, and use some sheet metal screws to secure it.
Using The Tool Box

I use the tool box mostly to to things I should carry in the van (like jacks, tow straps, etc) but don’t want cluttering up the inside of the van. The flip side is that these things can be heavy, and you don’t want too much weight on the roof of the van, making it top heavy. Probably less of an issue in an Astro van compared to the high profile vans like the Sprinter and Promaster. Either way, I do try to be conscious of the weight I put up there. Also, too much bulk in the tool box forces the lid up on the sides a little, and it’s possible for rain to get inside if the lid is forced up too high.

To get inside the tool box, I stand on the floor of the van’s side door entry. This gives me enough height to see inside.
I have taken the tool box off multiple times, so I could store it inside a standard garage. I have to remove everything inside, but it’s not too bad. It’s a 10 minute job.
Previous Van Build Project: 18 – Cell Signal Booster | Van Build Project Index | Next Van Build Project: 20 – Repairs
Chevy Astro Camper Van Build: Cell Signal Booster

Chevy Astro Camper Van Build Phase 18: WeBoost Drive Reach Cell Signal Booster

Tools & Materials
Materials:
Tools:
Dewalt Cordless Impact Driver
1/4″ Drive Quick Release Bit Extension
Craftsman 3/8 Drive Drill
Craftsman Socket Set
Drill Bit Set
Tape Measure
Screwdriver
Video – Chevy Astro Camper Van Build: Cell Signal Booster
Project Overview: Cell Signal Booster
The setup for the cell signal booster is fairly simple. There’s the signal booster (amplifier) and two antennas that connect to the signal booster. One antenna runs to the outside and picks up the signal, send it to the amplifier, and another cable sends the signal to an interior antenna for your devices to pick up. I’ve heard good things about these cell signal boosters, which is why I invested the money on one. And they are expensive. So, it better work!
Mounting The WeBoost Signal Booster
Installing the WeBoost cell signal booster is a little more difficult than it needs to be, but it’s till not too hard. It’s just that, the unit doesn’t have any type of mounting plates/holes or anything on it to assist with mounting. The instructions say to place it under your seat, and maybe velcro it to the floor. Um, no.

Instead, I mount my signal booster inside a cubby hole on the side shelving area when I open my side door. I use some mood pieces to fit snugly on top and bottom of the signal booster, and screw these in place. Then, I cut a (roughly) 1/2″x1/2″ piece of wood about 6″ long, and run this vertically over the signal booster to hold it in place.
Mounting The Outside Antenna


The WeBoost instructions say to mount the exterior antenna somewhere free of obstructions on the roof. Makes sense. I place mine in the very back, above the rear doors. The instructions also say to route the antenna’s cable under the weather-stripping, which seems highly suspect to me. Underneath is the sheet metal, with some paint over it. Not sharp, but with some force on it, maybe sharp enough to break that cable someday. For now, I run some duct tape over the cable as I route it along the inside of the sliding door over to the weather-stripping, and then some more duct tape over the sheet metal where the cable gets routed over it. Since my signal booster is right here by my side door, it’s easy to route the cable behind my shelving here into the cubby hole where the signal booster is mounted.
Mounting The Inside Antenna

Mounting the inside antenna is even easier. This antenna comes with some two-sided adhesive tape for mounting. I place mine along the top of my shelving, just below the ceiling, above the signal booster.
Using The Cell Signal Booster
The WeBoost booster’s power cable comes with a little on/off switch mounted at the plug, so I leave my signal booster plugged in to it’s outlet at all times. It takes maybe 10 seconds max after flipping the switch to ON for the booster to pick up the signal and amplify it. Usually, 2-5 seconds. While the signal booster is booting up and acquiring signal, the indicator light on the signal booster flashes red and green. After a few seconds, it should become solid green to indicate it’s working properly. If it’s solid red, there’s a problem. Try moving the outside antenna, unplugging the signal booster’s power cord and antenna cords.
The WeBoost cell signal booster draws a surprising amount of electricity, around 2 amps. Therefore I only turn it on when it’s really needed.
Yes or No: Does The WeBoost Drive Reach Cell Signal Booster Work?

Yes, it does. I used the WeBoost Cell Signal Booster for 5 months straight last winter and it consistently boosted 1 bar of 4G to 2-3 bars, 2 bars to 3-5 bars, etc. And the speeds increased noticeably too. More often than not, it turned an unusable “quasi 4G” signal into a good internet connection, usable for working remotely if needed. The bottom line is that it works, and although it was expensive, it does it’s job well.
Previous Van Build Project: 17 – Media Center | Van Build Project Index | Next Van Build Project: 19 – Tool Box
Chevy Astro Camper Van Build: Media Center
Chevy Astro Camper Van Build Phase 17: Media Center

Tools & Materials
Materials:
Android TV Box
5v DC Power Cord For Android TV Box
Anker 36W Dual USB Car Charger Adapter
4TB Portable HDD
Shock Cord
HDMI Cable
Tools:
Dewalt Cordless Impact Driver
1/4″ Drive Quick Release Bit Extension
Craftsman 3/8 Drive Drill
Drill Bit Set
Tape Measure
Screwdriver
Video – Chevy Astro Camper Van Build: Media Center
Project Overview: Media Center
Since I’ll be using a computer monitor instead of a smart TV, I’ll need some sort of “smart device” to run my media center. My first thought was a Raspberry Pi, but hen I found something even simpler… an Android TV Box. It does just what it sounds like; it runs android and runs apps that allow you to watch or stream media. I found a power cord to run it off of DC current, so powering it is not an issue. I will be able to plug in an external HDD that I can load up with movies, TV shows and whatever, for the times (most of the time!) when I don’t have internet.
Testing The Media Center Setup

When I first received my android TV box, I did most of the setup inside the home. I tested that it could read USB flash drives with movies and media files, tested that it could power and read my external HDDs, and learned the layout of the operating system. It came with two remotes, one normal remote and one with a full keyboard and mousepad.
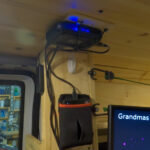
Mounting The Android TV Box
I decided to mount my android TV box on the ceiling, above the monitor next to my shelving. Here, it’s out of the way, the cable runs are short, and I can read the screen on the front face of the unit.

I had to get creative for the mounting of the android TV box inside my van. I used a thin (3/8″ or so) sheet of wood and cut it into a rectangular shape, roughly 5″x8″. I rounded the edges on the belt sander to make them smooth. Then, I placed the android box on top of the wood piece to se where it should be mounted. I choose a spot, and drill two screws in line with each other along one of the narrow sides of the board, bout a half inch in. I place the android box against the screws and mark the backside of the unit on the board. Here, I install a hanger hook. The android box fits snugly between these three points, but I still need to hold it down with something. I use shock cord for this. I tie the ends to the screws and then pull it over the hanger hook to secure the android box to the mounting board.

I drilled out two holes to mount this board to the ceiling. These screws will sit above the android box, hidden when it’s installed. I’ll also use the same drywall screws that are used to mount the cedar planks to the ceiling. I’ll measure them from center to center, transfer this mark to my mounting board, drill pilot holes and then mount the board to the ceiling using the existing holes through the cedar plank ceiling.
Mounting The External HDD
This is kinda tough to explain. You should really just watch the video I made that shows this part in detail. But if you want to read my attempt at explaining it, well here you go.

The external HDD came with a soft neoprene case, with a sort of “flip top”. I flipped the top open and back, now the top faces the ground and the large part of the pocket, where the HDD fits, faces up. I cut a thin (1/8″ or so) rectangular board that would fit inside of the top part of the neoprene case that now faces down. In other words, if the little board was mounted to something, the neoprene case could just be slid over the board and sit on top of it.


First, I make a vertical slit into the front of the neoprene case with a knife, about 1-2″ wide. I drill holes through both the neoprene case and the mounting boards behind it. I get some screws started in the holes, then mount it to the shelving above my monitor’s swivel arm, and below the media center on the ceiling.

Once the case is mounted to the shelving, I add a thin piece of neoprene as a backer inside the neoprene case, to protect the backside of the HDD as it slides against the screws that are used to mount the case. The HDD just slides into the pocket now, with easy access for cables and frequent removal.
Can I Use An Android TV Box In My Camper Van To Power A HDD?
The above is what it all really boils down to for me. I had to figure this out on my own. The answer is yes!
The HDD itself draws very little power. Less than .2 amps. So here’s my power setup for the Media Center:
Anker 36W Dual USB Car Charger Adapter
5v DC Power Cord For Android TV Box
Each of the two USB ports on the Anker charger is 18W, which can support 3.6amps at 5v, which is what the android box runs on. The android box inly uses about .2 amps on it’s own, though. So if 3.6 amps is being sent to the android box, and it’s only using .2 of those amps, it has some extra to pass on to the HDD. That’s great news, because we don’t want to have to plug in an extra HDD, when the android box can power it on it’s own through the same cable that data passes through. The android TV box and the HDD combined, I see about .3 to .45 amps being drawn, which is minimal.
Using The Media Center

I plug the android TV box and the monitor into the same 2-outlet bank, controlled by one switch. So, I an flip one switch and turn on the monitor, android TV box and the HDD simultaneously. Cool.
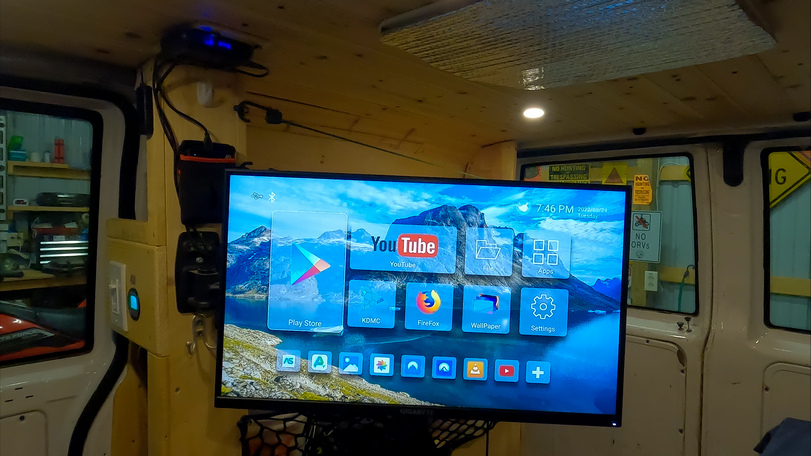

The android box boots to a familiar android operating system with a series of apps to choose from. KDMC (Kodi) is the main app I’ll use for my media. This is a media center app, and it allows you to specify an external drive to scan for media. It finds my 4TB HDD and boom, there’s all my shows and movies! It’s really that easy.
Because it’s android, there’s a ton of apps to choose from and there’s a bunch of cool things you can do with this device. For example, I’ll be bringing my guitar on my next trip, and I’ll want some guitar tabs to play along with. So, I found an app that reads guitar pro tabs, and I load up my collection on the android box. Now, I can play along to guitar tabs as they scroll across my monitor. Pretty damn cool!
Previous Van Build Project: 16 – Computer Monitor | Van Build Project Index | Next Van Build Project: 18 – Cell Signal Booster
Chevy Astro Camper Van Build: Computer Monitor

Chevy Astro Camper Van Build Phase 16: Computer Monitor & Swivel Arm

Tools & Materials
Materials:
Gigabyte G27F Monitor
Swivel Arm For Monitor
Ratchet Straps w/ Carabiners
Tools:
Dewalt Cordless Impact Driver
1/4″ Drive Quick Release Bit Extension
Craftsman Socket Set
Craftsman 3/8 Drive Drill
Drill Bit Set
Tape Measure
Video – Chevy Astro Camper Van Build: Computer Monitor
Project Overview: Computer Monitor & Swivel Arm
I went with a computer monitor over a TV in my van, because I found the Gigabyte G27F Monitor which comes with a DC plug instead of AC. Perfect. I won’t have the features of a smart TV though, which is unfortunate. To counter that though, I’ll simply run an Android TV Box as my Media Center. More on the Media Center setup in the next phase of the build. It’s a 27″ 1080p monitor with built in speakers, 2 HDMI ports and 2 USB ports.
To mount the monitor in the van, I’ll use a swivel arm. It will be bolted to the reinforced, vertical frame of the shelving above the power center. Mounting the swivel arm here will allow me to swing the monitor towards every available angle in the van, and even outside of the van’s side door if I were standing outside.
TV vs Computer Monitor In A Campervan Build
You want to watch tv and movies, but also want a big monitor for your van’s work station. WFV, work from van. Well, most TVs use AC power, and would need an inverter to use in a van. You don’t want to do that. Inverters are only about 70% efficient, so the power draw becomes 130% more. This may not be a big deal for your setup, but ideally, you want to minimize the things you run off an inverter. They should be more of a “last resort”. Try to run everything off the van’s 12v DC system instead. There are a few TVs that are powered by DC, but they are pretty crappy looking.
The Gigabyte G27F Monitor is one of the few good monitors out there that ships out with a DC power cord, so I can just plug it right into my van. The monitor itself doesn’t have the built in features of a smart TV, but I’ll run an Android TV Box instead. The benefit of the Android TV box over smart TVs might be that the android box is going to be more customizable, especially if you are tech savvy.
Mounting The Swivel Arm

Mounting for the swivel arm begin a few steps back, when I built the shelving above the power center. I had the foresight to use a 2×4 here, instead of the 1″ and 3/4″ stuff I was using throughout the rest of the shelving build. I knew I’d mount the monitor there, so I reinforced the area. These monitors can weigh over 10lbs, and will be hanging 18″ off the shelving. A thin board will not hold this kind of weight over time.

The swivel arm came with some decent heavy duty lag bolts, so I used those to screw it into the side of my shelving after picking a height and leveling it. There’s actually little level built into this swivel arm, which is pretty cool. Not only does it help mounting it level, but the level will also be useful in the future when parking at campsites and such.
Mounting The Monitor

Mounting the monitor to the swivel arm is pretty straight forward. I have to remove a desk stand from the monitor, that’s how it was shipped. Then, I install the mounting bracket from the swivel arm to the back of the monitor itself. Most monitors have a universal screw layout on the back, so that these brackets can be made for a universal fit. Mine line up perfectly.


On the back of the mounting bracket, there’s a square tab that is mounted in the center, and pivots. This is how the unit tilts, and it’s also the piece that fits into a slot on the swivel arm. You can add a screw into the side of the little slot on the arm to secure the monitor to the frame for extra security.
Securing The Monitor While Driving


Because the monitor is mounted to a swivel arm, it will move when the van moves, and fly forward when braking hard. This is not good. To keep the monitor from moving while driving, I’ve devised a simple solution: Adjustable Rope Hangers and carabiners. On the back of the bracket that mounts the monitor to the swivel arm, I’ve attached a length of string spanning two of the screw holes. On the rear side of the shelving, at a height equal to the middle of the monitor, I install a screw eye. Then, I attach a carabiner to the screw eye. And finally, I use the adjustable rope hangers to connect the string on the monitor’s mounting bracket to the screw eye’s carabiner. These little mini ratchets work great for quickly tightening up the slack in the line, making it secure. And to remove, there’s a little quick release tab that makes adding slack o the line fast and easy, and removal is a quick as opening the carabiner when I’m ready to use the monitor.
Previous Van Build Project: 15 – Window Coverings | Van Build Project Index | Next Van Build Project: 17 – Media Center
Chevy Astro Camper Van Build: Window Coverings
Chevy Astro Camper Van Build Phase 15: Window Coverings

Tools & Materials
Materials:
Scotch Heavy Duty Adhesive Velcro
3M 90 Hi-Strength Spray Adhesive
Roll of Reflectix
Black Felt
Refelctix Tape
Magnets
AVS VentVisor Window Visors
Cardboard for making templates
Tools:
Scissors
Permanent Marker
Tape Measure
Video – Chevy Astro Camper Van Build: Window Coverings
Project Overview: Window Coverings

Windows coverings are essential to any van build. But for the stealth camper van, there are some things you can do to make your van even stealthier.
To make my window coverings, I use use a roll of Reflectix and black felt. They are held up to the van with magnets. It’s a pretty simple system, and it works extremely well. If you have a VentShade for your front windows, and you SHOULD, then you can modify your front window coverings to have tabs/cutouts that allow for airflow so that you can crack your front windows. With the VentShade, your windows can be cracked , and with the tabs cutout from the top of the inside window covering, nobody can tell from the outside, it just looks like one solid black tinted window. Stealthy.
Making Templates
First, you’ll want to cut some template out of cardboard for your window coverings. Trim the cardboard down to fit the window opening as closely as you can… not just the glass, but the metal part of the body alongside the window too… this is where the magnets will go. Make one for each window.
Cutting Reflectix
Next, lay the templates over your roll of Reflectix. Cut out the templates, making sure to leave extra material just to be careful. The window coverings will shrink a little over time, so if they overlap now, that’s ok.
Taping On Magnets
Now I’ll add the magnets. I’m putting 3-4 magnets along the sides of the smaller, rear windows, and more along the larger side and front windows. Put magnets on the corners at least, and then as many as needed in between to achieve a firm fit over the window. Tape these magnets to the Reflectix using, you guessed it, Reflectix Tape.
Glue On Black Felt

Here’s where the window coverings get more, uh, stealthy. What do you think would stand out more: a van with all its windows lined with Reflectix, or with dark tinted windows? Yup, the shiny reflectix. So, I’ll glue some black felt to the outside face of the Reflectix to mimic the look of dark black tinted windows. Sure, up close you can tell it’s not window tint, but really, only from a couple of feet away.
I use 3M 90 Hi-Strength Spray Adhesive here to glue the felt to the window coverings. The easiest way to do this is to spray both the Reflectix and the felt, then sandwich them together, with the felt on the bottom. After they dry, use a pair of scissors to cut the window covers to shape.
Installing the VentShade

Before I can finish my front window coverings, I need to install the AVS VentVisors. These side window deflectors let fresh air in while keeping rain out. It also helps to keep the sun out of your eyes, reduce interior wind noise and fogging, and reduce interior heat. And finally, they allow a stealth camper van to have it’s windows open at night for ventilation, but to anyone outside, the windows look like they are completely rolled up.
The installation of the VentVisor is easy. It comes with an adhesive tape on the back of the visor. Clean the paint on the van with rubbing alcohol to prep the surface where it will be mounted on the door, above the top of the window. Line up the visor and press the adhesive tape onto the body. Done.
Cutting Tabs For Airflow On Front Window Coverings


With the VentVisor installed, now I know how far down I can roll my window before it can be seen from the outside, as it dips below the VentVisor. I then roll the window up slightly from there, and transfer this mark to my front window coverings. I cut out all of the material along the top of my front window coverings, except for the tabs I leave so that I can mount magnets to them. I cut off about 2-3″ from the top of the window coverings, and this now allows airflow to enter the vehicle while the windows are cracked and the coverings are up. This works great in conjunction with my overhead fan for ventilation.
Foldable Windshield Sun Shade
I just used an off-the-shelf Foldable Windshield Sun Shade to cover my front windshield. I just used the normal, reflective sun shades for this, because having a dark tinted front windshield would be weird and stand out. For a stealth camper van, you want to blend in. This folds up and I’m able to store it out of the way, next to/behind my driver’s seat.
Previous Van Build Project: 14 – Passenger Swivel Seat | Van Build Project Index | Next Van Build Project: 16 – Computer Monitor
Chevy Astro Camper Van Build: Passenger Swivel Seat
Chevy Astro Camper Van Build Phase 14: Passenger Swivel Seat

Tools & Materials
Materials:
Swivel Seat Base For Astro/Safari
Tools:
Craftsman Socket Set
Dewalt Angle Grinder
Dewalt Cordless Impact Driver
1/4″ Drive Quick Release Bit Extension
Craftsman 3/8 Drive Drill
Video – Chevy Astro Camper Van Build: Passenger Swivel Seat Base
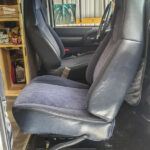
Project Overview: Passenger Swivel Seat Base
To install a swivel seat base for your passenger seat, we can break this down to 5 steps: remove the passenger seat, remove the seat’s sliding track (sits in-between the seat base and the seat itself), install the sliding track on top of the new swivel seat base, install the passenger seat on top of the swivel base and track, install the passenger seat back in the van. Unfortunately, the sliding track is riveted to the seat base, and you will need an angle grinder and/or drill to remove the rivets. You’ll replace the rivets with bolts later, to avoid this debacle in the future. Besides removing the rivets, which is a pain in the ass, you’ll need a socket and/or wrench set.
The official installation instructions for the swivel seat can be found here:
https://files.cargocollective.com/c1283167/AstroSafariInstall-Small.pdf
Remove Passenger Seat

There’s 4 large nuts holding the seat to the floor. Perhaps 19mm, from memory. These weren’t too hard to get off, since I’ve already had these rusty old nuts off a few times throughout the van build. If you haven’t done this yet, it’s not a bad idea to take some WD40 and spray your threads, and even take a wire brush to them, to make them easier to remove in the future.
Remove Seat From Seat Base & Track
First, remove the bolts holding the seat base and sliding track to the seat itself. There should be 4 bolts, make sure to save these, you’ll need to reuse them.
Remove Rivets Holding Sliding Track to Seat Base
This is the worst part of the swivel seat installation process. The seat track is secured to the base by rivets, and these will need to be removed. There are a couple of things you can do to get the rivets out: use an angle grinder to cut slots in the top of the rivet, use an angle grinder with flap disc attachment to grind the tops of the rivets down, drill them out, and use a hammer and punch to aide in the “pushing” of the rivets out of the holes if the heads are sufficiently removed.
Attach Sliding Track To Swivel Base

After the rivets are removed, the sliding track should be free of the seat base. Now, drill out the rivet holes to 5/16″, to accept the new bolts. We sure as hell aren’t putting rivets back in. Use the bolts that come with the swivel base to fasten the sliding track to the new swivel seat base.
Install Passenger Seat Back Into Van

Finally, install the entire passenger seat assembly, complete with new swivel base, back into the van. That’s it, the swivel seat is in. Time to, uh, swivel.
Previous Van Build Project: 13 – Dometic Electric Cooler | Van Build Project Index | Next Van Build Project: 15 – Window Coverings
Chevy Astro Camper Van Build: Dometic Electric Cooler
Chevy Astro Camper Van Build Phase 13: Dometic Electric Cooler

Tools & Materials
Materials:
Dometic CFX28 Electric Cooler
Dometic CFX28 Insulation Cover
Tools:
None!
Video – Chevy Astro Camper Van Build: Dometic Electric Cooler
Project Overview: Dometic Electric Cooler
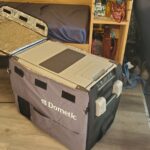
For me, having some type of fridge is a necessity for long term van living. Dometic is probably the most well known name in the electric cooler market. Many/most of the smaller van builds are using something like an electric cooler, if not a mini fridge or even larger. For me, one person in an Astro van, I’m going with a 28L Dometic electric cooler. It also has a freezer function that I have never used once. The 28L model I bought is no longer available, and the closest options now are 25L and 35L.
Wrapping the Electric Cooler In The Insulation Cover


The insulation cover fits pretty well over the cooler. There’s a few pieces of Velcro and a couple of zippers to keep the cover in places and tightly fitted over the cooler itself.
Choosing The Location Of The Cooler

When I first started my van build, I was thinking the cooler would go in the very back of the van. For some reason, I envisioned opening the back doors all the time and having that be my access to the cooler. But as the van build went on, I realized that is a terrible place for it. Where will I be most of the time, while in the van? Driving, or in the passenger swivel seat. So, I think it makes sense to put the cooler in-between the front seats. I can access drinks and food while I’m driving, and from my main lounging spot inside the van when at camp. Sure, it prevents me from moving from the drivers seat over to the back of the van with ease, but I can do it if I really want to. No matter where I park, I’d open the side door anyways, to place my water jug outside of the van, and maybe a few other things.
Electrical Connection

Dometic electric coolers can be hooked up via AC or DC power. My cooler came with both an AC and DC power cord, and so I was able to plug the cooler right in to my 12v sockets I installed some plugs in the lower portion of my shelving, behind the driver’s seat, specifically for the cooler. This way, most of the length of the cord can be tucked away and out of sight.
One thing I noticed about the cooler is that the male prongs on the plug need to be bent out a little so that they make better contact with the female side of the plug. I’ve come back to my van a bunch of times and had the cooler be off, as I slightly brushed against the cord perhaps, on my way out.
Using the Dometic Electric Cooler


I wasn’t sure what to expect as far as power consumption goes, but the cooler doesn’t draw too much power. How often the compressor runs will depend on how hot it is outside, if it’s in direct sunlight or not, if you’ve had it open for a while and/or recently put hot/warm foods inside. The compressor can draw 3-6 amps when running, but will only run for a few moments at a time. It may not run for hours, if the temps are cooler.
For me, one person, I can fill up the cooler with food and have it last about a week, or a little longer. This, of course, is a supplement to other foods that don’t need to be kept cool.
Previous Van Build Project: 12 – Shelving & Storage | Van Build Project Index | Next Van Build Project: 14 – Passenger Swivel Seat
Chevy Astro Camper Van Build: Shelving & Storage
Chevy Astro Camper Van Build Phase 12: Shelving & Storage

Tools & Materials
Materials:
Tool Box
Cargo Netting
Bungee Cords
Dimmer Switch For LED Puck Lights
12v DC Dimmer Switch
12v LED Light, Flush Mount
Shock Cord
Sikaflex 715
Wire Loom
Spax Construction Screws
Tools:
Dewalt Oscillating Tool
Dewalt Angle Grinder
Dewalt Orbital Sander
Dewalt Cordless Impact Driver
1/4″ Drive Quick Release Bit Extension
Wire Wheel Attachment
Air Tools
Craftsman Socket Set
Long Clamps For Woodworking
Hole Saw Kit
Speed Square
Video – Chevy Astro Camper Van Build: Shelving & Storage
Project Overview: Shelving & Storage
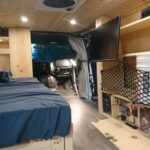
The main components of the van build are now done. I have insulation, flooring, walls and ceilings. The All of my electrical components are in place. I have a bed. Basically, all of the things I need to function are done. Now, it’s time to turn the rest of the available space into usage storage.
Shelving and storage in a camper van takes some thought. Making use of vertical space is probably the single most useful thing I can tell you about planning your shelving and storage layout. You need a place to store things, while not compromising floor space, if possible. The deeper your shelves are, the more interior space you lose. So it’s a compromise.
I chose to build shelves above my power center and behind my bed. Additionally, I’ll have plenty of storage under my bed. The shelving above the power center will be for my clothes, hiking gear, food, camera gear, toiletries etc. The shelves next to my bed will be for things like my glasses, remote control for media center, hat and various odds and ends that come and go in the cubby holes. The shelves between the bed and driver’s seat, that go floor to ceiling, will be for books, food and various things I want to keep close to me as I drive. The bottom section of the shelves will be open, to access the deeper space behind it, and taller. Here, I’ll keep my backpack that I store my laptop in.
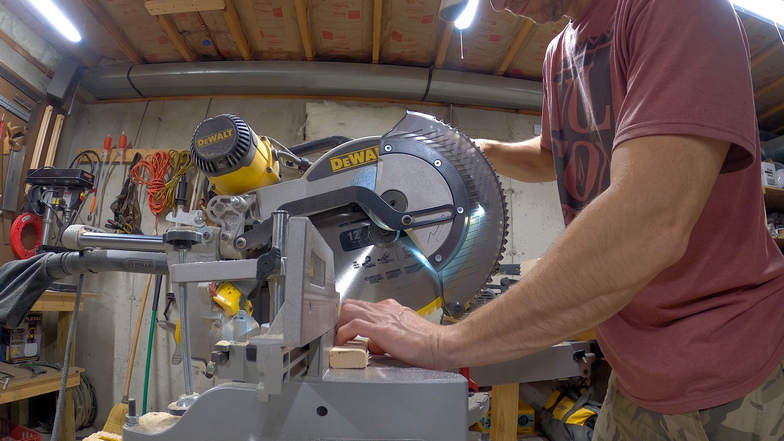
Building the shelves, as well as all of the other woodworking projects in a camper van build, is much easier with a good workshop. I had access to a nice compound miter saw with sliding arm, table saw, belt sander, drill press, router… basically most things needed for woodworking. At a minimum, you need a table saw to rip long boards, and a miter saw (or circular saw) to do chop cuts. To make cuts that follow the contour lines of the van, it’s pretty necessary to have a jigsaw.
I highly recommend sanding the edges of all of your shelves down and rounding off the sharp corners. With sharp corners/edges, you WILL cut and nick your fingers, knuckles and hands from time to time as you reach into the shelves to grab something. It’s a nice touch to add extra comfort to your setup. I’ll be living in this camper van, so better make it comfortable.
Underneath the bed, I’ll store things like tools, towels, hiking and fishing gear, and a tray or two dedicated to my rock and mineral finds. I’ll use a series of open-top baskets/trays for this. It’s a bit of trial and error, buying a bunch of them from the store, and seeing which combination of bins fits the best for my space. Then, I just return the ones I didn’t use.
Build Shelves Above Power Center

Building the shelves above the power center
First I start by cutting a 1×10 piece of select pine board for the vertical ends of the shelves. Because the wall is curved, I’ll need to trim off a bunch of wood along the ceiling and upper part of the boards. This takes at least 10 trips to my basement workshop and back to get right. I trim off a little at a time, mainly using a jigsaw. I’ve screwed down a board across the wall behind the shelving, and this provides a smooth surface for the vertical sides to butt up against, making the trimming somewhat easier as it follows a consistent curvature at the top.

I cut this funky piece (above) to fit around some wires on the ceiling. This piece gets screwed to the ceiling, and provides the horizontal surface for the vertical shelf ends to screw into.

The shelves are pretty basic. I made the bottom one tall enough to fit a 5 gallon bucket, since I’ll be carrying one often on my rock and mineral hunting adventures. I made the middle shelf tall enough to fit a box of Triscuits, and the top shelf gets whatever’s left. Spax construction screws of course, you know by now how much I love these. Notice the space I left on the end. I’ll use this for something else, later on.

Above you can see how I added another cedar plank to hide the ugly transition from ceiling to shelves. This (thankfully) doesn’t have to look too nice, since things on the shelf will hide most of this.
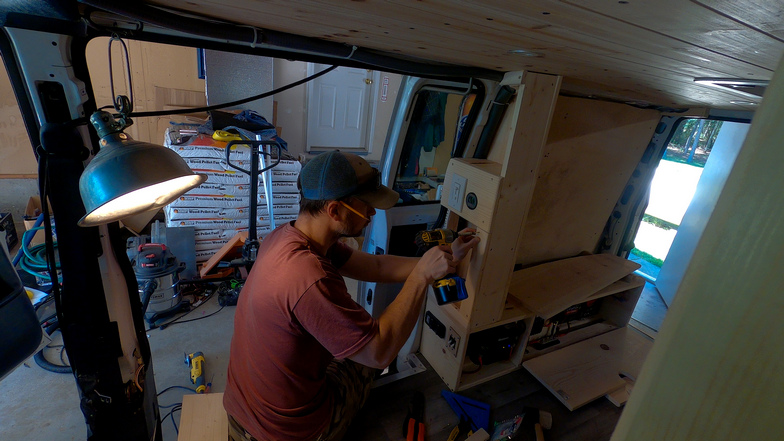
Build Shelving On Side Of Power Center

Like the other side of the power center, I decided to bring the sides in a bit from the ends of the power center. Especially here, where It’d be really nice to have some sort of storage space right here when I open the sliding side door to my van. So, I’ll build some cubby holes and shelves here. First, I need to build a frame. This gives me something to screw the vertical side boards to. Also, I’ll be mounting a swinging arm for my TV monitor here later, so I need this spot to be really sturdy. I use a 2×4 here for this, running vertically.

Next I cut a frame for the top shelving to sit on. Then, I cut the shelf that sits on top of the frame. You can see the odd shape of it in the photo above. Everything in a camper van build is a custom cut piece, like this.

Next I cut a board to mount my dimmer switch for the LED puck lights and battery monitor to. I fasten this to the side of my shelving and run my wires. I use an oscillating tool for the square hole, and a hole saw for the circular one.
After wiring up the dimmer switch and battery monitor, you can really see what a good location this is for these things. Right there when I open the sliding door on the van, which is how I always enter it. I add some trim pieces of wood along the edges of the vertical board, which turns the side shelving into a cubby hole of sorts. It will make a great place to store things that I use every day, and will need as I enter and exit the van… toothbrush and toothpaste, soap, hand wipes, watch, light, knife, etc. Additionally, I’ll use this space to lay my chargers and charging cables in while they are being charged or not being used.
Building Shelves Behind The Driver’s Seat

These shelves will go from floor to ceiling. They will only be as wide as the distance between my bed and the driver’s seat. Those who like to lean their seat way back won’t get much shelf space. A modest lean gives more storage space, so that’s what I go with. Again, I use select pine boards from home depot here. I use 48″ clamps to keep the boards together while I lined them up. I use the tall board in the back to keep the three side boards straight and aligned.

I fasten the boards together using spax construction screws. I know I’ll put some books in the top shelf, so I use them to make sure there’s enough vertical height for them.

Above, I’m laying the back piece for the shelves. I want the bottom part of the shelf to be taller, and not have a back to it. This will allow me to storage things deep in the cavity behind the shelves, under more shelves that I’ll build later, behind/above my bed.
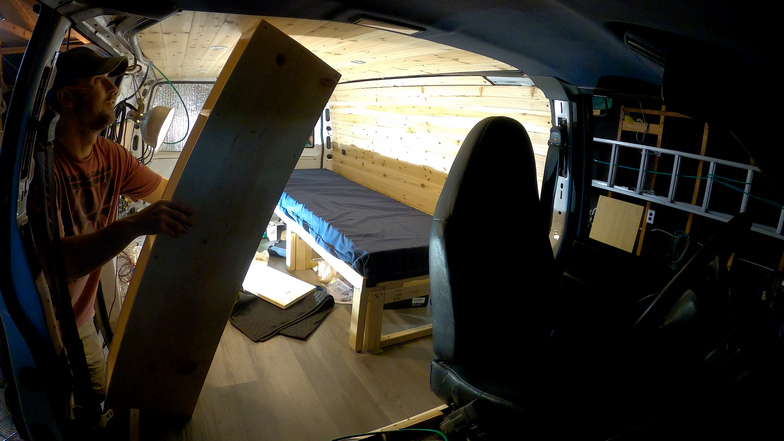
When I try to put the shelves in the van, I realize they don’t fit. Well, the dimensions are right, but I forgot to account for the fact that I would need to turn/twist the shelves to fit them into the space I want them in. This can’t be done when the shelf has a width of 12″ or whatever, it can only be done when the shelf has no top and side pieces. So, I need to putt it out, disassemble it, and reassemble it in the van.

I’ve gotten the shelf in place and standing upright, and have put the top piece back on at this point. Now, I need to fasten the side board again, before I can slide the shelf into place behind my bed.

After reassembling the shelf, it slides into it’s place perfectly. You can see how the bottom is open, hopefully this makes sense now. I can easily access that “large” space for storage because the shelf has no back to it there.

The photo is dark, but it shows the two 12v outlets I wired in here at the top of the bottom opening. These plugs will power my fridge/cooler and my laptop
Sanding Edges Of Shelves

Sanding the edges of your shelves and woodworking inside the van is a nice touch to a camper van build. Don’t scoff at this. You will be living in this van for weeks and months on end, and every time you reach your hand into the shelf to grab something, you’ll appreciate the rounded corners over sharp, jagged edges and splinters. I use a belt sander and/or orbital sander to round the edges of my shelves.

Using an orbital sander to round the edges of my shelving
Build The Shelves By My Bed

Now I’, left with a space behind my bed, between the backside of the shelves I just built and the wall. For this space, I plan to build another series of shelves for storage. The design is simple: I’ll build a frame out of 1x2s, screw them together, and slide/wedge it in place between the wall and shelves, the screw it to the backside of the shelves. I won’t screw it to the wall at all, so it will just be held by the screws on one side, along with the force of being wedges in-between the wall and shelves.

Above, I’m sliding the shelf’s frame into place. I’ll be able to add a support board below the frame on the wall here, because there is wood behind the wall here for support. But, not so higher up.
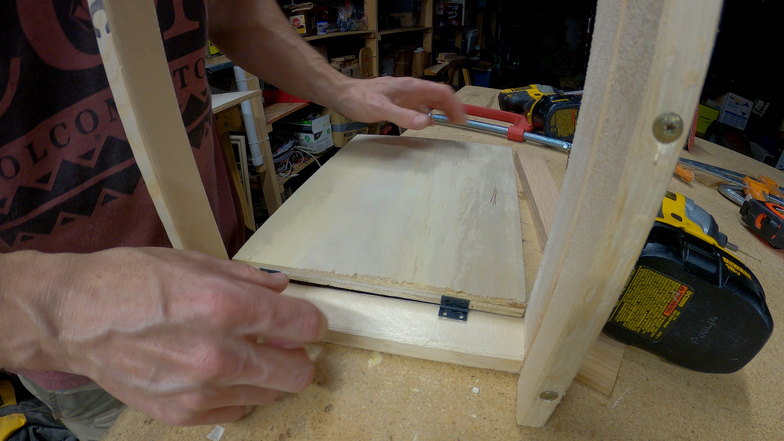
I want the bottom part of this shelf to open, so I can access the storage underneath, from my bed. At first, I use hinges, as shown above. However, these hinges are not going to hold up long-term. These are tiny screws biting into the side of plywood. It’s just not going to last.

Instead of the hinges, I use blocks of wood below the top part of the shelf for support. These blocks of wood allow the top part of the shelf to rest perfectly flush with the bottom of the shelving, and act as a stopper. I attached a thin piece of fabric to one side of the top piece, so all I need to do is pull this up to remove the top when needed. No hinges are necessary, the top just moves freely when needed.

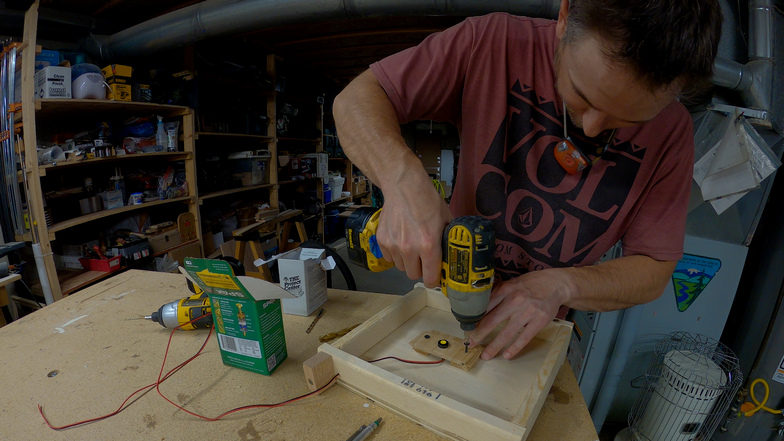
Next, I build another similar frame and shelf system for the middle. This one, and the shelf above that, will have Flush Mount LED LIghts built in, to light up the cubby holes. Obviously I cant just drill through the bottom of the shelf itself to mount the light, so I build a mounting system that gives me a little clearance. A couple of scrap wood pieces accomplish this. I drill a hole in on, to mount the light through. Other wood pieces below this are cut to a half circle shape, making spacers behind the wood piece with the LED light in it. I route the wire through a hole drilled out the back of the shelving, which will run towards the backside of my driver’s seat.

Above, I install the dimmer switch for the LED lights in my shelves. The dimmer switch unit is square, so I had to cut a square-ish hole into a block of wood to mount the dimmer in/on. Then, I use drywall screws to fasten it to the wall.


Next I’ll cut a thin board to finish off the backside of the shelves, behind the driver’s seat. This wood becomes the back of the shelves I just built above my bed. I start by making a template out of cardboard, and transferring it to the board. I use a jigsaw to make the cut. This takes several attempts, taking a little off at a time, to ensure I don’t take too much off and ruin the board. Eventually, it slides into place for a fairly tight fit. You could use many things to secure this board, such as panel nails, tack nails or Wire Nails.

Above is a look at the shelves above the bed, complete. Because I hadn’t run wire behind the cedar plank for the simmer switch, I had to run my wire on top of the panel, a much less desirable solution. I made it look OK by wrapping it with some wire loom. Also notice the MaxxFan’s remote mounted here. I used a rubber/neoprene type material to line the bottom shelf with for grip. I also placed some little hooks on the underside of the middle shelf, to hang things from.
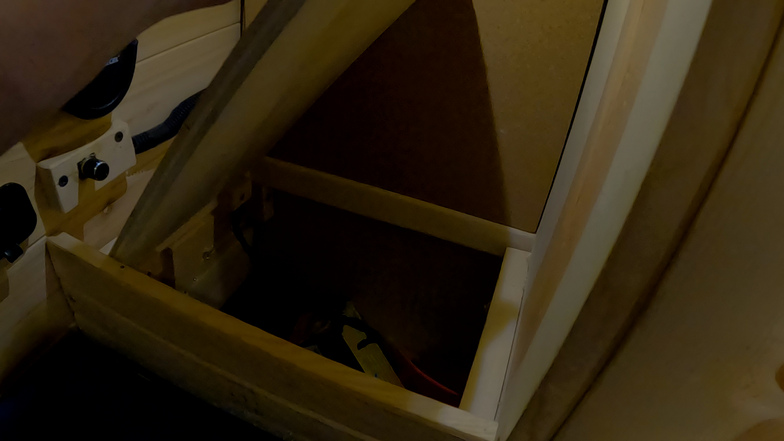
And finally, above you can see the bottom piece of my shelf and how it flips up to access storage underneath.
Netting For Shelving


So you’ve built yourself some shelves. But how do you keep stuff from falling out when you drive? Especially down rough dirt roads? Well, this is my solution; nails and Shock Cord. I used nails on the side faces of the shelves, and ran flexible shock cord in between them. This works really well. You can customize this setup to fit your needs… more or less tension, many rows of shock cord or only a few, or only running the shock cord across part of the opening (just the bottom half, for example). It sacrifices zero space from the shelves and costs very little. Shock cord has many great uses so I keep it around for other things too, especially my hiking gear.


For the larger shelves, above the power center, shock cord isn’t going to work. It works great for smaller spaces with less tension. For my largest, lower shelf, I’ll just use this Cargo Netting. This works great here, because many things I’ll put on this lower shelf (like clothes) actually stick out past the shelf itself, and the flexible cargo netting allows the storage space to essentially expand to fit your needs, within reason of course. The cargo netting came with a ton of these awesome plastic J-hooks, which I haven’t seen sold anywhere else expect through the manufacturer that makes the cargo netting (Organized Obie). Obie sells the J-Hooks for $1.05 each, with a minimum order of 10, and they don’t come with the screws. So when I rain out, I just bought some screw eyes instead, as these are cheap and easy to find anywhere. I used the J-Hooks and screw eyes to attach a bungee cord across the opening of the top two shelves. This provides enough surface area and tension to keep things in my shelves in place. I try to use bins, trays and boxes to store small items, instead of loosely placing them on the shelf. By Only placing bins and trays in the shelves, it’s easier to keep everything in place as well as organized.
Storage On Rear Side of Power Center Shelving


Above, you can see how I built the shelves in from the edge of the power center. So what will I do with this space? I use it to store taller, vertical items; fishing pole, ice axe, tent poles, etc. I also have a small garbage can attached here with a bungee. I store extra grocery bags here (for my garbage can), fishing reels, and a few other things.
Storage Under the Bed

The space under my bed is perfect for bins that can be slid underneath. The trick is finding the right combination of bin sizes for your space and needs. You can try to guesstimate while in the store, but ultimately, you’re better off just buying a bunch of various sizes and actually fitting them together under the bed. I just returned the ones I didn’t use.


You can see the wood blocks in the photo above. I made these out of oak, and had run a 1″ board in-between these blocks to keep the bins from sliding out from under the bed. However, after a month or so on the road, I realized the boards don’t really do anything for me, as the bins aren’t sliding around much, if ever, even under the worst of conditions. So I removed the boards, but kept the blocks, the blocks do sometimes catch the bins on the edge from sliding and keep them in place. There’s often enough tension between the bins themselves that that these blocks of wood on the outer edges are just enough provide a little help, while not being in the way at all. So, I just left them there, for now.
Previous Van Build Project: 11 – Power Center | DIY Stealth Camper Van Build Index | Next Van Build Project: 13 – Dometic Electric Cooler
Chevy Astro Camper Van Build: Power Center
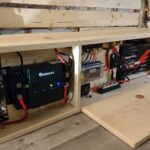
Chevy Astro Camper Van Build Phase 11: Power Center

Tools & Materials
Materials:
100a Lithium Battery
Battery Monitor
Renogy 12V 50A DC-DC MPPT Charger
Blue Sea Systems Battery Shut-Off Switch
Blue Sea Systems 12v Outlet
Blue Sea Systems 2-Socket Panel
Blue Sea Systems 60a Circuit Breaker
Blue Sea Systems 70a Circuit Breaker
Blue Sea Systems Toggle Circuit Breakers, 20a & 80a
Blue Sea Systems Terminal Fuse, 150a
Blue Sea Systems MRBF Terminal Mount Fuse Block
Blue Sea Systems Fuse Panel
Blue Sea Systems 250a Bus Bar (2)
20ft 4 AWG Flexible Welding Wire
100a Mini ANL Fuse Holder
12-10 AWG Ring Terminals 1/4″
12-10 AWG Ring Terminals 3/8″
4 AWG Copper Ring Terminals 3/8”
4 AWG Copper Ring Terminals 5/16”
12v LED Light, Flush Mount
12v DC Dimmer Switch
Dimmer Switch For LED Puck Lights
Spax Construction Screws
5/16″ Grommets
Heat Shrink Butt Connectors
Wire Crimp Connectors Kit
Spade Fork Terminal Connectors Kit
Tools:
Dewalt Cordless Impact Driver
1/4″ Drive Quick Release Bit Extension
Dewalt Oscillating Tool
Craftsman 3/8 Drive Drill
Craftsman Socket Set
Dewalt Compound Miter Saw
C Clamps
Heavy Duty Wire Lug Crimpers, 10-0 Gauge
Heat Gun
Wire Stripper/Crimper
Klein Tools Cable Cutters
Step Bit
Speed Square
Video – Chevy Astro Camper Van Build: Power Center
Project Overview: Power Center
The Power Center is the enclosure I’ll build to house all of the major electrical components. All of the van’s wiring will be routed here. The major components are the DC Charger, Lithium Battery, DC Fuse Panel, Circuit Breakers, Bus Bars and a master shut off switch. The power center will have two toggle switch circuit breakers, to turn on/off charging via solar and alternator. There will also be 5 12v outlets installed in the power center.
I’ll need to figure out the most space-efficient way to mount the electrical components. Much trial and error is needed to visualize the optimal layout and design. I originally wanted to include a 1000w inverter, but I couldn’t find a good place to mount it, and decided against it. I ultimately chose to buy a 500w inverter, the kind that’s portable and not permanently mounted. Long term, I am happy with this decision.

I busted out the crayons and drew this diagram of my electrical wiring to help visualize what’s going on. Once you settle on your major components, it’s time to go shopping. Home Depot doesn’t carry practically any of this stuff, but it’s there on Amazon.
Power Center Layout & Design
The first step is to layout all of the components and see how much space they will take up. Things to consider: packing the components into a small a space as possible, keep wires as short as possible, and access to components like circuit breakers. The design of this box takes a lot of thought. What is the best way to utilize this space, given the awkward size and shape of the wheel well? How can I mount these components so that they are protected and out of the way, but also accessible for maintenance?

Playing around with the layout of the power center

That big inverter has got to go…
To start, I lay out my lithium battery, dc charger, fuse panel, circuit breakers, bus bars and a 1000w inverter. I toy with a design that places all of these components on the back wall, and building shelves out over this. Mainly, it’s the big inverter that takes up the largest and most inefficient use of space. I begin to seriously question how much I need the inverter, and ultimately give up on it. Instead, I decide to buy a 500w inverter that’s portable. I can plug it in via 12v DC or direct to the battery with little jumper cables. It takes up less than half the space as the Renogy 1000w Inverter, and I come up with a great storage spot for it later on.

Visualizing the layout of the box. Those components will be mounted no higher than the battery, in an enclosure around the wheel well
Next, I start thinking about a design that has all of the electrical components inside one large “box” that fits around the wheel well. I use some 1×2 boards to visualize the size of the enclosure. I am starting to like this design.

Designing the power center enclosure

I begin cutting 10″ pine board and make two side pieces, and use a scrap piece to simulate what the front would look like. Yup, this is going to be my design for the power center.
Building the Enclosure

Enclosure layout
I start framing out the box with the side pieces connected by a board on the floor, cut to fit in front of the wheel well. I’m using select pine board from Home Depot. I’m using the boards I’m using for the largest faces of the enclosure are 1×10 select pine boards from Home Depot. For other parts of the box, I’ll use 1×6, 1×4, etc. I’m using spax construction screws to fasten these boards. Cabinet screws are also a good choice, as they have a flatter head, pulling the boards together tightly without the screw head cutting into the board itself. The downside is that the heads of the screws may stick out a little more than the regular construction screws.


The metal bracket in the center joins two boards together to make one piece
Next, I’ll use metal brackets to join two boards together, creating one board, that will become the mounting board for my DC Charger. This mounting board will sit against the wheel well, and will be recessed in from the front face of the power center enclosure. This will allow the DC Charger to sit flush with the front of the power center when it’s mounted.

The enclosure for the power center
Mounting the DC Charger

The DC charger will be mounted so that it sits flush with the front of the power center
The DC Charger needs to be visible, because it has LED lights that tell me if it’s on, working properly, and charging my lithium battery or not. But, I want it to be out of the way as much as possible. There are also several 4 gauge wires that need to be routed to and from it. I decide to build a little box around it, essentially, but leave the front open. The cables can pass through on the sides. I prop up the DC Charger with some boards and screw it to the pine board with some spax screws. That’s it for now, until I make some cables to connect it.
Electrical Components Layout
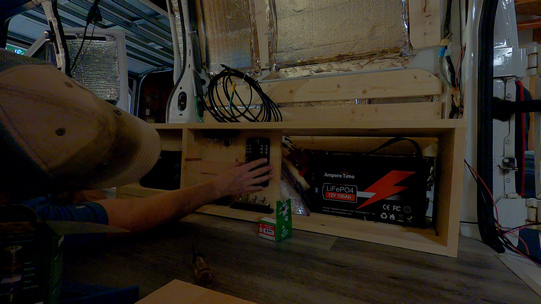
Moving the components around to test for the optimal layout

Hole drilled for running 12v circuit wires from back to front of the enclosure
More layout issues. I’ve made the box with a general idea of where the electrical components will go, but now it’s time to do the actual trial and error work of laying them all out in my available space. It helps to visualize the flow of power, from the lithium battery, through the main shut off switch, to the bus bars, the circuit breaks, and to the main components (DC Charger, DC fuse panel). Then you can see which component needs to be placed first inline, and how long the wire connecting one component to the next will roughly need to be.
Once I’ve fine tuned the layout, I start screwing down the bus bars and circuit breakers. In the bottom photo, you can see a hole I drilled through the pine board in the center of the Power Center. This will be used to route wires from the rear of the enclosure to the front. All of my 12v circuit wiring will come in through this one hole, making for a clean installation. Try to be conscious about doing a clean and tidy installation. You don’t want a rat’s nest of random wires tangled up in your power center. When you have problems later on that need to be troubleshooted, or when you want to add to or modify your electrical setup, you will thank yourself when the wiring is ran in a clean, efficient manner.
Installing the Battery Monitor Current Sampler

The current sampler for the battery monitor
Next, I’ll install the battery monitor’s current sampler. This thing is exactly what it sounds like: it samples the current, and sends it to the battery monitor. The two big lugs on top are for the for the negative cable coming directly off the battery. The actual current is measured by a smaller gauge positive wire. The ring terminal goes on the battery, before/after the fuse. I’m using a Blue Sea Systems MRBF Terminal Mount Fuse Block with a 150a Terminal Fuse.

Mounting the battery monitor’s current sampler
Making Cables & Connecting Electrical Components

Tools and materials for making 4 gauge cables
Next I’ll start on making cables to connect my electrical components together. I’m using 4 gauge flexible welding wire for most of these cables. This wire has an amp rating of 100-150 amps, far more than I’ll need for any single component in my setup. You’ll need Heavy Duty Wire Lug Crimpers, a Heat Gun, razor blade, and Cable Cutters for this next part. You’ll also need 4 AWG Copper Ring Terminals and heat shrink tubing (if this doesn’t come with your ring terminals already).

Trimming off the end of the insulation on the 4 gauge wire

Crimping on a 4 gauge ring terminal

Using a heat gun to apply heat shrink to the cable
First I’ll start by making the cable that connects the positive terminal of the battery to the input side of my master ON/OFF switch. I’ll use a razor to cut off about 3/8″ of the insulation from the end of my 4 gauge welding wire. Next, I’ll slide a piece of heat shrink tubing over the wire. Then, I’ll place a 4 gauge copper ring terminal over the end of the exposed part of the wire, and crimp this down using the heavy duty lug crimpers. This tool is absolutely necessary to get a good connection and crimp. Don’t think you will get by using a pair of pliers or something, it’s not going to cut it here! Then, slide the heat shrink tubing over the ring terminal, and use your heat gun to put the shrink on that heat shrink tubing. This provides further protection from the elements and anything touching the exposed part of the wire that may or may not be covered up by the entirety of the ring terminal. Plus, it makes your install look really clean and professional.

Cutting the 4 gauge cable with cable cutters
Next I’ll cut the cable to length, and put another ring terminal on the other side of the wire.

Keep them cables short!
Some of the terminals in your setup may be 3/8″ and some may be 5/16″. You may need one or the other, or both, of the ring terminal sizes throughout your setup, so be aware of that. They don’t sell this stuff at Home Depot or Auto Zone, so you need to plan ahead and order these things from Amazon, unless you have some excellent local electrical supply store or something.

Crimpin’
Above, you can see the wiring coming together now in the power center. You can also see that you need to consider the angle at which you crimp on your ring terminals, especially on such short runs of cable. The two ends might be facing totally different directions, so ALWAYS crimp one end on at a time, and recheck the position of the other end before crimping that one.
Install Toggle Switch Circuit Breakers

Oscillating tool to the rescue
Next I cut the hole in the side of the power center for my toggle switch circuit breakers. I’m using a Dewalt Oscillating Tool for this, the perfect tool for the job. I highly recommend buying one for your van build, if you don’t own one already. There will be multiple instances where this tool comes in handy. It allows you to cut very straight and precise cuts in tight environments. There are multiple attachments and uses, but just for it’s unique cutting abilities, I use it all the time. It makes quick work of cutting a hole for the toggle switches to sit in.
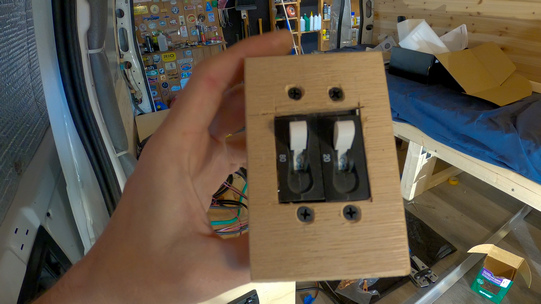
Toggle switches for solar and alternator charging
These are circuit breakers that are meant to be used like toggle switches. The 20 amp switch will be the master ON/OFF switch for solar charging, and the 80 amp switch will be the master ON/OFF switch for alternator charging. I made a mounting plate for the switches out of some scrap wood. It’s not the prettiest, but it works. And, it looks better from afar!

The switches slide right into the hole, a great fit. On the backside, I’ll connect the cables to the correct switch. Coming into the 20a switch from the ceiling, I’ll attach the 10 gauge cables coming from my solar panels. I’ll use a 4 gauge cable (out of convenience, because I have so much of it) connecting the 20a switch to the DC charger. Coming in from the ceiling, from the vehicle’s battery under the hood, I connect the 4 gauge wire from the battery for alternator charging to the 80a switch. I’ll use 4 gauge wire to connect the 80a switch to the DC charger.
Install 12v Outlets in Power Center Enclosure

Power center with toggle switches and 12v outlets installed
I added some 12v outlets to the sides of my power center. You can separate yours into however many circuits as you’d like. The Blue Sea Systems 2-Socket Panel comes with the necessary wiring to wire two outlets together like this, but the Blue Sea Systems 12v Outlet are sold separately.
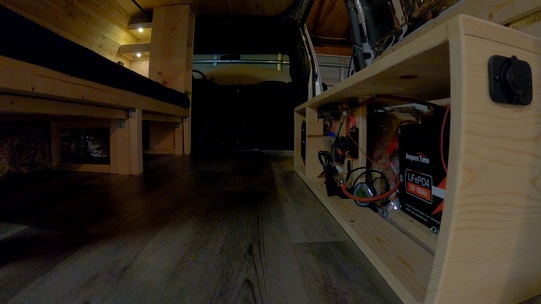
12v outlet installed on the rear of the power center
Connect 12v Circuits to DC Fuse Panel

Crimping on spade fork connectors for the DC fuse panel terminals
That hole I drilled through the pine board earlier? Now it’s time to run all of my 12v circuit wires through it. This hole not only provides a way to pass the wires from the front of the back of the enclosure to the front, but also to route them cleanly through on location. The terminals are just below the hole, so it’s a short run and most of the wires sit behind the power center, out of sight. The 12v circuit wires are all 14 gauge, so I use Spade Fork Terminal Connectors for 14 gauge wire. I crimp on the appropriate size spade fork and make the connection to the terminals on the fuse panel. Easy. Also, don’t forget to label your circuits on your fuse panel. The fuse panel should come with stickers for this… use them!
Choosing The Right Size Fuses For DC Fuse Panel
My fuse panel uses the standard sized fuses, and like many people, I already had a drawer full of these amongst my automotive stuff. Fuses are kind of pricey to buy from AutoZone and such, but pretty cheap on Amazon. There’s always your local pick n pull junkyard, too.
It will be up to you to choose the correct size fuse for your 12v circuits. How do you do that? Well, think about how many amps your end appliance will draw. For example, my LED puck lights. I have four 3W lights, for a total of 12w. These lights will draw less than an amp when on with dimmer set to 100%. You want to choose a fuse that is rated for more amps than you will be using, but the smallest amount over what you’ll be using at the same time. For example, a 15 amp fuse is way to high for my LED puck lights. Why? Because if there’s a short in the circuitry and 15 amps are pushed through the circuit, that much juice may damage the LED puck lights, and could melt the thin wires coming off the LED lights. Instead, a better choice for a fuse would be something like 2 amps. That’s much less likely to fry the LED lights or the wires if too many amps slip through.
Now, for something like an outlet, you don’t know how many amps are going to be drawn. That’s up to the appliance you plug in. So here, you should consider the wire you are using in your circuitry. I’m using 14 gauge wire, which is rated for 15 amps. So I’ll use a 15 amp fuse.
Making a Magnetized Access Door For The Power Center Enclosure

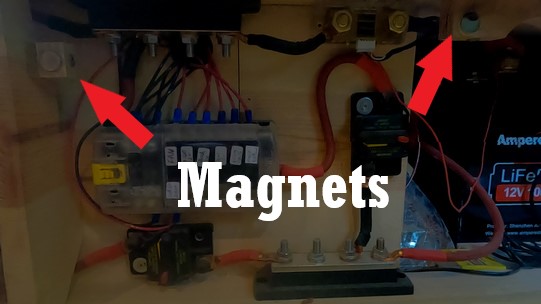
Power center door held in place by magnets
I made a door for the power center that is attached to the enclosure via a hinge on the bottom. I cut out a circle near the top to grab when opening the door. Behind the door, I attached a few blocks of wood to act as stoppers for the door, so it sits flush when placed against the stoppers. Also, I attached magnets to the outer facing edges of the wood stopper blocks. These magnets will contact plates of metal on the inside of the power center’s door when closed. A couple of these magnets together is strong enough to keep the door in place on even the roughest of dirt roads.
Installing the Battery Monitor

AiLi Battery monitor
The battery monitor is technically installed in the next phase, after I’ve built the shelving. But since it it directly related to the power center, I’ll include it here. I cut a hole in my shelving, next to m dimmer switch for the LED puck lights near the side of the van, and install the battery monitor. I’m using the AiLi Battery Monitor, which has a reputation of being a good bang-for-your-buck battery monitor. This essentially connects to the battery monitor’s current sampler, that I installed earlier. One thing to note about this monitor is that whenever power is being drawn from, or charging to, the battery, the green backlight will illuminate on the screen. This is very annoying at night, as it lights up the entire van. You’ll want some way to cover this up at night.
Previous Van Build Project: 10 – Electrical Wiring | DIY Stealth Camper Van Build Index | Next Van Build Project: 12 – Shelving & Storage
Chevy Astro Camper Van Build: Electrical Wiring
Chevy Astro Camper Van Build Phase 10: Electrical Wiring

Tools & Materials
Materials
Blue Sea Systems 12v Outlets
Blue Sea Systems 2-Socket Panel
100a Mini ANL Fuse Holder
12-10 AWG Ring Terminals 1/4″
12-10 AWG Ring Terminals 3/8″
12v LED Light, Flush Mount
12v DC Dimmer Switch
Dimmer Switch For LED Puck Lights
Spax Construction Screws
5/16″ Grommets
Heat Shrink Butt Connectors
Spade Connectors Kit
Wire Loom
14 Gauge Stranded Electrical Wire
Non-Twist Wire Connectors
Painter’s Tape
Gorilla Glue
Battery Post Extenders
Tools
Dewalt Cordless Impact Driver
1/4″ Drive Quick Release Bit Extension
Craftsman 3/8 Drive Drill
Craftsman Socket Set
Dewalt Oscillating Tool
Dewalt Compound Miter Saw
C Clamps
Heat Gun
Wire Stripper/Crimper
Klein Tools Cable Cutters
Step Bit
Video – Chevy Astro Camper Van Build: Electrical Wiring
Project Overview: Electrical Wiring
**I am not an electrician, and the information I’m sharing here in this post is not meant to be regarded as professional advice. I will not be held liable in any way for harm done to yourself or others by use of the information presented here in this post.**
I’m splitting up the electrical wiring phase of the project into two posts: this one (Electrical Wiring) and Power Center. The power center is where most of the major electrical components are housed, and requires building a cabinet. So I figure, that ought to be its own post. Here, I’ll be talking about the wiring of the 12v electrical system (the lights and outlets), as well as running the 4 gauge wires for my DC Charger (in the next phase) from the back of the van to the engine compartment. This will allow me to charge the house battery via the van’s alternator.
Electrical wiring is something that is not done all at once in a van build. You will find yourself doing a little bit of wiring throughout much of the van build process. I ran what wiring I could prior to installing my walls and ceilings. Then, I connected my 12v lights and sockets while installing my walls and ceilings. Then I had to build my “power center”, where I installed more outlets. Then I built some shelving, and these shelves had more lights, outlets and switches installed in them that needed wiring as they were built. So you see, wiring is something that should be considered throughout the entire build.
For my 12v lights and outlets throughout the van, I’ll use 14 gauge wire. 14 gauge wire is capable of handling up to 15 amps, which is about double what I could possibly use, given my setup, for any one outlet. All of my wiring runs will be less than 20ft, so amperage loss over long runs is not much of a worry.
All of my outlets will be Blue Sea Systems 12v Outlets. Blue Sea Systems makes marine grade electrical components, which means they are a little more water friendly than typical household electrical equipment. I’ll have several 12v sockets throughout the van in various locations. I’ll use 3w LED puck lights in the ceiling, which I’ll control with a dimmer switch. I’ll also have some small LED lights that I’ll build into the shelves by my bed, and I’ll control these with a dimmer as well.
Running the 14 Gauge Electrical Wire
The first step in electrical wiring is figuring out where you are putting what, electrical-wise. Where will I install my 12v outlets? How many will I need? What type of things I will I be plugging in, and how much current will they draw? These are all questions you will need to figure out before moving forward with your electrical wiring.

14 gauge wire

Wires ran in the beams along the ceiling

Running wires through the open cavity of the body
Now that I have my wall insulation in, I can install my electrical wiring over this. You can read up on the debate between stranded wire and solid wire for your van build, but I chose 14 gauge stranded wire. Mainly, because it’s more flexible, and infinitely easier to run in a van build than solid wire.
I know where my power center will ultimately go, which will house my lithium battery, dc charger, fuse panel etc, so all of the 14 gauge wires that I’m running for my 12v circuitry will all be routed to the same place: the back of the van, on the passenger side. I run wires through the beams on the ceiling to get to the driver’s side, and just use some tie wraps to keep them in place here. I had to drill through the metal beam a couple of times for the wire run, and I used rubber grommets here to protect the wire from the sharp edges of the metal along the hole.
I route the wires through hollow parts of the body where I can. This is pretty easy to do throughout much of the van, especially in the rear. The wires are well protected in here as well and don’t require much work to secure. Tie wraps work pretty well here.
Splicing off to multiple locations…

Some of the wiring I’m doing requires some splicing. A good example of this is the shelves I’ll build at the head of my bed. I’ll run one 14 gauge wire here, which I’ll splice off into three 12v outlets and two LED lights. I use some non-twist connectors for an easy, push-in splice job.

14gauge wires for LED puck lights taped to ceiling, ready for cedar plank installation
The wiring for the lights is done in a daisy-chain fashion, so I run one wire from the power center to the first light, then cut short sections of wire to connect to the next light in the chain, and so forth. I use painter’s tape to tape them wires to the ceiling for now, until they are ready to be covered with cedar planks.
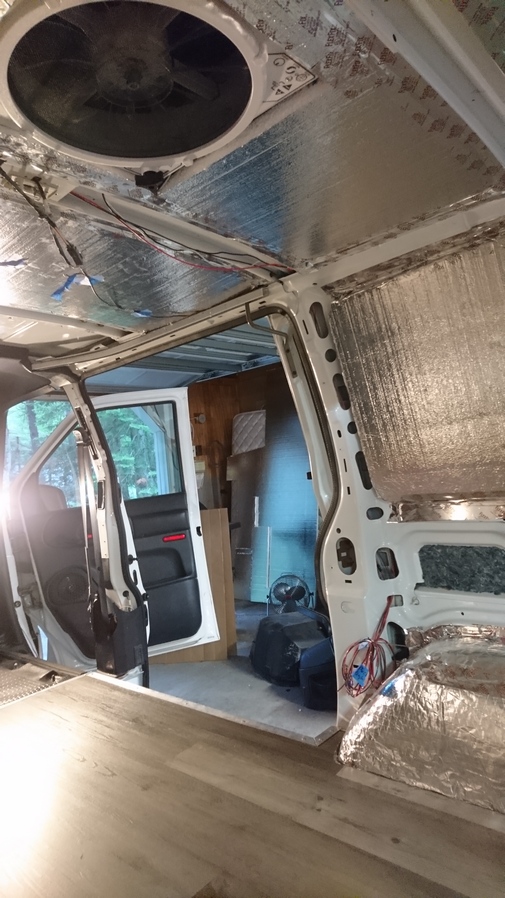
A few runs of wire routed here, to the future power center

I’m still not exactly sure where all of the components of the power center will actually go, so I make sure to leave a bunch of extra wire rolled up at the ends of my runs to the power center, just in case.
Installing the 12v Outlets

The 12v outlet will sit in that square hole, just below the bottom row of planks
Installing the 12v outlets requires something a little different at each mounting location. Some are easy, and some have less clearance on the backside. The 12v outlet at the head of my bed is a good example. The 12v outlet is a cylinder that’s a few inches long and about the diameter of a quarter. It fits into the square hole in the body, just below the bottom cedar plank on the wall above. However, it needs just a little more depth. I can’t make that hole any deeper, since that’s the outer skin of the van, but I can add a spacer between the cedar plank and the outlet’s mounting plate. This will raise the surface that the outlet sits on, and allow it to fit the depth.

Time to put a circle into a square opening. Me learning shapes…
In the photo above, the 12v outlet is wired up and the cedar plank is ready to go up on the wall. Notice the grommet in the wall to protect the wire. I used spade connectors to connect the wires to the 12v outlet terminals.
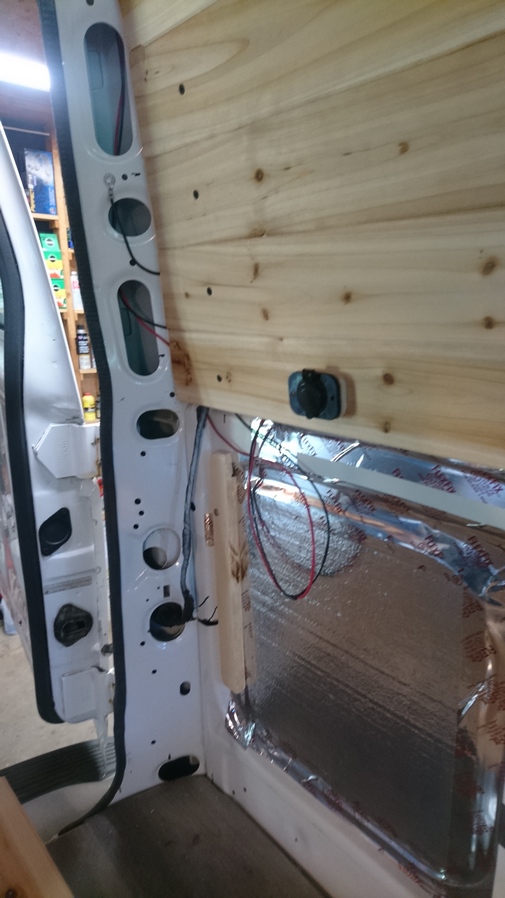
I made this wood spacer to go behind the outlet’s mounting plate to give me extra clearance in the rear

The wood spacer
In the photo above, you can get a better look at the wooden spacer I made here to be able to get the depth behind the wall I need to fit the 12v outlet. I used a belt sander to smooth the edges out as needed, to fit the shape of the mounting plate.


The above photo shows the wiring leading to two 12v outlets built in to the shelves at the head of my bed. I split the wires off here to provide power to two separate outlets.
Install LED Puck Lights

The LED puck lights have these metal springs that press down and hold the light in place

The LED puck light installation process
The wiring of the LED puck lights is easy: connect the red wires to red wires, black to black. So… there’s a pair of positive/negative wires coming into the first light, from the power center. I’ll strip off about 3/8″ from the end of my 14 gauge wire, and slide both wires into their own 2-port non-twist connector. Now if you’ll remember, I already cut wires to connect the rest of the LED lights, and taped them to the ceiling. So, all I need to do is take one end of the wire taped to the ceiling and insert them into the non-twist connector port connected to the first LED light. Then, connect the other end of those wires to another 2-port connector, and connect to the second LED light. Just keep moving down the line and connect all of LED lights together in the same fashion.
Install Dimmer Switch For LED Puck Lights

LED puck lights are controlled by this dimmer switch
I had to wait until my shelves were mostly complete to install the Dimmer Switch For LED Puck Lights. I used my oscillating tool to cut a nice square hole in the wood for the dimmer. The dimmer switch goes in-between the power center and the LED puck lights, so I just made a cut in my wiring at the appropriate location, and wired up the light. Your dimmer will have specific instructions for wiring, so follow the wiring instructions of your specific model.
Install LED Lights In Shelving
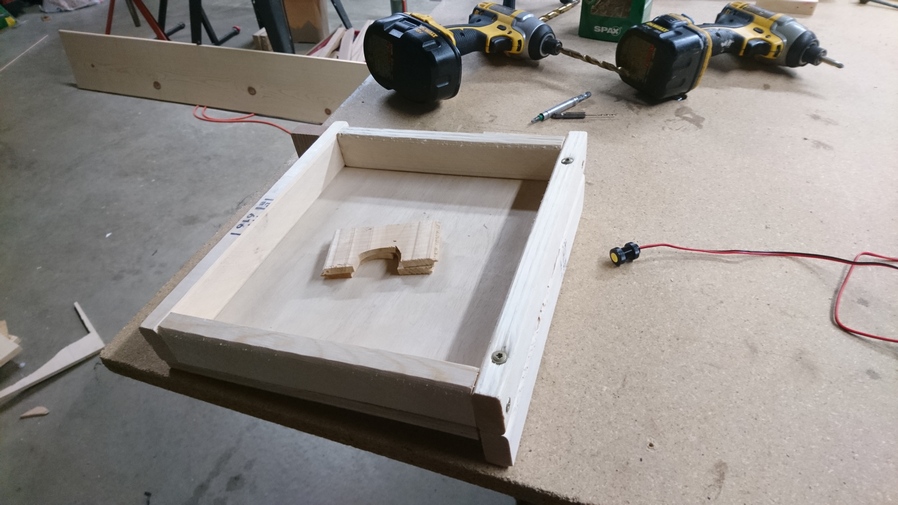
I had to build some special wooden pieces to mount my LED light under my shelving at the head of my bed. There is a certain amount of depth to the light, so I need to build up some space to gain the height I need. Much of the details here lies in the woodworking, rather than the wiring.

See what’s going on here? I made this cut out behind the quarter round for the wires to sit inside

I’ll glue these pieces in place
With the light mounted, I ran the wiring behind a piece of trim that I sanded the corner off of, to make a recessed area for the wires to sit behind.

Building a mounting plate for the LED light
Install Dimmer For Shelf Lights

The dimmer switch is a tiny little square piece, and I struggle to come up with a clean way to mount it. I end up taking a small block of wood and cutting a hole in it to fit the dimmer. I took some time to get the fit right, but it was tight and secure in the end. I also added some gorilla glue to bond the switch to the wooden mount.

Next I screw the wooden mount for the switch into the wall. I use two drywall screws for this. Be careful not to go too tight and crack your mounting piece, or the planks.

LED lights installed in the shelves, which you haven’t seen me build yet 🙂
Protect Exposed Wiring
For some reason, instead of using some type of junction box, I made some funky wood pieces to protect a couple of the connections in the wiring behind the driver’s seat. I took a drill to a 2×3 block of wood, and drilled out some cavities for the wiring to pass through. I don’t recommend this, but it worked, and saved a trip to Home Depot.

Don’t try this at home, kids
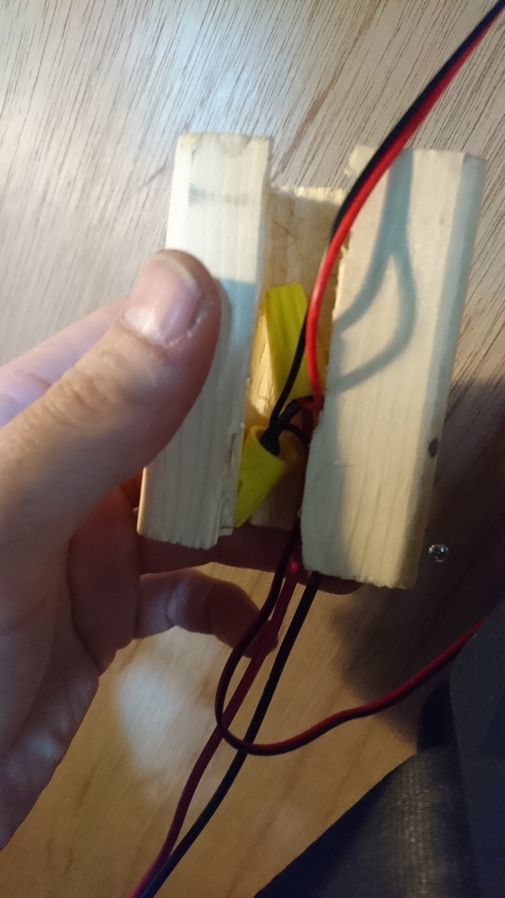
But yet, it serves its purpose

Wiring to shelving at head of bed, behind driver’s seat
Run 4 Gauge Wire For Alternator Charging
In the next phase of the van build, I’ll build the power center and will be installing a DC charger (more on how that works in the next phase). I’ll run the heavy-duty 4 gauge cables for that now. What I’m doing here with the cables is connecting the DC charger that I will be installing with the vehicle’s battery, under the hood.

Wires routed through the grey tubing, a flexible conduit
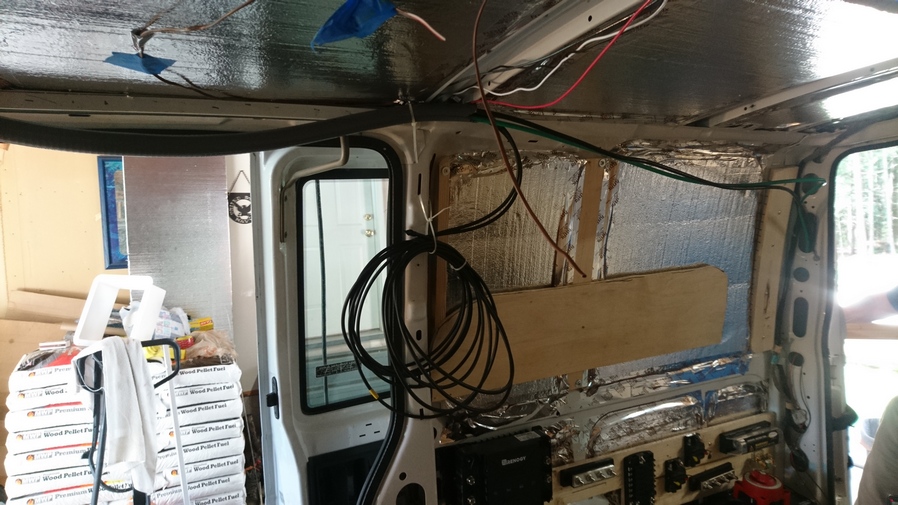
The green and black wires will be ran to the vehicle’s battery, under the hood
I used some flexible conduit to protect the 4 gauge cables as I ran the along the roof, alongside my side door, over to the head liner. I used some tie wraps to strap the conduit to the ceiling.

The cables will need to be routed above the headliner over to the A pillar

Wires ran down below the steering column
Next, I’ll need to run the cables above the headliner over to the A pillar. The A pillar is the part of the vehicle’s body that runs between the windshield and the front doors. This piece is usually held on by some clips, or possibly screws. Remove this and run the cables down the A pillar, and put the trim piece back on to cover up the wires.

Using a step bit to drill through the firewall

4gauge cables ran through the plastic plug into the engine bay
Next, I use a step bit to drill a hole through the firewall. I don’t want the sharp edges of my hole cutting the cables, so I insert a plastic plug into the hole. Then, I cut slits in the face of the plug and run my cables through that. That way, they are protected by plastic on all sides.

Connecting the ANL fuse holder

Finally, I pull the cables through the engine bay. I’ll install a 100a Mini ANL Fuse Holder and fuse in between the positive cable and battery terminal. This protects the DC charger from a high voltage spike. The negative cable gets hooked up to the negative terminal. I added some Battery Post Extenders to make it easier to add the extra connection to the post. When adding “accessory” connections to side post batteries, you may find yourself running out of threads for your bolt to grip after adding extra thickness (ring terminals, etc). The extenders help overcome that issue. But I’ll leave this disconnected until I’m ready to connect it to the DC charger, in the next step.
Previous Van Build Project: 9 – Solar Panels | DIY Stealth Camper Van Build Index | Next Van Build Project: 11 – Power Center
Chevy Astro Camper Van Build: Solar Panels
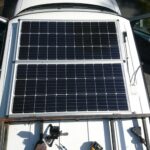
Chevy Astro Camper Van Build Phase 9: Solar Panel Installation

Installing two 100w solar panels
Tools & Materials
Materials
2 100W Solar Panels
Solar Panel Wires Roof Entry Port
Renogy 20FT 10AWG Solar Extension Cables
Solar Panel Y Branch Connectors
Spax Construction Screws
Adjustable Rope Hangers
Aluminum Tubing & Connectors
Sheet Metal Screws
Rivet Nut Set
Hinges
16 Gauge Sheet Metal Plate
Loctite Threadlocker 242
Angle Aluminum
3M VHB Tape
Heavy Duty Waterproof Rubberized Roof Tape
Loctite PL Max Construction Adhesive
Sikaflex 715
Metal Cutting Diamond Blade for Angle Grinder
Renogy 20a Inline Fuse
Tools
Dewalt Cordless Impact Driver
1/4″ Drive Quick Release Bit Extension
Craftsman 3/8 Drive Drill
Dewalt Compound Miter Saw
Rivet Nut Tool
Center Punch Set
Craftsman Socket Set
Dewalt Angle Grinder
File Set
C Clamps
Countersink Bit Set
Video – Chevy Astro Camper Van Build: Solar Panels
Project Overview: Solar Panel Installation
Mounting solar panels could have been a quick and easy job, but No out-of-the-box solution appealed to me. I did it the hard way and custom fab’d everything from the frame to the mounting brackets. And, I got the wild idea to mount the brackets for he panel with tape instead of drilling through the roof. Sounds like a crazy idea, but after a year on the road, it’s been holdings strong. Maybe I’m not crazy.
I’m going to build a mounting frame for the two solar panels, so I can mount them and move them together as one piece. I’ll using aluminum tubing for this. Then, the idea is to mount the back side of the aluminum frame to the roof rack using hinges, and then make my own metal brackets for the front that will get taped down to the roof of the van using very strong adhesive tapes, and a very large surface area. There are other adhesive solar panel mounting systems on the market, but they consist of multiple “clips” that stick to the roof with the same kind of adhesive tape I’m using. I’ll just use two huge brackets with a surface area 20x larger. It should definitely work.
Building A Mounting Frame For The Solar Panels

Just need to cut the frame to size

Cutting the aluminum tubing

Frame cut to size. The solar panels will go here…
I bought 1″ aluminum tubing and connectors from a company called EZ Tube, and building the frame is pretty straight forward. The top photo above shows the solar panels sitting inside the frame, which is too big. So, All I need to do here is cut the aluminum to the right size to fit around the panels. I use a hacksaw to make my cuts, and a file to clean up the edges so the plastic connector pieces slide in smoothly.
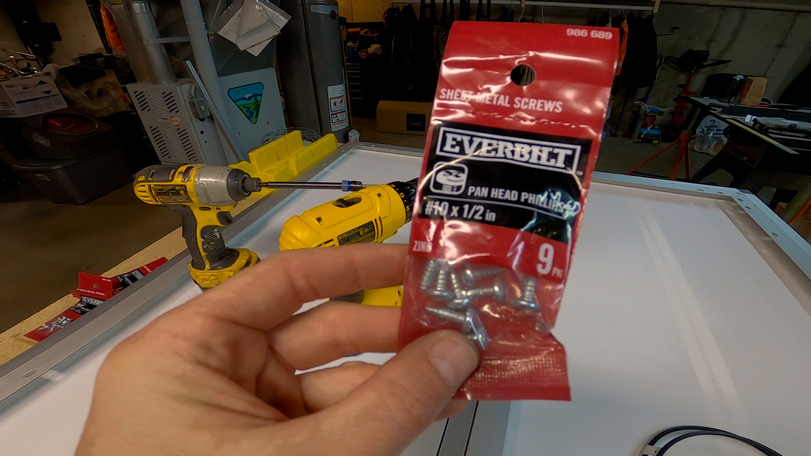
Sheet metal screws

Screwing the solar panels into the frame

Solar panels and frame are now one
Add Hinges To Roof Rack

Drilling holes for the hinges

Installing the hinges
Let me be the fist to tell you, this is NOT a “normal” way to mount solar panels. I’m using hinges to attach one side of the solar panel frame to the roof rack. I’m using hinges for a few reasons. First and foremost, I would need one really long bolt to go through the aluminum tubing and the roof rack, not to mention the fact that it would be impossible to have access to the nut or bolt on the underside of the solar panels to actually mount the thing. So, the hinges are mostly for ease of installation. One side of the hinge is mounted to the roof rack. The hinge flips up and provides easy access to bolt the other side of the hinge to the solar panel frame.
The other bonus about using the hinges is that my solar panels could now, theoretically, be adjustable, allowing me to tilt them up to follow the angle of the sun. This is, of course, dependent on how I go about mounting the solar panel frame in the front, as that would need to be easily removable in order for this idea to really be feasible out in the backcountry.
I’m using Loctite Threadlocker 242 on these bolts, as I want to make sure none of this stuff comes loose while driving over rough roads, etc.
Install Rivet Nuts In Solar Panel Frame

Drilling holes for the rivet nuts

Check out the name of my Rivet Nut tool… ASTRO! It was meant to be
Next, I’ll need to fasten the hinges to the solar panels. I drilled some holes in the solar panel frame and mounted a few rivet nuts. This will give me a female thread to thread into when it’s time to mount the hinges to the frame.
Run Solar Panel Wires Through Roof

Solar Panel wires will get routed through the roof here
Before I mount the solar panel frame to the roof rack, I’ll want to run my solar panel wires up here through the roof while I have unrestricted access. I drill holes through the roof and use rubber grommets to line the holes with. This will protect the wires from the sharp edges of the metal.
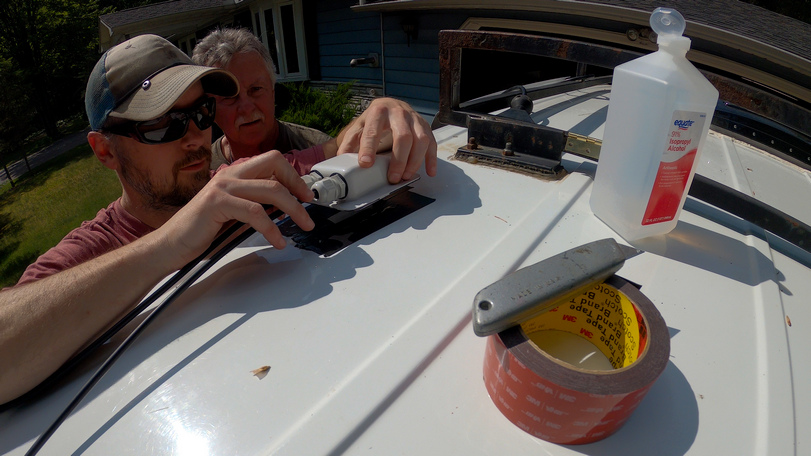
About to lay down the housing on the VHB tape

The solar panel wires entry housing thing. Great product
Next, I use this Solar Panel Wire Roof Entry Port thing. It’s a little plastic housing that fits over the holes I cut through the roof for the solar panel wires, and basically makes the whole thing waterproof. I run my wires up through the roof, through the entry port thing and out of the little holes on the housing. I can then twist the little connector pieces to tighten up the seal and make the connection waterproof. I use double-sided 3M VHB tape to connect the housing to the roof. I set the housing on the tape and it forms a rgeat bond. I trim up the excess tape outside of the edges of the housing, and lay some Sikaflex-715 down over the edges of the housing for a fully waterproof seal. I hope.
Attach Solar Panel Frame To Roof Rack Hinges

Lining up the panels with the hinges

Screwing down the solar panels to the hinge
Now it’s time to connect the solar panels to the roof rack. At this point, it’s just a matter of lining up the holes of the hinges with the rivet nuts on the solar panel frame. As with the other bolts from the hinges to the roof rack, I’m using Loctite Threadlocker 242.
Making Metal Brackets For Mounting Front of Solar Panel Frame

Cutting the sheet metal into 4″x8″ pieces

Tracing out the next cut
Next, I start the most complicated part of the solar panel mounting system, and the part that has me a little nervous; the mounting brackets for the front of the solar panels. Since the panels are well secured to the roof rack in the rear, I just need to think about securing them in the front. For some reason, I had it in my mind that I was NOT going to drill through my roof to mount my solar panels. I don’t know why, since I’ve drilled through the roof already for the Maxx Fan Installation and running the solar panel wires through. Either way, I was fixated on coming up with a no-drill solution. I found some mounting brackets online that fit around the edges of he panels, but they are supposed to be used when mounting to a flat roof, not a curved roof like mine. None of the products on the market, that I could find, seemed to jump out at me as a good fit for me and my van. So, I decided to make my own mounting brackets for the front.
I settled on 16 gauge sheet metal to make the bottom side of my mounting bracket. A large surface area is key to my plan here. I’m going with a size of roughly 4″x8″. So, I’ll need to cut down this piece of sheet metal to size. First, I tried using my miter saw with a metal cutting blade. I was getting nowhere. I eventually switched to my angle grinder and a Metal Cutting Diamond Blade. This did the trick and I was able to make the cut. Then, I used the piece I just cut to trace out another piece for the second bracket.

First view at the concept of the brackets
Next, I take my 4″x8″ sheet metal squares outside and place them under my solar panel frame to get an idea of where I’ll ultimately put them. I cut a piece of angle aluminum about 3 inches wide and place that on top of my 16 gauge sheet metal rectangles. Now, you can see the bracket idea coming together.
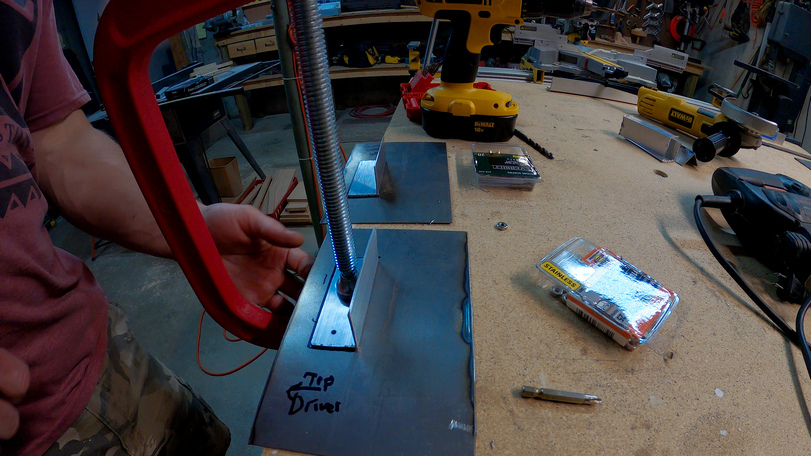
Tracing out a line where the angle aluminum will sit on the sheet metal

Used a countersink bit to allow my screw heads to fit flush
Next, I clamp the angle aluminum to the sheet metal and trace out a line where it will sit. I have pilot holes drilled through the angle aluminum, which allow me to mark the sheet metal underneath. Then, I drill holes through the sheet metal. On the bottom side of the plate, I use a countersinking bit to drill out a conical shaped divot into the sheet metal. This allows the screw heads to sit flush with the sheet metal plate. This is important, because this bottom side will be mounted to the van roof.

The bracket is complete

Another view of the completed solar panel mounting bracket
Now it’s time to attach the angle aluminum to the sheet metal. I’ll run a screw through the bottom of the sheet metal and up through the angle aluminum that’s sitting on top. I use a washer, nut and Loctite Threadlocker 242 to fasten the angle aluminum to the sheet metal.

Adding VHB tape to the bottom of the bracket
Finally, I add 3M VHB tape to the bottom of the brackets. When it’s time to attach the brackets to the roof, I’ll also be using construction adhesive in between the strips of tape in an attempt to achieve the strongest possible bond.
Attach Solar Panel Wires To Solar Panels

The little black things in the middle of the roof are a thick rubberized mat material. I’m taping these to the roof with VHB tape to give the panels some support in the center and to prevent sagging

Before I mount these solar panels in place, I’ll finish attaching the wires that I ran from inside of the van to the panels. These go to my DC to DC Charger, which I will be installing in the near future. For now, these connections are easy, they just plug in to each other. I’m using a Renogy 20a Inline Fuse here in between the Renogy 20FT 10AWG Solar Extension Cables and the Solar Panel Y Branch Connectors.
Fasten Metal Brackets to Solar Panel Frame

Drilling holes for the rivet nuts

Installing the rivet nuts

Fastening the brackets to the frame
Next, I’ll mount the brackets to the solar panel frame. I’ll need to drill some hoes in the frame and install some rivet nuts. Once that’s done, I screw the brackets into the rivet nuts on the solar panel frame.
Secure Metal Bracket (Underside) To Roof With Tape & Adhesives

Last look at the underside of the panels before they are mounted to the roof

Adding a bead of construction adhesive
Now I’ll mount the brackets to the roof. It’s time to take off the VHB tape and add a bead of PL Max construction adhesive to the strips I left in between the tape. I figure, this will add a different type of bond to the mix, and also provide a waterproof layer around the VHB tape, perhaps protecting it over time. Before setting the bracket down on the roof, I’ll clean it up again one last time with rubbing alcohol.

This is an important step in ensuring the strongest bond possible
With the down on the down on the roof, I move the van into the garage and sue some 4×4’s to press down on the brackets, providing constant pressure while the construction adhesive cures. I’ll let this sit overnight like this before coming back to it.
Secure Metal Bracket (Top Side) To Roof With Tape & Adhesives

Putting VHB tape on top of the brackets
The last step is an important one. While it’s possible that the VHB tape and construction adhesive from the previous step might be enough to secure these solar panels at highway speeds, there is no way I would chance that. There is still much more I can do here to make sure these brackets are secured to the roof firmly and that it’s going to be safe to drive. I’ll be adding a few more layers of tape over the brackets now. I’ll be trying to cover a large surface area, which is key to creating a a lot of holding power.
Firstly, I add a few more layers of 3M VHB tape. First I go around the perimeter of the bracket, covering the edges, then I run longer strips across the top. I can already feel how strong this is.

Laying the heavy duty rubberized waterproof tape over the vhb tape

The heavy duty rubberized tape is down and the mounting brackets are installed
Lastly, I add a few layers of this Heavy Duty Waterproof Rubberized Roof Tape over the VHB tape. This stuff is very thick and very strong. It’s used for patching roof leaks on RVs, and similar heavy duty repairs. I make sure to overlap all of the VHB tape I have applied, and run a few layers over each other.
Now, all I have to do is set the solar panels down and screw the frame to the bracket. I’ll use Loctite Threadlocker 242 for this. Solar panels, done.
One more thing: If I can figure out a “quick connect” system for attaching the solar panels to the brackets, instead of screws with Threadlocker, I might be more inclined to disconnect the panels from the front brackets and adjust the angle of the panels using the hinges in the rear to follow the sun during extended stays at backcountry campsites. Because I spend most of my time in the West, where it’s always sunny, I don’t even need to bother with adjusting the angle of the panels because there is already so many hours a day of full sunlight. However, I might be more tempted to pursue this quick connect idea if I were going to be spending more time in places that had less sunlight, where one needs to maximize any any all sunlight available.
**Update:
It’s been 15 months now and 20k miles of driving, and I have had ZERO issues with my solar panel mounting system. I’ve never had the brackets come off or come loose, never had a close call or anything. Nothing is peeling or deteriorating. I have driven the van up to 85 MPH and the brackets have held strong. This system WORKS!
Previous Van Build Project: 8 – Lithium Battery | DIY Stealth Camper Van Build Index | Next Van Build Project: 10 – Electrical Wiring
Chevy Astro Camper Van Build: Lithium Battery
Chevy Astro Camper Van Build Phase 8: Lithium Battery

Ampere Time 100ah lithium battery installed/secured
Tools & Materials
Materials
100a Lithium Battery
Adjustable Heavy Duty Rope Hangers
Spax Construction Screws
Screw Eye
Tools
Dewalt Cordless Impact Driver
1/4″ Drive Quick Release Bit Extension
Craftsman 3/8 Drive Drill
Dewalt Compound Miter Saw
Video – Chevy Astro Camper Van Build: Lithium Battery
Project Overview: Lithium Battery
This is a smaller project in the grand scheme of the van build, but it’s an important step: install the battery.
There are two main kinds of batteries used in van builds; AGM and Lithium. AGM batteries are cheaper, heavier and can only be discharged to 50% of their capacity before causing damage to the cells. Lithium batteries are more expensive, lighter, last 3-5x longer and can be discharged to almost 100% of capacity. The biggest drawback of lithium compared to AGM is that lithium batteries don’t handle cold weather as well. Otherwise, the lithium batteries seem like the best option for me, so that’s what I went with. Besides, I won’t be spending much time in freezing temperatures anyways, I generally seek warm weather, especially in my van.
Choosing A Mounting Location
I chose to mount the battery in between the passenger side rear wheel well and the back of the van. This is where I plan to put all of the electrical components, so it makes sense to put the battery here too. The battery, and all of the electrical components, will fit into an enclosure that I’m calling “the power center”, which I’ll be building in the near future.
Building a Wooden Base

The battery will fit inside this
To mount and secure my lithium battery, I cut some 3/4″ square strips of wood to screw into the floor around the perimeter of the battery. I used spax construction screws for this. The wood prevents the base of the battery from moving.
Tying Down The Battery

Top view. Notice the two holes in the metal wall. The carabiner is clipped in here through these holes

Here’s a close up of the carabiner and how it attaches to the two holes I drilled
Even with the base, the battery is still top-heavy, and liable to tip over. It will work best in connection with a tie down system. I used adjustable rope hangers for this. Aligned with the center of the battery, I drilled two 1/4″ or so holes into a raised metal part of the wall behind the battery. On the opposite side of the battery, I drilled a pilot hole into the wood along the base of the battery, and screwed a screw eye into it. the adjustable rope hangers have carabiners on both sides. So, I attached a carabiner through the two holes in the metal wall behind the battery, ran the rope over the battery, and attached the carabiner to the screw eye. Then, I pulled up the tension in the rope and ratcheted it tightly. There’s a little tab on the side of the pulley/ratchet that is depressed to release the tension on the rope and remove he battery, when needed.
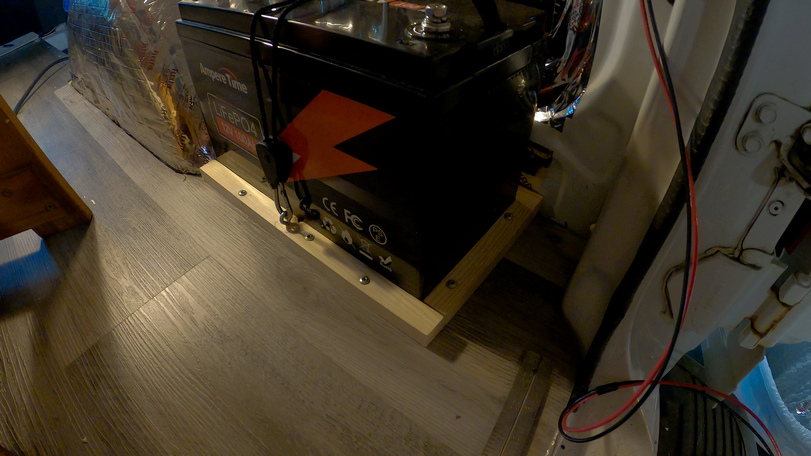
Like a glove.
That’s it, the battery is in. Soon, things will be connected to it!
Previous Van Build Post: 7 – Pull Out Slat Bed | DIY Stealth Camper Van Build Index | Next Van Build Post: 9 – Solar Panels
Chevy Astro Camper Van Build: Pull Out Slat Bed

Chevy Astro Camper Van Build Phase 7: Pull Out Slat Bed

Pull out slat bed build
Tools & Materials
Materials
Drywall Screws
Electric Poultry Knife
Spax Construction Screws
Drywall Screws
L Brackets
1/4″ Washers
Foam Mattress, 5″ Thick, (HD36)
2×3 Boards
1×4 Boards
1×3 Boards
Tools
Dewalt Compound Miter Saw
Dewalt Cordless Impact Driver
1/4″ Drive Quick Release Bit Extension
Craftsman 3/8 Drive Drill
Speed Square
C Clamps
Video – Chevy Astro Camper Van Build: Pull Out Slat Bed
Project Overview: Pull Out Slat Bed
The bed I am building is not unique. There are many resources across the internet describing how to build this exact bed, and I advise you to look at several of them to get a feel for slightly different variations of the same build.

Dimensions of my bed
I’ll be building a pull out slat bed/sofa that also folds up, to access storage underneath. The bed I’ll be building is called a slat bed. The The bed is made of two main pieces; the main part that’s fixed to the floor, and a sliding part. The sliding part stays together with the bed, until you want to pull the bed out and make it wider. The sliding part moves outward, and the sofa cushions are used alongside the main part of the mattress to make one large(r) bed.
The key to this bed’s pull out capabilities are the wood slats. The slats are laid out over both the fixed and sliding portions of the bed, but each slat is only screwed down to either the main part OR the sliding part of the bed, not both. The slats alternate, one is screwed to the fixed part of the bed, the next is screwed to the sliding part. When the bed is pulled out, Half of the slats stay with the fixed part of the bed, the other half move with the sliding part. Make sense? It’s kinda hard to conceptualize, but photos and video help.
The bed will also fold up. This is accomplished by a hinge connecting the bed to the bed’s support beam on the wall.

The finished sofa bed, with sheets
In this phase, I’ll also make a cut my own foam mattress and make a mattress cover sheet to fit over it.
Building The Top
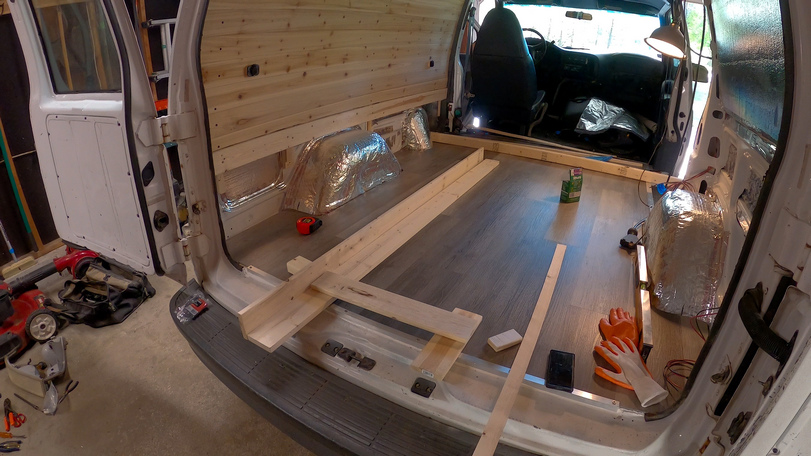
Laying out the boards and trying to visualize the project

Getting it squared up
The first step is building the top of the bed. I start by laying out a few boards in the van and measuring my space. For the bed length, I wanted to leave a few extra inches at my head and toes to avoid feeling crammed in. I’m just shy of 6ft tall, and I settle on 75″ for the length of my bed. This also worked great because the foam mattress I bought is also 75″ in length. Nice!
To build the side of the top piece, the part that I’ll pull on when pulling the bed out, I’ll lay a 1×4 on the ground and then another 1×4 alongside it, running vertically. Then I use spax construction screws to fasten them together. Having a set of clamps helps hold everything in place for this step. I need two of these L shaped boards.
This next part is hard to describe, and better left for photos and video (see the next photo and paragraph below). But here’s my attempt. What I’m doing here is lining up four parallel running 75″ boards. The two outer boards will be L shaped, like I described above. These hold the mattress in place on the top, and one side gets bolts to the bed support beam on the wall. Remember that there are two parts to the bed, the main fixed part and the sliding top part. The fixed part of the bed gets one L shaped piece of wood, and one flat one on the opposide side for the slats to connect to.

See the photo above. The four boards under the slats… the two outer boards are the L shaped ones, and the two inner boards are flat 1x3s. One of the inner boards is pushed up against the outer board, making it look like one wide board. The 1×3 in the center needs to be moved farther to the right, ultimately. Remember that every other slat gets screwed to one of the two sets of boards underneath. So here’s what needs to happen; the L board on the left, slats that are screwed to that one get screwed to the board that’s currently in the middle. The L board on the right, slats screwed to that one get screwed to the left-most inner flat board beneath the slats. Then, the parts of the slats overlap the other part of the top that they aren’t screwed down to, and they can be pulled apart. This is how the pull out top functions.
Fastening The Slats

Rounded edges on the slats
After determining the width of my bed at 25″, I can start doing the layout for the slats. The slats will be less than 25″, just as long as they overlap the edges of the boards beneath them by a few inches.

Laying out the slats and getting the spacing right

Drilling pilot holes, fastening the slats
I used drywall screws to attach the slats to the boards below. I recommend adding a flat washer in between the slat and board beneath for just a little extra clearance, this really helps them pull apart smoothly. I didn’t do this now, and had to remove each slat one by one later on to add washers. I also recommend drilling pilot holes to avoid any cracking when drilling in the drywall screws.

The top sliding piece of the bed is complete
Here the bed top is complete. From this angle, it should be easier to see and understand how the bed top is constructed. If I pull up on the piece that’s in my hand, the horizontal board, second from the bottom, will move up with it, along with the slats that are connecting the boards. The bottom board and the second from the top board will not move, they are fixed in place. Make sense? I hope so. The bed build is a little complicated at first, but it starts to make sense as you get into the project.
Building The Frame

I’ll build two of these rectangular frames, one for each end of the bed frame

One of these on each end of the frame…

Fasten the frame to the floor
Next I’ll build the frame that the sliding bed top sits on top of. 2×3 boards work great for most of this. I’m using spax construction screws to fasten them. Pocket Screws can also be useful here. Really, you just need the pocket screw bit, and you can use spax screws in the pocket screw hole you just drilled, if needed.

The bed frame

2×3 boards for most of this
The bed frame is basically made of two rectangular frames for the end pieces with two 2×3 boards spanning the distance between them.
Attaching The Bed To The Wall

The block of oak allows me to use longer screws for the hinges, to make it more sturdy and solid
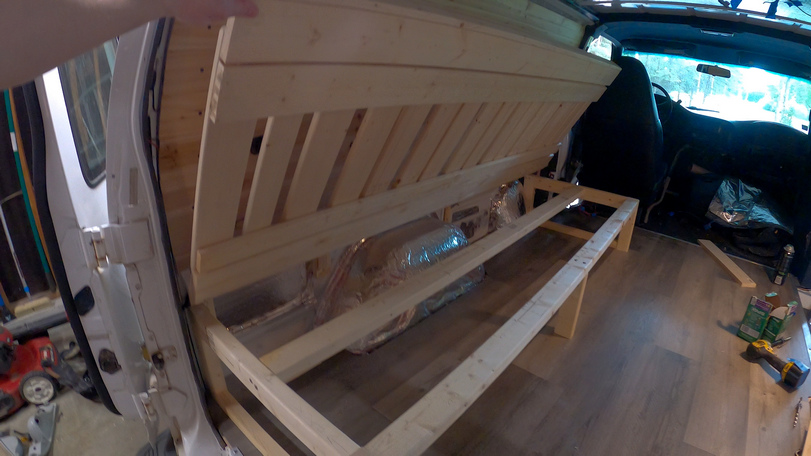
Here’s how the bed flips up on the hinges
I attached hinges to both the bed support beam on the wall and the top bed piece. I used a block of oak to increase the thickness of the board that the hinges are screwing into on the bed top piece. This allowed me to sure longer screws and make sure it’s solid. The top piece sits on the bed frame below, supporting it, so there isn’t much/any pressure on the hinges. The hinges are a nice addition because it allows me to lift the top of the bed to access storage underneath.
Adding The Legs

Rounded edges for the legs. Also, I’ll add felt to the bottom of the legs

Make sure to reinforce the legs with metal L brackets
I used 2×3 boards for the legs supporting the top sliding piece. These legs do nothing when the bed is in sofa mode, but they support the end of the bed when it’s pulled out. So, make sure they’re strong. I sued metal L brackets to add some rigidity to the legs. If you are debating whether or not it’s worth the effort to add these, let me tell you, it is 100%. They cost pennies and will go a long way to ensure your legs don’t get bent and crooked from repeatedly pulling out the bed and/or accidentally kicking it, for example.
I also rounded off the edges of the legs on the belt sander. I want the edges of all wood in the van to be rounded and smooth. Sharp edges end up splintering and can be abrasive to skin that rubs against it. Smooth edges it is.
Adjusting Slat Tension

Good thing I bought the 100 pack…

68 screws to take out, 68 washers to add, and 68 screws to screw back in…
As I mentioned earlier, I had to add washers in between the slats and board below them. The bed would pull out, but I really had to force it. Adding washers solved that issue, and gave me the clearance necessary for it to function smoothly. But, I had to remove every screw holding down the slats. I believe that was 68 screws! Make sure you get the 100 pack of washers.

The pull out slat bed build is complete
With the washers in place between the slats and board below, the pull out bed is smooth. The bed is also now complete!
Cutting A Foam Mattress

I’ll need to cut the overlap

This poultry knife works great for cutting foam

Like butter!

The mattress is in and the 3 cushions have been cut
Next, I’ll “build” my mattress. I bought a 5″ thick foam mattress from the Foam Factory, for $83 shipped. Not bad. It comes in a length of 75″, which is exactly what I need. Now, I need to trim the width to size. The mattress comes in 39″ width, and I’ll cut it to 37 inches. Then, I’ll cut that piece into two pieces; 25″ for the mattress, and 12″ for the cushions.
I used this electric poultry cutting knife to cut the foam, as recommended by “the internet”. The electric knife works very well, but it can be hard to cut a straight line sometimes. No matter, it doesn’t need to be perfect, the edges are hidden inside the bed sheets at the end of the day. Finally, I’ll cut the 12″ piece into thirds, and make three separate cushions.
Making A Custom Fit Mattress Cover Sheet
Unfortunately, I don’t have any photos or video of the sheets making process, just the finished result. But, it’s pretty simple.

The fitted mattress cover I made out of a twin bed sheet
I bought a cheap pair of bed sheets for a twin bed, and used the sheet to wrap around my foam mattress. Once I determined where the stitching should go, I used a sewing machine to stitch the sheets together and form a big “pillow case” for the mattress to just slide into. I sew up one end, and the other end stays open. With the mattress inside the cover, I fold over the excess sheet and use safety pins to keep it together.

I use safety pins to keep the pillow cases tightly on over the cushions
For the cushions, I just used the pillow cases that came with the bed sheet set I bought. The pillow cases were a near perfect fit for the cushions, and I used safety pins here too to keep them on tightly.

The pull out bed in action
That’s it, I now have a pull out slat bed that folds up! The mattress is super comfy, I sleep better on it than my own bed.
Previous Van Build Post: 6 – Cedar Plank Ceiling Installation | DIY Stealth Camper Van Build Index | Next Van Build Post: 8 – Lithium Battery
Chevy Astro Camper Van Build: Cedar Plank Ceiling Installation
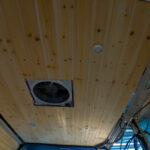
Chevy Astro Camper Van Build Phase 6: Cedar Plank Ceiling Installation

Tools & Materials
Materials
Spax Construction Screws
Drywall Screws
Loctite PL Max Contruction Adhesive
Heat Shrink Butt Connectors
Wire Crimp Connectors Kit
Cedar Planks
Tools
Dewalt Compound Miter Saw
Dewalt Cordless Impact Driver
1/4″ Drive Quick Release Bit Extension
Craftsman 3/8 Drive Drill
Wire Cutters
Hole Saw Kit
Video – Chevy Astro Camper Van Build: Cedar Plank Ceiling Installation
Project Overview: Cedar Plank Ceiling Installation

These are the cedar planks I will be installing for my walls and ceilings
I’ll be using cedar planks for my walls and ceilings. I bought these at Home Depot. They are very thin (1/4″), and I feel like I need to be careful with them. I’ll need to build a flat, even surface for my cedar planks to mount to. I’ll be mounting my LED puck lights in these ceiling planks, so I’ll net to cut those in and wire them up while I install these cedar plank panels.
Mounting Surface

I need to build this area up so I have something to fasten the ceiling panels to
The spot where the ceiling planks meet the headliner is tricky. There is no beam running across the roof here, so I need to build this area up to match the height of the other beams running across the ceiling. This will give me an even mounting surface for the cedar planks, and also, something to screw into. But first, I need to figure out a way to mount the wood to the ceiling, without drilling into the ceiling.

Laying a bead of construction adhesive on my wood pieces

Adjustable drywall sanding poles doing a great job

A close up look at the boards as the construction adhesive cures
I decide against one long board running across the headliner. The ceiling is very curved and would require kerf cuts, But then, I wouldn’t be able to glue it down as well. Instead, I decide to cut several 1ft sections of wood and glue them to the ceiling alongside the headliner. But how to keep pressure on them while the adhesive dries? I was lucky enough to have several adjustable poles, for drywall sanding, just laying around in my tool room. I used these below the boards, pushing up on the ceiling and twisting the poles to lock the position into place. Worked very well!
Laying The Planks

Installing the cedar planks on the ceiling requires a second set of hands
Laying the ceiling planks is just like laying the planks for the walls, except harder, because you’re doing it upside down. It definitely helps to have a second set of hands here for this. I didn’t ahve to build up the surface of the ceiling like I did with the walls, since the beams running across the ceiling were already at a good height to fit around the polyiso insulation. The existing ceiling beams also leave me with a decently flat mounting surface for the ceiling planks.

Here we need to make cuts to work around the Maxx Fan
The first couple of rows of planks are the easiest, since they are full boards. There is some cutting to do around the Maxx Fann, but all of the cuts here are chop cuts, nothing special to fir the contours of the van or anything. This makes the install fairly simple.
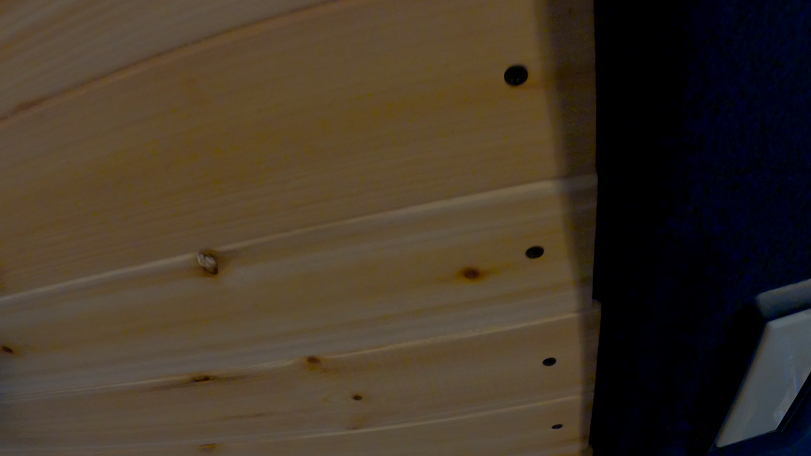
Transition between the ceiling panels and the headliner
I was initially unsure of how I would tackle the transition between the headliner and the ceiling planks. I was thinking I would have to put up a piece of trim here to hide the transition, but honestly, I am pretty happy with the way it looks as-is. I want the van to look nice, but I also don’t need every little thing to be perfect.
LED Puck Light Installation

Cutting holes for the LED puck lights

LED puck lights installed

Testing the LED puck lights with 9v battery after wiring them up. They work!!
Two of the planks in the ceiling will have LED puck lights installed. There will be a total of 4 3W LED lights, and they are dimmable.
I use a hole saw to cut holes in the cedar planks for the LED lights. The clips on the lights just fold back as you insert the light into the holes, and the snap back, holding it in place. Easy.
I’ve already ran my 14 gauge wires here to the light locations previously. Once I’ve got the ceiling plank with the LED lights in place, and a second set of hands helping hold the plank up, I crimp the LED light wires to the 14 gauge wire and tuck them up under the ceiling planks before screwing the plank down. Then, I can use a 9v battery to test that the lights are working. Oh yeah!
Maxx Fan Trim Installation

Trim for the Maxx Fan is installed, and the ceiling is complete
The final step for the ceiling is to install the trim piece for the Maxx Fan. It just slides into place and 4 screws hold it in. This little piece of plastic really gives the ceiling that finished look though, and this van is starting to look pretty respectable!
Previous Van Build Post: 5 – Cedar Wall Plank Installation | DIY Stealth Camper Van Build Index | Next Van Build Post: 7 – Pullout Slat Bed
Chevy Astro Camper Van Build: Cedar Plank Wall Installation
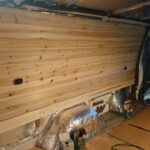
Chevy Astro Camper Van Build Phase 5: Cedar Plank Wall Installation

Cedar plank walls installed
Tools & Materials
Materials
Spax Construction Screws
Drywall Screws
Blue Sea Systems 12v Outlet
Loctite PL Max Contruction Adhesive
Heat Shrink Butt Connectors
Wire Crimp Connectors Kit
Cedar Planks
Tools
Dewalt Compound Miter Saw
Dewalt Cordless Impact Driver
1/4″ Drive Quick Release Bit Extension
Craftsman 3/8 Drive Drill
Wire Cutters
Brad Nailer
Video – Chevy Astro Camper Van Build: Cedar Plank Wall Installation
Project Overview: Cedar Plank Wall Installation
These are the cedar planks I will be installing for my walls and ceilings
I’ll be using cedar planks for my walls and ceilings. I bought these at Home Depot. They are very thin (1/4″), and I feel like I need to be careful with them. I’ll need to build a flat, even surface for my cedar planks to mount to. This will require some thought. A series of wood backing pieces will do the job. There are two 12v electrical outlets along this wall that I’ll need to install as I do the wall, while I have access behind them. The wall won’t go all the way down to the floor, since the bed will be raised about 12″ off the ground. There’s no need to panel the wall under the bed, where it won’t be seen, although one could do this if so desired.
Mounting Surface

I will mount the cedar wall planks to these wood strips


Support blocks for the wall and bed support beam
The first thing to consider when starting to put up the walls is, what you’ll mount them to. More than likely, you’ll need to build an even surface for the walls to attach to, since the walls of the van may not be even and flat on their own. The boards I cut t use as mounting strips for the walls will need to be thick enough to come out past the height of the polyiso board insulation that’s in sections of the wall. In some cases, I’ll need to stack two different thicknesses of wood in order to achieve my desired height. I only need the mounting boards for the cedar planks to be about two inches wide, wide enough for my screws to hit them and not crack it.

Kerf cuts

Screwing down the board with kerf cuts, and it fits the curved wall of the van nicely
Another issue I had is that the walls of the van are quite curved. Try fitting a flat board over a curved wall, and you get the idea. One solution to this is a technique called kerf cutting. This involves making a series of shallow cuts into the board on one side, all along the length of the surface you wish to bend. It works really well, and I was able to get my boards to bend in significantly.
Laying The Planks

The first two cedar planks in place

I use a miter saw to cut the cedar planks to length. I start at the ceiling and work my way down. In retrospect, I may have been better off starting from the bottom and going up. I was left with an odd-shaped piece to cut for the last plank, and it was not even. The area where the wall and ceiling meet has this plastic wire loom mounted here, and there really is no way to tie in the wall and ceiling planks together in a clean way here. It’s a year later and I’m still working on something to cover this up. Mainly, I just don’t want to buy a whole new box of cedar planks for just one piece, so I deal with the ugly gap that shows the wire loom. I’ve seen other Astro Van builds who struggle with this area as well.

Notice the three vertical pieces of wood. This are the points where I’ll screw down the planks
Laying the planks is pretty simple. It helps having a second set of hands for this. I three vertical strips of wood running along the walls to mount the planks to, so I’ll use drywall screws to fasten them. It’s wise to drill pilot holes for every screw, because the cedar planks are so thin they risk cracking otherwise.

With the top plank in place, I move down and slide the next piece in underneath it. The cedar planks have a tongue and groove type system of interlocking with each other, but aligning them is another story. Between the warpage of the boards and the length of each plank, it can be difficult to slide the planks together. Some of the planks were warped in and up/down fashion, so I’d have to screw in one screw then move down and press up very hard on the plank in order to bring it together with the next row above it. But,, if I screwed it in place while holding it up, I could overcome the warpage and secure it in this position. Moral of the story, check your boards at the store. Don’t be afraid to open each package and inspect every board.
12v Electrical Outlet Installation
When I got to the 12v outlets, I had to take care of them now, while I had access to the backside of the walls. I’m installing an outlet at the front and rear, and already have my wires run to these spots. It’s just a matter of drilling through the planks and hooking up the outlets.

12v outlet installed in the cedar plank walls. Notice the spacer piece I made to give extra clearance in the rear for the outlet

Installing the 12v outlet. Notice the block of wood next to the outlet, for support. This prevents flex in the wall panel when pushing in on the outlet
I use a hole saw to make the cut through the planks for the 12v outlet to pass through. I need the outlets to stick out of the wall just a little though so there’s enough clearance in the back. So, I come up with a spacer to achieve this. I trace out the outlet’s mounting plate over a thin piece of wood, and cut this out. I overlay them and this give me another 1/4″ or so of clearance, which is all I need.
Bed Support Beam
While the cedar planks are technically installed and done, part of building this wall is the support beam for the bed. This basically finishes off the wall on the bottom side, since I won’t run the cedar planks along the wall below the bed, where they aren’t seen.

Installing the bed’s support beam

I’ll be mounting the bed to this, later…
The support beam doesn’t need to be extremely heavy duty. I went with a piece of 1″x4″, and used Spax construction screws to fasten it to the wall. I did used strips of wood behind the beam to build up the height to be even with the walls above. Then, I screwed the beam to the wood on the wall.

Quarter round, to hide the transition from the wall to the bed support beam
With the bed support beam in place, I can add a small piece of quarter round wood trim to hide the ugly gap between the wall and the beam. I use a brad nailer here to secure the quarter round, and finish off the wall.

My beautiful new wall
Previous Van Build Post: 4 – Flooring | DIY Stealth Camper Van Build Index | Next Van Build Post: 6 – Cedar Plank Ceiling Installation
Chevy Astro Camper Van Build: Flooring

Chevy Astro Camper Van Build Phase 4: Flooring

Completed floor and threshold
Tools & Materials
Materials
Loctite PL Max Construction Adhesive
Sikaflex 715
Deck Screws
Spax Construction Screws
Angle Aluminum
Wood Furring Strips
Tools
Flooring Install Kit
Vinyl Snips
Circular Saw
Circular Saw Blade
Dewalt Compound Miter Saw
Countersink Bit Set
Dewalt Cordless Impact Driver
1/4″ Drive Quick Release Bit Extension
Scissors
Box Cutters
Saw Horses
Video – Chevy Astro Camper Van Build: Flooring
When I made my Van Build video series for youtube, I decided to put split up the insulation footage over two episodes, one for the Flooring and one for the Walls & Ceilings. Both of these require insulation under/beneath them, and I chose to include footage of the insulation process for those surface in their respective videos. This was just easier for me from a video production standpoint, but here on my website, I can dedicate this section just to insulation. Below are the videos for both Flooring and Insulation, you’ll need to watch both to watch the entire insulation process, if that’s what you’re looking to do.
Project Overview: Flooring

1/2″ Plywood Subfloor
The flooring phase consists of two main parts: installing the subfloor and installing the flooring material. The concept here is the same a it would be for doing flooring in a house .The subfloor provides the flat, smooth surface that the flooring will ultimately sit on. Most people are using plywood for the subfloor, which I will do as well. This will need to be fastened to the van, which means drilling holes through the subfloor and into/through the van’s metal floor. Deck screws are good for this.
Choosing a flooring material for your van build will likely take multiple things into consideration. Durability, looks, waterproofness, ease of cleaning, ease of repairing/replacing, price and availability.
Common types of flooring in van builds:
Sheet Vinyl
Interlocking Vinyl Planks
Stick-On Tiles
Rubber Flooring
Linoleum
Laminate Planks

Vinyl plank flooring installed
I’ve chosen the vinyl planks for my flooring material. They are waterproof (so they say), easy to clean, durable, possible to replace part of the floor individually as needed, and they look great. The floor is a small space, so to me, the cost of choosing a high grade flooring product makes sense, for the look and utility it provides.
I’ve installed vinyl flooring planks a few times before in houses. They are easy to install, but it’s a slow and tedious process. Custom cutting the planks to fit around things is very time consuming, and this part of the installation takes the most time. It’s fairly easy to cut, but you might find that it takes a variety of tools for different cuts. I used a miter saw and a jig saw frequently, as well as a bench grinder to grind away parts of the plank leaving a smooth, sounded shape.
Sub Floor Template

Using the floor template to trace a line on plywood for the subfloor
Fortunately, I can just use the same template I made to cut the insulation that goes under the subfloor here for the subfloor itself. A rare win in the van build project!
My van is wider than than a sheet a plywood though, so my subfloor will span two 4×8 sheets of plywood alongside each other. I’ll tape down the template to the wood so it doesn’t move, then I’ll go around and trace out a line on the plywood.
Cutting the Sub Floor

Many rounded cuts to make to fit the contours of the van

The smaller of the two subfloor pieces
A lot van builds use 3/4″ plywood for the subfloor, but 1/2″ is plenty strong for how its being used here. The 1/2″ ply is cheaper, lighter and gives me a quarter inch more clearance. Hey, every little bit counts in a van this small.
With my template traced out, it’s time to cut the plywood into my new subfloor. I place the plywood over a couple of saw horses and grab a jigsaw to make these cuts.
Furring Strips & Laying the Subfloor

Adding furring strips to the edges of the van to match the height of the ribs running along the floor

Placing heavy items on the furring strips as the construction adhesive cures
Now if you’ll notice, the ribs running along the floor. There are no ribs along the edges though, and to avoid flex in the floor, I’ll add pieces of furring strips around the edge to make the floor even with the ribs. Now I’m ready to test fit the floor.

Laying the subfloor over the insulation

Subfloor laid out in van, it’s together nicely

A great fit. Always leave a gap of 1/4″ or so around a subfloor for expansion
After the construction adhesive has cured and the furring strips are in place, I drop the insulation back in. Then, it’s time to lay the subfloor over the insulation. I’ve already test fitted the subfloor, and make the necessary trimming and cutting to fit, so it goes in smoothly at this point.
One key thing to remember about installing a subfloor is that there needs to be a gap around the edges of it to account for expansion. This should be about 1/4″ inch or so. You don’t want ANY part of your subfloor touching the walls, as this could start to cause issues with buckling of the floor under extreme expansion conditions (hot weather).

Painters tape marks the ribs along the floor, beneath the subfloor. This is where I’ll put my deck screws to fasten the subfloor down
Next, I added some pieces of painters tape at the back of the van, marking the ribs running along the floor underneath the subfloor. I will be putting my deck screws through the rubs to fasten the subfloor down, so I need to keep track of where these are at. It’s easy to see them from the back, that’s how I marked them in the first place. But what about in the middle, how will I keep that straight line, so my screws go into the ribs and don’t veer off into the valleys in-between the rubs? By tracing a line on the subfloor along the center of the ribs. With a line running along the length of the board that represents the center of the ribs, I can ensure every screw I put through the board hits its mark. All I need to do is line my screws up with the lines I’ve drawn. Simple.
Fastening the Subfloor

Tools for fastening the subfloor

1 1/4″ deck screws are perfect here
To fasten the subfloor down, I use two drills. One to drill pilot holes, the second to screw in the deck screws. I’m using 1 1/4″ exterior deck screws for this, and putting a screw in roughly every 10 inches or so. You could do more or less depending on your preference, but I would try not to space them out more than 12 inches apart. You’ll have less creaking and popping noises this way.

Drilling pilot holes in the subfloor

Overkill, but… I’m adding a dab of caulk in the screw holes, to (theoretically) seal the threads as they pass through the underside of the van

Fastening the subfloor with deck screws
The three pictures above show the process for every screw. Drill a pilot hole, making sure it goes through the metal floor of the van, add a dab of Sikaflex to the screw hole, and put in a deck screw. There are a LOT of screws that go into fastening down the subfloor, so this will take some time.

Fastening the subfloor
Flooring Installation Tools

Tools I’ll be using to install the vinyl planks


Attached underlayment on the vinyl planks
Installing the vinyl plank floor requires a few basic tools. A tape measure, ruler and/or square, pencil, rubber mallet, flooring install kit, a jigsaw and miter saw. You’ll notice the vinyl planks have the underlayment attached, which is a big bonus. Many vinyl planks are like that these days, but some planks don’t have the underlayment, and it’s something else you need to buy and install.
Vinyl Plank Flooring Layout

Sliding the interlocking vinyl planks together for a test fit
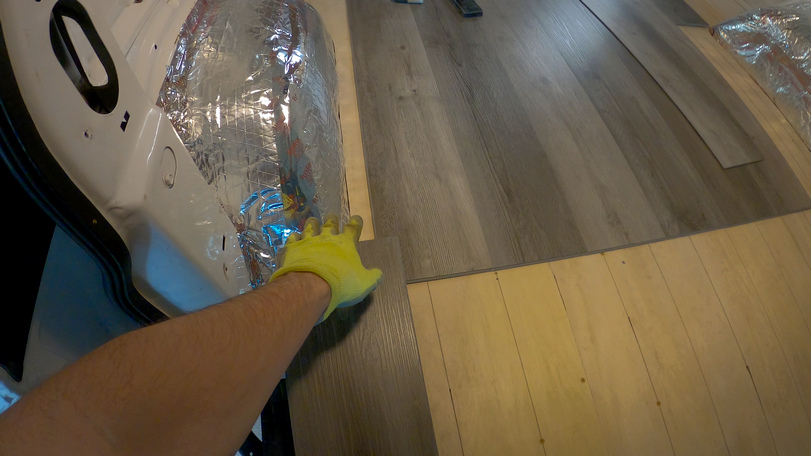
Test fitting the planks in the van. Always stagger your vinyl planks when doing the actual install, not side by side like they are shown here
When installing vinyl plank flooring, you need to give special consideration to the layout. There are a few things to consider. Firstly, layout your planks in the van, as many full pieces as you can. Then, center the planks in your space, so there is an even amount of gap between the planks and the walls. If the gap is only like 1-2″ on each side of the planks, then when you cut the planks for the outer edges, you’d be cutting the planks into thin strips. This not only looks bad, but the thin strips can be harder to keep in place over time, especially if the edges see any movement (sliding bins over them, etc). So, if you only have a thin gap between the walls and your planks, remove another plank. Center your planks, and measure your outer gaps… now your outer planks will not need to be cut so thin.

Rule of thirds: divide plank into thirds and stagger them when installing

Notice how the vinyl planks are staggered by thirds
The other thing to consider when it comes to the layout of the floor is the rule of thirds. Divide the length of the vinyl plank into thirds (don’t cut them yet, just measure/mark with a pencil if needed). Now imagine you are placing the next row of planks alongside the plank you just laid. Instead of laying the planks right next to each other (like the photo above where I’m test fitting the planks), you’ll want to stagger them. Every third row, you’ll start with a full plank. But for the other two, this means trimming off 1/3 or 2/3 of a plank when starting a new row. The good news is that sometimes you can reuse the portions of the plank that you cut off on the other end of the floor, when you then need another piece that is up to 1/3 or 2/3 of a plank.
Why stagger your vinyl plank flooring? It helps prevent warpage, buckling and gaps. And if that’s not enough, it just looks better.
Vinyl Plank Flooring Installation
These interlocking planks are pretty self explanatory when you get them in your hands. One piece slides into the other piece, at a 45 degree angle, and then the pieces snap together. This usually takes some pressure. If it’s not enough by hand, and it usually isn’t, use a block of wood or plastic alongside the plank with a rubber mallet to tap them together. This is easier demonstrated by watching the video. The Flooring Installation Kit comes with a plastic block for this purpose. The purpose of the block is to spread the impact of the rubber mallet over a larger surface area, to protect the grooves that allow the planks to interlock with each other.

A complicated piece with may cuts

Using vinyl snips. ok for rough cuts, but not recommended for precision

Transferring measurement over to vinyl planks
Start on one side and work your way to the opposite wall. Use paper templates to transfer contours of obstacles onto the planks. I used some vinyl snips for a rough cut, but they are not meant for clean cuts. Really, they weren’t that useful to me. I ended up making most of the rounded cuts with a jigsaw. Along the edges of the floor, every piece is a custom fit with many cuts required.

Cutting the vinyl planks with a jigsaw

A nice fit

I used a paper template to transfer this shape to the vinyl plank

Using the special tool in the Flooring Install Kit for tight spaces
In the last photo, I’m installing the final piece of the flooring. You can see the black metal tool there, and that’s what is needed to be able to fully seat the planks in tight spaces. With the left side placed behind the edge of the plank, I’ll just tap the upward-facing metal tab on the right there with my mallet and this will pull the plank in, locking it in place with the adjoining plank.

Looking good!
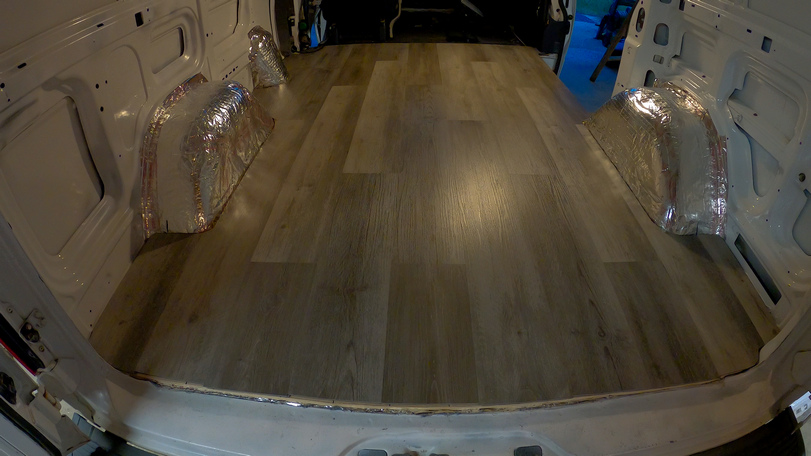
The vinyl plank flooring installation is complete
Angle Aluminum For Flooring Threshold

Inside cut on the angle aluminum threshold
I use angle aluminum to make a threshold, finishing off the edges of the flooring. I cut it on a compound miter saw with a metal blade, but a hacksaw would also work. You’ll also want to file down the edges after cutting.

Drilling pilot holes

Using a countersink bit

See the conical shaped indentation that the countersink bit created? This will allow my screws to fit flush on top of the threshold
I’m drilling pilot holes, then using a countersink bit. The countersink bit creates a conical-shaped indentation in the aluminum for the bottom of the screw to fit into, so the screw sits flush on top of the aluminum. Then, I use 1 1/4″ Spax Construction Screws to screw down the threshold ever

Angle aluminum threshold in the rear
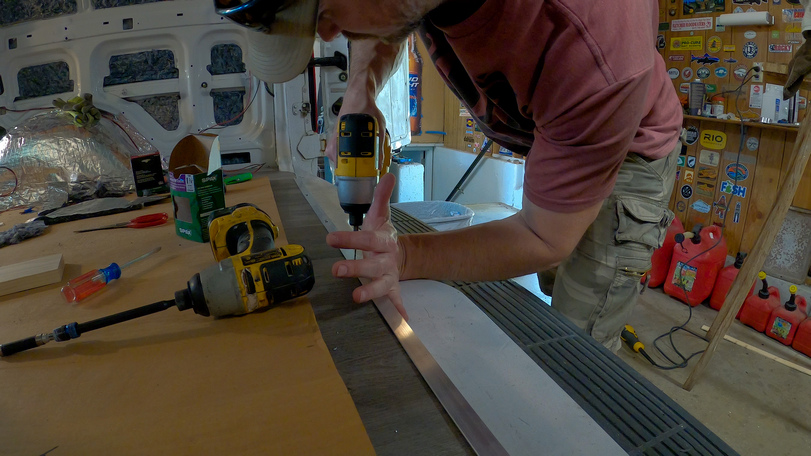
This angle aluminum will curve to fit the contour of the floor
Final Touches

Running a bead of sikaflex caulk along the bottom of my aluminum threshold
And the last thing I’ll do is use some Sikaflex-715 to run a bead of caulk along the bottom edge of my threshold, to prevent water from getting in underneath. That’s it, my van now has a floor!
Previous Van Build Post: 3 – Insulation | DIY Stealth Camper Van Build Index | Next Van Build Post: 5 – Cedar Plank Wall Installation
Chevy Astro Camper Van Build: Insulation

Chevy Astro Camper Van Build Phase 3: Insulation
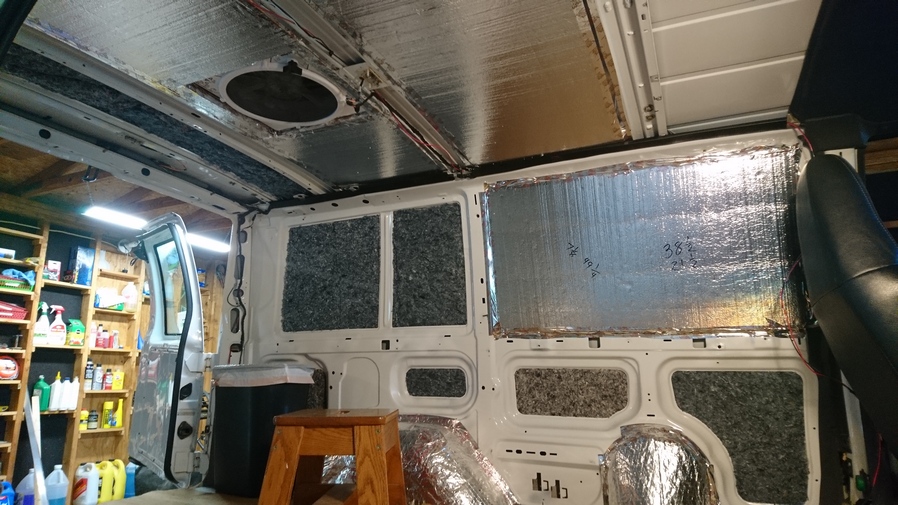
Insulation installation: PolyIso foam over Duct King radiant barrier/cotton insulation
Tools & Materials
Materials
Frost King Duct Insulation, Natural Cotton
Refelctix Tape
Builders Paper
Painter’s Tape
Tools
Scissors
Box Cutters
Putty Knife
Drywall Square
Tape Measure
Video – Chevy Astro Camper Van Build: Insulation
Flooring Insulation Video
Walls & Ceiling Insulation Video
When I made my Van Build video series for youtube, I decided to put split up the insulation footage over two episodes, one for the Flooring and one for the Walls & Ceiling. Both of these require insulation under/beneath them, and I chose to include footage of the insulation for those surface in their respective videos. This was just easier for me from a video production standpoint, but here on my website, I can dedicate this section just to insulation. Below are the videos for both Flooring and Insulation, you’ll need to watch both to watch the entire insulation process.
Project Overview: Insulation

Insulation complete on this wall
Insulation is another major decision for any van build. Insulation keeps the van cooler in direct sunlight on hot days, and warmer in cooler temps when you want to retain heat. The insulation layer will go in-between the walls and wall panels, and in between the floor and subfloor. There are many different ways to do insulation, there are different approaches and different materials that can be used.
Some of the major insulation materials used in van builds:
Polyiso Rigid Board
XPS Rigid Board
Recycled Cotton/Radiant Barrier
Reflectix
Spray Foam
Rockwool
Thinsulate
Like most things on this van build, cost was somewhat of a factor in my decision. There are some top-of-the-line options that would perform very well, like the thinsulate, but the cost is too high for my build. If I had a 100k van, I would be looking at it differently, but this van is destined to be a budget build, to some extent.
There was a product on the market called UltraTouch Radiant Barrier which I wanted to use, but Home Depot stopped carrying it and I couldn’t find it. Then, I found the Frost King Duct Insulation, which is basically the same thing is the UltraTouch; recycled cotton attached to a foil backing. The foil acts as a radiant barrier, while the recycled cotton acts as an insulator and sound dampener. The only real downside of this stuff is that it would hold moisture if it gets wet, but I generally operate in very dry regions. Because it’s cheap and easy to get, I’m going with the Frost King Duct insulation.

Frost King duct insulation
I’ll use the Frost King insulation underneath the flooring as the only layer of insulation. On the walls, there are areas that are recessed and could easily fit extra insulation, and much of the wall will need to be “built out” a bit anyways. This means more room underneath for insulation. So, for the walls and ceilings, I’ll use the Frost King duct insulation as a radiant barrier/insulator, and put a layer of polyiso board on top of that.
Insulation Under Flooring

The main issue with the Frist King Duct insulation is that it only comes in rolls of 1’x15′. To use them, I’ll need to lay out 5 rolls alongside each other and tape them together with Refelctix Tape, forming one big piece. Can do.

Making a floor template out of builders tape

Cutting the template to the shape of my floor
Now that I have my Frost king insulation laid out and taped together, I’ll need to make a template of my van’s floor. I can use this template to trace out a line over the insulation, so I can cut it all as one solid piece. To make the template, I tape builders paper over the van floor with painter’s tape. It takes several pieces of overlapping builders tape to cover the entire floor, but the painters tape holds the template together.

Next, I lay the template over the insulation, use painters tape to hold it in place, and trace along the edges with a permanent marker. Then I cut along the line with a pair of scissors and cut my insulation to the shape of my van’s floor.

Floor insulation complete
With my flooring insulation cut, it’s easy to slide it into the van and test the fit. Trim as needed… you cut it a little on the big side, right?

Insulation over the wheel wells
I’m adding insulation to the wheel wells now while I do the floor, since I’ll do my flooring before I do most of my wall insulation. I cut out strips of the Frost King duct insulation and tape them over the well well with reflectix tape. I can see this making a big difference to dampen road noise, not just over the wheel wells, but throughout the van.
Radiant Barrier Insulation Under Walls & Ceiling

Installing sections of the Frost King insulation on the walls

I used this doubled sided carpet tape to attach the insulation to the walls
Putting up the Frost King insulation on the walls is pretty easy. I used double-sided carpet tape for this. It sticks really well to the walls of the van, and sticks well to the foil side of the insulation. I cut the carpet tape to strips that attach the edges of the insulation and just press it into place on the wall. Easy.

I’m installing the Frost King insulation on the inside of all of the panels that are recessed into the walls

Most of the walls and ceilings covered with the frost king insulation
Most of the surface area of the wall covers an odd-shaped size, so almost every piece requires cutting and a custom fit. Such is the nature of a van build, it seems everything I touch needs a custom fit.
PolyIso Foam Board Over Radiant Barrier
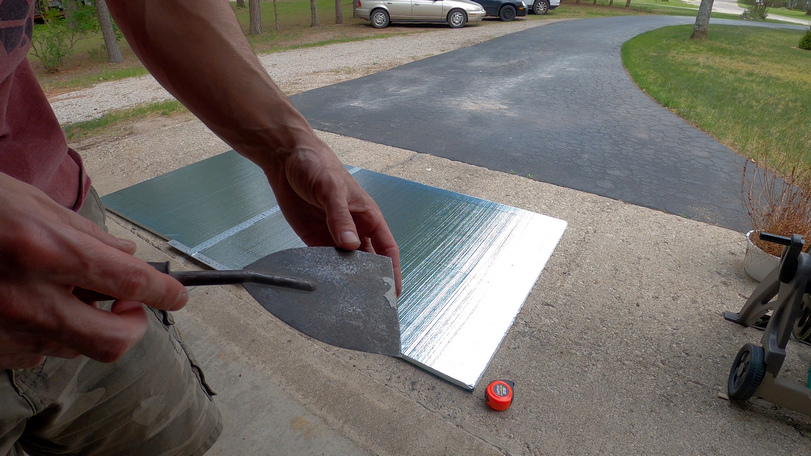
I cut the polyiso board with the side of this putty knife

Score the line, then cut deeper
Now it’s time to start cutting the polyiso board. After some google searching for how to cut polyiso, it appears that the side of a putty knife is one of the better tools for the job. First score the line, then cut deeper.

Fitting the polyiso board on the walls

Adding polyiso to the ceiling
Now i’ll fit the polyiso board over my radiant barrier, in-between the beams on the roof and in-between he recessed areas of the walls. The polyiso board and the beams will sit flush with each other when it’s all taped down. i’m using this reflectix tape to attach the polyiso to the van.
I’m also going to go around the edges of the polyiso board with some reflectix tape. it’s basically Styrofoam in-between the outer foil layers, and I don’t want tiny pieces of Styrofoam crumbling away, making a mess later on.
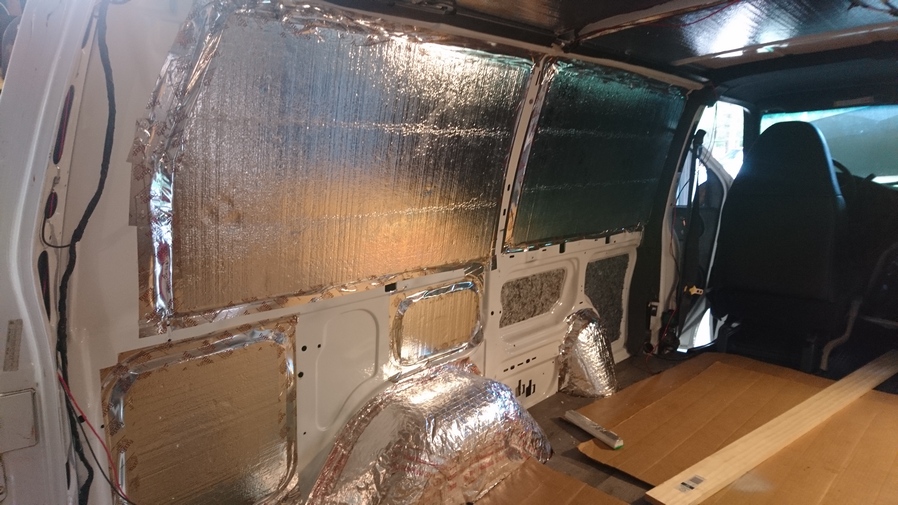
This wall is almost done

Ceiling insulation nearly complete
That’s it for the insulation. I wasn’t incredibly anal about my insulation process, filling all the pillars and such with spray foam, etc. I want to be able to access the inside of those pillars to runs wires, etc in the future, and spray foam just seems like a big mess for anything you do in the future. Either way, the an is really starting to come along now with he insulation up. Next, I’ll install the flooring.
Previous Van Build Post: 2 – Maxx Fan Installation | DIY Stealth Camper Van Build Index | Next Van Build Post: 4 – Vinyl Plank Flooring
Chevy Astro Camper Van Build: Maxx Fan Installation

Chevy Astro Camper Van Build Phase 2: Maxx Fan Installation

Maxx Fan installed
Tools & Materials:
Materials
Maxx Fan Deluxe
Butyl Tape
Sikaflex 715
Rubbing Alcohol
Rags, Towels
Painters Tape
Tools
Step Bit
Diamond Blade For Angle Grinder
Reciprocating Saw
Reciprocating Saw Metal Blades
1/4″ Drive Quick Release Bit Extension
Jigsaw
Dewalt Cordless Impact Driver
Dewalt Angle Grinder
Klein Tools 9″ Linemans Pliers
File Set
Caulk Gun
Drill Bit Set
Tape Measure
Video – Chevy Astro Camper Van Build: Maxx Fan Installation
Project Overview: Maxx Fan Installation
Many, if not most full-time van dwellers are using some sort of overhead fan for ventilation in their camper van. A fan is important because it can help regulate temperature and humidity inside your van, two things that are very important to have control over. So, a fan is pretty much a necessity for me and my build.
What kind of fan do I need for my camper van? It seems the two biggest competitors in the ventilation fan market are Fantastic Fan and Maxx Fan. Both offer different models and have their own pros and cons to consider. I personally went with the Maxx fan, because I could drive the van with the vent open (in case I forgot to close it, which does happen), and because it had more speeds to choose from (fine tune fan noise, power usage etc).
To install a fan for ventilation requires cutting a hole in the roof of the van. I figured this was the best time to do the fan, while the van is stripped down and before the insulation, wiring and ceiling panels get in the way.
Roof Rack Modification

This center bar needs to be cut off for the fan to fit
Before I can install my fan, I need to modify my roof rack. There’s a bar running across the roof, right in the middle of the spot I want to mount my fan. Fortunately, this bar can be cut out and removed without compromising the structural integrity of the rack itself.

Making the cut

The center bar is gone and the roof is now clean, ready for the fan
For this job I use my angle grinder with a metal cutting wheel. But because it’s such a hard steel, I am having more luck with a diamond tipped blade. I also use a reciprocating saw with a carbide tipped metal cutting blade, which also worked ok. Place another piece of sheet metal underneath the spot you make the cut, so when your blade comes down after completing the cut it won’t hit the top of the van’s roof.
Layout & Measurement

Drilling holes on the four corners

On top of the van, lining up the 4 corners and tracing the inside of the flange

Using a step bit to drill holes at the corners. This will allow me to get a jigsaw blade in there and start my cuts
Next I must consider the layout of the fan on my roof and exactly where I will install it. Once I’ve decided on a spot, I use the fan’s mounting flange to trace an outline on the ceiling inside my van. Next, I drill 4 small holes through the roof at the corners of the outline. Then, I jump up on the roof and line the flange up with the 4 holes I drilled at the corners. This allows me to trace a line out along the roof of the van, since I will make my cut up here and not from below. But now, I need a way to get my jigsaw in there and start the cut. So, I use a step bit to drill out wider holes at the corners. This worked perfectly.
Cutting The Hole
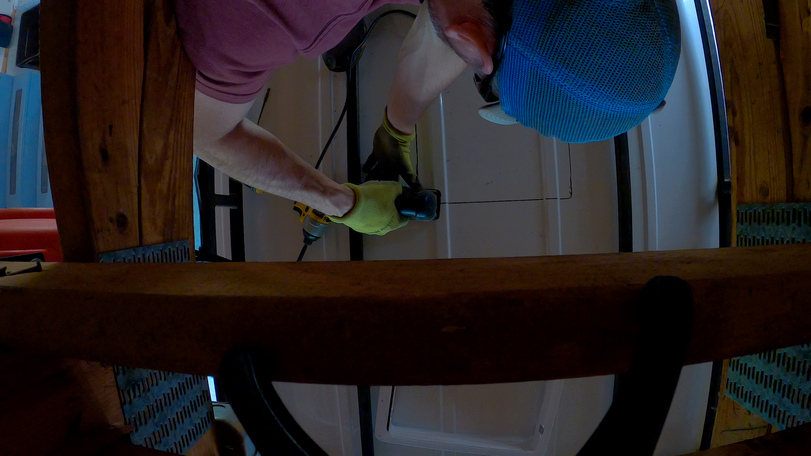
Cutting a hole in the roof using a jigsaw
Now it’s that time I’ve been dreading: time to cut a big, gaping hole in the roof of my van. It just seems wrong, but this is where you need to just ignore that instinct and go for it. Using a metal blade on my jigsaw, the cutting goes pretty smoothly. I cut it too small at first, and had to spend some time widening it later on. But I would rather cut off more later than too much the first time.

Cutting the tabs with an angle grinder
Next, there’s the ribs of the roof to deal with. These are maybe 3/8″ higher than the rest of the roof, so I have two options; build up the base of butyl tape (what goes in-between the roof and flange) with extra material in the valleys between the ribs, or cut the ribs out into little tabs, and try to bend them down lower, to be flush with the roof. I am going with the second option.

I want the tabs to be lower, and flush with the rest of the roof
I use my angle grinder to cut about 1.5 inches (measure YOUR mounting flange for this number) in from the edge of the opening along the two sides of the ribs. Then, I use a pair of lineman’s pliers to bend the tabs downward, so that the tabs are roughly even with the height of the rest of the roof. Surprisingly, this works very well. The tabs line up close enough to the rest of the roof, and now I have a fairly even surface to mount my flange to.
Surface Preparation

File them edges

Surface prep
The next step is to prepare the surface around my cut. I go around the edges of the cut with a file and try to smooth it out. Then I clean the area with rubbing alcohol, Next, I apply some painters tape around the edges of the area I’d like to paint, to protect from overspray. I’ll add some etching primer to the bare metal, and then a coat of white paint over the primer.
Installing The Flange

Laying the butyl tape
The recommended type of adhesive to use in-between the fan’s mounting flange and the roof is butyl tape. This stuff is kind of like a silly putty consistency. Or better yet, for those familiar with it, plumber’s putty. But it’s a little stickier, and comes in this two-sided roll. Lay it down around the edges of the cut, and make sure to overlap it a little at the corners. I went right over the tabs I cut with the butyl tape, and used Sikaflex-715 to lay a bead down on the underside of these tabs, from inside the van. This is one of the layers of waterproofing protection I’ll implement here around the flange.

About to place the mounting flange. Notice the layer of Sikaflex-715 caulk around the edges of the butyl tape
Next, I’ll add a bead of Sikaflex-715 around the edges of the butyl tape. I’m doing this so that there is another completely waterproof line of defense around the edges of the flange, before water even contacts the butyl tape. Basically, it can’t hurt. It would be pretty disastrous to have this leak, so I’m going all out here and making sure nothing will get in.

Screwing the flange down to the roof
With the adhesives in place, it’s time to screw down the flange to the roof. I’ll drill pilot holes for this, then use the supplied sheet metal screws to fasten the flange. This really brings the flange down and seals it nicely, and any doubts I had about this being waterproof are quickly fading away.

Adding Sikaflex-715 around the edges of the flange and over all the screw heads
With the flange screwed down, it’s time to go over everything with Sikaflex. I’ll lay a bead down over the outer edges of the flange, so it’s now fully sealed from below and from the top. I’ll also go over all the screw heads with some Sikaflex. No water is getting in my van.
Mounting The Max Fan
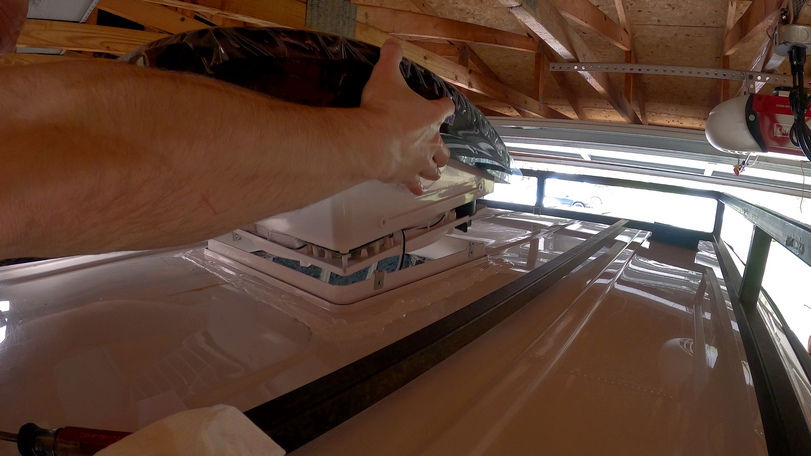
Placing the Maxx Fan in the flange
Now it’s time to place the Max Fan into it’s mounting flange. The little tabs on the the flange that accept a screw slide around easily and require some alignment. Besides that, it’s a drop-in fit.
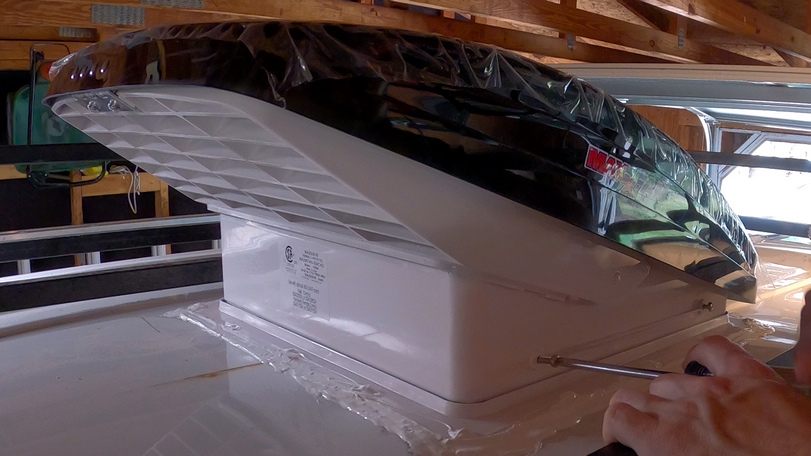
Screwing the flange to the fan. Installation complete!
It’s only four screws to attach the fan to the flange, and that’s it, installation complete! Of course, I’ll need to wire this baby up, but I can’t do that until I have power in the van, and it will be a few more weeks before I get there.
Previous Van Build Post: 1 – Strip & Clean | DIY Stealth Camper Van Build Index | Next Van Build Post: 3 – Insulation
DIY Astro/Safari Stealth Camper Van Conversion Build
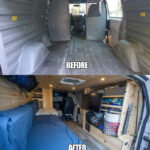
DIY Astro/Safari Stealth Camper Van Build

In just 6 weeks, I’ll transform this ordinary Chevy Astro cargo van into the budget-friendly camper van of my dreams. Here, you can follow along and see how I converted this van into a camper van. I’ve broken the build project up into categories, and each has it’s own dedicated page to that part of the build process. Browse through the entire build project in sequence, or use the index below to choose specific parts of the van build you are interested in. Each page in the van build index contains a list of tools and materials for that part of the job, with links to buy them.
Table of Contents:
0 – Project Overview
1 – Strip & Clean
2 – Maxx Fan Installation
3 – Insulation
4 – Flooring
5 – Walls
6 – Ceiling
7 – Pull Out Slat Bed
8 – Lithium Battery
9 – Solar Panels
10 – Electrical Wiring
11 – Power Center
12 – Shelving & Storage
13 – Electric Cooler
14 – Swivel Seat
15 – Window Coverings
16 – Computer Monitor
17 – Media Center
18 – Cell Signal Booster
19 – Tool Box
20 – Repairs

Master Parts & Materials Spreadsheet
All of the parts and materials used in my stealth camper van build are listed in this spreadsheet
Above is my master parts & materials spreadsheet for my DIY Chevy Astro stealth camper van build. The total parts and materials for my camper van conversion was roughly $7500, not including tools and vehicle maintenance. You can also download your own copy of my spreadsheet to work with here: Chevy Astro Camper Van Build Part & Materials List by Seeking Lost
DIY Astro/Safari Stealth Camper Van Build Video Series
If you’d rather watch this van come together on your TV screen, check out my Chevy Astro Camper Van Build series on youtube. This video series details each step along the way for converting my cargo van into a camper van. The videos are an excellent supplement to the written information provided here. With both, I’m confident that you too can tackle a similar van build project. And if you’re not looking to build one, it sure is cool to watch this camper van conversion project come together!
Chevy Astro Camper Van Build: Strip n’ Clean
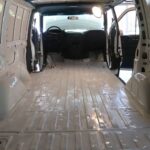
Chevy Astro Camper Van Build Phase 1: Strip n’ Clean
Chevy Astro van stripped and cleaned before camper van build
Before I can start building my camper van, I need to strip it down and clean it. Everything must go! Right down to the bare metal. Just like painting, prep work is key. It takes time to do things right, and this is a perfect example. This isn’t an exciting part of the van build project, but it’s where it all begins.
Tools & Materials Needed:
Materials
Sikaflex 715
Bucket, Brush, Sponges
Soap, Cleaning products
Rags, Towels
Tools
Dewalt Cordless Impact Driver
1/4″ Drive Quick Release Bit Extension
Dewalt Angle Grinder
Caulk Gun
Wire Wheel Attachment
Air Tools
Craftsman Socket Set
Shop Vac
Video – Chevy Astro Camper Van Build: Strip & Clean
If you’d rather watch this part of the build, check out the video below:
Project Overview: Strip & Clean
This phase of the project needs little explanation; strip the van down and clean it. If you’ve just bought a used van, any build project like this should start by thoroughly cleaning and inspecting what you have. Plus, you want to start with a clean van, right?
Strip the Van

View of the cage in the rear cargo area

Removing the cage

Removing the interior
First things first; I need to remove everything in this van. Everything. This job is perhaps easier than if it were a regular passenger van, as opposed to this, a cargo van. Still, the rear cargo area presents it’s own unique challenges. The first thing I do is remove the front seats. It helps having air tools for this, it makes quick work of the otherwise tight and awkward bolts holding the seats to the floor. With the front seats gone, on to the to the cage that this cargo van had installed in the rear. I end up needing the angle grinder to cut off many of the bolts. With the cage gone, I moved on to the plastic walls. These had rivet nuts mounted through the wall, and prevented me from removing the plastic. So, the angle grinder saves the day again. I used this to cut the plastic around the nuts to free the wall, and then removed the rivet nuts afterwards now that I have the necessary clearance to do so.

Repairing a door entry way
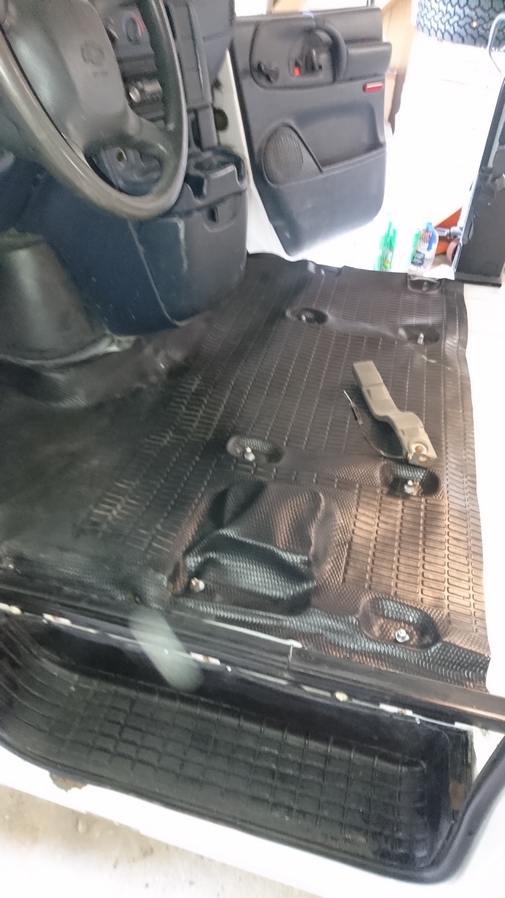
All patched up, good as used
Next I repaired a spot on the driver’s side door entry where the floors was soft. Well, rusted through, actually. Damn Michigan vehicles, always riddled with rust. This spot is probably the worst on the entire van. I added this sheet metal here to provide some support to this area when stepping into the vehicle. I’ve also added some caulking and spray foam to try and seal up the area as best I can from the outside elements, bugs etc. There’s a trim piece that fits over this awful looking patch job to make all this look “normal”.
This area has never been a concern for me before, but while I’m building out this van, I might as well address issues as I come across them.
Cleaning
Condition of the floor
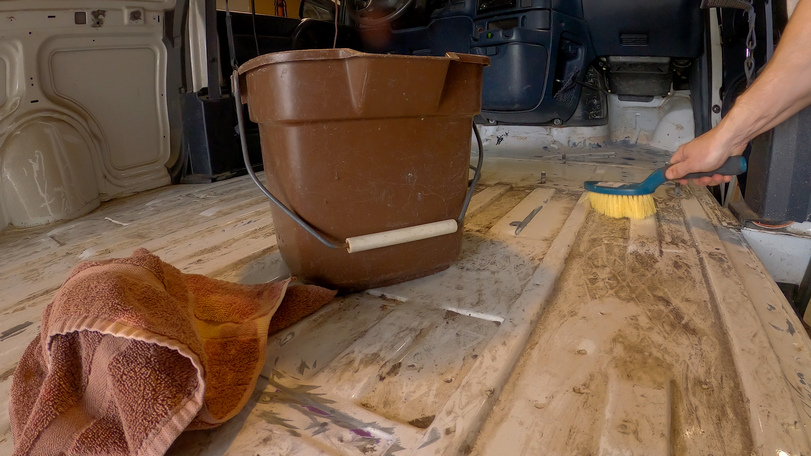
Cleaning the floors. I’m using Awesome cleaner and water

With the runner mat removed in the front and rear, I get a look at my floors. They’re dirty, but in good overall condition, with less rust (almost none) than I was expecting. Next, I’ll clean the floors using awesome cleaner and water. I use a bucket with a brush and scrub the floors and walls, and wipe down with a towel afterwards.
Surface Preparation

Stripping all the paint that’s chipping up with a wire wheel

After using the wire wheel attachment to strip the chipping paint
Now that the van is stripped of it’s interior and has had a thorough cleaning, it’s time to start prepping the surface. Now, I use an angle grinder with wire wheel attachment to strip the paint that’s chipping up on the floor. This will be key for the next step. Anywhere there’s a speck of rust, hit it with the wire wheel until you only see bare metal.
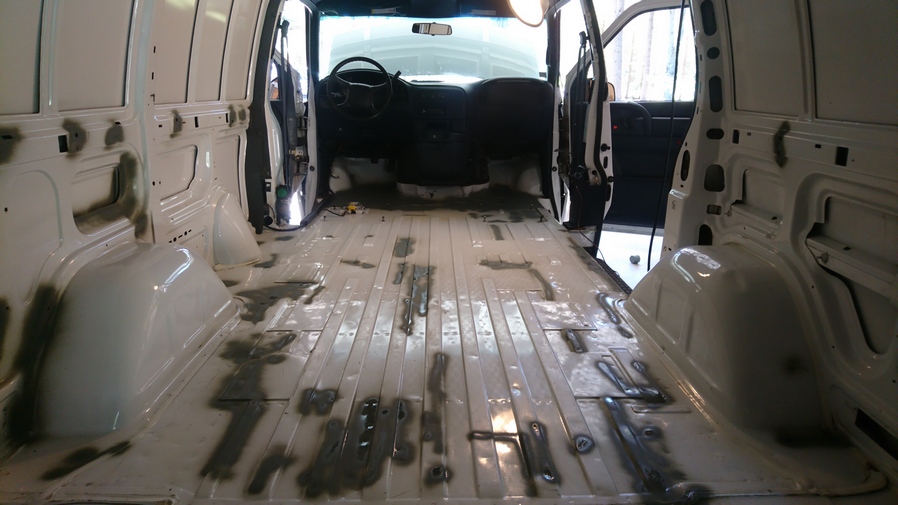
Just sprayed the bare metal spots with etching primer

Spraying over the primer with white paint
I go around the van and spray all of the bare metal areas, that I just went over with the wire wheel, using an etching primer. The etching primer helps create a better bond with the bare metal than a regular primer would. After this dries, I spray over the areas I hit with primer using a white spray paint. This will all be underneath the flooring, so none of needs to look good. It’s all about functionality here.
Caulk & Seal

Filling screw holes with caulk. I’m using Sikaflex-715
Finally, I go around the van and fill all of the screw holes, cracks etc with Sikaflex-715, a good quality flexible roofing sealant that I’ll use throughout the rest of this van build project for various applications.
Previous Van Build Post: 0 – Project Overview | DIY Stealth Camper Van Build Index | Next Van Build Post: 2 – Maxx Fan Installation
Chevy Astro Camper Van Build: Project Overview
Chevy Astro Camper Van Build: Project Overview
Welcome to my Chevy Astro camper van build project. Here, I’ll be converting a 2000 Chevy Astro cargo van into a camper van, in just 6 weeks, with the following goals:

- Off-grid capable for 7+ days
- Cheap purchase price
- Decent gas mileage
- Decent off-road capability
- Stealthy appearance
- Media Center & workstation
Project Origins
It was around New Year’s Day 2021 when I got the idea to build a camper van. I had been watching some youtube videos about camper van build projects and living the van life, and I started thinking, this is right up my alley. I can’t stand another winter in Michigan, and a van would allow me to “live in” and explore the southwest over the winter months. I could avoid the long, cold winters and the seasonal depression that comes with 8 months of grey skies in Michigan. Essentially, I can turn a time of year I dread into a time of year I enjoy and look forward to. Yeah, this is sounding like a good plan.
At the time, I was busy editing my Basin and Range Trail video series, as well as the movie, which took several months of full-time editing. You heard me right, FULL-TIME, as in 60 hours a week. I was burned out, and watching the van build videos at the end of a 10-12 hour day of editing was all I had to look forward to. I set a hard deadline for myself, May 1st… I won’t sacrifice my summer for the Basin and Range Trail project. I was able to finish the movie, and about 90% of the series (which I later wrapped up in the fall 2021). When May 1st hit, I instantly dropped my editing and switched over the van build mode. I set myself a goal, to build a camper van by June 21st, the first day of summer. After that, I’ll hit the open road and head West, wherever life takes me.
Camper Van Conversion Step 1: Buy A Van
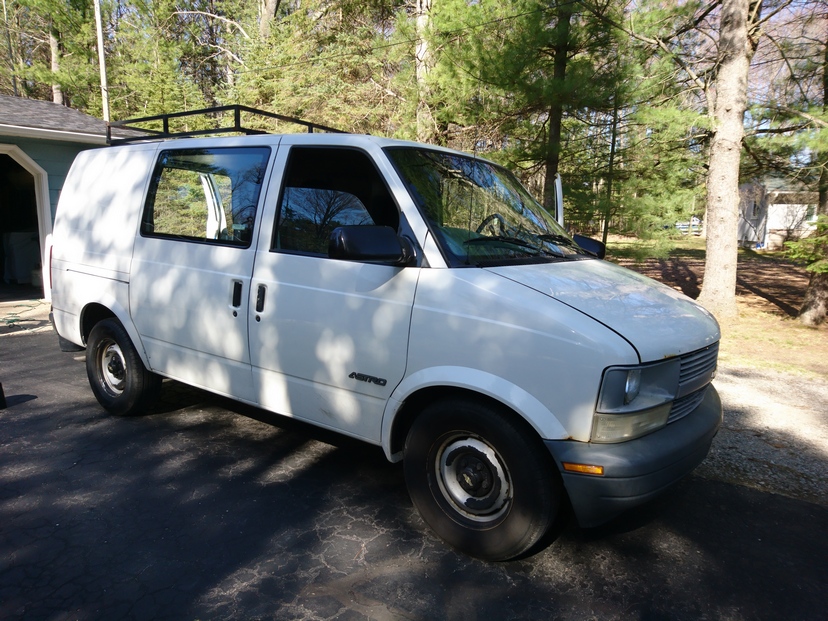
Before I started the van build project, or even thought about building a camper van, I already had a 2000 Chevy Astro cargo van. I bought this van in 2019 so I could haul tools and materials around to my rental houses, as well as transporting my kayak (which I did a LOT of). I bought his van for $1600 and it had 146k miles on it. There was practically nothing wrong with it, and it was in pretty good shape considering it’s age and status as a work van. The guy who owned it was in jail with a DUI, and his wife was selling it to raise money for his lawyer. His loss is my gain.
Truth be told, once I started thinking about building a camper van, I thought about selling my van and looking for an AWD version of the Astro. Had it been pre-covid, this probably would have been possible. These AWD Astro vans could be found pretty cheap, in the $3500 range for something pretty nice. But after 2020, these vans skyrocketed in price due to the face that everyone and their mother was looking to live the van life. It would have cost me $10k or more to get an AWD Astro, and I would have had to fly across the coutnry to get something that didn’t have a ton of rust. So, I settled on the van I already own, willing to sacrifice AWD to save about $8500. No-brainer, right?
Spoiler alert: 1 year alter and I am very glad I didn’t get the AWD Astro. It would have gotten worse gas mileage, and AWD is almost never needed. A good set of All Terrain tires, like the General Grabber ATX tires I bought, makes a HUGE difference, and I seldom felt like I needed more than this. I would rather have higher clearance than AWD, if given the choice.
Humble Beginnings
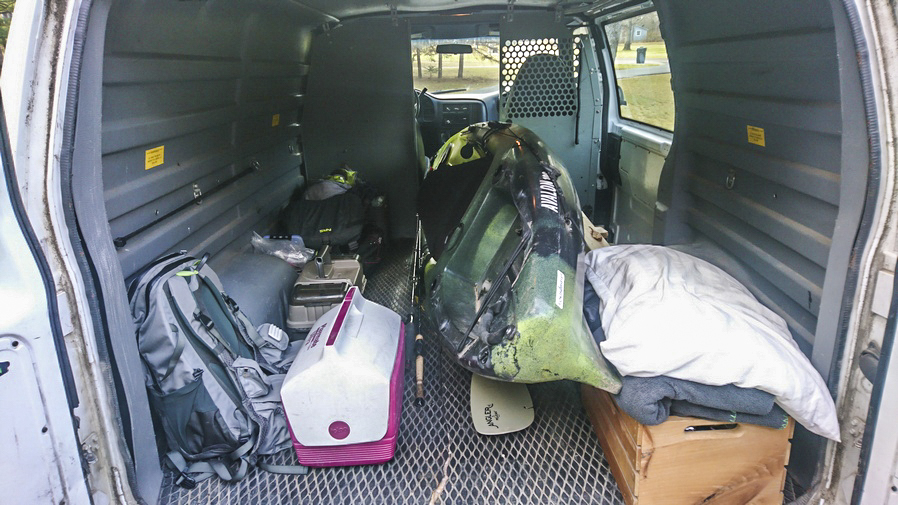
Before I built my camper van, this is how I would do overnight trips with it. It was very basic; I would pull the kayak out at night and sleep on the floor in the back, using my thermarest air mattress on top of my tyvek ground sheet, the same setup I use for backpacking. I had my little cooler that was good for a day or two. It got the job done, but it also made me think about ways to improve my setup. And that’s when I started watching youtube videos about camper van conversions and build projects.
My Vision For This Camper Van Build Project

This van build project was definitely subject to the phenomenon called “scope creep”. For those who are not familiar, this is where your idea starts small and simple, but grows more complicated over time. The more I researched van builds, the more I wanted out of mine. Sometimes, it’s simply a matter of being aware of what is out there, what exists on the market and what others have done, to inspire your build. After educating myself for several months leading up to my van build project, I had a pretty good idea of what I wanted out of mine.
Vehicle Capability: This is all about choosing the right vehicle for the way you want to use it. Fortunately, I happened to already own the model of van I settled on that fit my needs; small and stealthy, decent gas mileage, and decent off-road capability.
Off-Grid Capable for 7+ Days: I want to be able to take this van out anywhere and not have to go into town for a week or more. For a power system, I’ve determined that solar panels used in conjunction with a lithium battery should accomplish this goal, providing they are correctly sized for my needs. I will also need a way to store food and water for a week. Water is easy, one or two 5 gallon jugs is all I’ll need. But for food, I need a way to keep it cool. I don’t want to buy ice and deal with it melting, so I’ll look at electric coolers for my “fridge”, like the Dometic models. These can run off DC power, and with my solar panels providing a steady supply of juice throughout the day should have no problem powering one of these coolers. Food, water and power, that’s really all I need to be off-grid for a week at a time.
Workstation/Entertainment Center: I’m going to need a way to work in the van, as well as a way to entertain myself if I’m going to be living it. I envision a computer monitor mounted on a swivel arm, bolted to my shelfing. I’ll also install a swivel base for my passenger seat, so it can face the rear of the vehicle. This will be key to my workstation/entertainment center. This not only gives me a comfortable place to sit up properly, but it also makes the van feel so much bigger. I should be able to use the swivel arm to position my monitor towards the front of the vehicle, when I am facing the rear in the swivel seat. I’ll also have a board for my laptop and mouse to sit on, making it a comfortable setup for long periods of computer-ing. I’ll ultimately settle on an android TV box and portable HDD as my media center, so I don’t have to run the laptop to play movies or shows.
So that’s my plan for the Chevy Astro Adventure Van. Follow along to watch this Chevy Astro cargo van transform into the budget friendly stealth camper van of my dreams!
Watch my Chevy Astro DIY Stealth Camper Van Build Series on Youtube
**There are 20 more pages detailing every step in my camper van build. Use the links at the bottom of the page to navigate to the next page in the stealth camper van build project, or to go back to the van build index.
DIY Stealth Camper Van Build Index | Next Van Build Post: 1 – Strip & Clean
Van Life


The term “Van Life” is a bit cliché these days, but yeah, I too bought a van and converted it into an awesome camper van. When I’m not out on the trail or at home, I’m living out of my 2000 Chevy Astro van somewhere in the West. I gotta say, it’s pretty awesome… no more Michigan winters for me! This van will open a whole new world of adventures, enabling me to spend more time pursuing my outdoor passions, while finding new ones. You could call it a camper van, but I call it the Adventure Van.
This page serves as an index for all things relating “Van Life”… my Chevy Astro camper van build project, traveling and camping in the van, van life tutorials, tricks, and more.
Chevy Astro Camper Van Build Project

Chevy Astro Camper Van Build Index:

Intro to the van & the build project
Strip & Clean
Maxx Fan Installation
Insulation
Flooring
Walls
Ceiling
Pullout Bed
Solar Panels
Lithium Battery
Electrical Wiring & Power Center
Shelving
Fridge
Swivel Seat
Window Coverings
Computer Monitor & Media Center
Cell Signal Booster
Tool Box
Repairs