8 Day Rockhounding & Mineral Collecting in the Santa Teresa Mountains, AZ (Nov 2022)

Rockhounding & Mineral Collecting in the Santa Teresa Mountains, AZ – Nov 2022

Trip Overview
This is an 8-day solo rockhounding and mineral collecting trip in the Santa Teresa Mountains, SE Arizona. This trip took place in mid November, 2022. I’ll be using my Chevy Astro Camper Van as my home base, and do a series of 7ish-mile day hikes to various abandoned mines. I’ll also do an overnight hike to one of the mines and sleep in the tunnel. This is a beautiful and remote mountain range with the opportunity to find some interesting, beautiful and rare minerals!
Disclaimer
Rockhounding and mineral collecting requires that you research public/private land access, existing mining claims, etc. Many old mines and claims are abandoned, and you must use your judgement whether or not it’s safe and legal to access. The author shall in no way be liable for any use, misuse or omission of information presented here in this guide.
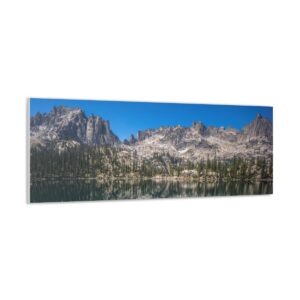
Santa Teresa Mountains Arizona Rockhounding Map

About The Area
The Santa Teresa Mountains are located within the Coronado National Forest and partially within the San Carlos Apache Indian Reservation, in Graham County, Arizona. My trip will take place just a few miles from Klondyke, a small populated place in Aravaipa Canyon. It was founded around 1900 by a group of miners, who recently returned from the Klondike Gold Rush in Alaska. They decided to name the town “Klondyke”, with a Y. Today there are only a few people living in the area. The Klondyke Country Store & Lodge is supposedly open, but in the four times I’ve driven by in multiple visits to the area now, I haven’t seen open. The Grand Enchantment Trail runs right through this area, and hikers DO use the store in Klondyke as a resupply, so you’d probably have better luck catching them open if you make prior arrangements.
Day 1: Arrive At Camp in Santa Teresa Mountains
Getting into the Santa Teresa Mountains takes some time. I approached from Safford. From US-70 near Eden, take Klondyke Rd west for 25 miles. It’s a dirt road that’s in great shape, you can drive 50 if you want to. This dead ends at a T junction in Aravaipa Canyon. Go right (Northwest). Technically this is still called Klondyke Rd here through Aravaipa Canyon. This dirt road is also in great shape. Take this 10 miles. There will be two roads on your right within a few hundred feet of each other, both with closed gates, right before you reach a cattle guard. The first gate says private property (debatable), but the second gate says nothing. The map shows BLM land here on the second gate, so your good to go. The first gate has private property on ONE side of the road, BLM land on the other. I don’t think the property owner has a right to keep people off that road since he only “owns” half.
Now this Forest Service road gets rougher. I drive 1 mile to a spot where I camp, and trust me, it’s nothing special. But it’s a home base and one that’s reachable without a high clearance 4×4. I had to do a little road maintenance on my last visit, using my shovel to bridge the gap in a washed out section of road. You may have to do the same.

Not the prettiest campsite, but it’s as far as I can make it on this road!
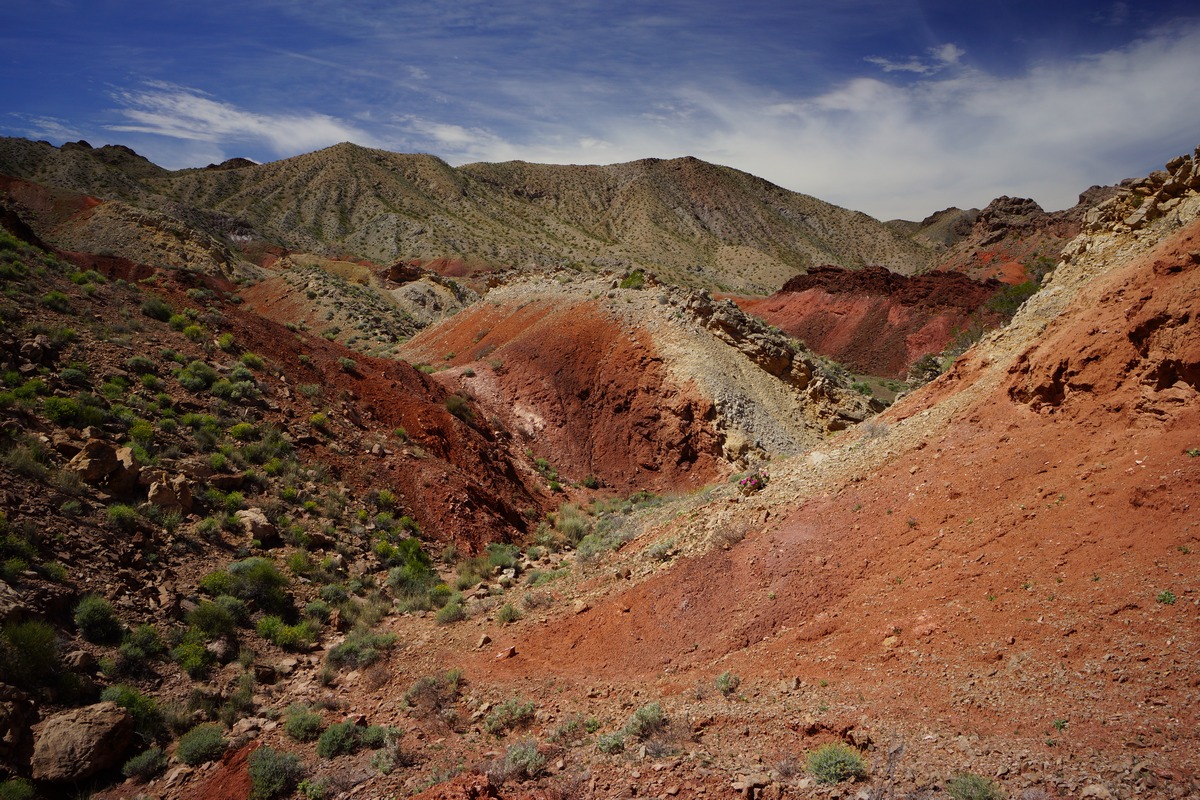
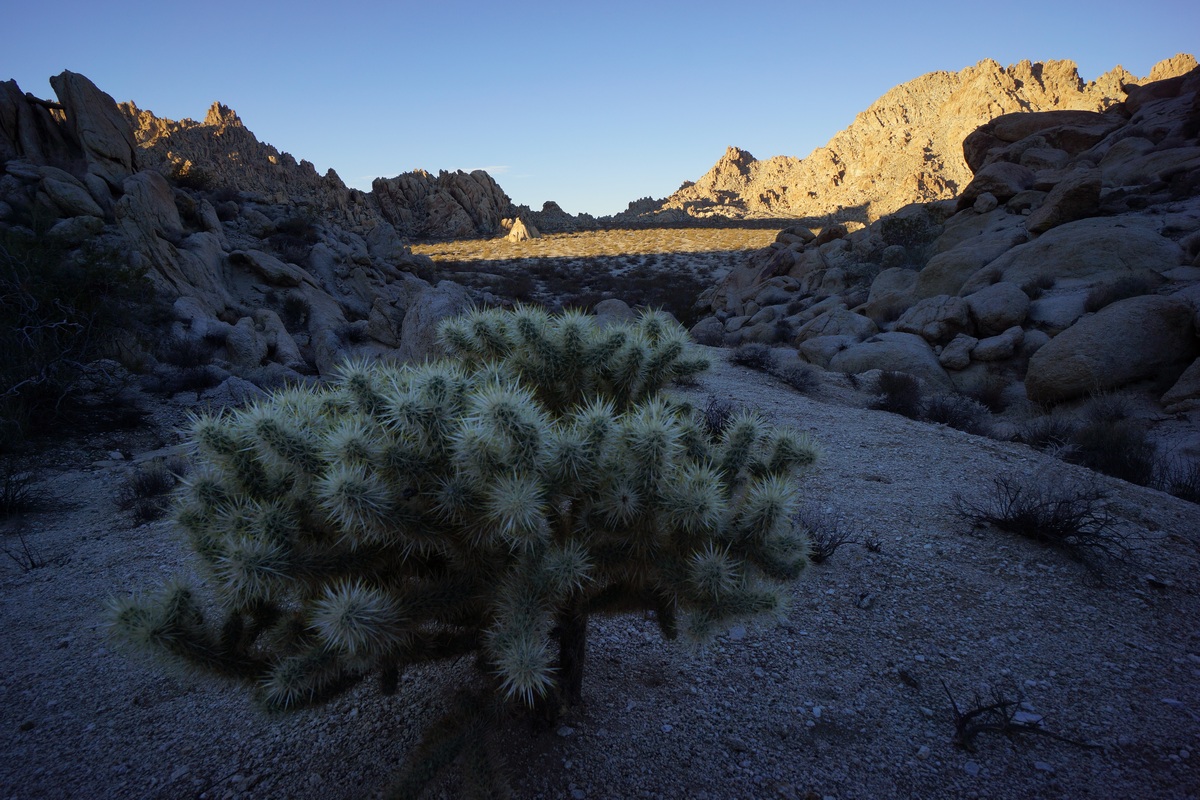
I camped at this spot last winter on my first visit to the Santa Teresa Mountains. My van camper requires almost nothing to “make camp”, so right after I parked, I load up my backpack, grabbed my bucket and headed up the canyon to explore with the last remaining hour plus of daylight.

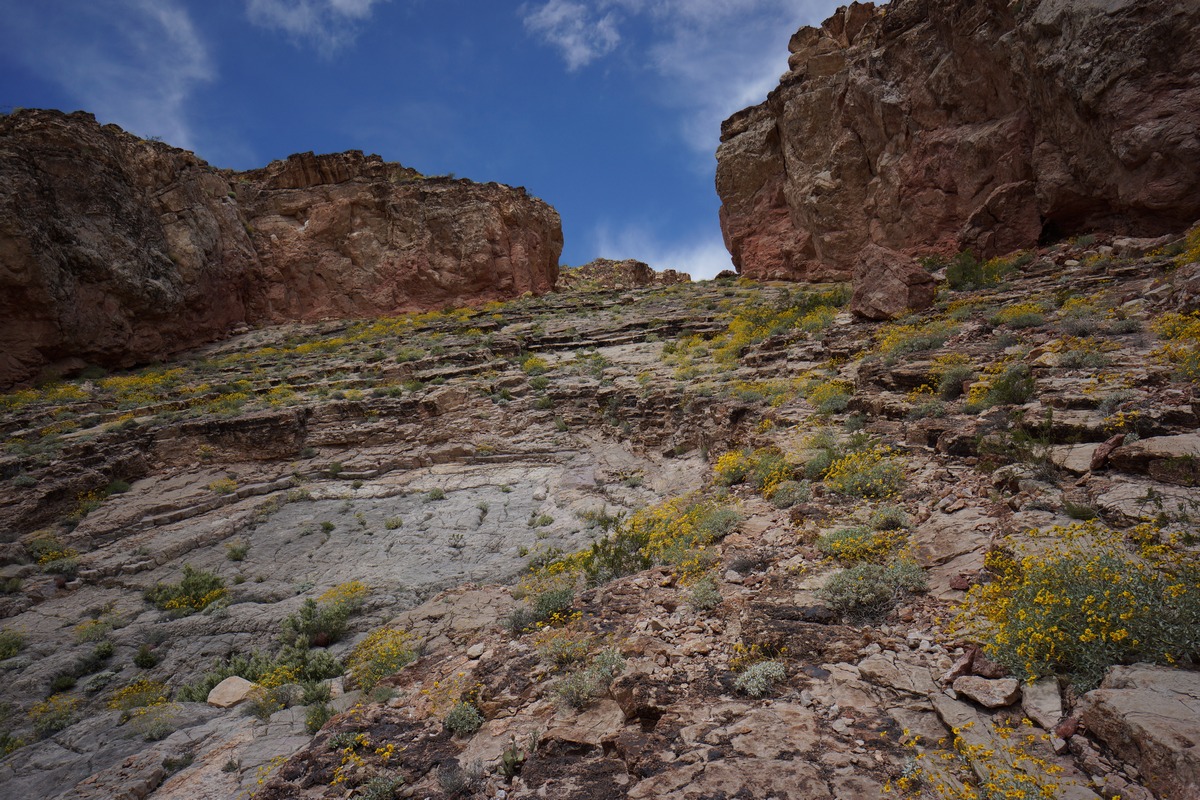
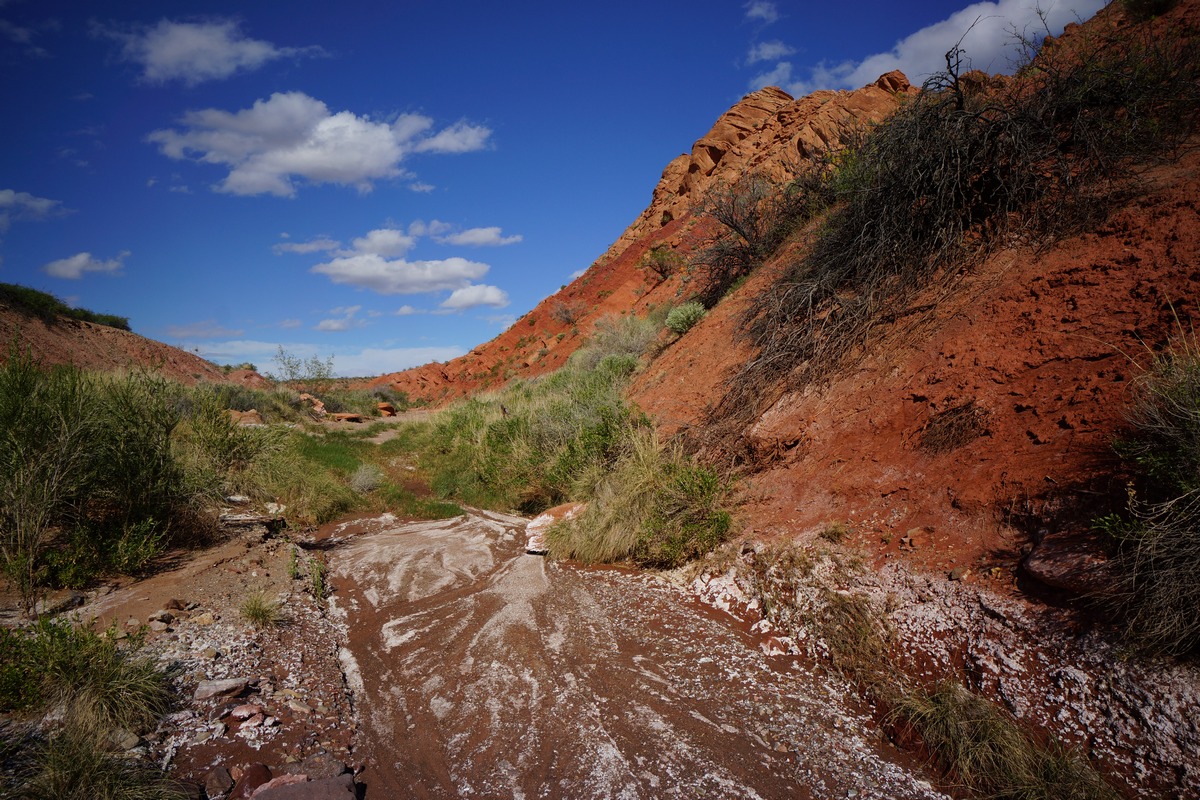
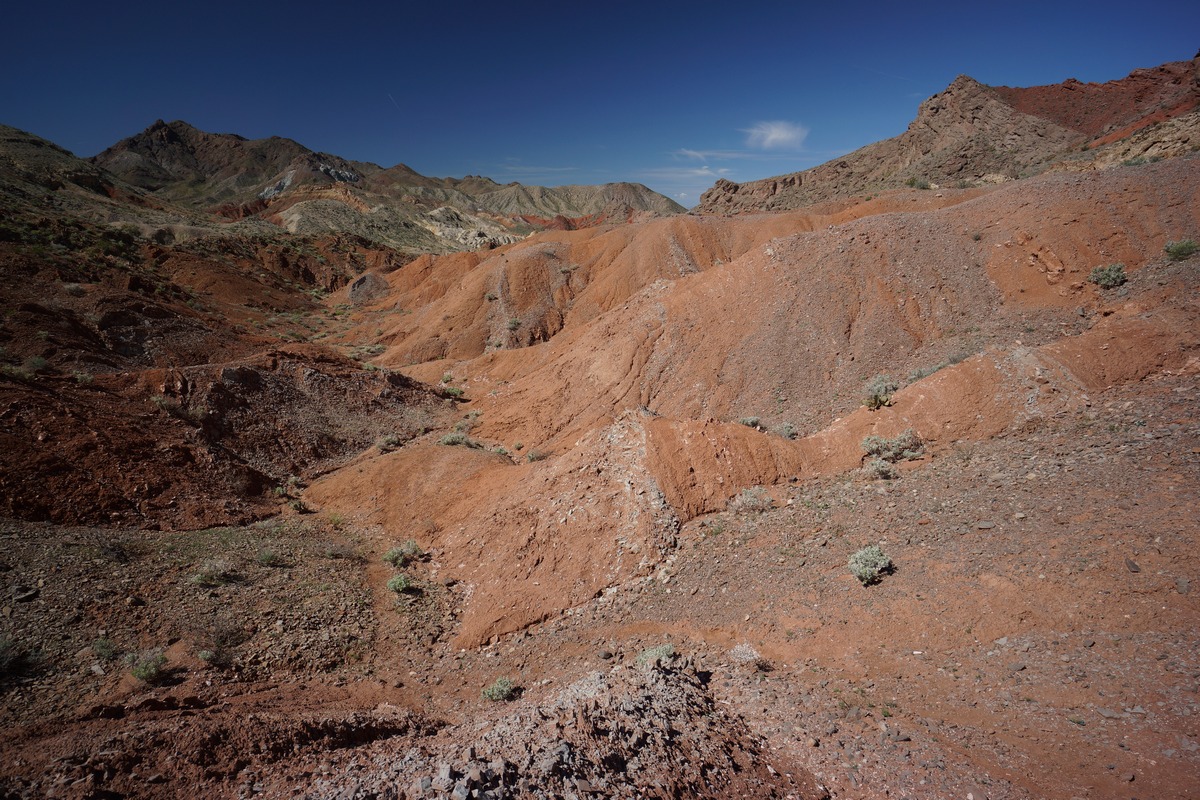
Nice hike this evening up this beautiful canyon
The dirt road turns and heads up over a ridge, and now it’s a walk through the wash up the canyon. I don’t usually have a ton of luck finding good rock and mineral specimens in washes like this one, but if nothing else, it’s a great time of the day to be hiking through an increasingly beautiful canyon. Suddenly, it narrows. I head up a short ways, but turn around as the daylight is fading fast. I see no interesting rocks or minerals along the way tonight, but it was still worth exploring. Tomorrow will be different!
Day 2: Overnight Hike to Laurel Canyon, Grand Reef Mine
Mines Visited: Grand Reef mine
The Grand Reef Mine is a former underground Pb-Cu-Ag-Zn-Au-Mo-V-Baryte-Fluorspar-Silica mine located in Laurel Canyon, 4.6 miles SSE of Aravaipa, and about 4 road miles NE of Klondyke in the Santa Teresa Mountains, Graham County, Arizona.

Ready for an overnight hike/mining trip

New cheapo backpack for rockhounding
It was a cold night, perhaps upper 20s. I warm up, eat breakfast and pack up for an overnight trip to the Grand Reef Mine. I’ve never done an overnight mining trip before, so I bought a new backpack just for this kind of thing. It’s a no-name cheapo backpack, but it was one of the few bags I could find that had everything I was looking for: bottom compartment for sleeping bag (will put rock/mineral finds here), heavy duty material (not thin ultralight materials), and cheap price. It was about about $85 for the 60L. I’ll carry my tools in a separate bag that I strap to the top of the backpack, carry my tent/sleeping bag/food etc in the main compartment, and have some small tubs, boxes and bags in the bottom compartment which I hope to fill with minerals later on.

I follow the canyon uphill…

The canyon narrows…

And now I shimmy my way up this crack to exit the slot
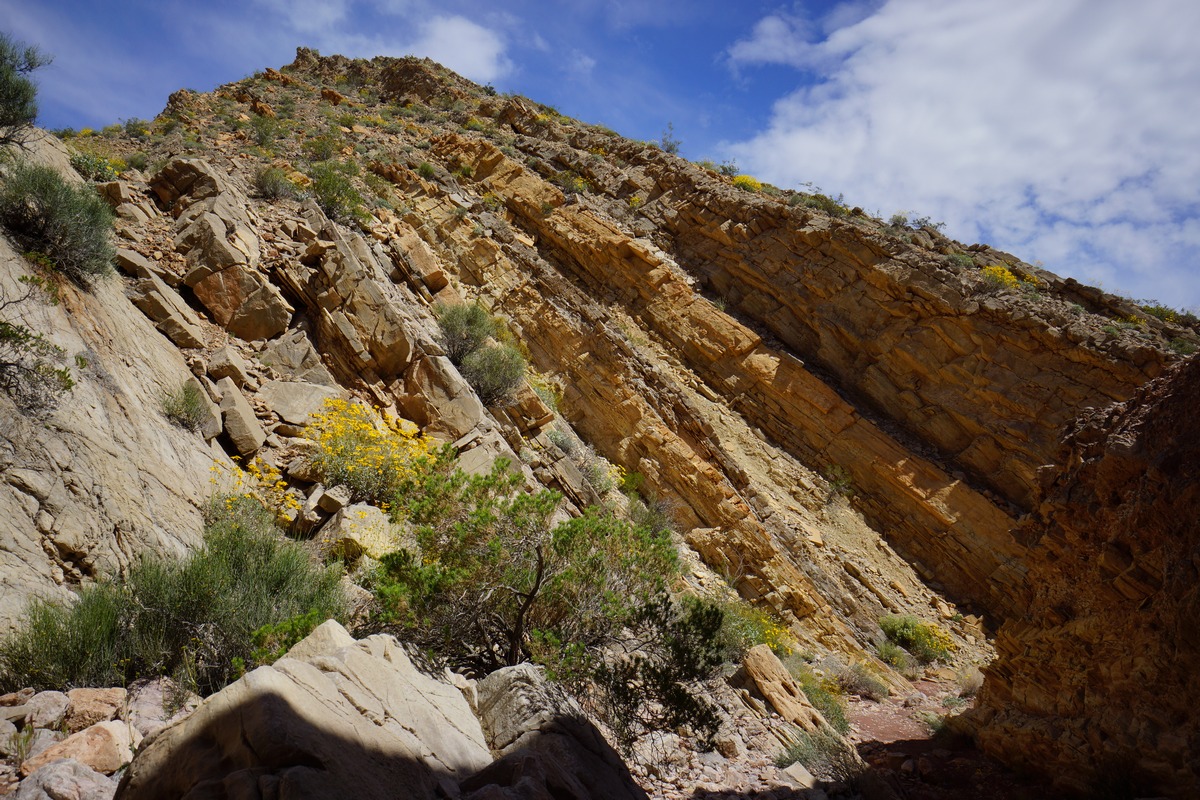
It’s about 4 miles each way to the Grand Reef Mine from my location, and some of this is off-trail. Leaving camp, I set out towards a canyon that quickly narrows into a slot. I shimmy my way up it to keep moving up, and eventually get past it. I find a nice quartz crystal point, about the size of my thumbnail. Weathered, but a good sign. Saw a lot of these last winter on my previous visit, would love to find where they are coming from.

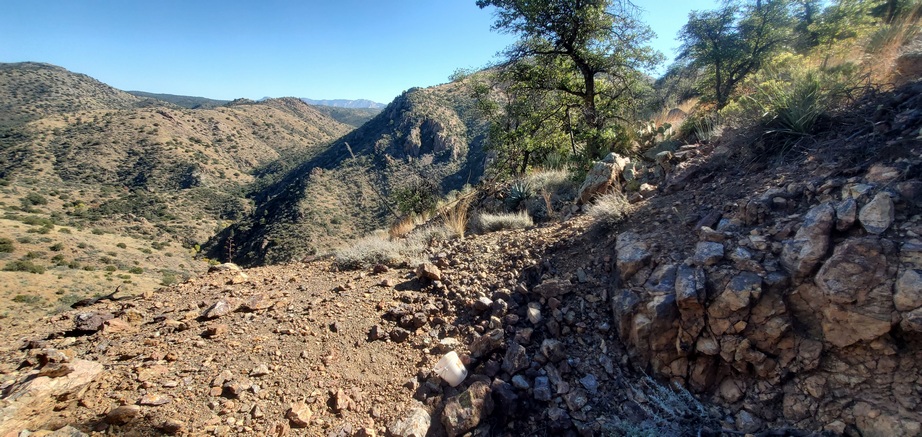
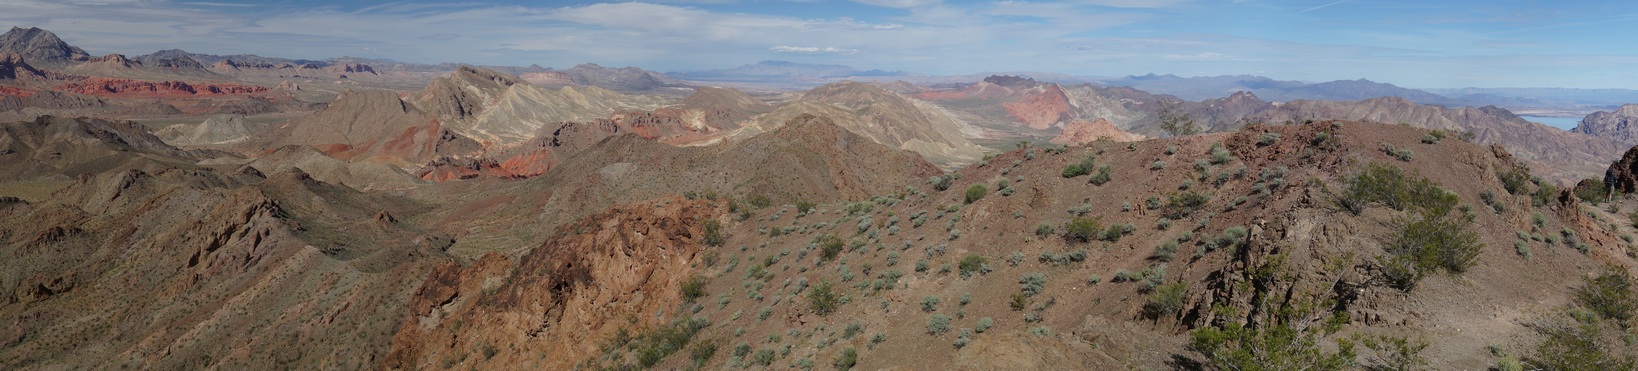
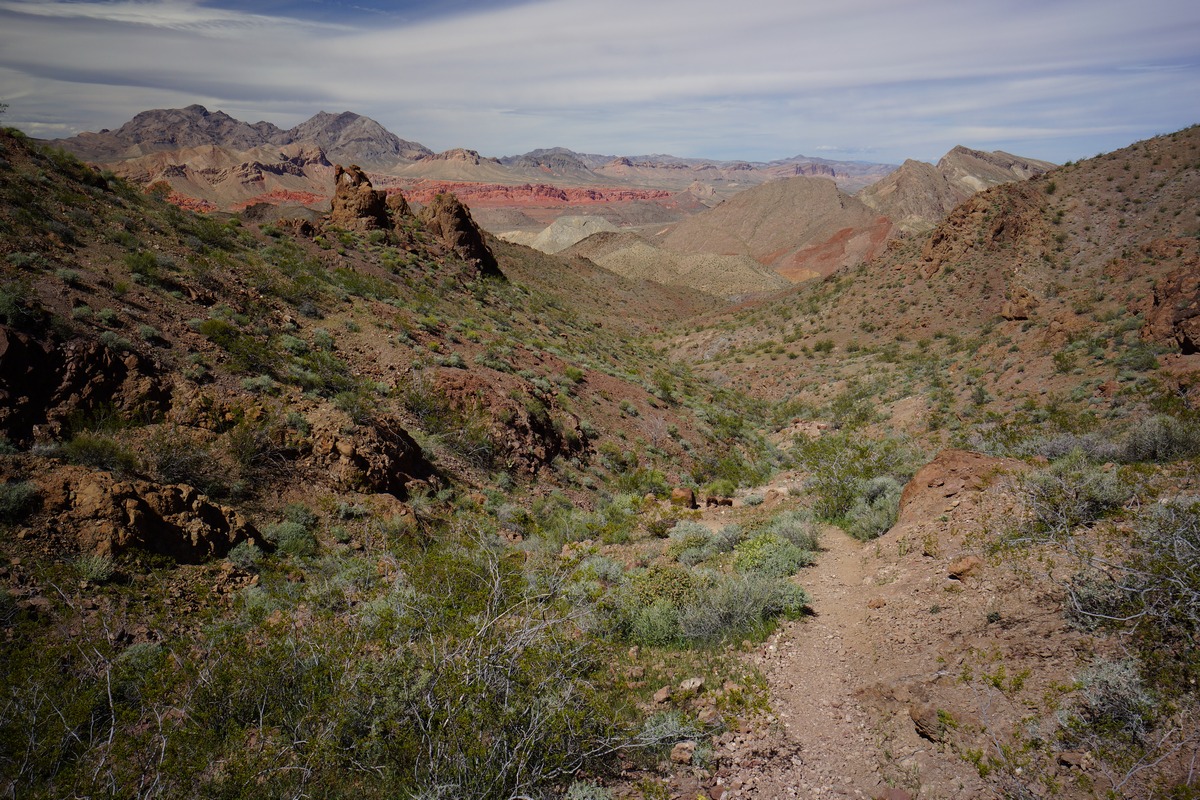
View of the Santa Teresa Mountains from the road, along the Grand Enchantment Trail

Aravaipa Canyon

Nice size quartz points in a vug
My route takes me up and over a series of ridges and drainages before reaching a dirt road. This dirt road is part of the Grand Enchantment Trail, a 770-mile hiking route from Phoenix to Albuquerque. A route that I would love to hike myself someday. But today, I’m here for the minerals. Along this road, and the nearby ridges, I found some more quartz points, more weathered than the last ones. I also found a thumb sized quartz crystal in an exposed vug in a boulder along this road on my hike up. Last winter, I found a quartz point on the ground near here almost the size of my hand! The views are also excellent, looking northeast to the Santa Teresa Mountains ridgeline.

I follow the road up past the point where there’s a faint path that leads downhill to the Grand Reef Mine. I keep going a little farther to another mine shaft and tunnel that’s marked on the map, perhaps 1/3 mile north of the Grand Reef Mine. It’s very steep here, but I follow the slopes downhill to the point where the shaft and tunnel are marked. I see neither a shaft or a tunnel, merely a few small prospecting pits with almost nothing of interest. Ah well, it was worth checking.

Laurel Canyon

Large pools of water throughout the canyon

Very scenic!
After a steep descent, I’m down to the bottom of Laurel Canyon. It was a beautiful hike with many obstacles. I found several large pools of water, some big enough to do a cannon ball into. There were many wasps about, likely commuting from the massive nest at the Grand Reef Mine, just down the canyon. I saw this on my visit last winter.

Worth poking around here for a bit
Next I came across some copper deposit staining of the rock along the creek bed. I stop here for 20 minutes to chip away at the blue/green coloring but find nothing warranting a continued effort.

It’s a 60ft drop down this mostly dry waterfall, but there is a trickle of water complicating the climb

The chute I eventually climb down
Eventually I reach a point in the canyon where I find myself along the upper edges of a bowl with a 60ft drop. The terrain above the bowl is very steep, thick and thorny. On the other side of the bowl, I thought I saw a weakness in the rock that I could climb down. So that’s where I headed. I bushwhacked across the top of the bowl for a solid 20 minutes, and nearly stepped on a rattlesnake. Eventually, I reached my chute, climbed down and reached the bottom. That was a pain, but also pretty fun.

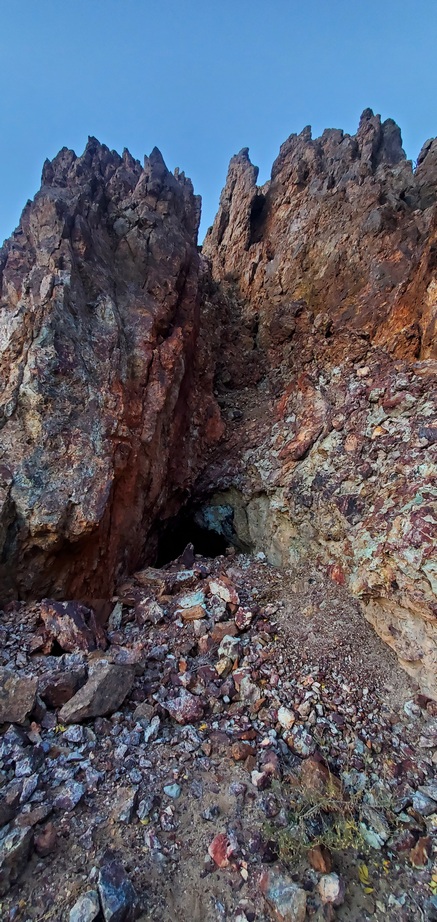
The Grand Reef Mine

Laurel Canyon cuts right through the reef
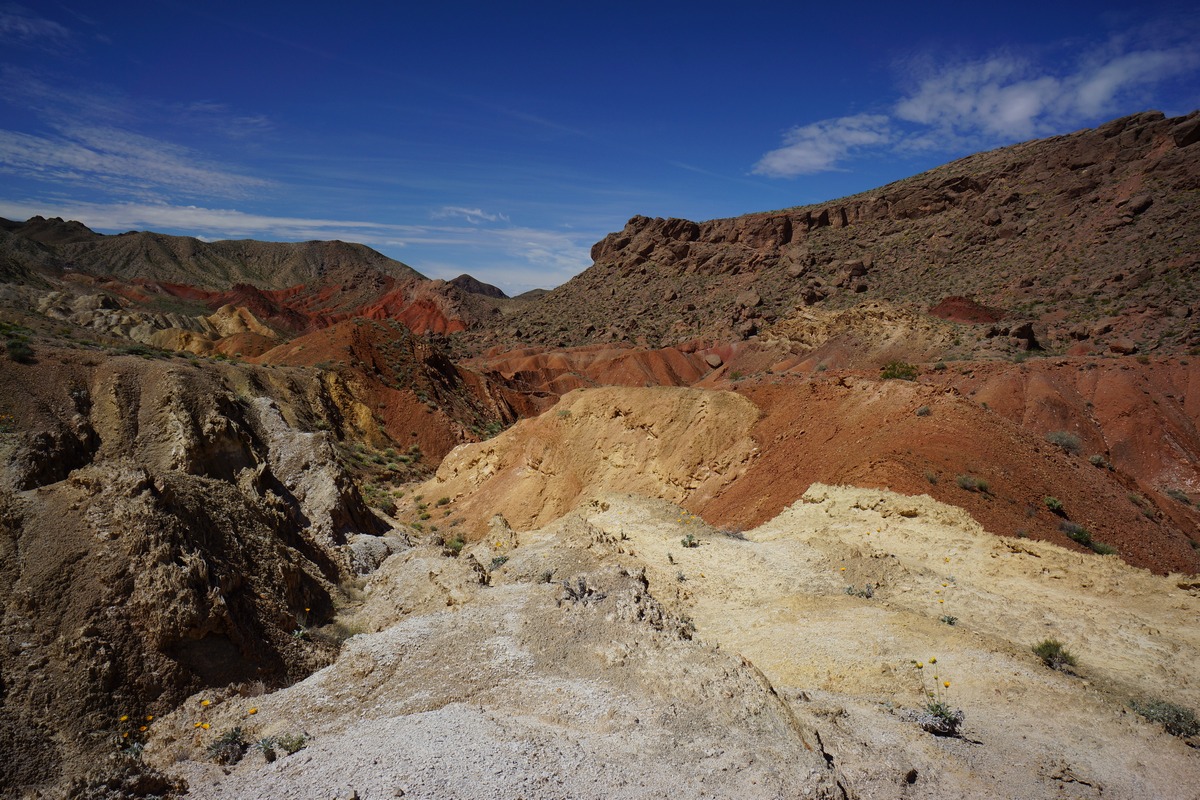
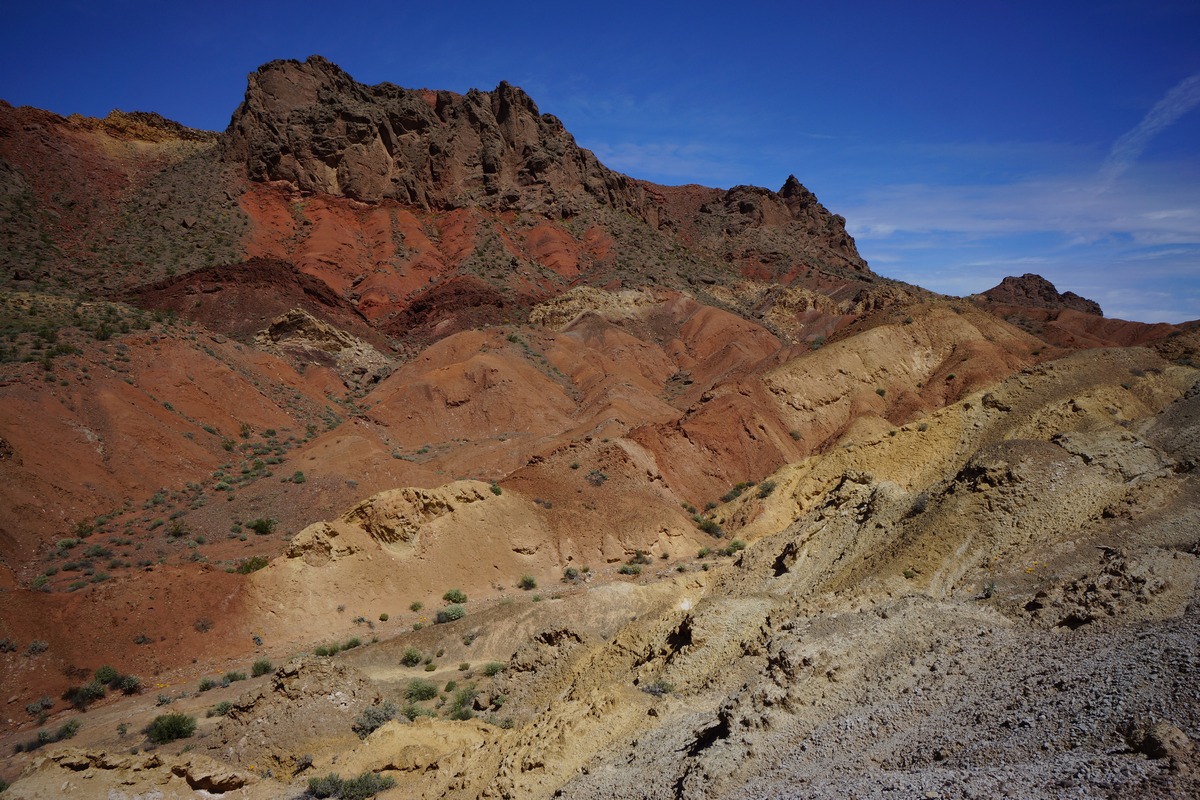
Finally, I come to the “end” of the narrow canyon section as I reach the reef. Besides the information written about the Grand Reef Mine on Mindat, I couldn’t find any information online about the geology of the area. Presumably, the mine’s name is a reference to an ancient reef here in the area, which has been uplifted. Imagine a flat section of the Earth that is tiled 90 degrees, towards the sky. The site is marked by a vertical outcrop of rock, running perpendicular across Laurel Canyon. Mindat makes a reference to the Grand Reef Fault and block faulting trending NNW.
Mine tunnel

Grand Reef Mine

Camp for the night
On my visit to this mine last winter, the rough 8 mile round trip hike took a decent chunk of the daylight and I wasn’t left with enough time to really hound these tailings. This time, I’ll camp here for the night, and hike back to my van tomorrow. From the bottom of Laurel Canyon, looking up at the “reef”, you’ll notice a tunnel about 25ft up. About 20ft into the tunnel, there’s a locked gate preventing further entry. I dropped my stuff here in the tunnel, where the ground looks clear enough for my tent, and the tunnel appears to be just barely wide enough.

View from the climb up the tailings pile
Next I grab my bucket and head up the VERY steep slope of tailings to get to the main collecting area. I do NOT recommend doing this. There’s a “road” leading up to the mine, or there was. It’s much easier to find coming down. If you want to find it going up, walk down Laurel Canyon a short ways, past the mine tailings, and take one of the ravines on your right uphill. The road is completely gone at the bottom, washed out and overgrown, but it’s better than the tailings pile. Only near the top will the road become more obvious.

The Grand Reef Mine
At the top of the tailings pile, you’ll see a large open shaft that’s fenced off. Around the edges of this shaft is the main collecting area. As of 2022, there is a MASSIVE wasp nest about 75ft above the top of the mine shaft. The size of this nest could be roughly that of a small car. This is the nest I eluded to when I was hiking down Laurel Canyon earlier. The wasps can be heard nonstop buzzing overhead as they travel to the water in the canyon. They have not been a problem for me, but it’s worth the mention.

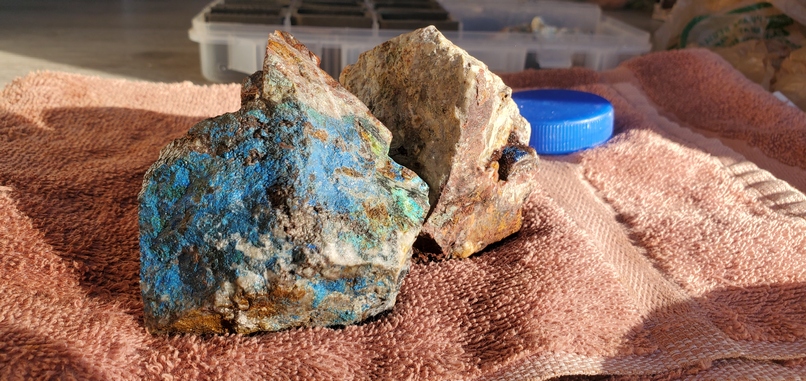
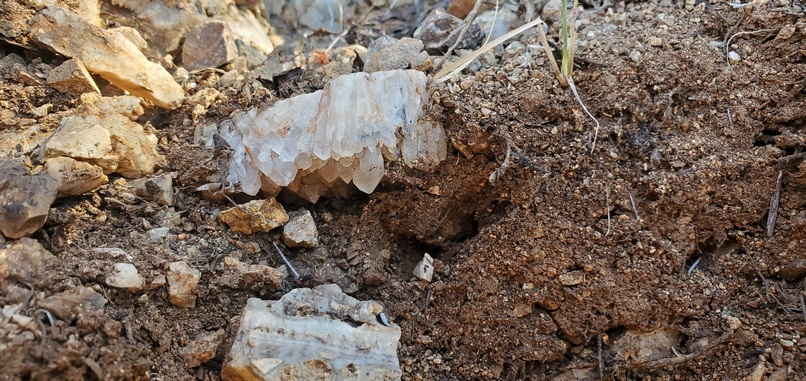
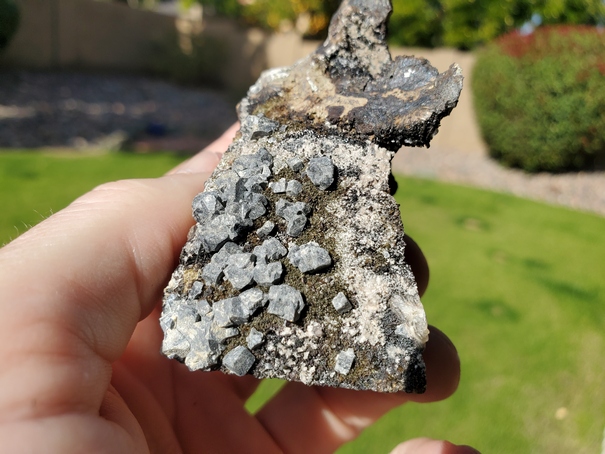
Linarite on Quartz

Some strange lumps/masses of Linarite

Deep blue Linarite on Quartz
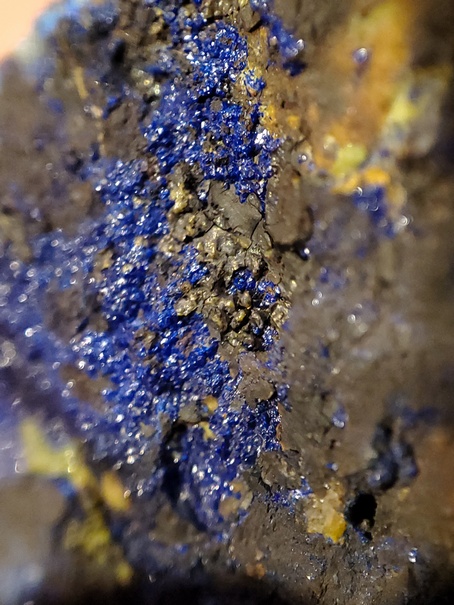
Deep blue Linarite


Linarite
It won’t take long before you find your first pieces of linarite. The deep blue color of this mineral will easily catch your eye, but the challenge is finding worthy specimens to keep. I found most of my specimens by turning over piles of rocks and boulders, and digging small holes. The best material likely came from the various levels of the mine, and with no access to those, all that can be done is pick through the tailings. Hard rock mining can be done on the walls of the reef, I have not gone this route here.

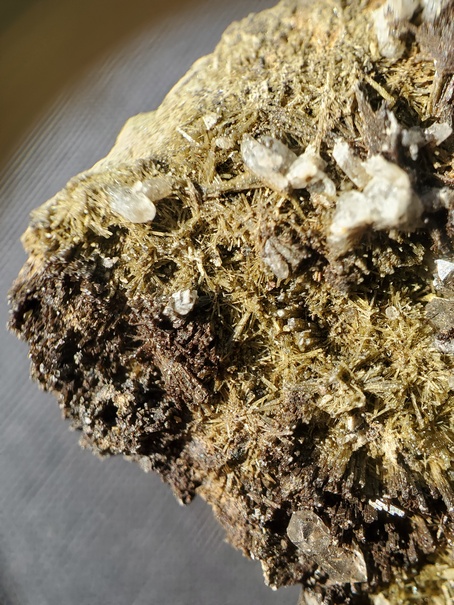
Linarite and Brochantite

Linarite and Brochantite

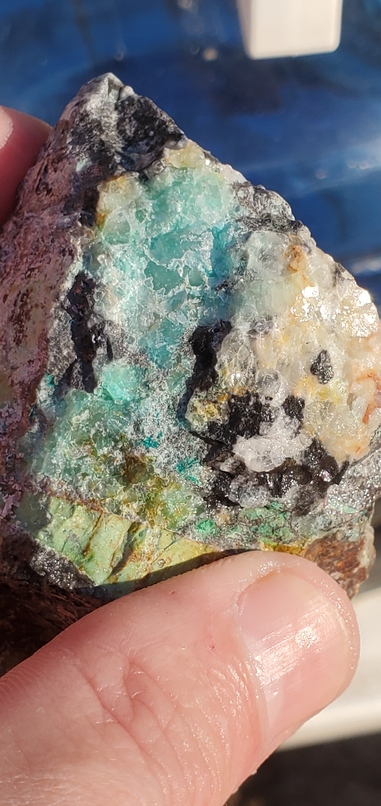
This specimen does not appear to be Chrysocolla. This color is more common to Caledonite
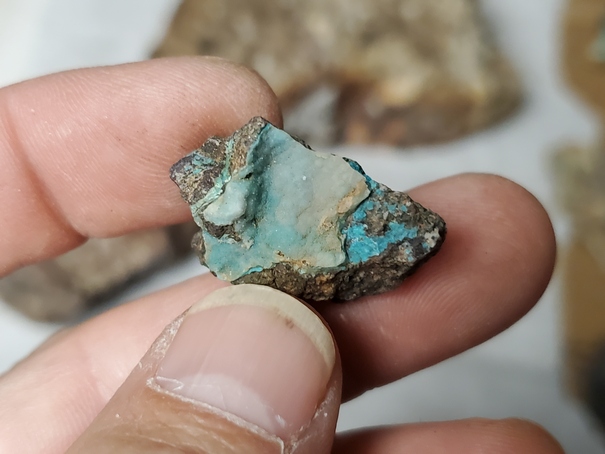
Along with the blue Linarite, you’ll find lots of green Brochantite. Malachite and Chrysocolla don’t seem very prominent here at all, the typical source of greens and blues at many Arizona copper mines. Caledonite is another blue mineral you may find at the Grand Reef Mine. Some really nice specimens of Caledonite have been found here in the past, but I did not find any nice crystals. Instead, I found a nice drusy piece of Caledonite, or perhaps, Chrysocolla.

Quartz with an interesting golden bronze coating

Quartz with a dusting of… something blue/green

Nice clear quartz found on the hike to the Grand Reef Mine

Found this BIG quartz point on the hike to the Grand Reef Mine. There are some really big crystals here, would love to find them before they get this weathered!
Some nice quartz crystals can also be found here. Nothing like the large sizes I found in the washes on on the ridges on the hike to the mine, but the quartz here can take on some interesting looks. For example, I found a really nice bed of quartz crystals, with a golden bronze staining. And another plate of quartz crystals that have a coating of black and light blue minerals.
Fluorite

Linarite over some iron-stained quartz druse
Blues n’ greens
There are a lot of interesting minerals to find here, but it is apparent that it’s been pretty picked over throughout the years. After several hours of collecting, I found some nice pieces, but not as nice as I was hoping for when it comes to Linarite. Same as my last trip. Trust me, I am NOT complaining. But it’s clear the highest quality specimens are gone now or are just few and far between.
With sunset approaching, I head down the old road, bushwhack my way down to the bottom of Laurel Canyon, and over to the mine tunnel. I set up my tent with the last remaining bits of daylight and settle in for a long night. A constant breeze through the old tunnel makes my tent flap in the wind all night. But after a hard day, I’m ready to rest.
Minerals I Found at the Grand Reef Mine, Day1
- Brochantite
- Linarite
- Quartz
- Galena
- Fluorite
- Caledonite?
Day 3: Leave Grand Reef Mine, Look For Dog Water Mine, Return to Van Camp
Mines Visited: Grand Reef mine, Dog Water Mine

Morning from camp
It took a long time for the sunlight to reach the canyon this morning, and with nearly freezing temps, I stay in my tent until about 9am. Once that sunlight pours into the tunnel, I’m motivated to eat breakfast and head back over to the tailings.

Purple Fluorite octahedrons on quartz
This morning, I’ll hound the bottom of the tailings pile, instead of climbing up to the top again. Fluorite can also be found at the Grand Reef Mine. There’s some nice green fluorite pieces to be found, as well as some more gemmy purple fluorite. I found a few nice purple fluorite octahedrons on a matrix of quartz crystals, a great find for me. Score! I found the nice purple fluorite pretty close to the entrance of the tunnel. The green fluorite was mostly up top near the mine shaft entrance.

Looking back at the Grand Reef Mine from Laurel Canyon
After a couple hours of leisurely mineral collecting, I pack up and begin the hike down Laurel Canyon. I’ll take a different route back than I took yesterday. There’s a halfway decent 4×4 road running down the canyon, in better shape in some places than others. There’s no public access to this canyon, since private property blocks it a few miles down the canyon. Likely the only use this road, this canyon, ever sees is from the local rancher down the canyon.
About a mile down Laurel Canyon, I reach the junction for Waterfall Canyon to the east. I follow this road a half mile or so in search of the Dog Water Mine. Supposedly there Wulfenite to be found here. However, when I reached the general area of the mine, I could only see some small workings on the hillside above. And from the road, it’d be a bushwhack through a ton of thorn bushes on a steep slope. I’m already pretty cut up from bushwhacking yesterday in Laurel Canyon, so I opted to skip this one. I keep forgetting to bring a pair of hand shears for working through the thorn bushes.
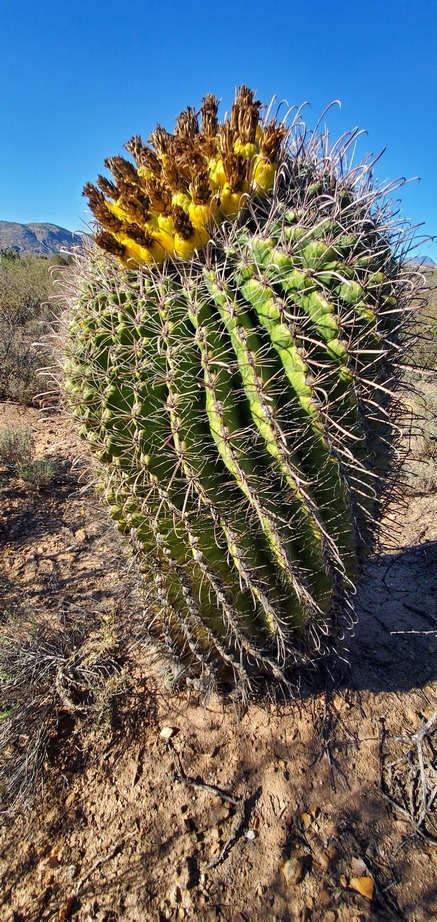
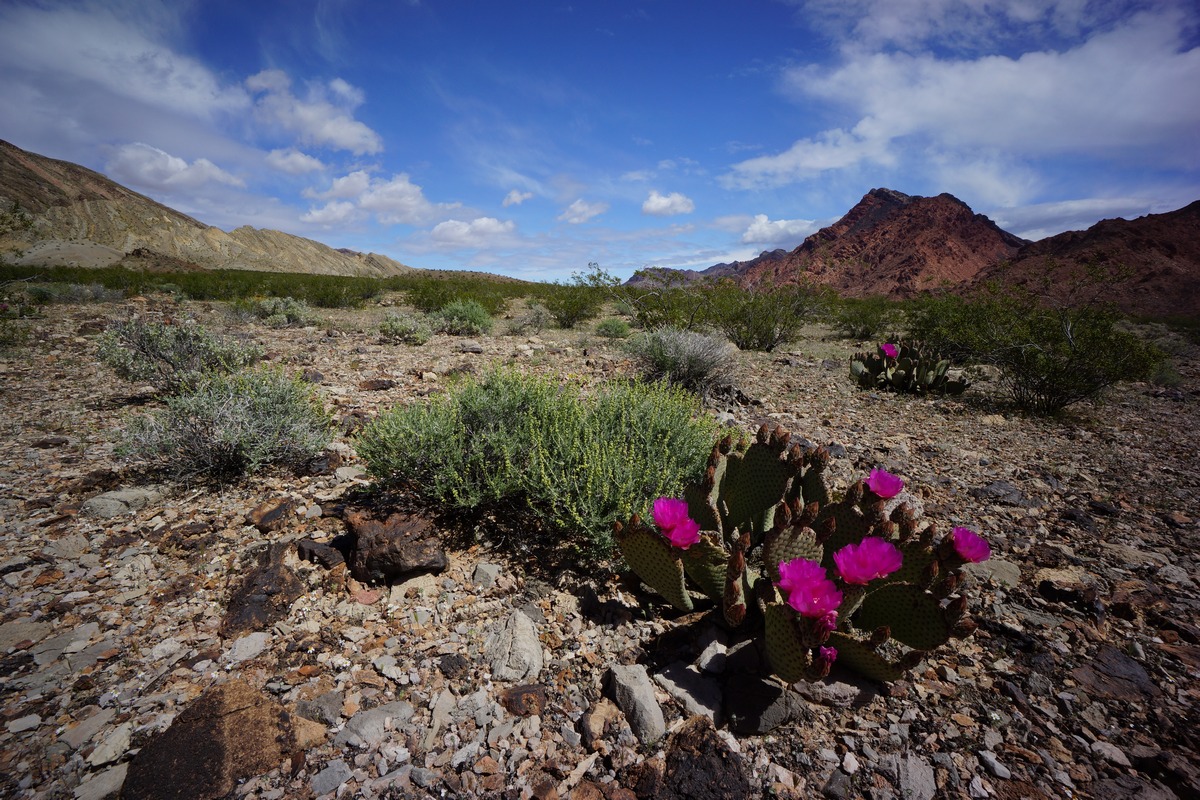
Big burly Barrel Cactus
I headed back down the dirt road, back down Laurel Canyon and reach fence line around the private ranch. I follow the fence line up hill and over the first ridge, cross the road I came in on, and continue hiking west across a series of ridges and washes. Lots of thorn bushes, cow activity and a general pain in the ass.
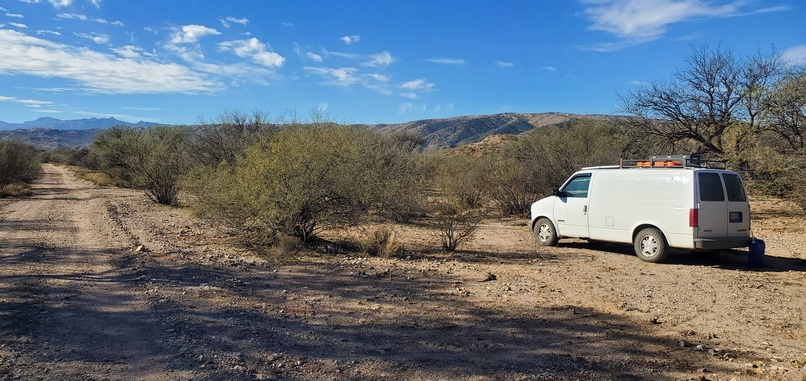
It was mid afternoon when I made it back to my van. This is always a great feeling, to return to the relative comfort of camp at the end of a long day of mining. Or in this case, two days of mining and hiking. I dropped my pack, cracked a beer and began to wash off the accumulated dirt and filth with my limited water supply.
After cleaning myself up, it’s time to wash my rock and mineral finds. I always like this part of rockhounding, where you can really see what your finds look like cleaned up. I just use a bucket of water and a toothbrush for most minerals, at least when I’m out in the field. Some are too fragile to risk the toothbrush though, so be wary of that. I try to wash the bulk of the dirt off these pieces before storing them. I’ll let them sit in the sun and dry off, then bust out the loupe and have a closer look. So satisfying.

Duhhhh, I can’t go backwards, but there’s something in front of me. Maybe if I stay still…
While washing my minerals, a group of cows walked through my campsite. They stopped about 20ft away, and stayed there for about 20 minutes trying to figure out what to do. I just carried on scrubbing my rocks and drinking my beer. Cheers!
Minerals I Found at the Grand Reef Mine, Day 2
- Brochantite
- Linarite
- Quartz
- Galena
- Fluorite
Day 4: 7-mile Day Hike to Tenstrike Mine
Mines Visited: Tenstrike Mine
The Tenstrike Mine is a small former surface and underground Pb-Zn-Cu-Au-Ag-V mine located 3.9 miles SSE of Aravaipa, 3 km N of NNW of the Grand Reef Mine on the western slope of the Santa Teresa Mts.
Base camp
Today, I’ll do a day hike to the Tenstrike Mine and return back to my camper van this evening. This will be about 7 miles and 1400ft elevation gain, mostly on a dirt road.

At least I have this road to walk most of the way today
After leaving camp, the road climbs out of the wash and up onto a mesa-like ridgeline. Good views of the Santa Teresa Mountains and Aravaipa Canyon. As I neared the Tenstrike Mine, a fighter jet screams over the mountains above me, perhaps 1,000ft above the terrain. He dips down into Aravaipa Canyon, banks hard and cuts back up over the Santa Teresa Mountains, a few hundred feet above the terrain. That was super cool to see. I had been hearing the jets the last few days, and even a couple of sonic booms.
Mineshaft marking the northernmost workings of the Tenstrike Mine

Some good signs
Nearby creek bed is lined with this kind of quartz
The Tenstrike Mine is a series of workings along a ravine. At the very top is an old mineshaft, collapsed and filled with dirt. This mine is supposed to yield some nice specimens of purple fluorite or quartz, and I’m not seeing anything like that up here. In the nearby wash, there’s a vein of quartz crystals embedded in the dirt along the banks. I see a few crystals on the ground and spend some time working at the vein. I pull out a few plates of quartz crystals, but nothing really exciting. I’m hoping to find them in either larger size, or with some fluorite, but after tracing the vein I’m not seeing that.

I’ll follow the mine workings down this ravine

Didn’t see much of interest here
Next, I head down the ravine. Lots of evidence of mine workings here, but again, nothing too interesting to be found. There’s some larger boulders here and there with quartz veins though to at least tell me there’s something nearby.

Old rails at the Tenstrike Mine

Let’s see what we got. Oh, flies…
My map marks several prospects and tunnels as I continue downhill. There are three tunnels marked on the USGS maps, and I had the most success at the northernmost one. I wanted to go into the tunnel to explore it, but there were swarms of thousands of flies inside and I turned back.

Above the tunnel entrance, the hillside is covered with this
No matter, there was some great collecting to be had on the tailings pile outside of the mine tunnel. I didn’t have time to climb to the very top of the hill, but on the slopes 50ft above the tunnel, there were many outcrops of rock that were just littered with cavities and vugs, with quartz and fluorite inside. The problem is, this is hard rock mining. A saw would be great, if not, a drill so you can create weaknesses in the rock when chiseling around the piece you’re looking to extract. Without these tools, it’s best to just collect on the ground, in the piles of existing rocks and boulders. It’s worth breaking some open though.

Nice purple Fluorite on Quartz

Some really nice color to the Fluorite
I found many nice pieces of Fluorite octahedrons here, usually on quartz. The Fluorite here may not have the shiny gem luster we’re all after, as they often have a bit of a rough, pitted kind of texture, but they are still nice pieces with some deep purple color that are highly attractive in their own way. As a somewhat new collector, I found my best Fluorite specimen to date here.

Bottom of the canyon, near the southernmost workings of the Tenstrike Mine

The southernmost “tunnel” at the Tenstrike Mine
It was getting late in the afternoon, but I wanted to hit up the other tunnels in the area that make up the Tenstrike Mine. I didn’t see much that interested me at these other locations. I would definitely have a second look at the area though on a subsequent visit, because I kinda rushed through the area.


I followed the unnamed canyon uphill and back to benchmark 4468, where I rejoined the road I hiked in on this morning. This is my favorite time of day to be hiking, late in the day with the sun low in the sky. Today was no exception. I walked back with the sun on my face and a bag full of some great Fluorite specimens. I knew the Grand Reef Mine had some great minerals, but my expectations for the rest of this trip were not as high. So far, so good!

Best Fluorite specimen from the Tenstrike Mine

A dark staining on these Quartz crystals, and some Galena as well
Back at the van, I cracked another celebratory beer and washed up myself and my day’s mineral finds. When the sun goes down, I eat dinner and watch a movie in the van. My body aches from the last few days of hiking and mining, but damn does it feel good to lay my head down at the end of the day. Especially, knowing I get to do it all over again tomorrow.
Minerals I Found at the Tenstrike Mine
- Quartz
- Fluorite
- Galena
Day 5: Move Camp Near Aravaipa Ghost Town. Day Hike to Lead King Mine
Mines Visited: Lead King Mine
The campsite I’ve spent the last 4 nights at gave me great access to the Grand Reef Mine and Tenstrike Mine. Today, I’ll move camp to another location, so I can do some day hikes from there to a few more mines.

The drive up Aravaipa Town Rd. Imperial Mountain is in the Background
I drive back down to Klondyke Rd, then a mile west and take a right (north) on Aravaipa Town Rd. Pass through a gate to enter some newly designated public lands and continue heading uphill. The road was surprisingly good most of the way. In fact, it was only the last mile or so where the road became more challenging. The main issue was some large berms in the road, either built to channel flowing water or in the process of an old flash flood that was never cleared out. Either way, these are large bumps in the road that my van bottomed out on a few times. Thankfully, contact with the ground was made only with the frame and not the oil pan or anything. There was a Cat parked along the road a few mile in, and it looked like some grading had been done and is perhaps currently in progress. So maybe, they will make it up to these large bumps and take care of them. Any high clearance truck with have no issues.

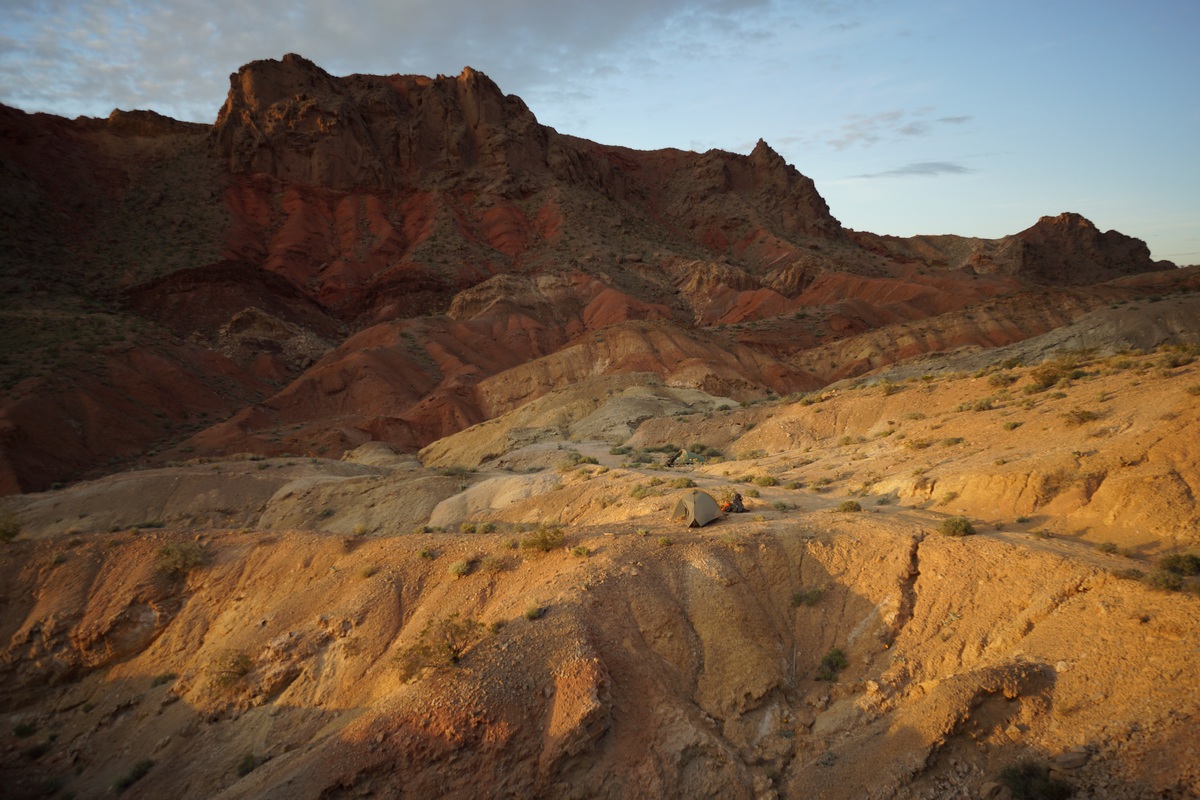
I’ll camp here for the next few days

View from camp
From Klondyke Rd, It was 6.6 miles to a saddle where there’s a road junction and a sign that says Aravaipa Townsite 1 mile. I just parked here at this junction and it made for a great home base. And, I actually had cell service here with 4g signal! A first for this area, I had nothing just a few air miles away.

Nice hike to the Lead King Mine
Fortunately I don’t have to do practically anything to “set up camp” when I arrive in my van, so after parking I grabbed my backpack and bucket, and headed out to do a day hike to the Lead King Mine. It’s located on the north side of Imperial mountain, at the junction of Stowe Canyon and Tule Canyon. It’s about 1800ft away as the crow flies, but to avoid bushwhacking down the steep canyon slopes, I’ll take a 1.75 mile route each way along some dirt rods.

Dropping down into the canyon

Little bit of bushwhackin’ at the end
The last half mile or so, the road fades away and becomes extremely overgrown with thorn bushes. I lose the road and drop down into a wash, where some light scrambling is needed to get down. But soon, I’m there, at the base of the mine.

Entrance to the Lead King Mine tunnel
Now, I mistakenly set out to this mine thinking it was the nearby Tule Mine, which was supposed to have some really nice Fluorite. realized something was maybe not right when I saw no evidence of Fluorite here. In fact, I didn’t see too much of interest laying around in the tailings piles. So, I had a look inside the tunnel next.

I wonder how old this is?
Upon entering the mine tunnel, I was once again greeted by a swarm of thousands of flies. I was bummed to turn back last time, only for flies. After all, the are completely harmless, just annoying. So, I pushed in anyways, displacing the flies as I entered. And luckily, they wanted little to do with me, and pretty much just left me alone, vacating the area. I’ll take it.

Nice green veins of Fluorite
The mine tunnel are in good condition and stable. Inside, I find some interesting minerals and veins. Firstly, I notice the bright green fluorite veins in a few areas. Not the gemmy stuff I’m after, but a really nice color nonetheless.

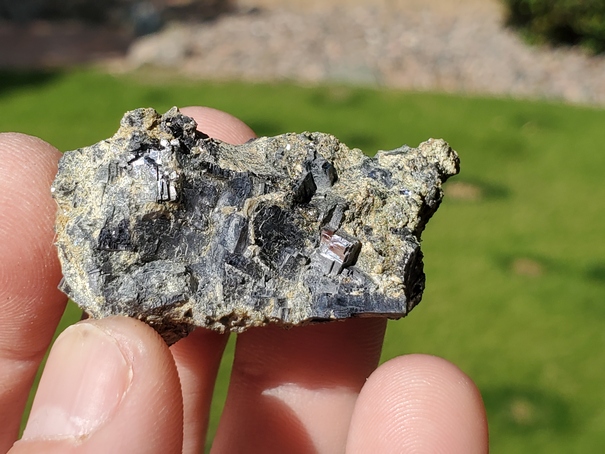
I believe this is Laurelite
I do see some lead deposits amongst the walls, along with specular Hematite, and Pyrite. Then, I notice a white mineral coating on one section of hematite. Upon closer inspection, the mineral is a series of very fine, thin bladed crystals, in a puffy fan-like configuration. I don’t have much info on this mine saved on my phone, so I’ll bag a sample and take it with me. I’m pretty sure it’s rare, that’s all I know at the moment.
I spend some time removing a chunk of hematite with the previously mentioned white mineral, and realize this section of the mine has less oxygen than I’d like. Work is much harder here, despite not being all that far from the mine entrance. I bag my sample and move back to the main shaft, and enjoy the invigorating feeling of oxygen once again.

Love this view from my campsite
It’s late in the day now and it’s time to walk back uphill and try to find the old road again. I fight the thorn bushes and get back to the better dirt road, and life gets a little easier again. Excellent views of Imperial Mountain at sunset, perhaps best viewed from my campsite.

Another shot of the Laurelite specimen
Back at the van, I don’t really have any minerals that require cleaning today. But with some phone service and a little research, I surmise that my mystery white mineral is Laurelite. The nearby Grand Reef Mine is the Type Locality for Laurelite, having being first identified there. And there are other recorded Laurelite occurrences in the Aravaipa Mining District. This is a pretty rare mineral, perhaps more rare than I first suspected. I carefully transported this piece on the way back, protecting the delicate crystals as best I could, and I believe I have a pretty nice specimen to show for it. It may not have the instant wow-factor of those beautiful Fluorite octahedrons I found the other day, but finding a mineral as rare as Laurelite has it’s own rewards. I never even found the Tule mine, which was my original intention when I set out this afternoon, but I’m sure glad I stumbled upon this mine.

Quartz/Hematite
Another noteworthy find from the Lead King Mine was this quartz/hematite combo. Not a spectacular piece, but an interesting one. Another good day.
Minerals I Found at the Lead King Mine
- Fluorite
- Pyrite
- Hematite
- Quartz
- Laurelite (my best guess)
Day 6: Ben Hur Mine, Small Prospecting Pits
Mines Visited: Unnamed Cu Prospects, Ben Hur Mine
Today was my lazy day. It was cold and windy, and I decided to stay closer to the van today.
The unnamed Cu prospect near camp

You can see my van/campsite from this prospecting pit
Across the dirt road I’m parked along, about 40ft off, were a couple of prospect pits. This unnamed Cu Prospect is shown a few hundred feet down below in the canyon, and perhaps, part of the same workings. I didn’t follow the tailings too far downhill. In either case, these turned out to have some moderately interesting material.


Inside the pits, I didn’t see anything in the remaining host rock that looked like it was worth digging into, so I spent my time picking through the tailings. The rocks had some really nice greens and blues that drew me in. There was some Chrysocolla and Malachite, and perhaps some sort of mix of the two. This was more of the tumble or slice kind of material though, nothing really of the cabinet specimen quality. However, there were some pieces of Smithsonite that would have been decent if not damaged.

Ben Hur Mine
Next, I wandered down the road towards Aravaipa ghost town. It’s only a mile, but I never made it to the townsite on this trip. I spent some time poking around at a few prospecting pits alongside the road and over to the Ben Hur Mine. This one was pretty devoid of anything interesting, but that’s to be expected being so close to a “main road” like this.

On my very short walk back to the van, I did manage to find a couple of chunks of a lead/zinc ore with some nice green color to it. Nothing crystalized, but it was a dense chunk of more mineralized ore that was left behind. Perhaps a window into the kind of stuff once found here. But today, slim pickings.


Minerals I Found At the Ben Hur Mine & Unnamed Prospects
- Smithsonite
- Chrysocolla
- Malachite
- Quartz
- Hematite
Day 7: 7-mile Day Hike to Iron Cap Mine
Mines Visited: Iron Cap Mine
The Iron Cap Mine is a former surface and underground Pb-Zn-Ag-Cu-Au-Fluorspar mine located 2 miles NE of Aravaipa Ghost Town, ½ mile N of Landsman Camp, and near the head of Arizona Gulch, in the foothills of the Santa Teresa Mountains, at an altitude of approximately 5,000 feet.
Today was a great day of mineral collecting. One of my all time favorites, in fact. But it does take a 7 mile round trip hike to reach from my camp. No matter, this is an easy hike up a relatively good dirt road, so this hike takes just over an hour each way.

Landsman Camp
About 2/3 the way to the Iron Cap Mine, I pass through Landsman Camp. Nothing remains of the camp today, but a hundred years ago, an eccentric prospector named Frank Landsman called this area home.

Old rails at the Iron Cap Mine


Ore chutes

Old machinery and equipment
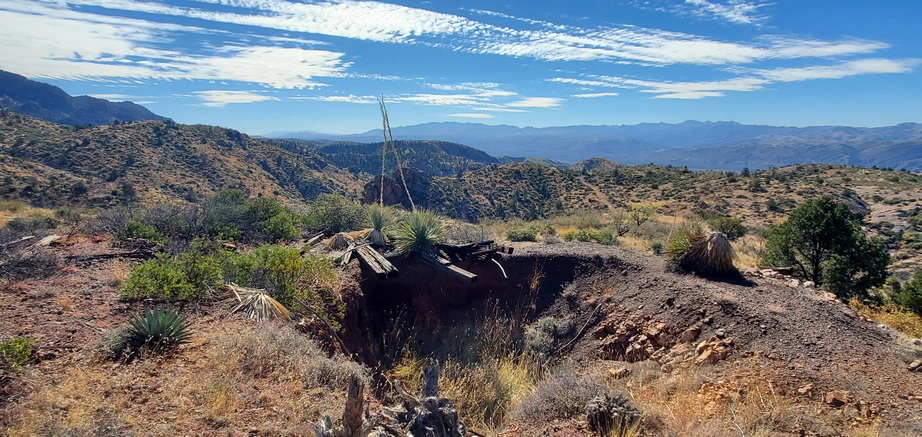
Not far up the road from Landsman Camp is the Iron Cap Mine. This mine has many rare and interesting minerals that can be found here among the lead/zinc ores. There’s some old structures and equipment left here, which I spend a moment exploring first. There’s some ore chutes, rails, pumps and motors along the side of the road.

Iron Cap Mine


Iron Cap Mine
The mine itself is farther uphill. A weathered road leads up to the top, before fading into nothing at the base of the tailings pile. Here is a U shaped valley, and the mine is located inside the “U”.

Nice gemmy green Sphalerite

Sphalerite

Sphalerite, Galena

Pieces of Sphalerite

Sphalerite
As I make my way into the main collecting area, I see a mine shaft and small adit tunnel along the wall. I stop here and drop my gear, making this my little home base for the day. There’s lots to grab my interest already, and I quickly become excited about the possibilities. In fact, I already had a handful of rocks as I walked up to this spot. Sphalerite immediately stands out, something I really haven’t seen much of, at least not this green gemmy stuff.
I had all sorts of temporary piles going as I tried to figure out what all of these new-to-me minerals are and which ones are actually worth keeping. I typically take a sample of any new mineral I find with me, even if I know it’s a crappy specimen. Until I find something better, this is what I have! And that’s the fun of mineral collecting. No matter what you have found, there is always a better, or at least equally stunning but different and unique, specimen out there to find.

Really nice Galena. Some pyrite mixed in some of these pieces as well
Galena
Cubes of Galena on a bed of Johannsenite

While most of these Galena cubes are oxidized and have lost their luster, these cubes still make for an attractive mineral arrangement
So, we have lead/zinc ore here in abundance. Veins of it coat the walls of rock here. I pulled off some really nice solid chunks of blocky Galena the size of my head, and broke them down to some smaller pieces to to take with me. Really excellent, blcoky Galena. Also, some cubes of Galena on a matrix of various other rare and interesting minerals. It was truly a wonder to see, for this rather amateur collector.

Large chunks of Calcite to be found
There are also large blocky chunks of Calcite strewn about in the tailings. I’ve always liked these kind of Calcite pieces on their own, but it’s also a good indicator that other minerals nearby may be “growing big”, too. There are large deposits of Calcite visible in the walls and some other minerals growing along with them. However, much of the surface area of these walls was also covered with a thick white substance. I didn’t mess with it too much, but it appears to be, perhaps, an oxidation effect, a reaction of air with the “newly” exposed, highly mineral rich Lead/Zinc walls.

This is Johannsenite

Johannsenite makes an interesting matrix for other minerals to sit upon

Many pieces like this to be found here
One of the minerals commonly found here at the Iron Cap Mine, and a new one for me, is Johannsenite. Johannsenite isn’t really a spectacular mineral on it’s own. But, a bed of these green/brown Johannsenite crystals make a cool matrix for other minerals to sit upon. It reminds me of the old retro “puke green” carpets of the 70s, for some reason.

What I think is Manganbabingtonite

Suspected Manganbabingtonite

Another close up of the Manganbabingtonite

Blades of Manganbabingtonite
The Iron Cap Mine is also known for a rare mineral called Manganbabintonite. This mineral is very similar to Babingtonite, but has a little more Manganese in the mix. I believe I found one piece with Manganbabingtonite.

Andradite

Pyrite cube among Andradite

I also found Andradite, and a few small pieces of cubic pyrite. This wasn’t as abundant as the other minerals, but there were a few pieces to be found.

Axinite
Another new mineral find for me is Axinite. I didn’t find any spectacular pieces of it, but I get the impression this is not a very attractive mineral in it’s best form anyways. Still cool to find something new.

I believe this is Hedengergite, with some Sphalerite

This one I am not sure of. It could be Hedenbergite
Another mineral I found at the Iron Cap Mine is Hedenbergite. At least, that’s what I think it is.

Combo piece containing Calcite, Quartz, and two distinct colors of Johannsenite
A closer view of the bed of Johannsenite
And finally, here’s one of my favorite pieces of the day. It’s combo of Quartz, Calcite, Johannsenite and, well, something else. I originally thought it was Manganbabingtonite, after I got it home I had a closer look under the loupe and discovered the darker mineralis Johannsenite as well. I suspect the original bed of the typical greenish-brown Johannsenite formed, and then later another round of mineralized fluids seeped in that contained a higher concentration of a darker mineral (Iron, Manganese, etc). But being the amateur I am, this is just a guess. Still, a really cool piece.
I stayed at the mine as late as I could, since the collecting was so good. When it was time to leave, I had filled up most of my containers that I use to put my finds in. My bucket was full, I had a full tupperware container, and for the first time in recent memory, I completely filled my padded fishing tackle divider box thing. That’s how you know you had a good day.

Cows…
About a mile before camp, I ran into some lazy cows on the road. It’s a steep drop on one side, and a steep hillside to climb on the other, so I pretty much herded the cows down the road all the way back to my van.
List of Minerals I Found at the Iron Cap Mine
- Axinite
- Sphalerite
- Johannsenite
- Calcite
- Quartz
- Galena
- Zinc
- Hedenbergite
- Pyrite
- Manganbabingtonite
- Andradite
Day 8: On to the Next Adventure

The drive out of the Santa Teresa Mountains


Driving down Aravaipa Town Rd
After spending my final night in the Santa Teresa Mountains, I headed down Aravaipa Town Rd towards Klondyke Rd. This has been one of my favorite mining trips of all time! Not only some rare, beautiful and interesting minerals to add to my collection, but some beautiful mountain and canyon scenery, some good hikes and lots of adventure. I couldn’t ask for more and I can’t wait to get back to the Santa Teresa Mountains again in the future!
For now, I’m headed into Phoenix to stay with a friend for a few days, plan my next move, and head out into the desert again. Stay tuned for the next adventure!
Interested in purchasing any of these mineral specimens?
Many of my rock and mineral finds are available for purchase. Contact me at if you’re interested in buying any of the minerals you see in this post.
Pioneering Nevada’s Basin and Range Trail: Official Movie Trailer
I haven’t been very active here lately, but a LOT has been going on behind the scenes. Since I returned from my Basin and Range Trail thru hike last summer, I have been hard at work documenting the journey. Since November, I have been working non-stop on this project; building a dedicated website for the BRT, writing a guidebook, creating maps for navigation. The website is now live, and you can visit it here: https://basinandrangetrail.com/
Additionally, I have been working on a feature film called “Pioneering Nevada’s Basin and Range Trail”, and today I am pleased to share the trailer for the movie with you:
")
The movie is to be released on streaming and video on demand services late spring/early summer 2021. More info to come soon! Also in production is a much more detailed 10 part series on the Basin and Range Trail. The movie barely scratches the surface of the adventures to be had on the BRT, and the series will really give you a chance to immerse yourself in the full experience.
How you can help: Marketing is the biggest factor that can make or break the success of a film. If you enjoy the trailer, please take a moment to share it on facebook, reddit or the social media platform of your choice.
Thank you all for your patience and support!
UPDATE: You can now watch the 60 minute Basin and Range Trail Documentary Film for free on youtube, but if you’d prefer, you can also watch it on the following streaming services:
Glacier National Park 95 Mile Hike (Sep 2019) – Wateron Lakes CDT Finish
6 day, 95 Mile Hike in Glacier National Park – Glacier Highline Trail (Modified Route)
In 2018 I thru hiked the Continental Divide Trail, and the last section (NOBO) goes through Glacier National Park on the Glacier Highline Trail. It’s one of the best sections of trail on the entire CDT, and a fitting way to end a 3000 mile hike. However, it was the end of September when I reached East Glacier, and heavy snow in the high mountains forced me to bail down to the road and walk the highway to the border of Canada, finishing at the Port of Piegan. Yuk! I still completed the CDT, but not at the monument at Waterton Lakes. This was a bit crushing to end my 5.5 month hike in such a way. So, this year I came back out to Glacier to hike the Highline Trail again, and get the finish I missed last year at Wateron. This is my second chance at a true CDT finish. This is my redemption!
Check out my CDT finish video for the backstory:
Unfortunately we couldn’t get permits for the exact Glacier Highline Trail route. Instead, we started at Cut Bank (already did most of everything south of here anyways last year on the CDT up to Old Man Lake), hiked north to Many Glacier, then had to detour from the Highline Trail by going through the Ptarmigan Tunnel. From here we follow Cosley Lake to Stoney Indian Pass and into Waterton. Finally, some closure to such a long and grand journey!
Sawtooth Wilderness, ID High Route – 8 Day Solo Hike Aug 2017

Sawtooth Wilderness High Route – 8 Day Solo Hike August 2017
View All Sawtooth Wilderness Photos | Watch the Sawtooth Wilderness Hike Video On Youtube
- Park Administration – National Forest Service
- Fees & Permits – No fees to access the Sawtooth Wilderness. You need a permit which is FREE. Permits are available via self-registration at the trailheads.
- Trailhead – Tin Cup Trailhead at Pettit Lake
- Length Of Time Hiked – 8 Days, 7 NIghts
- Miles Hiked – 67
- Route Difficulty – On marked trails, 6. Off trail sections, 9
- Fires Allowed – Yes, on a fire pan or fire blanket. Campfires are not allowed: Off-trail from July 1st through Labor Day. In the following drainages: Alice/Twin Lakes, Toxaway/Farley Lakes, Goat Creek (tributary of the South Fork of the Payette River), or Alpine Creek. Within 200 yards of Sawtooth Lake, Goat Lake and Alpine Lake near Iron Creek, Alpine and Saddleback Lakes in the Redfish drainage, and Scenic Lakes.
- Scenic Beauty – 9
- Solitude – 4 on Trail, 9 Off Trail
Sawtooth Wilderness Pre-Hike Planning Notes
Actually, the route I set out to hike was much longer, closer to 90 miles and over 25k feet of elevation gain. Averaging 8517′ over 89 miles, I called it “The Ultimate Sawtooths High Route”. Over 50 miles of the 89 mile route was off trail. A route like this would have a lot higher chance for successful completion if one had firsthand knowledge of what to expect in key sections. I didn’t have that luxury though, this will be my first visit to the Sawtooths, and first to the sate of Idaho. I will be sharing more info on the Ultimate Sawtooths High Route later on.
My goal with the route was to to stay as high as possible, while hitting as many of the places I could that were on my “must see” list. As far as planning a hike goes in the Sawtooths, you’ll find information from scattered sources online but there is no dedicated forum or “go-to” resource for the Sawtooths. I gathered what info I could about my route between trip reports and pictures, google earth, and studying the topo maps to create the route.
Sawtooth Wilderness Weather Forecasts
For weather in the Sawtooth Wilderness, I was using mountain-forecast.com for Mount Cramer:
https://www.mountain-forecast.com/peaks/Mount-Cramer/forecasts/2500
Sawtooth Wilderness Backpacking Maps & Route Information
Here’s my caltopo map I used to plan my route:

Download GPX file of this hike
Day 1 – Friday August 18th, 2017
Miles Hiked – 6.35
Elevation Gain – 2090′
Route Hiked – Pettit Lake to Alice Lake
The road to Pettit Lake from ID-75 was well graded and in great shape for a dirt road. I was driving a Chevy Cruze, and wouldn’t hesitate to take the smallest car. High clearance not need whatsoever. I arrived at the Tin Cup Trailhead (located at Pettit Lake) around 6pm, and man was it packed. I was able to find a spot, but there were’t many left if any at all. I changed clothes and did my final packing, and was on the trail at 6:30pm.
My destination tonight is Alice Lake, hopefully. I have 2.5 hours of daylight max to work with, better get moving. I quickly passed several groups of hikers, walked past the lake and hit the Wilderness Boundary sign. Here is where you self register for your permit.
The trail is mostly forested for the first few miles. Eventually, it emerges into a couple of open areas where boulders and talus have spilled down the slopes above. Hiking is still easy through these sections because this is such a well traveled trail, and in great shape. Once the first set of switchbacks are encountered, roughly half the way there to Alice, you start to get some nice elevated views. The Sun was already going down fast at this point.

Hiking to Alice Lake

The hike to Alice Lake was pretty nice for a day 1 hike. Normally, the trail taking you to the high country is in a low valley, long and rather uneventful. I would say the trail to Alice Lake is much more interesting, and if nothing else, shorter than many of the approach hikes I’m used to.

Dusk near Alice Lake

Alice Lake at sundown
Right before I reached Alice Lake is a couple of small ponds, with great views and lots of people already camped there. Farther up the trail, at Alice Lake proper, I was again out of luck finding a campsite in a prime location such as the outlet. With the Sun fading quickly I hurried on farther along the lake. The trail starts to climb above the lake offering no viable campsites.
Towards the center of the lake, at a point where the trail had veered farther from the water, I found a place to hang my hammock. Not the most scenic spot, but who cares, it was already time to bust out the headlamp. Nothin’ to see here tonight. No need to use the tarp over my hammock, skies are looking clear and will remain so for the next couple of days according to the weather forecast.
I arrived at camp around 9pm, and after setting up headed to bed at 10. I’ve got a long week ahead of me!
Pinto Valley Wilderness, NV (LMNRA) – 3 Day 25 Mile Loop Hike March 2017
Backpacking The Pinto Valley Wilderness, Nevada (Lake Mead National Recreation Area)
View All Pinto Valley Wilderness Photos | Watch the Pinto Valley Wilderness Hike Video On Youtube
- Park Administration – National Park Service (Lake Mead National Recreation Area)
- Fees & Permits – No fees or permits to access the Pinto Valley Wilderness, but there IS a fee to enter the Lake Mead National Recreation Area (in which the Pinto Valley Wilderness is located)
- Trailhead – Northshore Summit Trail parking lot off Northshore Rd.
- Length Of Time Hiked – 3 days, 2 nights
- Miles Hiked – 25
- Route Difficulty – 6.5, except where on descent into Pinto Valley near the “choke point” on my GPS file where it’s an 8.5
- Fires Allowed – Yes, but only if you bring your own, or use driftwood below the high water line of Lake Mead (which is not nearby)
- Scenic Beauty – 9
- Solitude – 8
Pinto Valley Wilderness Pre-Hike Planning Notes
The Pinto Valley Wilderness is relatively new, only being designated a wilderness in 2002. Therefore there are not a whole lot of references to this wilderness online. Many people just refer to the area as the Lake Mead National Recreation Area, which is technically also correct since the Pinto Valley Wilderness is located within the LMNRA.
The northern boundary of the Pinto Valley Wilderness is Northshore Rd, and this is pretty much the only place to park unless you have a 4×4. Here, there are several pull-offs along the road where you can park for a day hike. But what about overnight hikes? Well, you aren’t supposed to park in the pull-offs overnight, and even that was OK with the park service, would you want to leave your car there? Probably not. For me, the only real option was parking in the Northshore Summit Trail parking lot. It’s located approximately a half mile east of mile marker 20 on Northshore Rd. The southern boundary of the wilderness is Lake Mead, the western border is Callville Wash Rd and the eastern boundary is Boathouse Cove Rd. Also not that Boathouse Cove Rd separates the Pinto Valley Wilderness (39,173 acres) from the Jimbilnan Wilderness (18,879 acres) to the east. You can access the Pinto Valley Wilderness from the east, west and southern boundaries, but by far the easiest is Northshore Rd.
Water sources in the Pinto Valley Wilderness are limited. While there are likely other water sources located in the Pinto Valley Wilderness, the two most prominent sources (from my pre-hike research) are Sandstone Spring and Cottonwood Spring. I did not make it to Sandstone Spring to check if it was flowing. I passed by Cottonwood Spring, but did not search for the source. I did see that an animal had dug down into the wash near Cottonwood Spring and there was a pool of water about 6 inches down. Neither one of these springs are reliable enough to count on as a easy water source (you might have to dig for water). Pack in all water you will need for this hike and assume you will not find any!
It does not appear that backcountry camping is very popular in the Pinto Valley Wilderness. The lack of trail heads with overnight parking, marked trails and water sources seem to indicate that most people use the area for day hikes. However, the off-trail enthusiast will find that the Pinto Valley Wilderness provides some excellent 2-3 day hikes to those willing to haul their own water.
Pinto Valley Wilderness Backpacking Maps
[sgpx gpx=”/wp-content/uploads/gpx/PintoValleyMar17RouteHiked.gpx”]Download GPX file of this hike
Here’s my caltopo map I used to plan my route:
Day 1 – Saturday March 25th, 2017
Miles Hiked – 8.26
Elevation Gain – 1228′
Route Hiked – Northshore Summit Trail parking lot to Pinto Valley near Sentinel Peak

Driving along Northshore Rd
Dan and I spent the previous day in the nearby Valley of Fire State Park, and camped in the Arch Rock campground. From here, it was about a 30 minute drive to the Northshore Summit trail head. It was cloudy this morning and was sprinkling when we were packing up our gear, but that quickly faded away. The drive along Northshore Rd was very scenic, and worthy of spending some time here by itself. However, we did not have the extra time, and drove directly to the parking lot.
When we arrived at the Northshore Summit Trail parking lot, we were the only ones there. Good sign. Yesterday, Valley of Fire State Park was packed. There’s a bathroom and garbage cans here, but that’s it. We left the parking lot around 9:30am and started walking east on Northshore Rd. While road walks are never ideal, this was the best route I could come up with that fit together a starting point, the destinations I wanted to hit and the time frame. Despite walking this paved road for 2 miles, it was beautiful country. Big views to the north, looking across Bitter Spring Valley.
Leaving Northshore Rd behind

Climbing up Pinto Ridge

We found this turtle shell hiking up Pinto Ridge
After 2 miles, we reached a pull-off where another vehicle was parked. Here, we leave the road and head south towards the Pinto Ridge. We hiked up over a small ridge to start the climb up. The terrain is pretty jagged here, with lots of sharp rocks. As we climbed up the ridge, I came across a turtle shell. The turtle itself was long gone, but the shell was an interesting find. A few hundred feet farther and I saw a second shell.

On the “pass” at the top of Pinto Ridge
Farther up the ridge, the path narrows as we reached the top of the “pass”. The vegetation was a little greener, thicker, and thornier here. Lots of wildflowers in bloom, and some of the cacti as well. There’s not much of a view form the high point, but this changes as you descend into Pinto Valley.

Descending into Pinto Valley
Looking back up the way we came. Very steep!

The descent from the top is pretty gradual at first. We could tell there was a steeper section ahead, which I anticipated. Now the views of Pinto Valley were materializing, and they were impressive. However, the immediate problem was the terrain that lies between us and the valley below. The steepness would have been enough to worry about, but of course, loose rocks and debris compounded the difficulty. The angle was such that you could grip decently walking down slowly, but only just. Any steeper and this would have been questionable. I crab crawled in a few spots after watching Dan fall a couple of times.

The chute funnels you to this choke point
It took a good amount of time to safely work our way down this steep slab, only to be led to a choke point… a couple of boulders wedged between the steep, narrow canyon walls. There’s no easy way to climb down it, but there’s a route around it. Backtrack about 50 feet from the boulders and go up a ridge on your left (to the east). Here, there’s a more manageable route down and the rest of the way is less frightening.

Them rocks ain’t supposed to be angled like that!
Now down off the worst of Pinto Ridge, jumped down into one of the two washes, which merge, and headed out into the valley. It’s a whole new landscape here. In the wash we could see chunk of earth pushed upright, with a variety of layers visible. This isn’t solid rock like granite, though. It’s made up of compacted, crumbly dirt and smaller rocks.
Sentinel Peak behind a blooming Prickly Pear cactus

Vibrant colors of Pinto Ridge

Looking west into Pinto Valley. Pinto Ridge on the right
After emerging from the wash, we found ourselves in the expansive Pinto Valley. Sentinel Peak was in front of us, dominating the view with shades of orange and red. We decided to camp here, on the north side of the valley, so we could have a good view of Sentinel.

My campsite in Pinto Valley. That’s Sentinel Peak in the background
Sentinel Peak from Pinto Valley
We found a couple of flati-ish spots and cleared the sharp rocks to make way for our tents. The view was great, but there’s no shade anywhere nearby. After setting up camp, we took a break for lunch. Afterwards, Dan rested while I took some pictures.

Approaching Sentinel Peak
After our break, we headed over towards Sentinel in an attempt to climb to it’s summit at around 2:30pm. The path to Sentinel from our camp involved dropping down into and climbing out of several washes along the way, before finding the main wash that runs through Pinto Valley. We took this to the Base of Sentinel where the route I had planned begins. The path up to the top was not very obvious from here, so I was hoping the track I created in Caltopo, based off someone else’s route up Sentinel, was accurate.

At the base of Sentinel Peak

Climbing up Sentinel Peak
We started climbing up Sentinel, and quickly found the most promising route to be blocked by a huge boulder. We moved farther east and started uphill here. Dan wanted to go right up the mountainside whichever place looked easiest from his point of view, while I wanted to try and stick to the GPS route I created ahead of time. We both pursued various route options but keep finding ourselves in tough spots. I ended up breaking one of my Gossamer Gear LT4 trekking poles, again. Looking back, I think I’ve broken more of these poles than I have completed hikes with them. I don’t think I can use those poles anymore, need something beefier.

Dan carefully walking across a rock face with a healthy fall below

Coming own Sentinel Peak looking north towards Pinto Ridge
The climb was a lot harder than we anticipated. While we probably could have made it to the top and back to camp if we continued, we decided that it was getting late in the afternoon and didn’t really want to be getting back right at dark or after if the route continued to be as challenging. We turned around and headed back to camp, somewhat defeated. At least there’s Hamblin Mountain tomorrow, which should have an easier route up.

Main wash running through Pinto Valley
While we walked back to camp in one of the washes, we saw what looked to be bobcat tracks and poop. We saw lots of similar tracks throughout our hike, but of course, never saw anything.

When we got back to camp we still had no shade. Dan set up his emergency blanket (he was using it as a footprint under his tent) as a lean-to, and we had a nice shaded spot to escape the sun for a while.
There was a TON of plane and helicopter traffic overhead in this region. Commercial planes I understand as we’re not that far from Las Vegas. The helicopter though, I don’t understand why there were so many. Throughout the day we saw a couple per hour. Right before nightfall, I saw 6 in row, flying the same flight path spaced about 1 minute apart. Maybe some sort of training exercise?
View to the west before sunset
Looking to the east, the views of Sentinel and the mountains beyond were colorfully illuminated by the sun now. To the west, the distant landscape looked lush and green as the sun shined on it, although it in reality the vegetation is much more sparse up close. Dan said it looked like Jurassic Park. I watched the sun set and headed to bed shortly after.
Day 2 – Sunday March 26th, 2017
Miles Hiked – 9.88
Elevation Gain – 2173′
Route Hiked – Pinto Valley near Sentinel Peak to Pinto Valley Castle
It was a calm night with no animal sounds or high winds. The only sound I could hear was Dan snoring, as we set up our tents a little too close together. I got up around 6:30 to watch the sunrise, and tried to wake Dan. Of course, Dan continued to sleep and didn’t get up until 7:30 or later.

Sunrise in Pinto Valley
While Dan wrestled with the agony of leaving his tent, I sat on a small hill near camp and took some pictures. The sunrise was not very impressive from this spot though as it was so high in the sky by the time it peaked out over the top of Sentinel Peak. I was already packed and ready to go by the time the sun rose and Dan finally left his tent.

View of Hamblin Mountain from our camp in Pinto Valley
We broke camp around 8:30, following the nearest wash to the main wash running through Pinto Valley. Walking in the washes is the easiest route through Pinto Valley. This is not because the terrain outside of the washes is difficult, but because the washes are cut steeply and often deep into the surrounding earth. Hiking in and out of them gets old after a while.

Hiking west through the main wash through Pinto Valley

Hiking the main wash was very easy. We made good time as we traveled west through Pinto Valley. We passed an outcrop of rocks and boulders that people have been signing their names on for years, dating back to the 1920s. Even though some of the writing is nearly 100 years old, it still looks brand new. Is is really that old then? Surely they would have been weathered somewhat in 100 years, right?

Wash leading to Pinto Valley Castle (the tallest point in the very center of the horizon)

What a mad place!

West of the rocks with writing along the main wash, we could start to see the colors of Pinto Valley Castle in the distance. Soon we left the main wash, and headed up another wash towards Pinto Valley Castle. This is a really interesting area, visually and geologically. Lots of upheaval going on, exposing many different layers of sediment. Small patches of “badlands” can be found all over here too.
“And behind me is Pinto Valley Castle…”


View south near Pinto Valley Castle

Pinto Valley Castle
Pinto Valley Castle was impressive. Erosion has shaped the walls of PVC in an unusual way, with sharp edges and symmetry. The top is made up of some lighter colored sediment, while the bottom is comprised of a contrasting red color.


Looking northeast from the small pass, where we just came from
Looking southwest from the small pass, towards Hamblin Mountain
After heading general north for a while through the Pinto Valley Castle area, we abruptly turned west after passing by PVC. After hiking through a small patch of badlands, we noticed an obvious path up one of the ridges, which led us to the top of a small pass. This is the general area I wanted to camp, since it looked so colorful from the satellite maps I studied before coming out here. It certainly lived up to the hype I had in my mind. Now, we just needed to find a place to set up camp.

Campsite 1/4 mile west of Pinto Valley Castle
Coming down from the little pass, we followed an obvious path down and along the side of the high ground. This path appeared to be an old mining road or something. We followed it a short ways before find a couple of small flat areas for our tents. Excellent views, and enough space to spread out more than we did last night.

After setting up camp and eating lunch, we headed out to climb Hamblin Mountain. From camp, it appeared that there was a high and low path to take. We opted to take the high ground since we were already up here. This path led us generally where we wanted to go, but then started curving south. We backtracked a little and realized we had to go over a ridge to get to where we wanted to go. We should have taken the low ground from camp as it would have gone around this ridge, but I didn’t realize that at the time.

Wow!


Still not on the trail yet
We followed the ridge for a while looking for a weakness. After a short but steep climb over it, we still didn’t see an obvious route to follow. We headed down hill and along the top of a very deep cut wash below. On the other side we could see a trail, but we needed to cross this wash. We found a spot to descend, and even saw a cairn in the wash. We figured we were on the right path now.

A faint path led up hill

Looking back the way we came

The land was changing from red washes and badlands to green, rocky mountainous terrain. We followed our new trail up a ridge and along the mountainside. The path was very narrow and barely cut into the steep slopes. Eventually this path merged with a larger one, and it was much easier to follow from here on out. We hiked a short ways before seeing a path that led down into the wash below, which looked easier and more direct than the route we took up here. We noted this and decided to go this was on the descent.
Next we encountered are first humans of the trip, a couple from Henderson, NV who a had just left the summit of Hamblin Mountain. We chatted for a few minutes and parted ways, knowing they had only been hiking 25 minutes from the top. I was really looking forward to this view!

The hike up was not technically challenging or particularly steep, but there were a few false summits. Really great views as your near the top. Not far from the summit, we passed an older couple from Colorado making their way down. The woman seemed bewildered that we had “large” backpacks on, and asked if we were camping at the top. Ha, nope. Just carrying our water, snacks, camera gear, etc.
View southwest over Lake Mead from Hamblin Mountain

View south/southeast from Hamblin Mountain summit

Lake Mead from Hamblin Mountain. The narrows is just out of frame to the left (east)

Hamblin Mountain Panorama

Sentinel Peak from summit of Hamblin Mountain
We had the summit of Hamblin Mountain to ourselves when we made it up here at 2:30. It had taken us 2 hours from camp. From the top I could see Lake Mead, Bowl of Fire, Sentinel Peak, Pinto Valley and all the other landmarks for many miles. Las Vegas lies hidden from view in a valley, but beyond that the snow-capped peaks of Mt. Charleston can been seen. Several USGS markers dot the summit as well as a summit log/register.

Hamblin Mountain Summit View

Muddy Mountains to the north

Pinto Valley & Sentinel Peak Viewed From Hamblin Mountain Summit

View northeast from Hamblin Mountain
We stayed on the summit for about an hour taking pictures and soaking in the view. However, we were also soaking in quite a bit of sun, and with no shade, it was time to head back to camp.

Trail down Hamblin Mountain

Dan went ahead of me as I snapped a bunch of pictures on the way down. For some reason, I enjoyed the view better going down than up.

Before we knew it, we reached the path that leads down into the wash that we noted on the way up. We headed down here and found this route to be quite obvious, and in fact, the actual route. The first trail we found on our way up was actually an alternate route the just happened to meet up with this main trail. This was confirmed by passing the same cairn that we passed in the wash on our way up. We originally thought the cairn marked the way to the main path that we took, instead, it marks the main path which we crossed right over without realizing.

Almost back to camp
Our path in the wash was leading us directly back to camp now. We passed the junction of the old 4×4 road that passes by Cottonwood Spring and heads out to Northshore Rd. This would be the route the day hikers would have taken, parking at a pull-off along the highway. We walked past this junction and the path led us right back to camp in a very direct way, much more so than the way we took up the mountain. We made it back to camp in only 1 hour from the top of Hamblin, half the time it took to reach the top.
Back at camp, we sought out the only shade around and exploited it for a while. Having not eaten anything since noon, which was just some snacks, I devoured my bacon & cheese wrap for dinner. Dan was running lower on water than I, so I gave him a half liter. That’s about all I had left myself when I went to bed.
Sunset at camp
Dan was whooped and went to bed at 6pm. With another hour and a half of daylight left, I couldn’t do that. I found a decent spot to sit and wait for sundown. Several bats were out at dusk, and flying closely overhead too.
Day 3 – Monday March 27th, 2017
Miles Hiked – 4.99
Elevation Gain – 531′
Route Hiked – Pinto Valley Castle to Northshore Summit Trail parking lot
I woke up at 5:45 this morning. From my tent I yelled, “Hey Dan, time to get up”. To my surprise, he actually did get up without any additional prodding. That’s good, because I have a plane to catch at 12:45pm this afternoon, and we need to hike back to the car, drive back to Vegas, get some food and clean up. Originally I planned to hike an off-trail route back to the car, but worried about time, we opted to take the route the Hamblin Mountain day hikers use to get to Northshore Rd, then road walk a few miles back to the car. This would be the safest route from a time perspective.
We packed up quickly this morning and were moving by 6:30. We took the low ground this time for a direct route to the junction with the old 4×4 road, now called the Cottonwood Wash Trail.

Cottonwood Wash Trail

Hiking the Cottonwood Wash trail was easy. Some spots were more narrow than others, and made you wonder how a vehicle passed through. Much of it is wider though. This road would have been in use up until 2002 or prior, when the area was designated as the Pinto Valley Wilderness.

Lone tree at Cottonwood Spring

Cottonwood Spring
A lone Cottonwood tree stands in the middle of the wash at Cottonwood Spring, hence the name. I did not see an obvious source, but I didn’t look around much either. There were lots of thick, green shrubs and bushes in some areas, an indicator of water, but I had no desire to wade through them looking for water. We did see a small hole dug in the middle of the wash with water about 6 inches down, but no natural emergence of water to the surface.

Cottonwood Wash Trail
After leaving Cottonwood Spring, we headed down the home stretch. This was offered the same interesting geological features as others, a variety of rock and sediment layers exposed by upheaval.

Road walk along Northshore Rd
When we reached Northshore Rd, we headed east. We still had about 3 miles to cover before getting back to the parking lot. I didn’t even mind walking the road so much since the views were so great. It was a steady incline the rest of the hike back.
We reached the Northshore Summit trailhead at 8:30, plenty of time to take care of my pre-flight needs. Another successful adventure under the belt.
Final Thoughts About Hiking The Pinto Valley Wilderness
This place exceeded my expectations. It’s uniquely colorful, and an all around cool place. Access is tough and some of the off trail segments can be challenging. Lots of aerial traffic remind you of how close this place is to civilization, yet we still felt solitude. Especially at night. The nights were calm and silent, with no animal sounds. We saw few animals the entire trip, just a couple of chipmunks and birds. The vegetation wasn’t too thick or thorny overall, only a few short spots where we encountered that. We saw no snakes or spiders, just a couple of butterflies and a beetle. I was expecting wildlife to be a little more active this time of year.
Camp on our second night was my favorite. You can’t go wrong pitching your tent anywhere near Pinto Valley Castle in my opinion. Hamblin Mountain is an easy hike with a great view, and would make a great day hike (as the two couples we passed had done).
Coxcomb Mountains 3 Day Hike – Joshua Tree NP, CA – Dec 2016
Joshua Tree National Park – Coxcomb Mountains 3 Day Hike

View All Coxcomb Mountains Photos | Watch the Coxcomb Mountains Hike Video On Youtube
- Park Administration – Joshua Tree National Park
- Fees & Permits – Free permit, self register at one of 12 backcountry registration boards (none near the Coxcomb Mountains) or at one of the Joshua Tree national park visitor centers
- Travel Logistics – Flew into Ontario, CA airport, drove (with a local friend) to Joshua Tree NP
- Trailhead – There is no dedicated trailhead to access the Coxcombs. However, you can park along Hwy 62 (TwentyNine Palms Rd) at 34.095135, -115.420799. This is 11.9 miles west of the Hwy 62/Hwy 177 junction. This starting point is recognized by the park though as the main point of access to the Coxcombs. BEWARE of deep sand here at the parking area! We found another place to park (north side of hwy 62) a half mile or so east of the designated spot if you don’t have a 4×4.
- Length Of Time Hiked – 3 days, 2 nights
- Miles Hiked – 25
- Route Difficulty – 7.5
- Fires Allowed – No
- Scenic Beauty – 7
- Solitude – 9.5
Coxcomb Mountains Pre-Hike Planning Notes
The Coxcomb Mountains are situated in the northeast corner of Joshua Tree National Park. This region is seldom visited, and considered the most rugged area of Joshua Tree with many jagged peaks. The highest peak in the Coxcombs is Aqua Peak. Although most maps label the high point as Aqua Peak, Aqua actually refers to 3 separate peaks… Spectre, Tensor and Dyadic. Tensor Peak is the lowest, and Aqua is the tallest at 4,416′.
There are no dedicated campsites in the Coxcomb Mountains.
There are no reliable water sources in the Coxcombs. We hauled our own water in for this 3 day hike.
The Inner Basin and Aqua Peaks are day-use only, but I could not find any official information on this within the Joshua Tree National park website. There’s no signs telling you where you can/can’t camp, and there’s nobody around to enforce it, but still you should try and honor these regulations as the are set in place to protect the local population of Big Horn Sheep. When I arrived at the park to get my permit, I asked the ranger to show me on the map the boundaries of the day use area. His map was a Trails Illustration/Nat Geo map of Joshua Tree National Park, and it the boundary was clearly marked on it. Later at home, I created this image to show the boundary of the day use area in the Inner Basin of the Coxcomb Mountains:
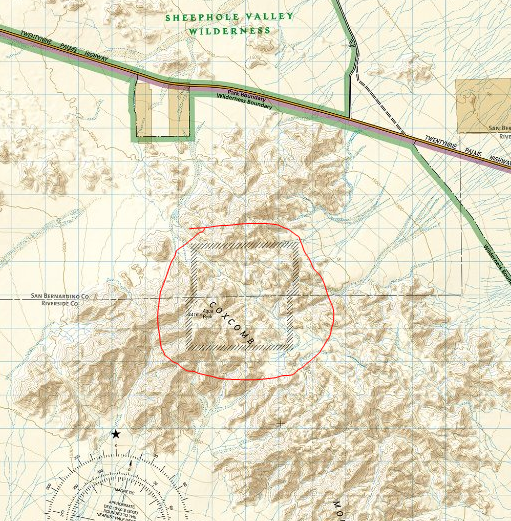
The day use boundary for the Inner Basin area of the Coxcomb Mountains can be seen on this map
Coxcomb Mountains Hike Maps
Download GPX file of this hike
[sgpx gpx=”/wp-content/uploads/gpx/CoxcombMtnsPostHike.gpx”]
This is the caltopo map of the route I hiked. I’ve highlighted the Inner Basin day use are for your convenience.
Day 1 – Friday December 2nd, 2016
Miles Hiked – 7
Elevation Gain – 1704′

Dan’s Mustang stuck in the sand
When it came time to park at the trailhead, we tried to drive on some sand that was way too soft for my friend’s Mustang, and the car got stuck. Very stuck. We had to call a tow truck to pull it out, which was a 4 hour ordeal. The only reason we we able to call that tow truck is due to a passing motorist, who stopped and drove Dan to an intersection several miles away that had cell service.
We didn’t start hiking today until around 2pm. I was hoping to make it past the Inner Basin today, but was also considering camping before the Inner Basin if it didn’t look like we could make it before sundown.
We parked about .85 miles east of the “designated” spot. From here, it would be slightly out of the way to walk back towards the standard route. which runs west of the outcrop of small mountains (marked 806T on my caltopo map). Instead, we started hiking south and aimed east of the 806T benchmark. This wash appeared to be easy and take us to the same place, so we felt confident about of choice and headed out into the desert.
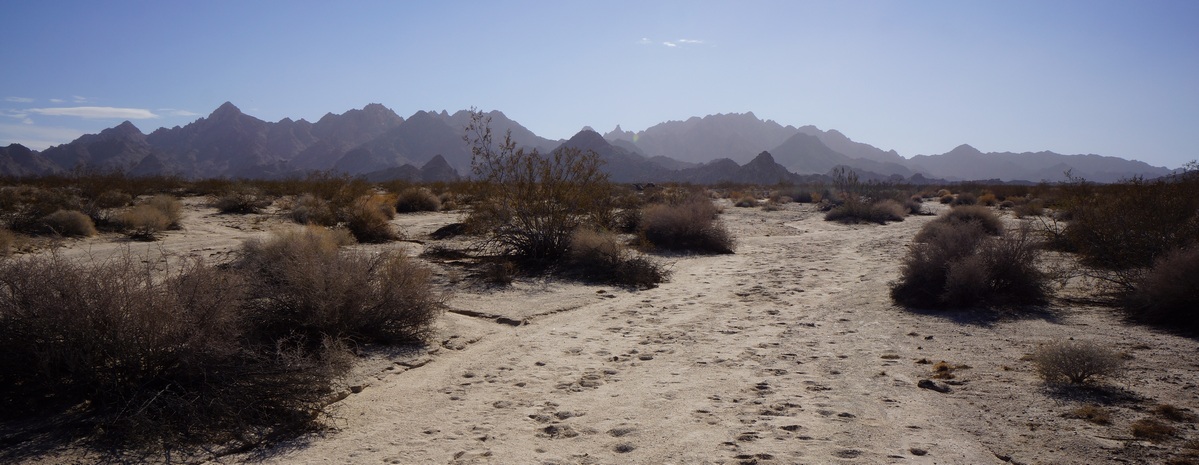
Coxcomb Mountains from the wash near Hwy 62
The desert floor consisted of soft sand in the washes, and slightly firmer sand elsewhere. Not the hard-packed desert soil I’ve hiked in much of the time in the past, in the Sonoran and Chihuahuan deserts. Vegetation consisted of low brush, much of it very thorny. No Joshua Trees here on this side of the park. We saw an occasional Prickly Pear and even a Sotol plant. Along the washes were some larger trees, at least compared to the rest of the scrub.

Not 10 minutes into the hike, and we saw a tarantula walking around, making it’s way back into it’s hole. This was the first time either Dan or myself had seen one in the wild. It was only about 55 degrees today, and being December I thought most of the snakes and spiders would be laying low somewhere. Cool to see!

I’m not sure it would have been any easier had we taken the standard route, but walking along the wash east of the outcrop was really easy. We made great time through here. Looking back towards the car, we couldn’t see hwy 62 running through the desert. Pretty quickly you feel isolated here. The mountains around us were really rugged looking, especially compared to the rounded boulders of the iconic Joshua Tree landscape.
When we reached the point along our route where it intersects with the standard route, right before it heads uphill to Inner Basin Pass, we had a decision to make: camp here, or push on and hope we make it out of the Inner Basin before dark. We’d made great time so far, so we decided to chance it and keep moving. The terrain here remains easy, hiking up a sandy wash as the canyon narrows. I saw a jackrabbit darting through the wash, just about the only wildlife wee’d see this whole trip.

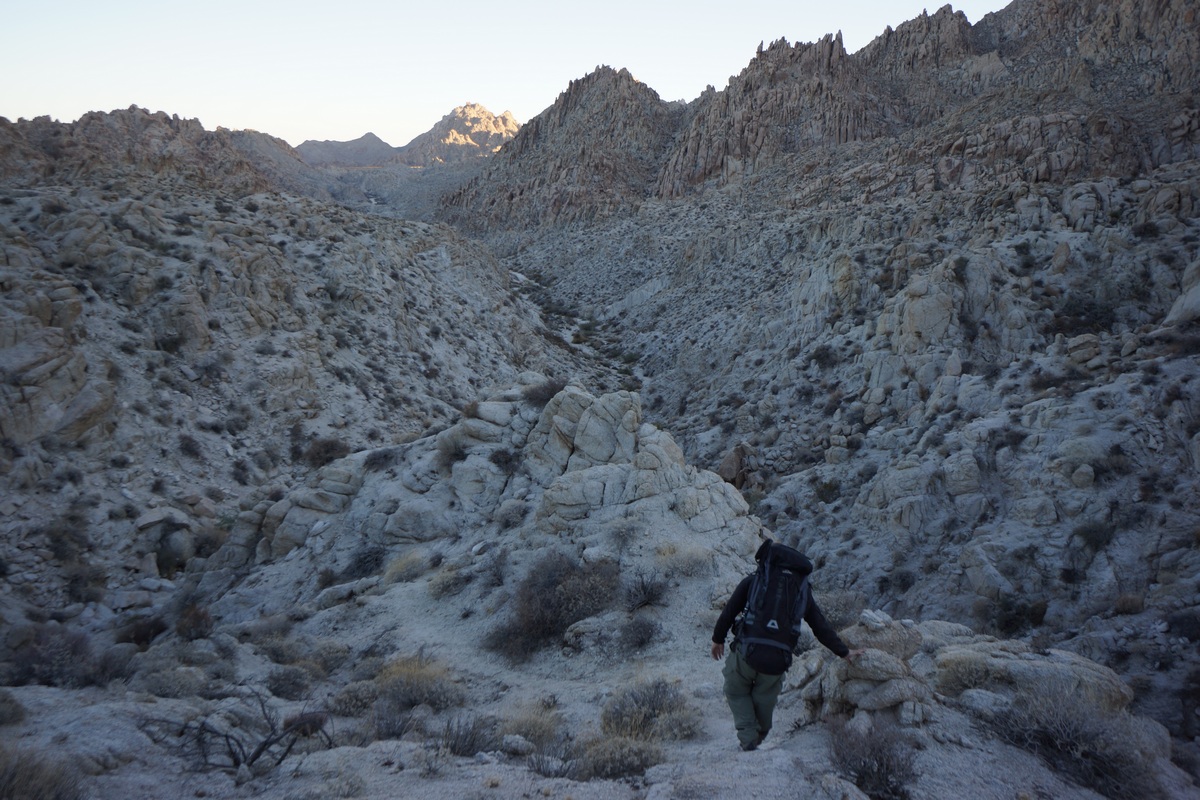
Hiking down the pass into the Inner Basin
Eventually, our route in the sandy wash becomes a boulder climb. Not terribly difficult or long, but a bit of a scramble in spots. Once at the top, it’s actually a bit of a flat plateau. Our first views of the Inner Basin were impressive, but the view is best right before the trail drops down in elevation.

After dropping down into Inner Basin, it was back to an easy walk in a sandy wash. There’s a lot of thorny bushes around to snag clothing, but nothing too thick. The sun was really disappearing now, and the entire basin was shaded at this point.
When we reached the end of the Inner Basin, there were cairns leading southwest. I was expecting the route to continue southeast and up hill. I could have taken the route I had marked on the map, but I just followed the cairns. The route winded through some narrow canyons and involved a little more boulders. Eventually, we popped out into the large flat area nestled in the heart of the mountains seen from my map. I originally thought this was the Inner Basin, based on the look of it on the map and the piss-poor descriptions available on the web. To be clear, I am talking about the open area on the map at these coordinates: 34.0195, -115.3733. Since this area is not part of the day use area, we started to look for a campsite. It was really windy, so we walked to several outcrops of rocks to see if they provided ample wind break. Wind always seemed to be hitting us no matter where we stood, so we just picked a spot. I had to use my headlamp to finish setting up my tent. The sandy soil was so soft, I had to weigh down my stakes with rocks to keep the tent from blowing over.
After setting up camp, Dan and I ate dinner. It was 5:30 now and the stars were shining bright already. In fact, we could clearly see the milky way despite competing with the moon’s light. It was also getting pretty cold. Tonight was supposed to get down to near freezing. After shivering in the wind for a while, Dan and I decided to turn in around 6:30. Nights in the desert are long in the winter!
Day 2 – Saturday December 3rd, 2016
Miles Hiked – 10
Elevation Gain – 1671′
I woke up at 5:50 this morning, hoping to get in position for the sunrise. I walked over to Dan’s tent and woke him, but he didn’t get out of his tent by the time I was ready. In fact. he was snoring again. So, I let him sleep while I climbed up rocks behind our camp.
Sunrise in the Coxcomb Mountains


My camp is along the base of the rocks I’m on
From my spot on top of the rocks, I had a pretty good view of the large flat basin in which we’re camped. I could tell the sun wasn’t going to be directly in view, but I had had a good spot to capture the glow of light in the distance.


I spent a good while up here taking pictures of the sunrise and enjoying the excellent scenery. This was one of the better views of the whole trip.
Some variety of Cholla Cactus


When I returned to camp, Dan was still snoring. Again, I let him be and continued with my search for some good early morning photo ops. Next, I headed southwest from camp to the edge of this flat open area. Here, the map shows a large drop off down to Pinto Basin below.

View of Pinto Basin and the Pinto Mountains beyond

Once at my destination, I realized most of it lies within the shade currently. maybe this would be better to return to this evening. I took a few pictures here before moving around some, trying to get to a higher vantage point. I bounced around from spot to spot along the tops of the nearby hills, but eventually I gave up on the area and decided to head back to camp.
Dan still wasn’t up when I returned after 8am now, so I tried waking him again. This time, it worked. After Dan ate breakfast and got ready, we headed out to do some exploring. Today, our plan is to go wherever we feel like going!

A small cave in the Coxcomb Mountains

First, Dan wanted to check out a small cave we saw last night as we exited the Inner Basin area and entered the flat open area we camped in. The cave was a rounded cavity in a rock face, sitting about 8-10ft above the ground. With some effort, it’s possible to climb into it from below.
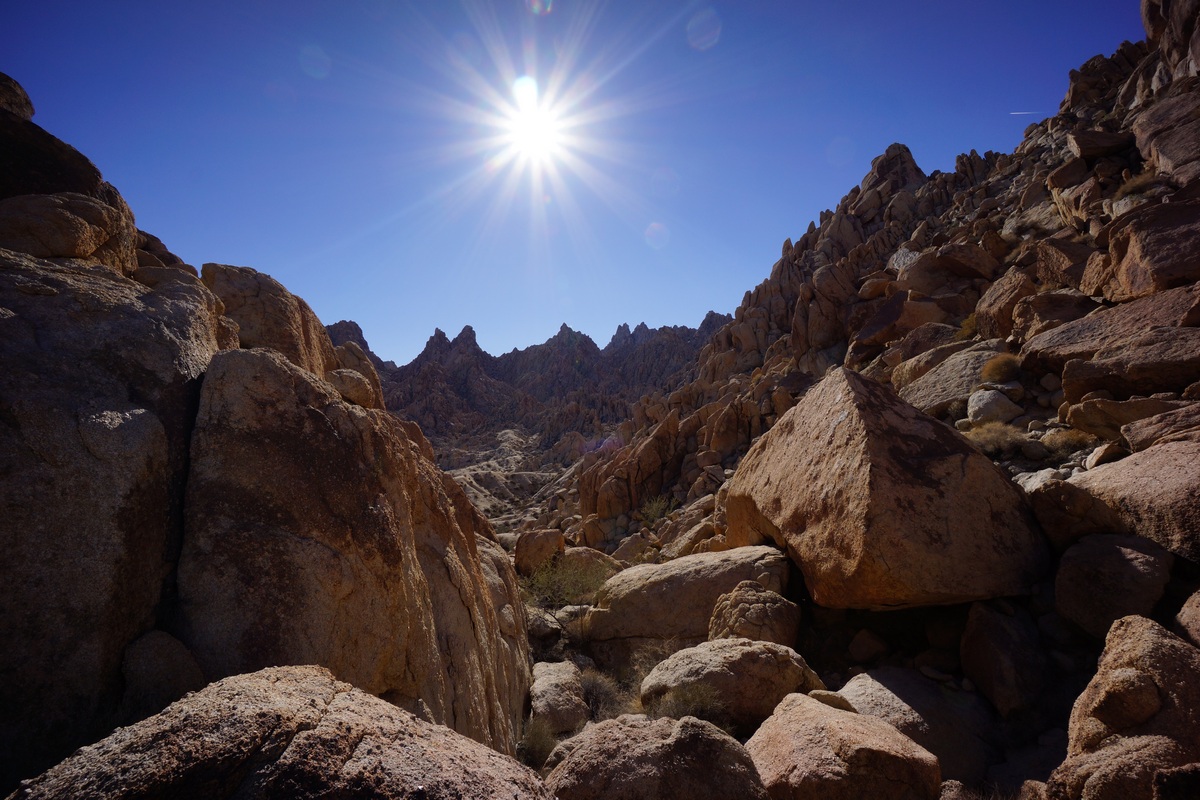
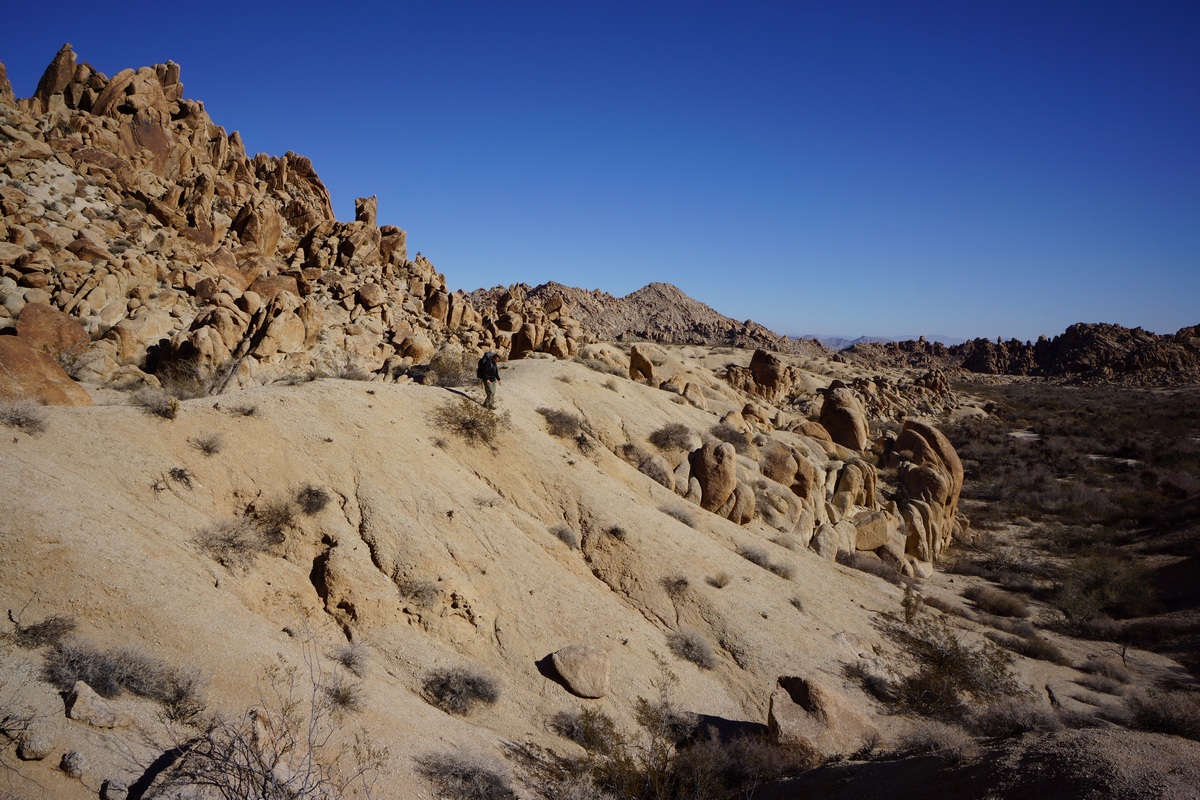
Dropping down into the wash below
After this, we headed south across the open flat area. We hiked up over some boulders and dropped down into a wash below. We followed this was downhill for a ways. I had this marked on my map as a potential spot of interest, as the canyon looks like it narrows further down and is flanked by some cliffs ranging from 400′-1200′ plus. Might be worth checking out.

The hike down this wash was pretty easy at first. There were some occasional boulders that needed to be climbed in order to continue along our path. We had no intentions of following this canyon out into the desert, just to follow it for a ways. We didn’t see much of interest here, so we decided to turn back at our first real obstacle. There was a short drop off along the wash that might have been hard to get back up if we had continued down past it, so we figured this was a good turn around point.

We hiked back uphill and eventually made it back to the spot where we had originally entered the wash. From here, I suggested hiking higher up the same wash. On the satellite maps I saw at home, I saw a sizable patch of green here, which might indicate a spring or seep. Since thee was nothing marked on the map and no info on natural water sources in the Coxcombs online, we decided it might be an interesting destination.
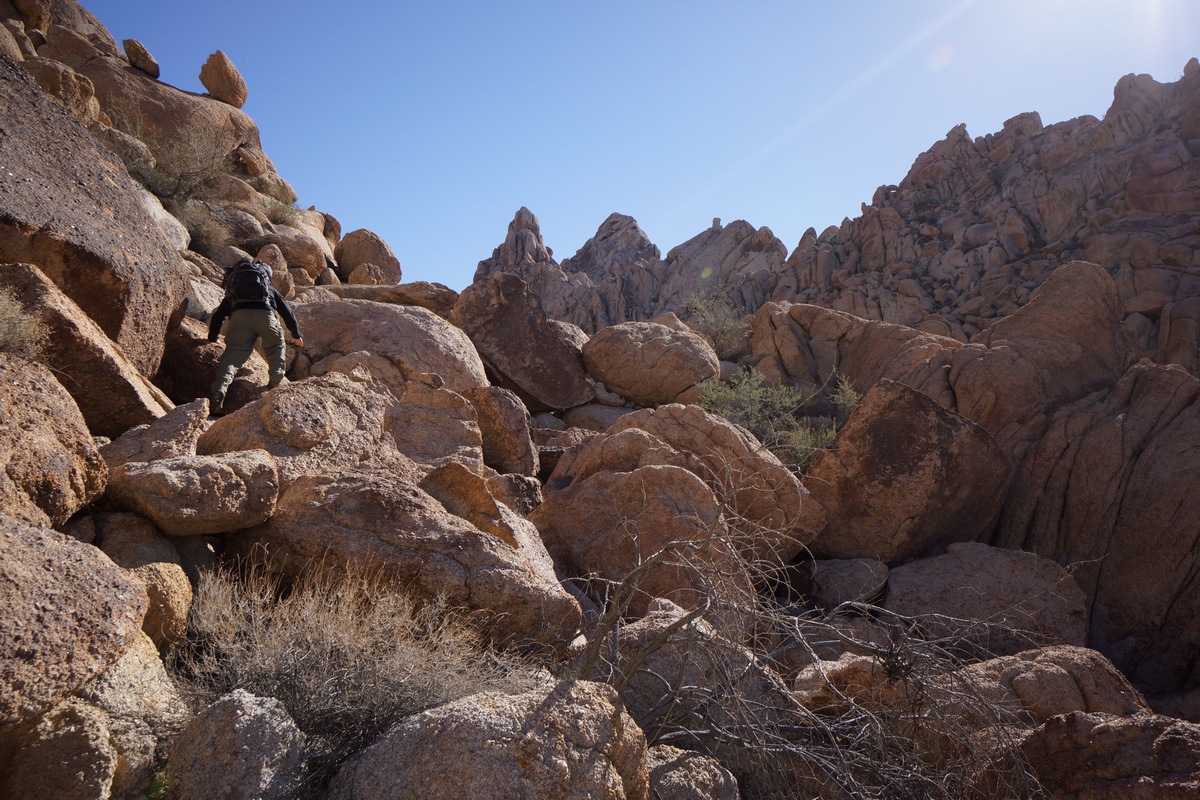
Climbing up the rock chute

View north from the rock chute

Dan enjoying himself
At first, our hike was again easy, winding through a sandy wash. Soon enough though, it turned into a boulder climb. This was a fairly long and sometimes challenging scramble, too. There were large boulders here, stacked on top of each other creating huge spaces in between them in which to fall. Sometimes, traversing the boulders meant walking along steep faces of the boulder with little or nothing to grip. A slip could result in a slide down the boulder and then a fall of up to 25ft onto various size and shapes of boulders below. Not exactly a high exposure type danger, but a real risk of injury if one step is out of place.
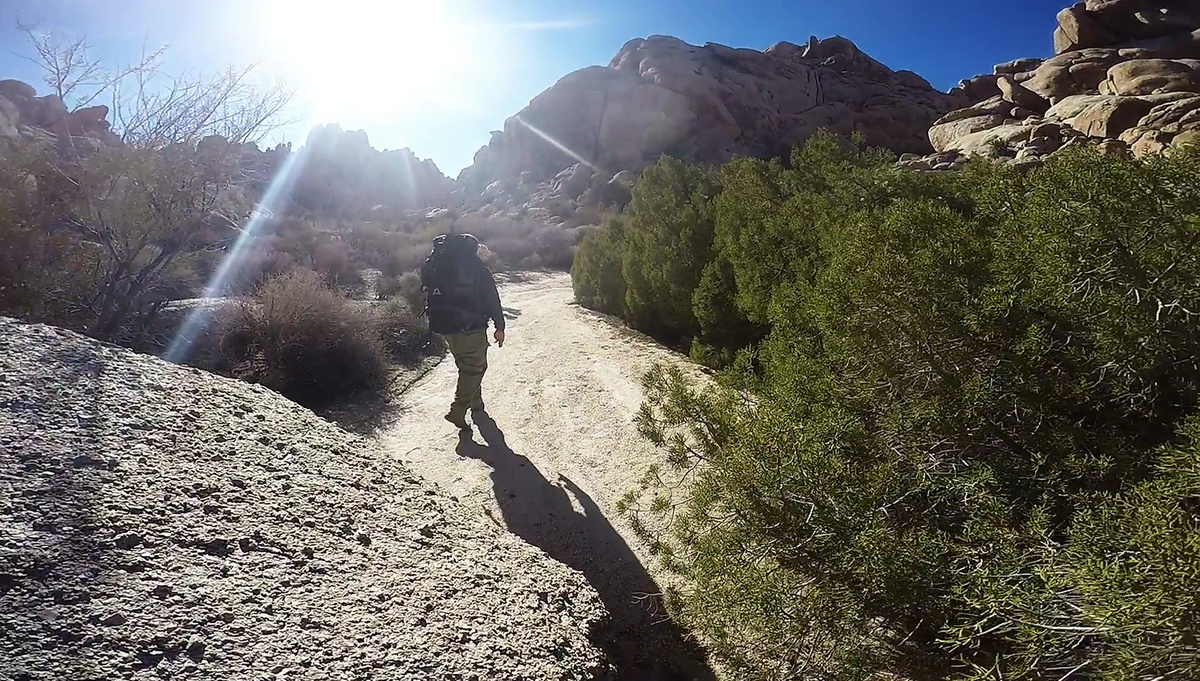
Lots of green around. I didn’t see water, but this is the closest to it I’ve seen out here
After a tough scramble to the top, there wasn’t much to see. The vegetation was thicker up here, and this meant mostly more thorn bushes. We had already been cut up pretty good during the rest of today’s hike, but the worst of it seemed to be up here. We pushed through the thorn bushes and headed for the spot of green I saw on the satellite map. Once at the spot, we did see a high concentration of some coniferous trees, the exact species, I’m not sure. They were so thick that I couldn’t penetrate them to check for existence of water, either.
We took a break here in the sun and relaxed for a while. We debated taking another route down, but that would require traversing some steep territory. Who knows what that will look like when we get there. It was early afternoon now and we end to start thinking about heading back to camp. We ultimately decided to take the same route back as we know it’s traversable already.

Descending the chute

Red rocks. Yup

Big Horn Sheep skull

The jagged peaks that surrounded us looked more impressive going down than it did when we went up. It was hard work, but offered up some of the best views of the day. We also saw a big horn sheep skull that we didn’t see on our way up. It had both horns intact.
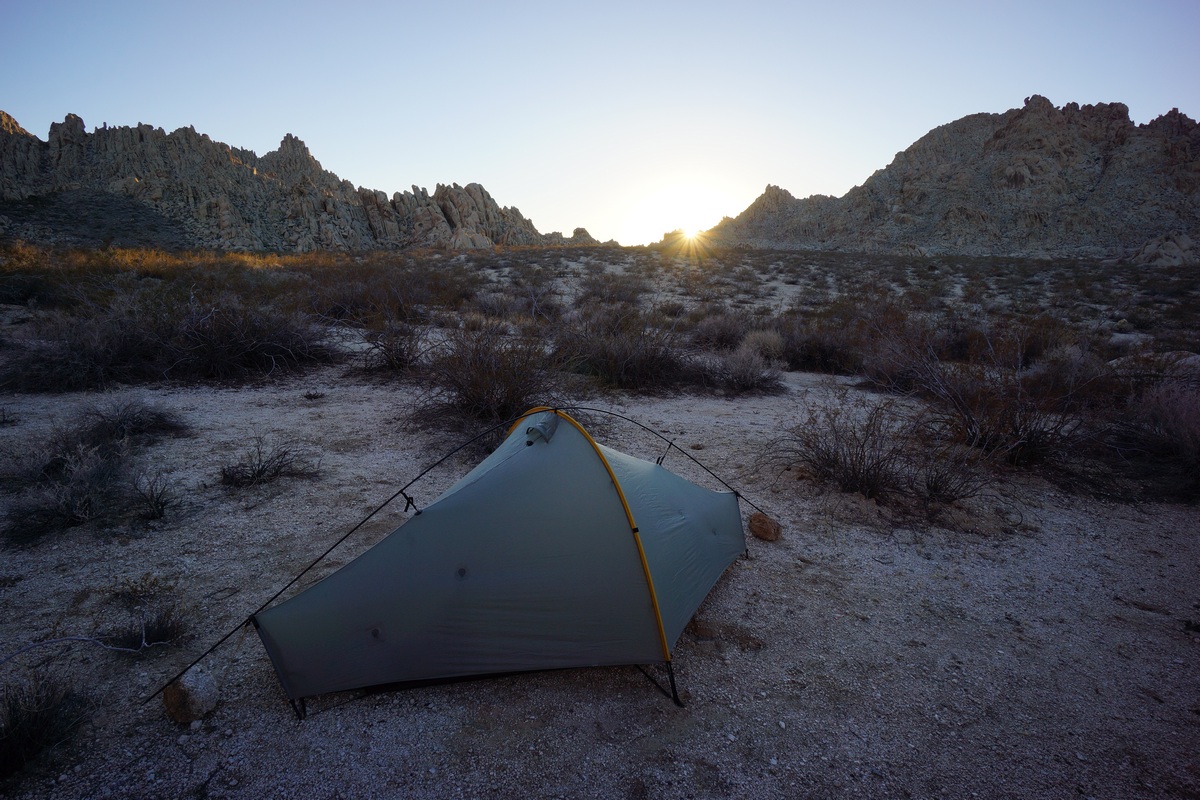
My campsite
Coming down was a little easier. Before long we were in the sandy wash again and headed back to the place where we entered this wash. We could go over the little ridge we did this morning, or take another route, running northeast from benchmark 927T. We opted for the second choice. This took us back to camp, where we relaxed and rehydrated.
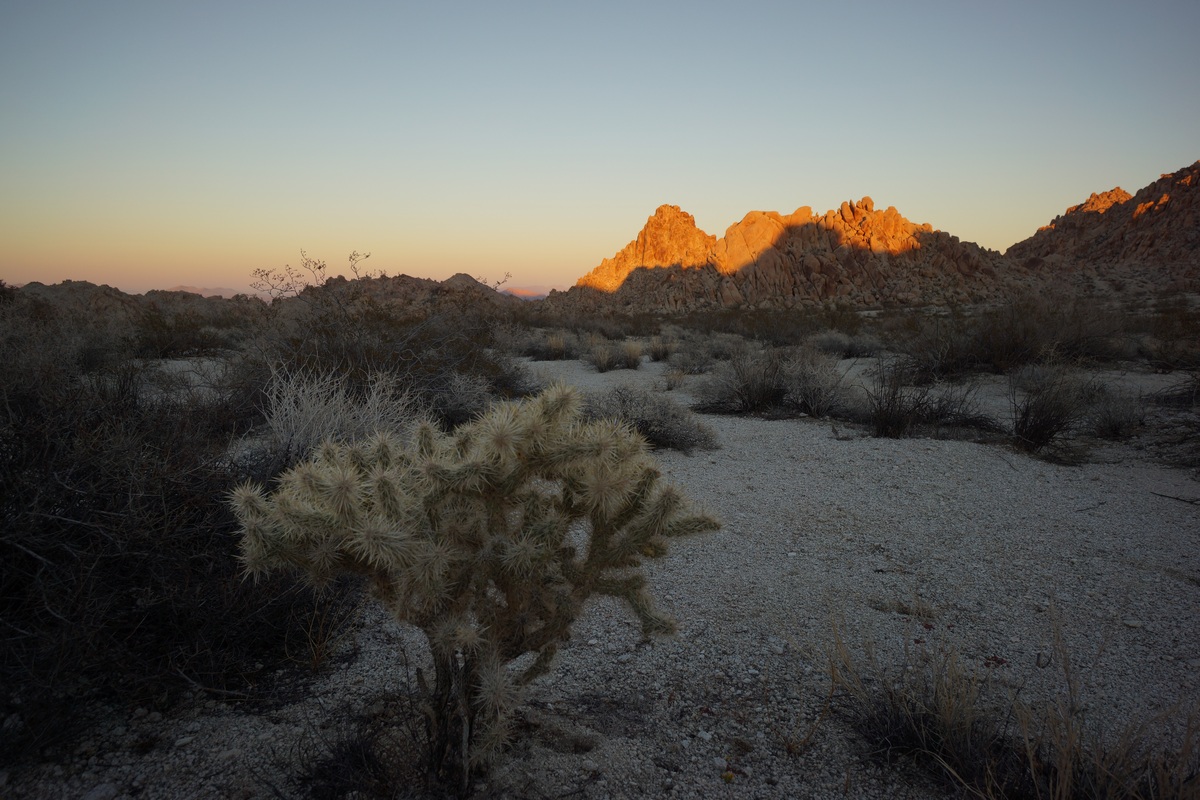

Sunset over the Pinto Basin

It wasn’t long before the sun was on it’s way down again, and fast. We decided to head back to the spot I visited this morning, on the southeast corner of the large open area. It was aonly a 10 minute walk to get there, but when we did the sun was just going down over the Pinto Mountains. It wasn’t the best vantage point base don the angle of the sun, but I snapped a few photos I was happy with. We ate dinner here as we watched the glow of the sun disappear.
Back at camp, we pretty much mirrored last night: sit on the rocks, watch the stars and chat. By 7pm we were both in bed again, seeking the relative comfort of the tent and the warm it provides.
Day 3 – Sunday December 4th, 2016
Miles Hiked – 7
Elevation Gain – 375′
I woke at 6am this morning, and Dan even woke on the first try. My original plan for today was to bag Tensor and Spectre peaks today on the way back to the car. However, Dan was not really wanting to do that after the climbing we did yesterday. He’d rather get back to the car early and spend the rest of the day driving through Joshua Tree or other areas nearby. While I was really looking forward to the great views from Aqua Peak (the name for Spectre, Tensor and Didiac Peaks), you really can’t go wrong with his plan either. So, I went along with the idea and started packing up my gear.


Hiking through the Inner Basin
We started hiking at 7am. It was a little warmer last night, and so this morning was easier to get moving. He hiked back towards the elevated cave, then down into the narrow wash leading into the Inner Basin.
We were able to follow our tracks back through most of the wash, not that that was necessary. The route is very straight forward, just follow the wash through the canyon. There is one large side canyon running northeast, but it’s obviously not the main path. This is the alternate route that’s marked on my caltopo map. I know nothing about this alternate route though, and skipped it because it looked like it would involve more climbing and steeper terrain that we won’t have to deal with if we continue the way we came.

Looking south into the Inner Basin

Inner Basin Pass, looking south
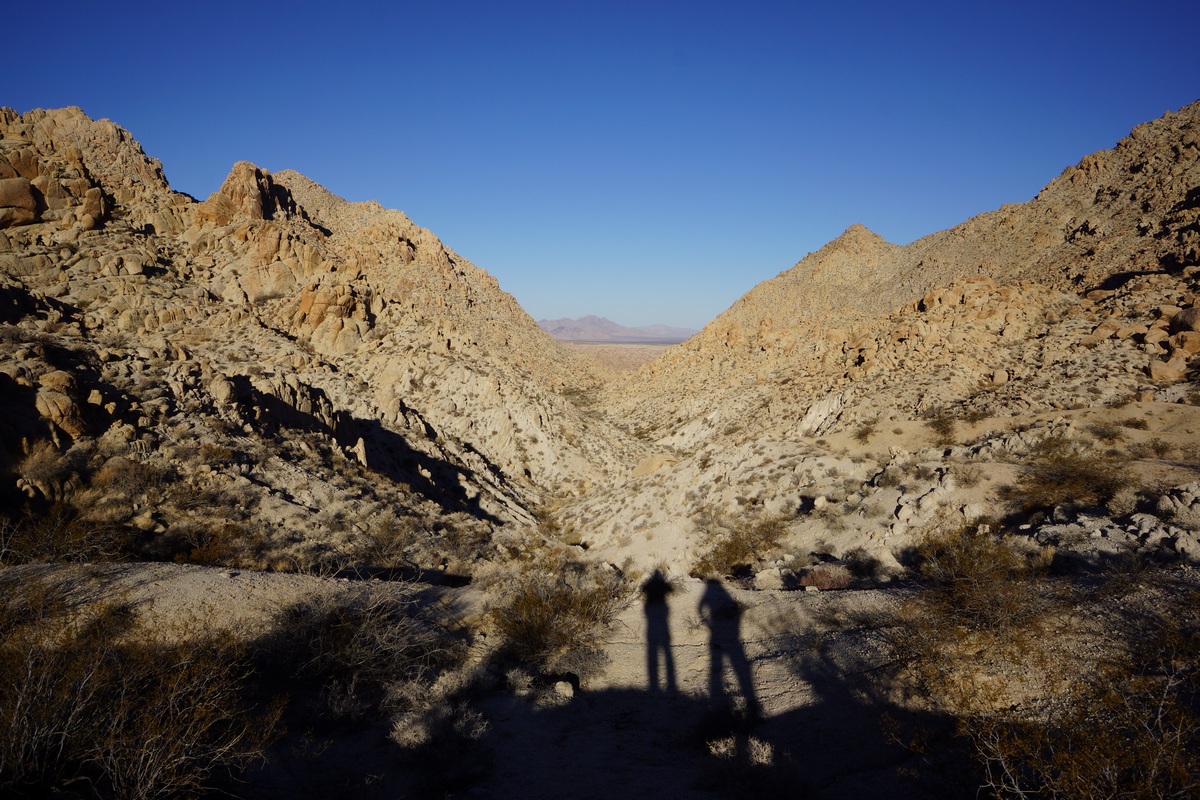
Heading out of the Coxcomb Mountains
We made it to the top of Inner Basin pass in good time, and had some nice views of the basin. We continued on down hill through a couple of patches of boulders, but the rest is pretty much sandy wash from here on out.
Back down in the main wash, we followed it out of the canyon and took the same path we took in two days earlier. We followed our own footsteps on and off as we hiked through the small canyon. I saw another jackrabbit through here, and wondered if it was the same one I saw Friday. It was practically the same area.
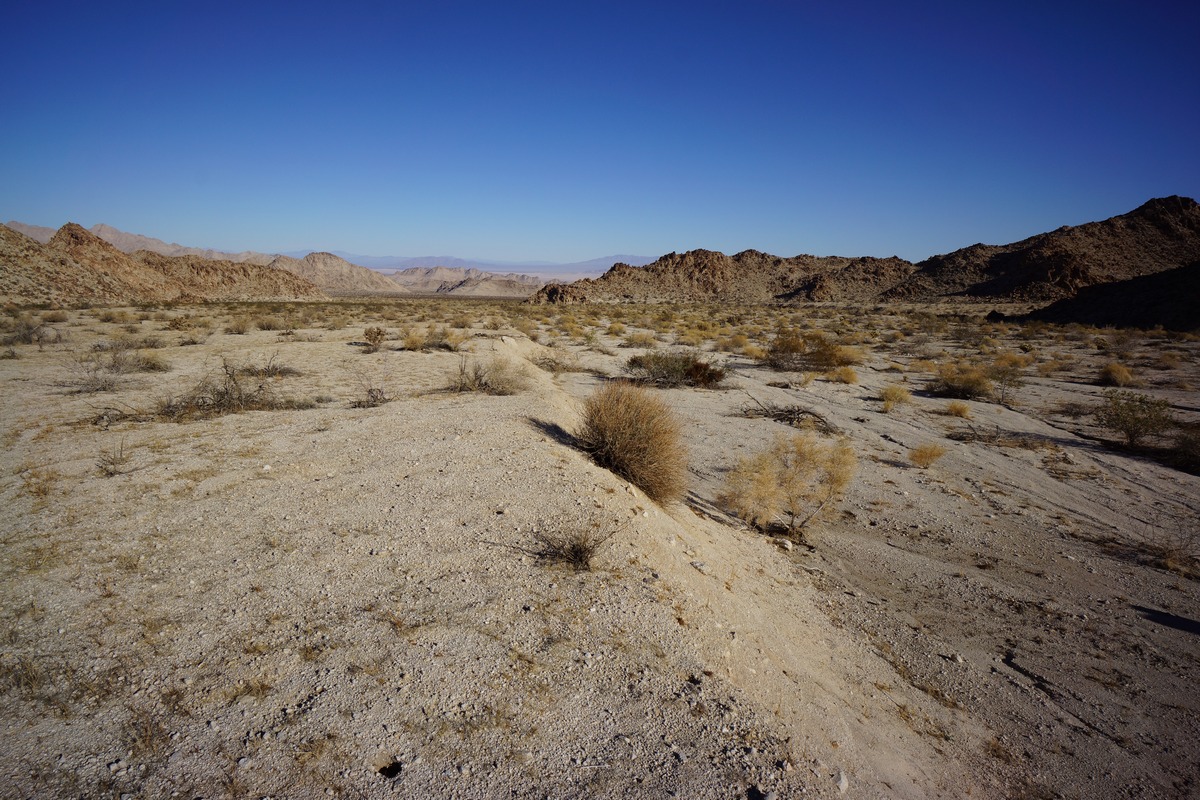
The landscape looked unfamiliar as we returned, as we now had a huge open desert in front of us. On Friday, all that was at our back and we only saw it as we turned back. It was nice to have this contrast as we left the mountains and now entered the desert.

The final stretch of desert had us talking about our dreams of a hot lunch. It took a while to actually spot hwy 62. The car was parked behind some boulders along side the road where others had clearly camped, and we headed for a graffitied rock that marked the spot. We were relieved to see that the car had not been broken into. The time was just before 10am, so almost a 3 hour hike from our camp.
From here, we headed back into 29 Palms and ate ate the Andreas restaurant. Good burgers, they really hit the spot! After this, we headed into Joshua Tree National Park on Utah Drive road to explore the park by car.
Final Thoughts About Hiking In The Coxcomb Mountains
The Coxcomb Mountains are a great place for a weekend hike, provided you’re OK with hauling in all the water you’ll need. Without a reliable water source though, longer trips aren’t really possible here. It doesn’t look like this place gets much use. The access probably keeps many people away, as well as the day use restriction in what might otherwise be the best camping spot.
As always, questions and comments are welcome!
If you found my trip report useful, please don’t hesitate to leave a comment! Alternatively, if you feel you have any information you’d like to share with others regarding this hike, please feel free to leave that below in a comment as well.
10 Day Sierra Loop Hike – Kings Canyon NP & John Muir Wilderness – Aug 2016

Kings Canyon National Park & John Muir Wilderness 10 Day Loop Hike Starting From Florence Lake
All Photos From This hike | Watch the HD video of my Sierra hike on Youtube
- Location – Sierra-Nevada Mountains, CA
- Park Administration – John Muir Wilderness, Kings Canyon National Park & Inyo National Forest
- Fees & Permits – $5 for a wilderness permit, required for overnight camping
- Travel Logistics – Flew into Fresno, rented a Chevy Sonic for the drive to Florence Lake
- Trailhead – Florence Lake
- Length Of Time Hiked – 10 days, 9 nights
- Miles Hiked – 95
- Trail Type – Loop, 50/50 mix of on and off trail hiking
- Route Difficulty – 8
- Fires Allowed – Only below 10,000ft
- Bear Canister Required? – No, not along my route. See map of where bear canisters are required in the Sierras
- Scenic Beauty – 9
- Solitude – 6
Kings Canyon/John Muir Wilderness Loop Hike Maps & GPS Files
[sgpx gpx=”/wp-content/uploads/gpx/SierrasRouteHiked2016.gpx”]
Pre-Hike Travel Logistics
To access the Sierras, one typically enters on the east of west side. People have mentioned using the town of Bishop as access from the east, but I chose to fly into Fresno, rent a car, and drive in from the west.
There are few direct flights to Fresno, so from Detroit I had to stop in Dallas. The problem was, bad weather in the Dallas area when it was time to leave, lots of red on the radar. We sat on the tarmac in Detroit for an hour before taking off, then we got diverted to a small airport in rural Arkansas to wait on the tarmac there for another 2 hours. Apparently, the entire DFW airport had closed down for a while due to the storm. By the time I landed in Dallas, pretty much all the flights had been cancelled. Great, gotta call the car rental company and change my reservation, as well as try to cancel tonight’s hotel in Fresno.
Now the real “fun” began… dealing with American Airline’s customer service. Calling them is a 2+ hour wait, and they suggest to leave your name and number and be called back later. Meanwhile, I waited in an hour long line to talk to an AA agent at one of the gates. I was given another flight to Fresno tomorrow morning at 10:37am, the earliest they had. I’m still optimistic at this point, thinking I could still get to Fresno, rent the car, get last minute supplies, drive to Florence Lake and hike a few miles in without wasting a whole day.

This is where I slept in DFW
Now I’m left with the task of finding somewhere to sleep. Since the cancellation is due to weather, American Airlines doesn’t offer any kind of compensation for the delays and you’re basically shit out of luck. All the hotels inside the airport are booked. Sleeping in the chairs was not working for me, and the armrests prevented you from laying down on them as well. They did bring out cots, but at a 1 to 20 person ratio. I didn’t get one. In fact, I spent 4 hours walking all the terminals looking for a decent place to sleep, and eventually found a yoga area that had a few yoga mats. I stacked a few of these up and at least had some cushion for the cement ground. All night people were coming into this little yoga area and I could hear them murmur “ah shit”, as they realized it was taken, just as I did for 4 hours prior.
In the morning, the plane was 5 minutes from boarding and all of the sudden there was a 20 minute delay. Every time I checked back, there was another small delay added. By this time, people were getting upset as there had been no announcement as to the reason. In order to get information, I had to wait in another 1 hour line to speak with someone. The American Airlines agents kept giving me different information and the delays kept getting longer. Finally after a 3.5 hour delay, the plane boarded and I was on my way to Fresno. On the plane, my seat didn’t lean back and the charging plug underneath the seat didn’t work. The flight attendant said “old plane”. American Airlines, you gotta step up your game! Why do I even fly with you?
In Fresno, I got my rental car and headed to my hotel. I did the “name your price” thing with priceline, and got a room nearby. The room ended up being a smoking room, and there were no other rooms available. I had no idea that smoking rooms were on the table when I bid on a room. I had to sit in this ashtray of a room all night before the hike. Disgusting.
Day 1 – Sunday August 21st, 2016
Miles Hiked – 12.49
Elevation Gain – 1976′
Route – Florence Lake to Evolution Valley/Goddard Canyon Junction
Coming from Fresno this morning, I drove to the ranger station in Pranther to pick up my permit. I had called them yesterday morning to let them know that my flight was cancelled and that I could not make my intended start date, and to try and push that date back by one day. The rangers they have working there at that station are great. They accommodated my request and were very nice to deal with all round.
I took hwy 168 to Huntington Lake, where I took Kaiser Pass Rd the remainder of the way to Florence Lake. The road is fine all the way up to Kaiser Pass Rd. From Huntington Lake, it’s about 23 miles to Florence Lake along a one lane road. This road happens to a cliff on one side much of the way, along with blind curves and blind hills every couple hundred yards. Some sections where really rough and had lots of loose gravel. There were few areas to pull off and let opposing traffic through as the non-cliff side of the road was often also a rockface itself. This was a white knuckle drive to say the least. It will take at least 1 hour to drive from Huntington Lake to Florence Lake. But, it’s totally feasible for any small car. My Chevy Sonic rental made it just fine.

Florence Lake Trailhead parking lot
The trailhead parking at Florence Lake was much busier than I expected. I was lucky to find what appeared to be the last parking space. I had about 20 minutes before the 10:30am ferry leaves to take me from the northwest side of the lake to the southeast side. This saves about 4 miles of hiking from what I am told. I bought my ticket for one way across the lake, unsure of what I’ll be doing on the way back and what time I’ll be making it to the ferry. As of 2016, the ticket prices are $25 round trip and $13 one way. When picking up my backpack to walk over to the ferry, one of the straps holding the top compartment down broke off. Great, not how I want to start a hike.
View of Florence Lake from the north side
The ferry across the lake was on a little boat that fit 8 people, 4 across two rows of benches. The captain of the boat was a skinny kid who looked about 25. He was wearing what looked like a 10 year old girl’s shirt with some home made hearts on it. Interesting thing for a guy to be wearing, but who am I to judge. There were two forest rangers on the boat with us, and they checked our permits during the ride. The boat ride across the lake took no more than 15 minutes or so. The boat lands at slab of rock with a floating dock. It’s a short uphill climb to get a lay of the land in front of you from here. I stopped to readjust my shoes and pack, and realized that I had forgotten my phone in the car. Bummer, no music this hike, but I’ll be fine without it.

South side of Florence Lake looking north. Not sure why this truck is here, but it was gone when I returned 10 days later.

I began hiking around 11:15am today. As always, the first mile is pretty tough. My pack is at it’s heaviest, 56 pounds including 4 liters of water, and I’m not yet acclimated to the elevation. There were a lot of small ups and downs in the beginning as well. Regardless, I was making good time and eager to get out of the rather unimpressive lowlands. There were likely some better views from the meadows, where Muir Ranch and Blaney Hot Springs are for example, but on the trail the views were minimal.
Within the first 2 hours or so, I developed a blister on my heel. Before the hike, I was looking to replace my Inov8 Roclite 315 trail runners, but was disappointed to learn that model was discontinued. I settled for the next closest thing, the Roclite 295. My 315s required no break in, and so besides trying the 295s on to confirm the fit, I did not really test these shoes out. Big mistake! Although I don’t think this was the problem causing the blisters, I also noticed the shoe had a coarser mesh allowing much more debris into the shoe. This trail was pretty sandy so far, and I was getting tons of it in my shoes. These are just not the kind of problems I want to be dealing with, let alone on day one.
The skies had clouded over now, with rain looking very possible later. I’ve been seeing a lot of people on the trail so far, but all going the opposite direction. The trail gets a little more scenic after passing Blaney Hot Springs and Muir Trail Ranch. There’s a steep trail heading up to Seldon Pass just east of Muir Trail Ranch, which I took on my return on day 10. About 1.3 miles east of here is the official JMT/PCT route up to Seldon Pass. These two routes merge together about 600ft up, so either way, you’re going to reach the same place.


The landscape opened up a bit and the super fine dirt and sand on the trail seemed to subside. This was more akin to my style of hiking. Sometime around 2pm, it started to rain. I put on my rain jacket and covered my pack, but it was pretty light and so I left the rain pants off. The rain was very light and intermittent for a couple of hours, and was not too big a deal.

Small waterfall along the San Jaquin River
I crossed the bridge over the Piute River and entered Kings Canyon National Park. From here, the canyon narrows and is a nice change of pace. There were few tress in this canyon and the trail was mostly rock now, much better!

When I made it to the point on the map labeled “Aspen Meadows”, I didn’t see any meadows. I did see a campsite, but it didn’t offer much of a view and I decided to keep moving. About a mile and a half further, there was another campsite. While there were multiple sites here, several were taken and I would be camping a little too close to others. I kept moving once again.
The next potential campsite location was at the junction of Evolution Valley and Goddard Canyon, just south of the point where Evolution Creek and the South Fork San Joaquin River intersect. I figured there’d be some people here, and sure enough, I was right. I crossed the bridge over the South Fork San Joaquin River and scouted the east side of the river. More people. I eventually found a spot, but it offered no view and no immediate access to water. This is it, even if I have to walk a little ways to get my water. I saw 2 deer near camp while searching for it.
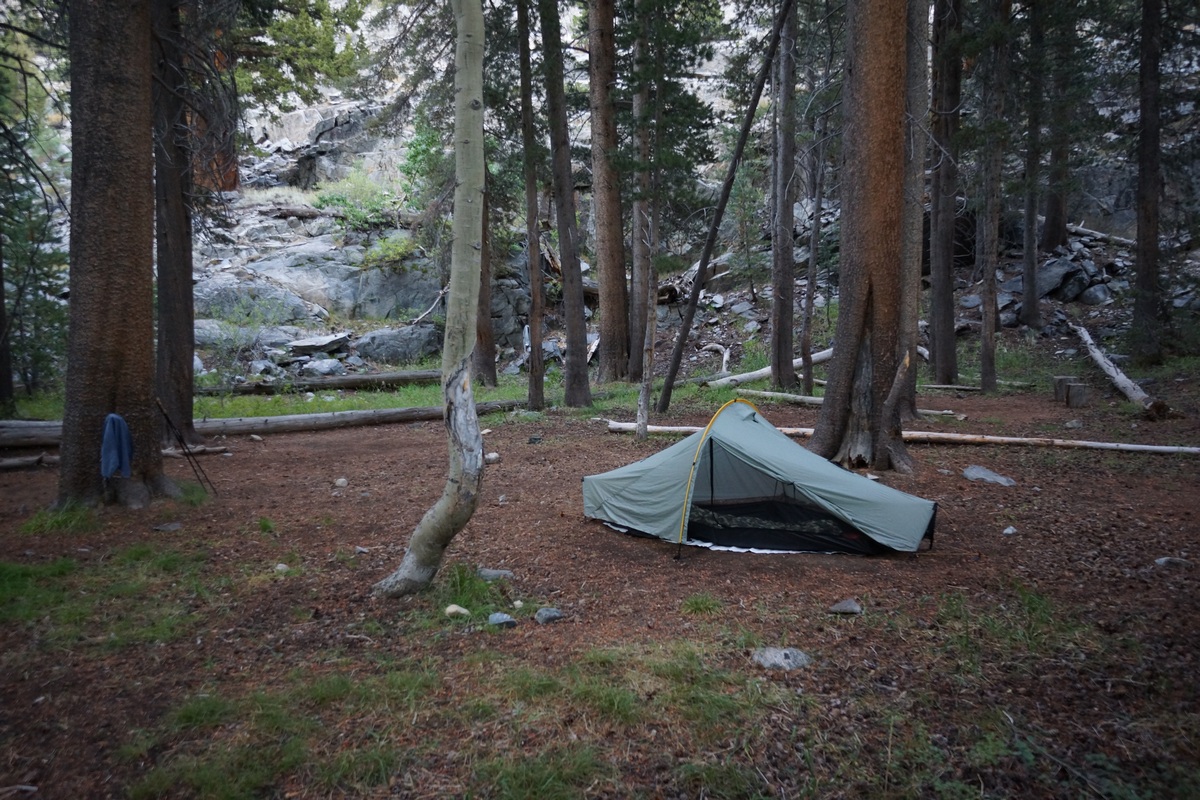
I set up my tent and got started on water. For this trip I have a new water filtration system, a Platypus GravityWorks setup. The jist of it is, you scoop up your dirty water into this 4L bag, then carry it back to your campsite where you can hang it from a tree or set it on a rock. The bottom of the dirty water bag has a quick connect fitting, where you connect the a hose leading into the filter, which empties out another hose as a clean water via gravity. I can remove the bite valve on my 3L Platypus bladder in my backpack and with a connector fitting, connect the GravityWorks hose to the bladder. No need to remove the bladder anymore from my backpack when filling it, and never have to open it during a hike. Just keep the dirty water bag above the container used to store your clean water and let gravity work for you while you do other stuff. This thing filters fast too. I didn’t time it, but it was about 1L per minute. After filling the bladder, I can then fill my water bottle (32oz gatorade bottle). I keep extra water in the dirty bag by clamping the little shut-off valve closed on the hose below the filter.
After water, it was on to fixing the broken strap on my backpack’s top compartment. The strap is attached by being inserted into a hole in the corner of the top compartment, and then sewed in place. Since I had no needle and thread, I used super glue. I put some glue on both side of the strap, inserted it into the hole it came out of, and used my fingers to clamp it together for a while. Yes, I got super glue all over my fingers. It took a couple of days to wear it all off. The repair seemed to be working well after a few minutes, but I let it sit overnight.
Even though I could have had a fire tonight since I was still below 10,000ft, I didn’t. Instead, I went to bed shortly after sundown. My heels were pretty sore and I was really wondering how I’m going to make it another 9 days without doing too much more damage. Oh well, no choice!
Day 2 – Monday August 22nd, 2016
Miles Hiked – 10.46
Elevation Gain – 2649′
Route – Evolution Valley/Goddard Canyon Junction to McGee Lake
It rained a little bit last night around 3am, so my tent was wet this morning. I was going to be slow at packing up my stuff this morning anyways as it certainly takes a few days to get my routine polished. I put some moleskin over my blisters and covered them with Ace sports tape. I was on the trail by 8:30 this morning.
The skies were pretty clear at this morning and I had high hopes of good weather. The trail starts climbing up some switchbacks immediately after leaving camp, literally within 20ft or so of camp. Nothing like an 800ft climb to get the blood pumping in the morning!
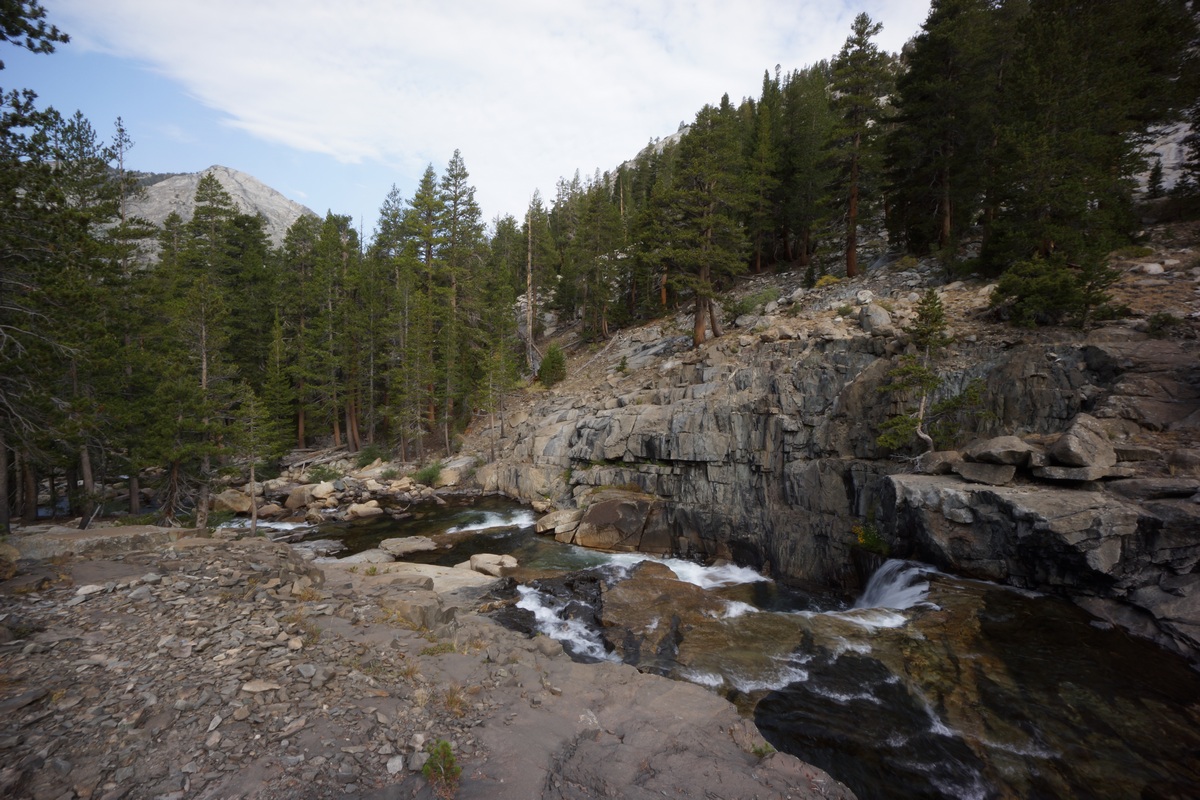
Lower Evolution Creek

Waterfall along Evolution Creek
Once near the top, the trail hugs the banks of Evolution Creek on and off as it tumbles over a few waterfalls. There are more people now, and there’s a sense of wonder among them. Hikers are moving slower and taking their time. And, many of them are older. I didn’t see so many people here under 40 it as I somewhat expected and planned, with school starting around this time.
There was a ford of Evolution Creek that required getting wet. Fortunately, the creek was very mellow here and barely knee deep at the max. I stopped on the other side for a snack and talked to a few nice people. Many of the hikers seem to be local Californians, and well familiar with the area. At least, the popular areas. I mentioned my plans to visit Ionian Basin, but many had not heard of it. That tells me I’m going to the right place!

Evolution Meadow
After the water crossing, the trail passes through a mix of forest and meadows. The meadows were pretty nice, and would make a great place to camp. There’s a ranger station in McClure Meadow, right off the trail. I didn’t stop in to see if it was manned, but it looked like it could have been in operation still. I saw some pack llamas on the trail in this section as well.
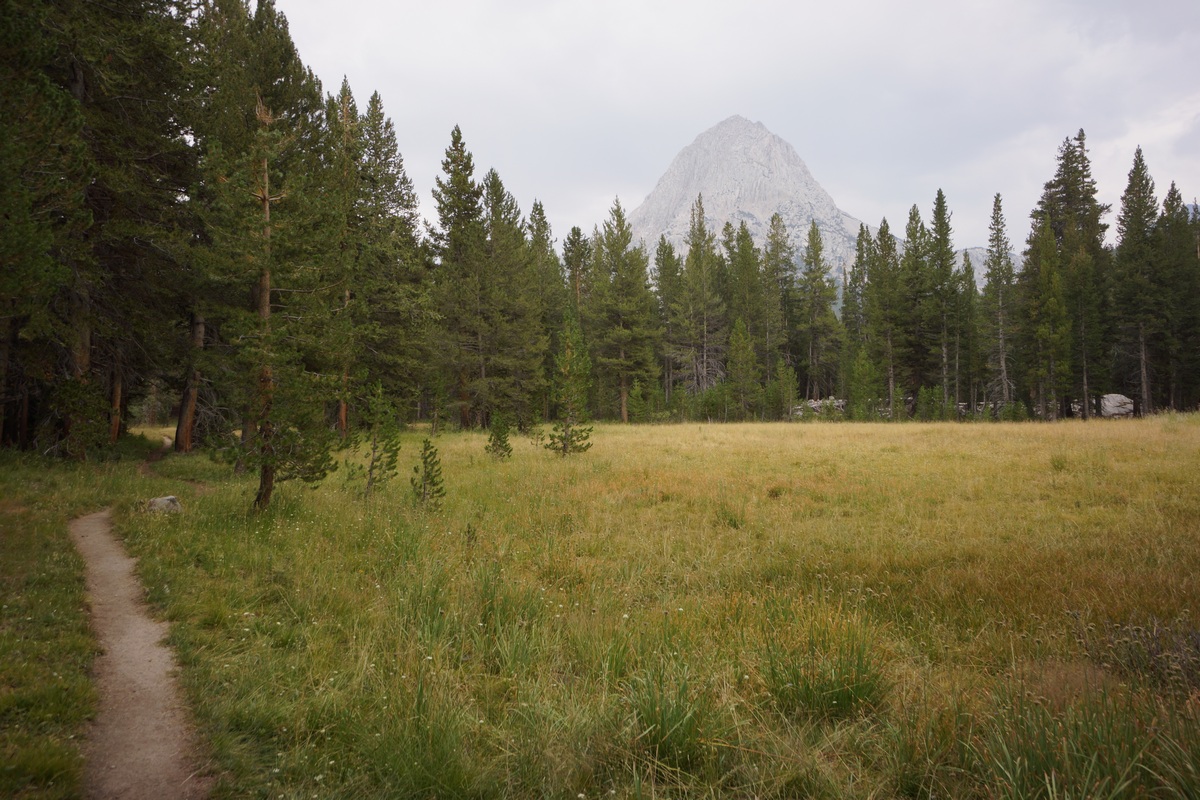
The Hermit
Eventually, The Hermit came into view. This marks the entrance to McGee Canyon. When I reached the Evolution Creek and McGee Creek, I did not see any time of trail leading into the canyon. I was pretty surprised as this is supposed to be a very popular area (Evolution, not McGee). I just assumed the nearby canyons would all have some sort of use trail at the very least.
I headed off-trail for the first time this trip towards McGee Canyon. After hiking through a small field I was at Evolution Creek at what appeared to be the perfect crossing, despite the lack of trails or tracks here. A tree spanned the width of the creek allowing for a quick and easy crossing. On the south side of Evolution Creek now, the land starts heading uphill into McGee Canyon. I headed towards McGee Creek so I’d have something to follow and started the climb up.
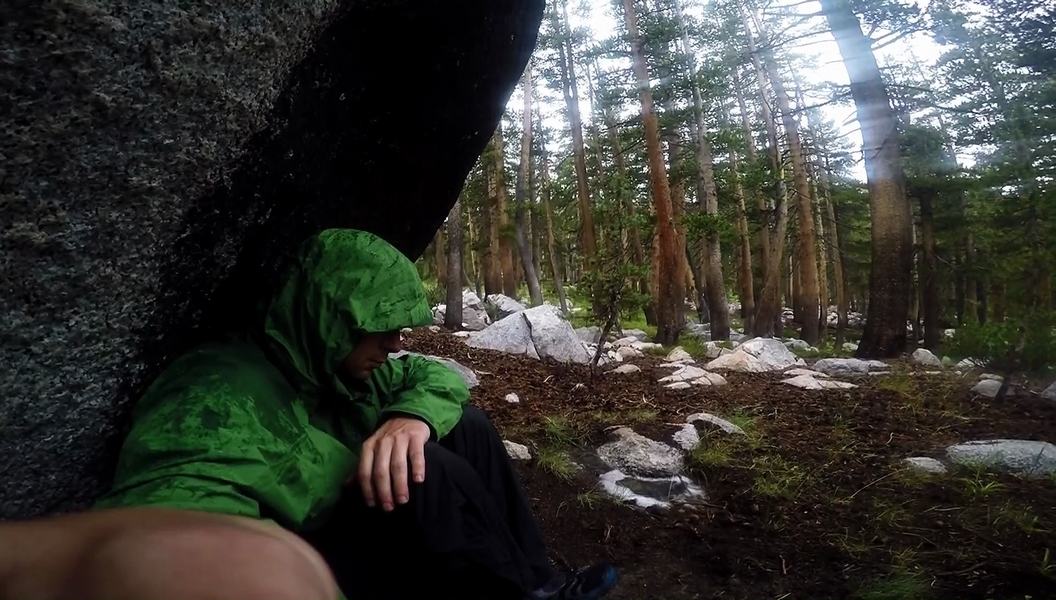
Waiting out the rain
Shortly after my ascent into McGee Canyon, around 12:15pm, it started to rain. A sprinkle at first, then it started picking up. I stopped to don my rain gear, and thought I might wait a few minutes under a couple of pine trees to see if it cleared up. It didn’t. Instead, the storm intensified with a display of hail, thunder and lightning. I decided to abandon my pine trees and head for more solid cover. I found a large boulder with an overhang that allowed me to stand underneath without getting wet. I ended up waiting around until around 2pm until the rain let up. I was getting pretty cold just sitting around, and was glad to get moving.
I continued uphill with grey, dreary skies above. There was no trail still, at least on the east side of McGee Creek. I crossed it for the first time around 10,250ft, but didn’t see a trail here either. The climb up to this was only 450+ feet, but felt like much more. My feet were soaked at this point.

Mt. McGee & Peter Peak from McGee Canyon
Out of the forest and into the meadows now, the views were more to my liking. I followed the creek upstream through a soggy meadow, with increasingly impressive mountains revealing themselves as I drew closer. Patches of snow remain on Mt. McGee. It was very nice to look at, but the going was a little slow through this area as the best path through here seemed to cross the creek often.
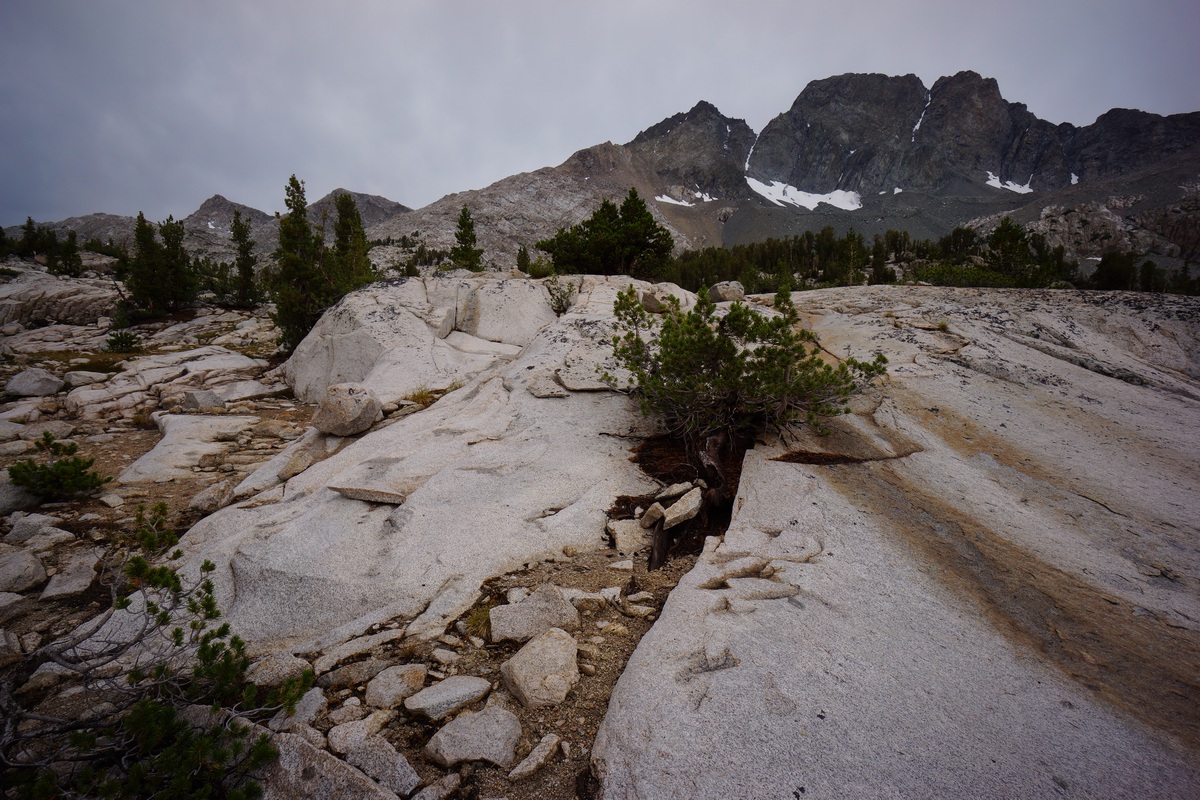
Climbing up to McGee Lakes
At the south end of the meadow where it starts to climb uphill, I stayed west of the creek(s). There is still no trail visible though here that I’ve seen. After another 450+ft climb, I reached the first lake in the chain. Great views, more scenic than I was anticipating for this area.


McGee Lake 10,816
After leaving the first lake behind, I noticed a faint trail around the lake, which I followed. I’m fairly close to camp now and done with the hardest part of the day, so it was time to slow down a bit and take some pictures around these lakes. I just wish the sun was out, the grey skies weren’t helping my cause.

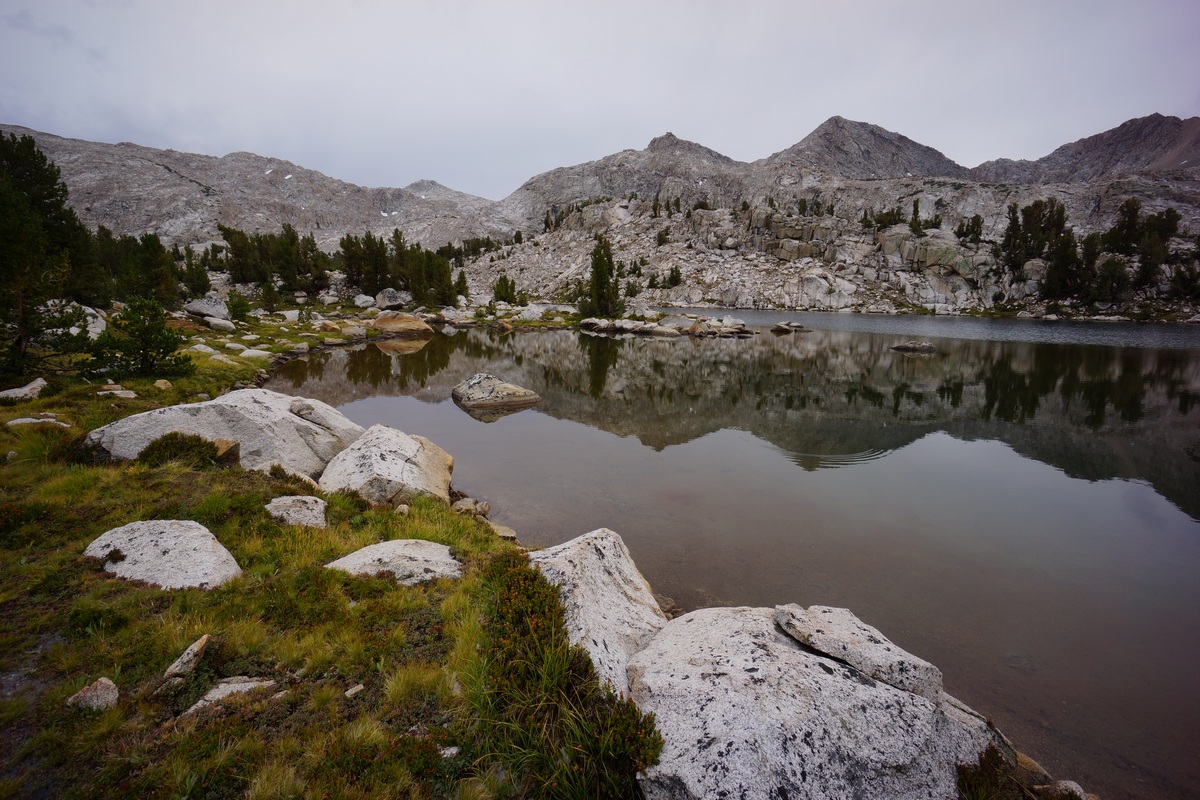
McGee Lake reflection
I eventually found a place to camp on the little peninsula between upper and lower McGee Lakes. After doing all my camp shores I headed down to the lake to do some fishing. I had seen some small brook trout in here on my way to camp. The sun was out now too, and I was feeling pretty good. I had a couple of bites on my mepps #2. but unfortunately I didn’t catch anything. Oh well, I wasn’t expecting much out of this lake fishing wise. The better-than-expected views and lack of people her more than make up for it. I haven’t seen anyone since leaving Evolution Valley.
The blisters on my heels didn’t get any worse today, and were much less of a problem with the moleskin and sports tape. Without the tape, the moleskin always falls off after a couple of hours as my feet sweat and the moleskin gets rubbed out of place. This is the first time I’ve used it in conjunction with that sports tape and so far, it’s working.
Not much of an appetite yet, even though I was hungry earlier. I ate what I could and headed to bed at sunset.
Day 3 – Tuesday August 23rd, 2016
Miles Hiked – 4.32
Elevation Gain – 1323′
Route – McGee Lake to Lake 11,196
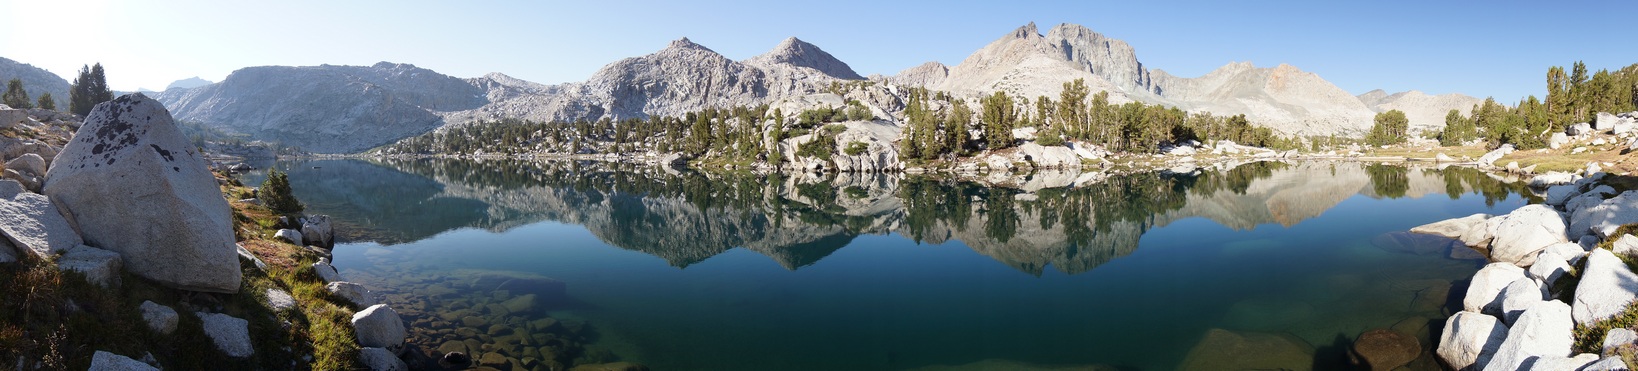
McGee Lake
It was an amazingly calm night last night with zero wind. I expected it to be windy out here on this peninsula. But the lack of wind came with a cost… lots of condensation in my tent this morning. It was a nice clear morning, and I took some extra time to let my tent dry out a little.
Today I plan to hike to Ionian Basin. The Davis Lakes side of Pass 11,720 didn’t look like a sane option, so I planned to work my way up towards Davis Lakes Pass from McGee Lakes. It looks a lot easier than Pass 11,720 itself. Then I will hike around Davis Lakes, through Goddard Basin, down to Martha Lake, over Goddard Col and over to Scylla. At least, that’s the plan.

After leaving camp there were some excellent views, with the mountains reflecting in the blue water. Ah, I love the high country! I took my time around the last bit of Upper McGee lake.
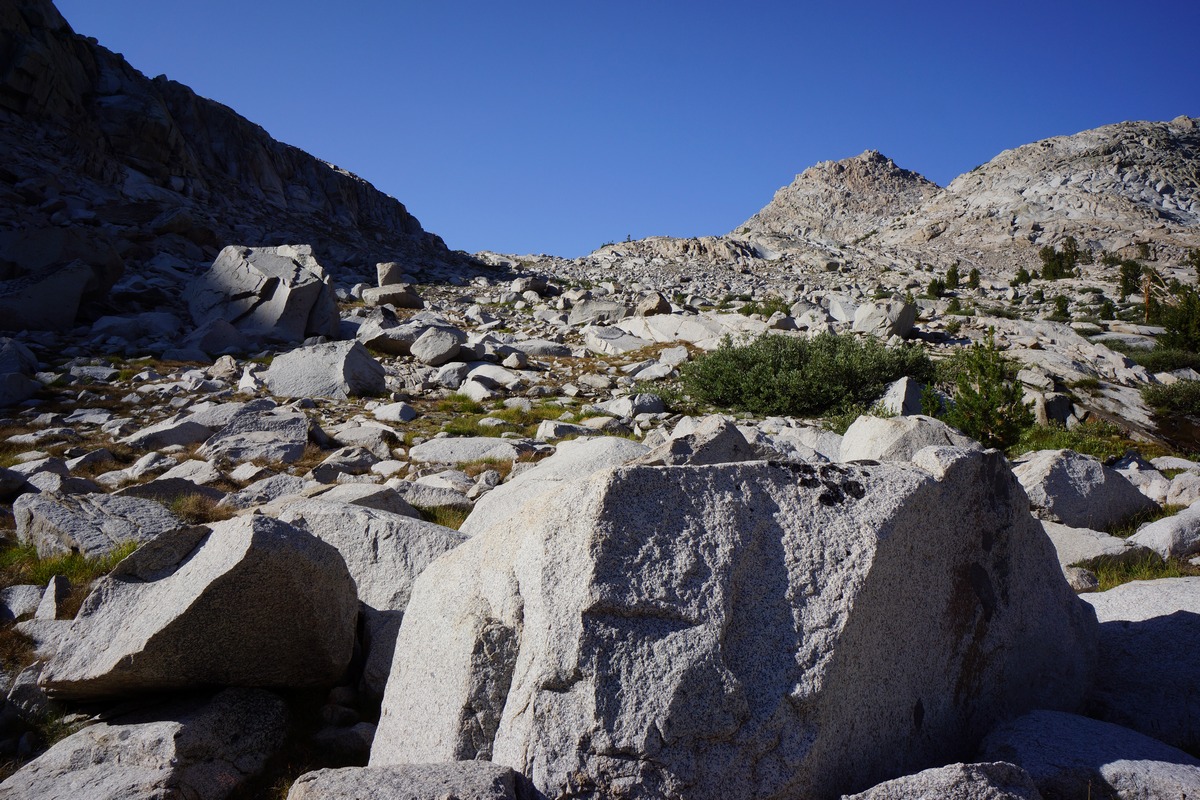
One of the many false summits above
When it was time to confront the first uphill battle of the day, it didn’t look so bad at all. A grassy hill with some occasional boulders. Of course, the higher I climbed the less grass there was, and eventually it was almost all boulders.
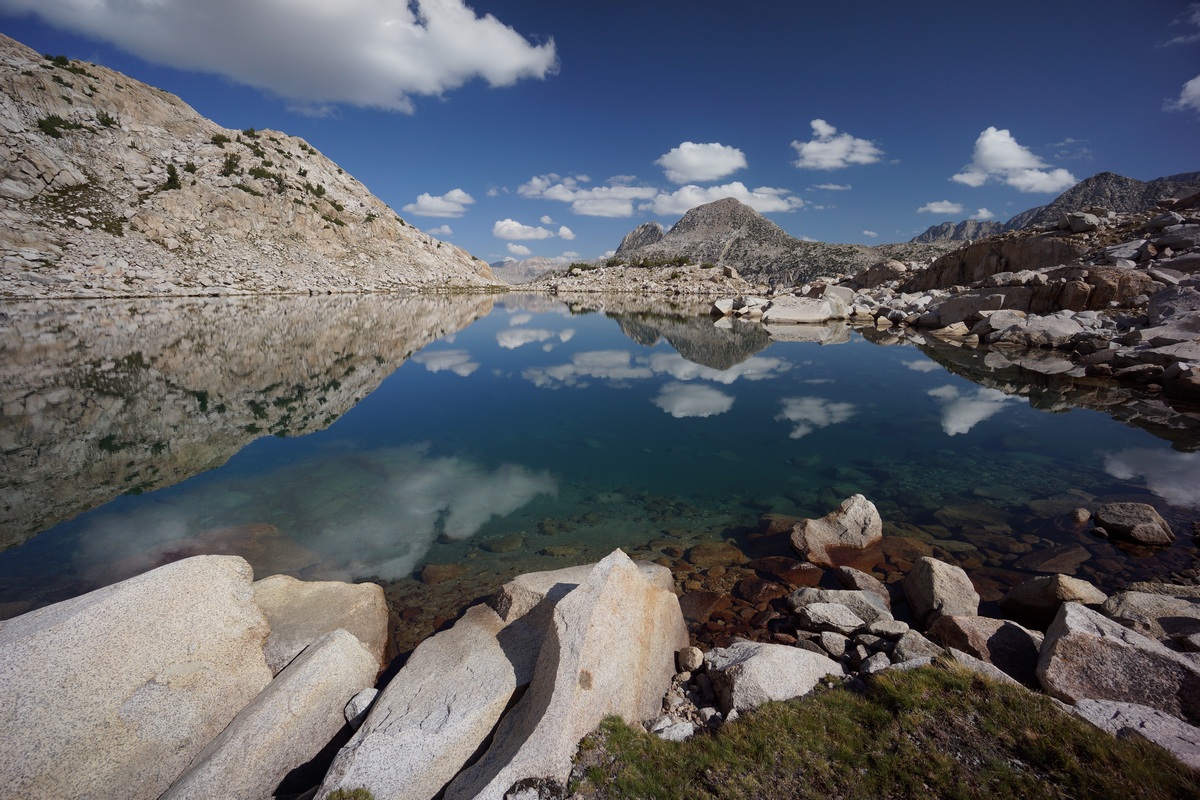
Unnamed lake below Pass 11,720

It was about 400ft up to the next small lake, and another 100ft to yet another lake. The higher lake, at 11,276ft, had a spectacular reflection on it that showcased the puffy while clouds above in contrast to the turquoise blue water. Really beautiful, and basically a “nothing” on the map.
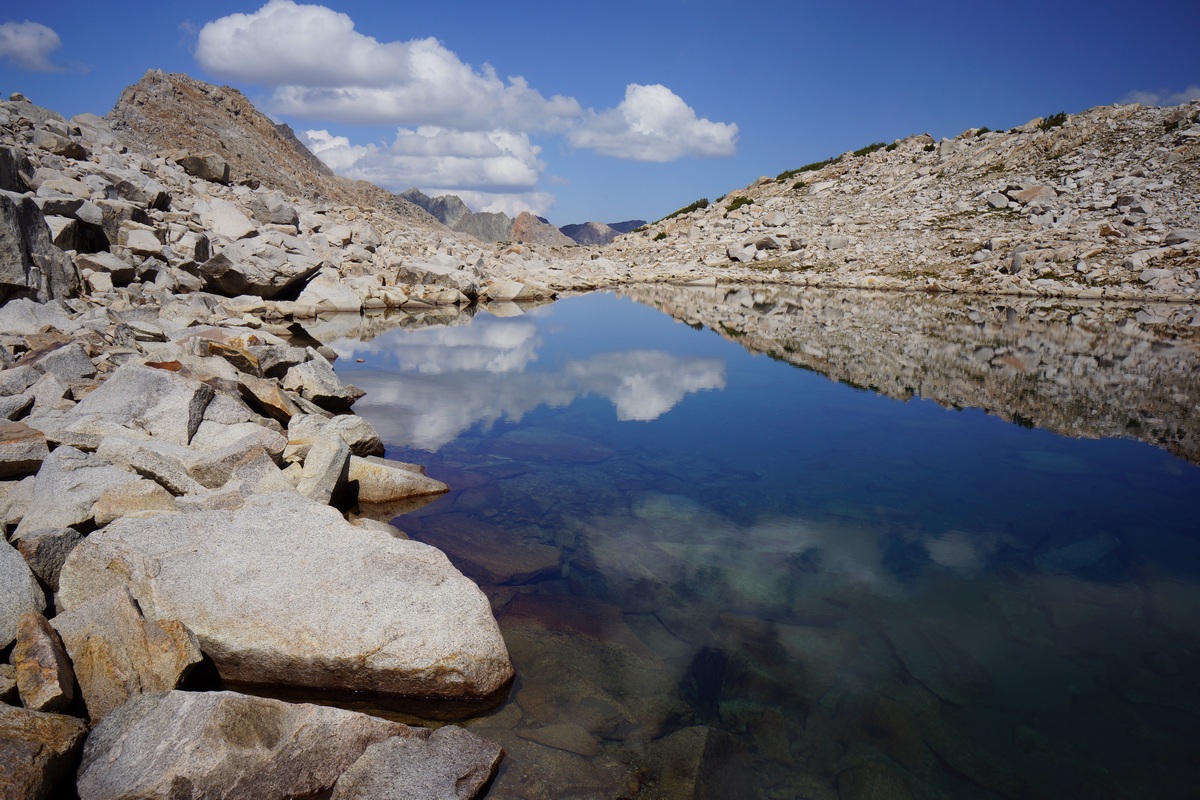
The next section of my route takes me up to the small lake just north of point 12,262. It’s a climb of almost 500ft over boulders and large sections of granite slabs. More excellent views along the way up. I reached the top of the pass, just northeast of point 12,262, at 10:45am. From here, my view was mainly to the east/southeast towards Wanda Lake.
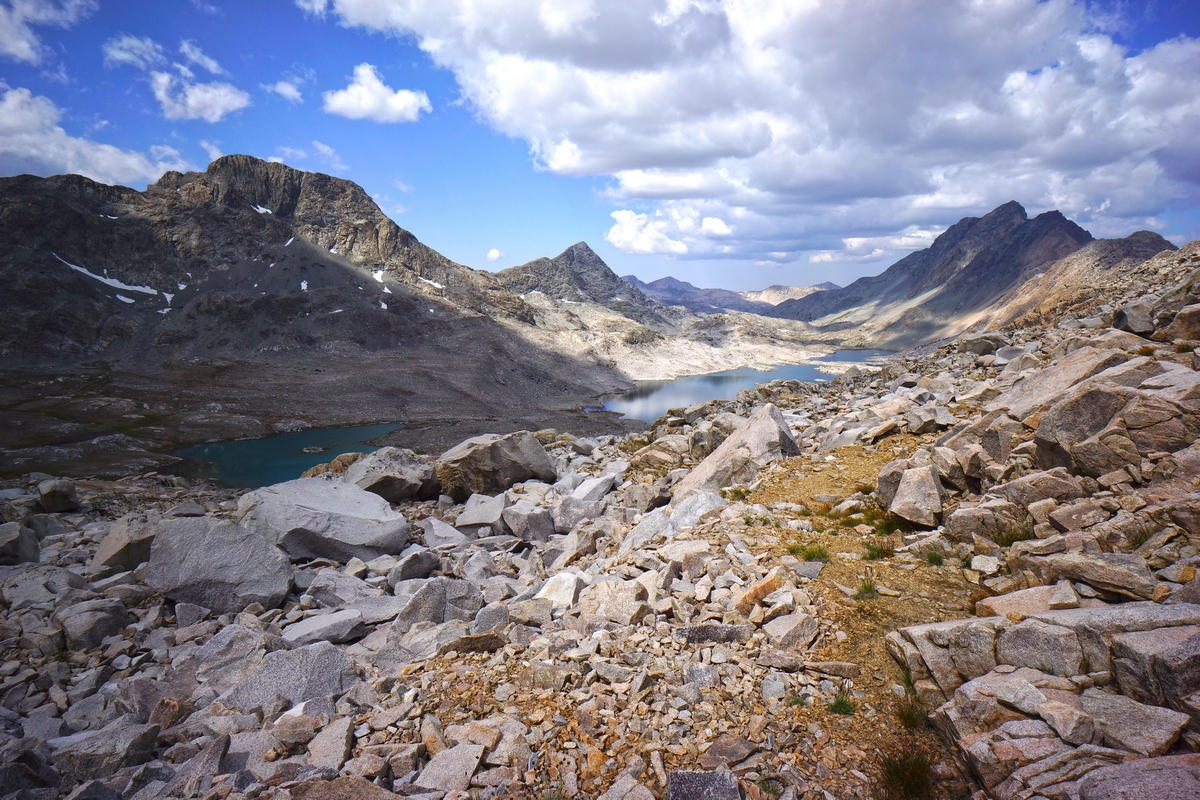
Davis Lakes
After a 30 minute break I moved on. From here, I had to work my way around some boulders that form a ridgeline running south/southeast from point 12,262. The pass I’m on now isn’t named, but the ridgeline I took drops me down to Davis Lake Pass. This looked like the best way over to Davis Lake from McGee Lake. On the HST map, viewing the cross country passes in the Sierras, there is a pass that more directly connects McGee Lake and Davis Lake directly called Pass 11,720. It’s labeled a class 2 route, but from the looks of the counter lines, I was extremely skeptical.
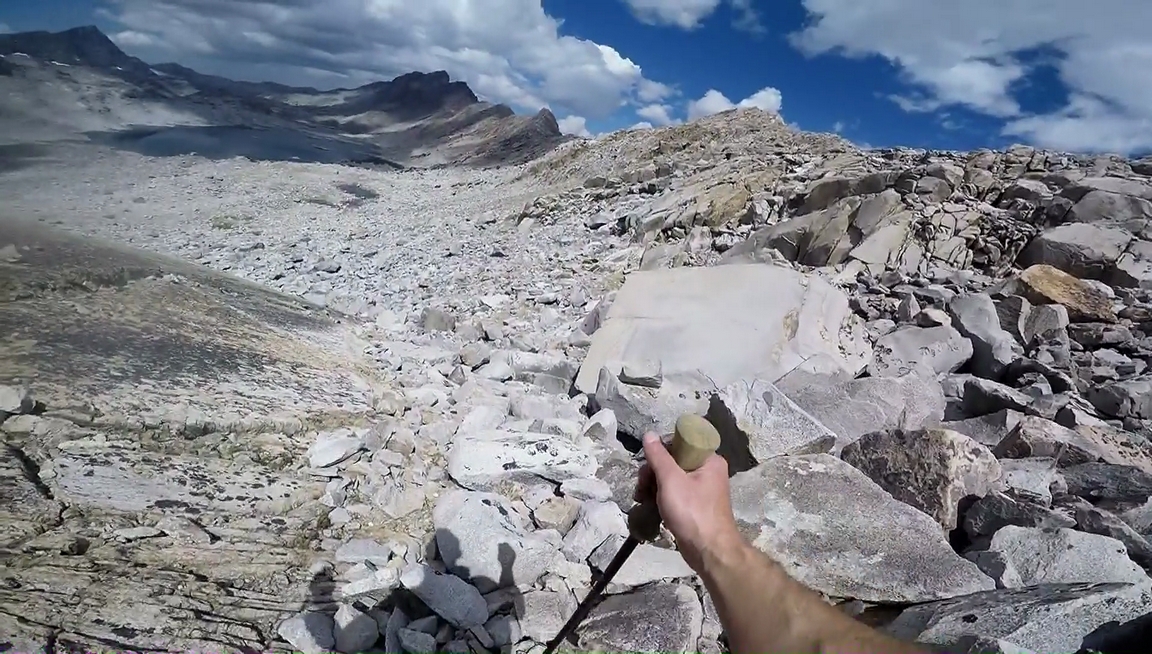
My terrible choice of route down Davis Pass
Along the ridgeline is a series of ups and downs. I didn’t follow the ridgeline far enough south to the low point at Davis Lake Pass, where the route down to Lake 11,1196 is the most gentle. Instead I started heading down sooner, eager to get out of this boulder field. The route I chose down was steep and time consuming. There were many loose boulders and treacherous chutes to traverse. I should have just continued south on the ridge a little farther! The sky was also clouding up fast, I’ll have to keep an eye on that.

Along the way down, I found a balloon that had the following written on it; “Go Dodgers”, “RIP Eddie” and “Miss you bud”, along with a date of 9-23-1993. Wow, these balloons sure do last a long time. So, friend of Eddie, next time you release a balloon into the sky, remember that it might end up somewhere like this.
The route down was long and tiring. To be honest, I felt “off” today. The scenery was great, but I was just having a hard time moving. Sure I was tired, but it was more of a mental thing. I guess I just didn’t feel like kicking my own ass today on this tough terrain. I still had a long way to go to my planned campsite, and it was already going on 1pm. It was around this time when it began to sprinkle. Now I really wanted to get a move on, but of course, there’s no shelter up here.
Now it was time to make some decisions. Strong storms look imminent now, so I’ll be very exposed with little or no shelter all day if I continue. I’ve heard Ionian Basin gets a lot of lightning and is a frightening place to be during a storm. If I do continue, it’s probably going to be pretty slow going, and I might not make it to Scylla tonight. I decided my best bet is to set up my tent for now and see if the storm passes quickly.


Storm looms over Lake 11,196
I hurried around Lake 11,196 looking for a place to set up my tent, and found a spot on the southwest side. There were a couple of other people camping on the southeast side of the lake as well. After getting my tent up, it rained on and off all afternoon. During this time I tried to do some repairs to my gear. One of the straps broke on my water shoes, so I repaired it with 550 cord. I added some carabiners to the bottom of my backpack on the outside so I had some way to keep my rain fly in place and taught.
Later in the afternoon I took shelter inside the tent for about an hour as heavy rain/hail, thunder and lightning pounded the area. Hail was piling up around the tent after it slid off, and it was starting to accumulate. I had a feeling it was going to storm heavily (as the weather indicated a few days ago), and I think I made the right call by staying put.
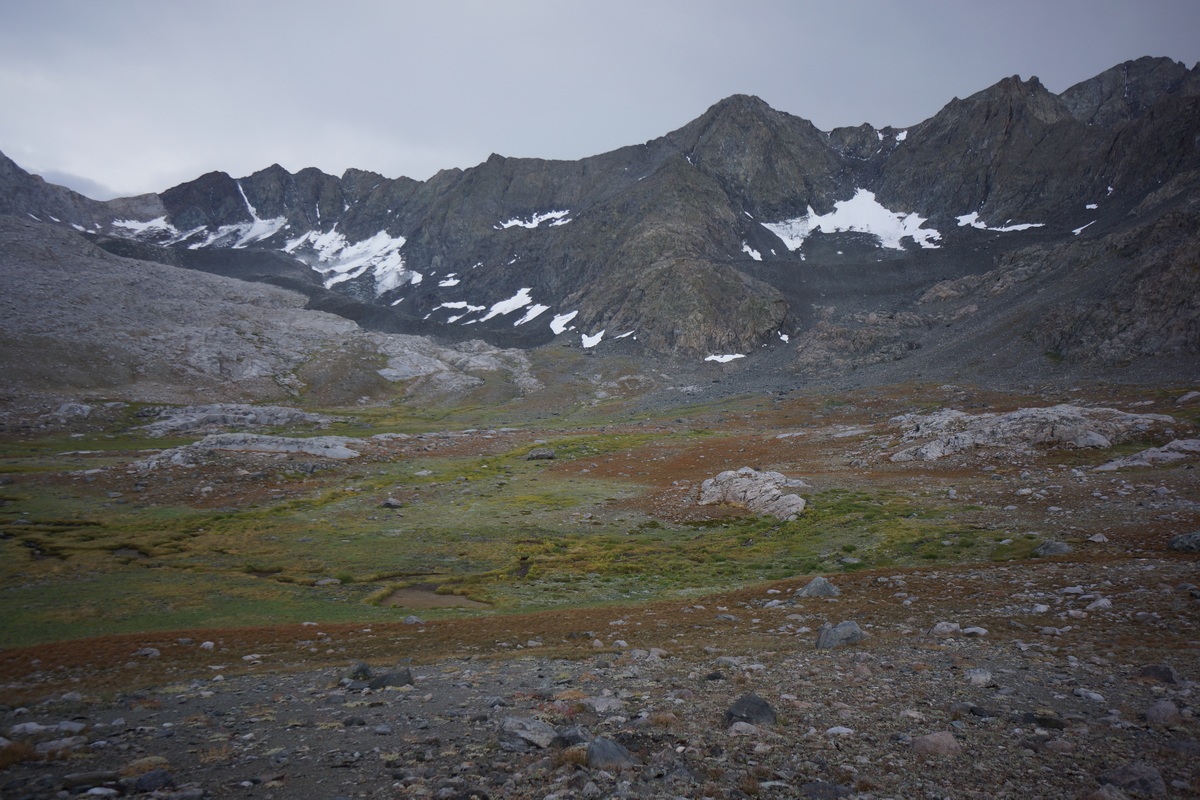
Goddard Divide

At this point I knew I was done hiking for the day. My new plan is to skip Ionian Basin. Instead, tomorrow I’ll go over the same pass I went over today, Davis Lkaes Pass, but will be taking a better route this time. Once at the top, instead of following that ridgeline, I’ll just go right over and drop down to Wanda Lake where I’ll pick up the PCT/JMT. I’ll follow that through Evolution Basin and over to Darwin Bench, where I planned to camp on night 5 anyways. I’ll be there a day early, which gives me wiggle room with the rest of my hike. I’m liking this plan, as I typically create a route and almost never deviate from it. I was disappointed in myself for not completing the route I set out to do, but at the same time, happy that I have some extra time to play with.


After the rain let up, the sky still didn’t clear. Storms loomed in the distance and the weather was still looking rather questionable. It stayed this way until I went to bed. The sunset was nice, with some reds illuminating the storm clouds. I hope this weather moves out by tomorrow.
Day 4- Wednesday August 24th, 2016
Miles Hiked – 7.7
Elevation Gain – 1372′
Route – Lake 11,196 to Darwin Bench
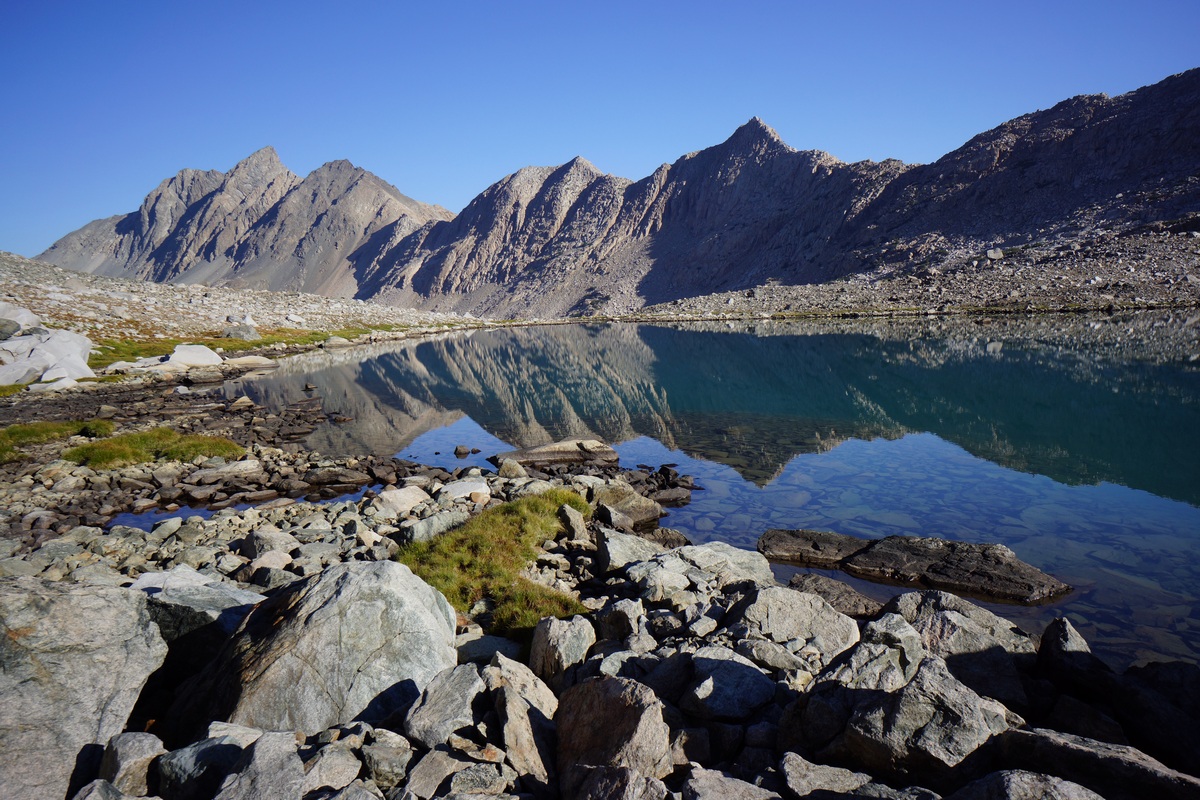
Reflection on lake 11,196
The storm seemed to vanish shortly after bed last night. It was very clam again, and there was a lot of condensation inside my tent again this morning. The sky was clear this morning, and I had a good feeling about today.
After breaking camp I headed around Lake 11,196 towards Davis Lakes Pass. I passed by the other group of hikers at camp who were set up on the southeast side of the lake. The terrain immediately before the route goes uphill is basically a flood plain, with various streams running through it. Combined with the rain yesterday, everything through here was drenched. Gotta love wet feet first thing in the morning.
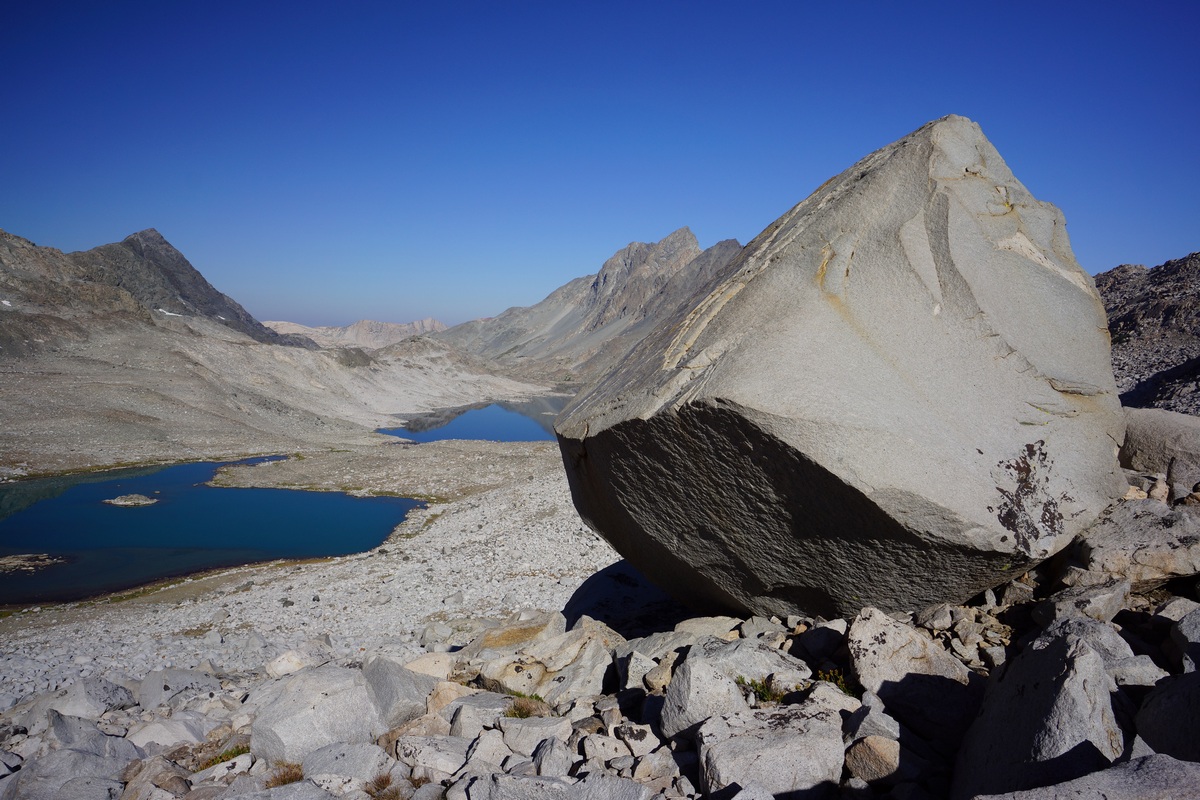
Hiking up Davis Lakes Pass, looking back towards Lake 11,196 and Davis Lake
The route up was much easier here than it was going down yesterday. Not only is the terrain less steep, but the route is a little shorter and doesn’t climb as high. There were still a lot of large boulders to contend with and some hard work, but I made great time going up nonetheless. There was another guy at the top when I arrived, although he was a little farther the ridgeline I traversed yesterday.
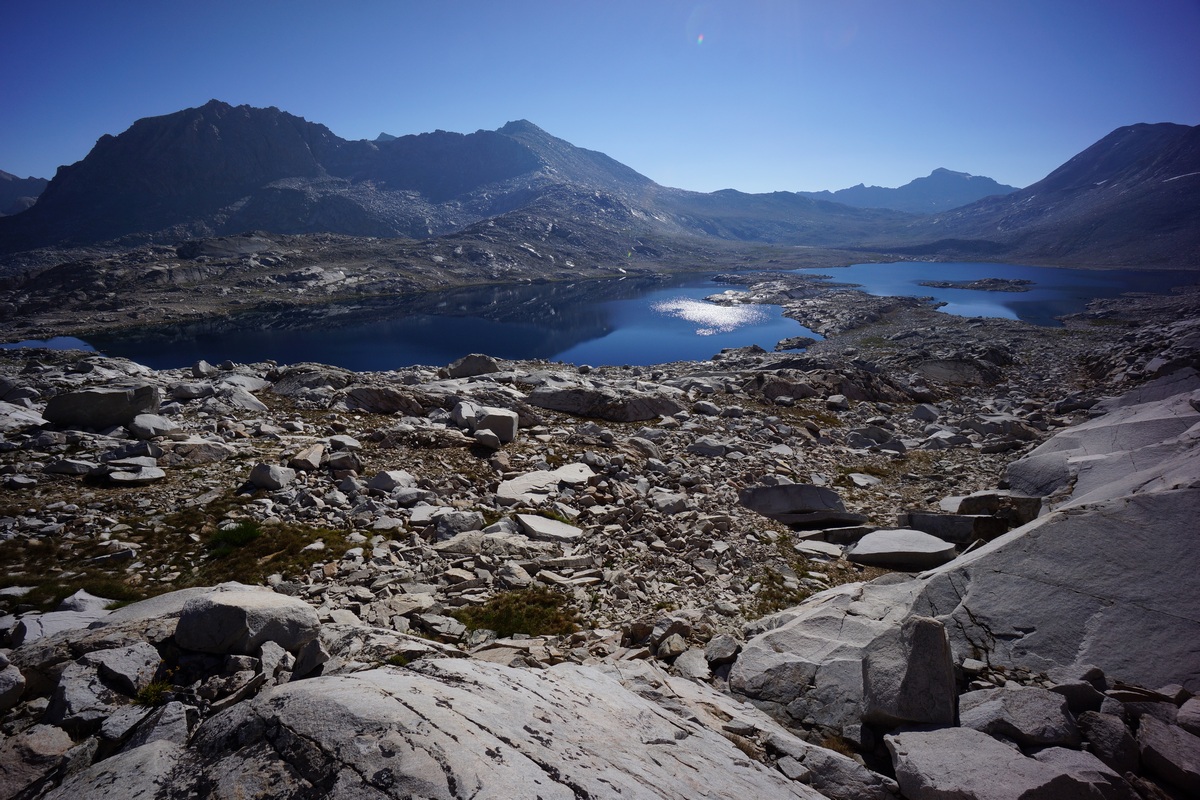
Wanda Lake
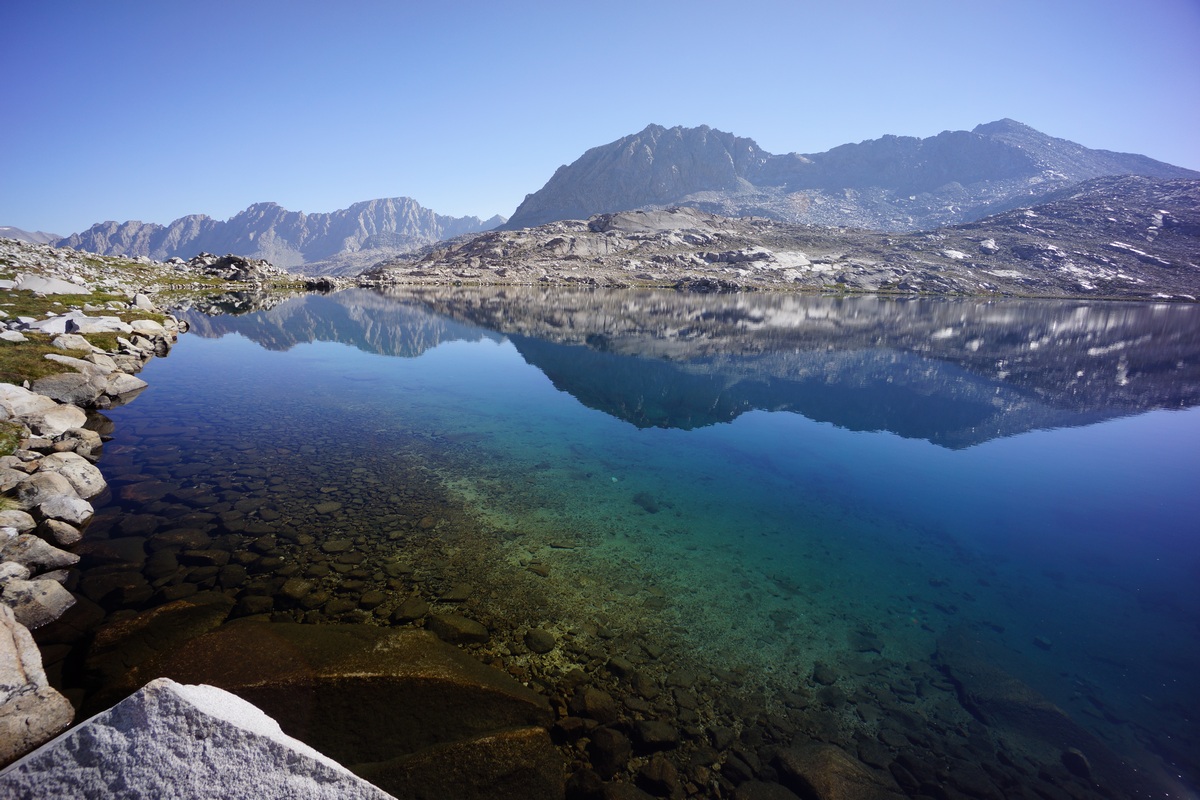
Wanda Lake
I stopped to eat some snacks real quick and kept moving. The path down to Wanda Lake was much easier than the Davis Lake side. The PCT/JMT runs along the east side of Wanda Lake, so I made my way towards the northern end of the lake and picked up the trail near the outlet.

Evolution Basin
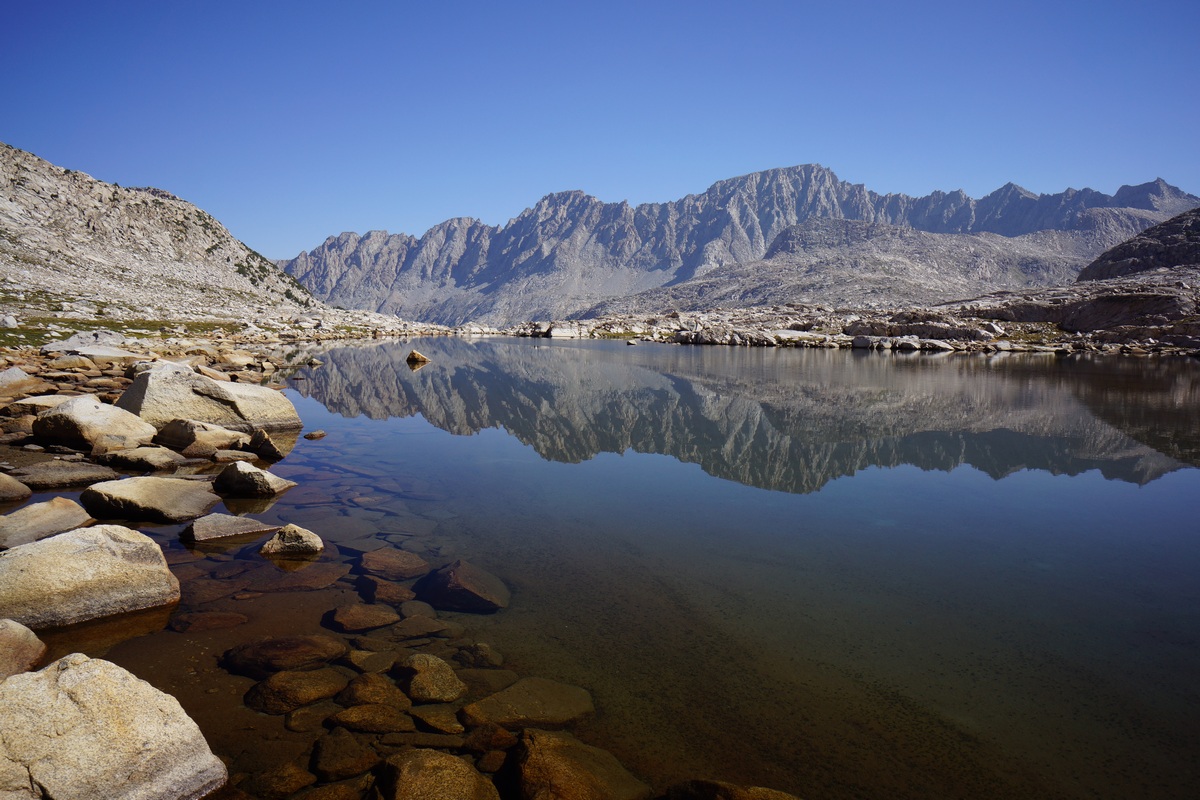

Next, I headed north through Evolution Basin. I started to see a lot of people now. Almost every person I saw today was hiking south. Good views and easy trail to follow. Mostly downhill all the way to Evolution Lake too. I stopped several times to eat along the trail this morning, as I was in no rush today.

Sapphire Lake
I passed by Sapphire Lake which was nice. The trail runs high above the lake though, at least until the northern end of the lake. Here, it drops down to lake level as it rounds the final bend before reaching Evolution Lake.
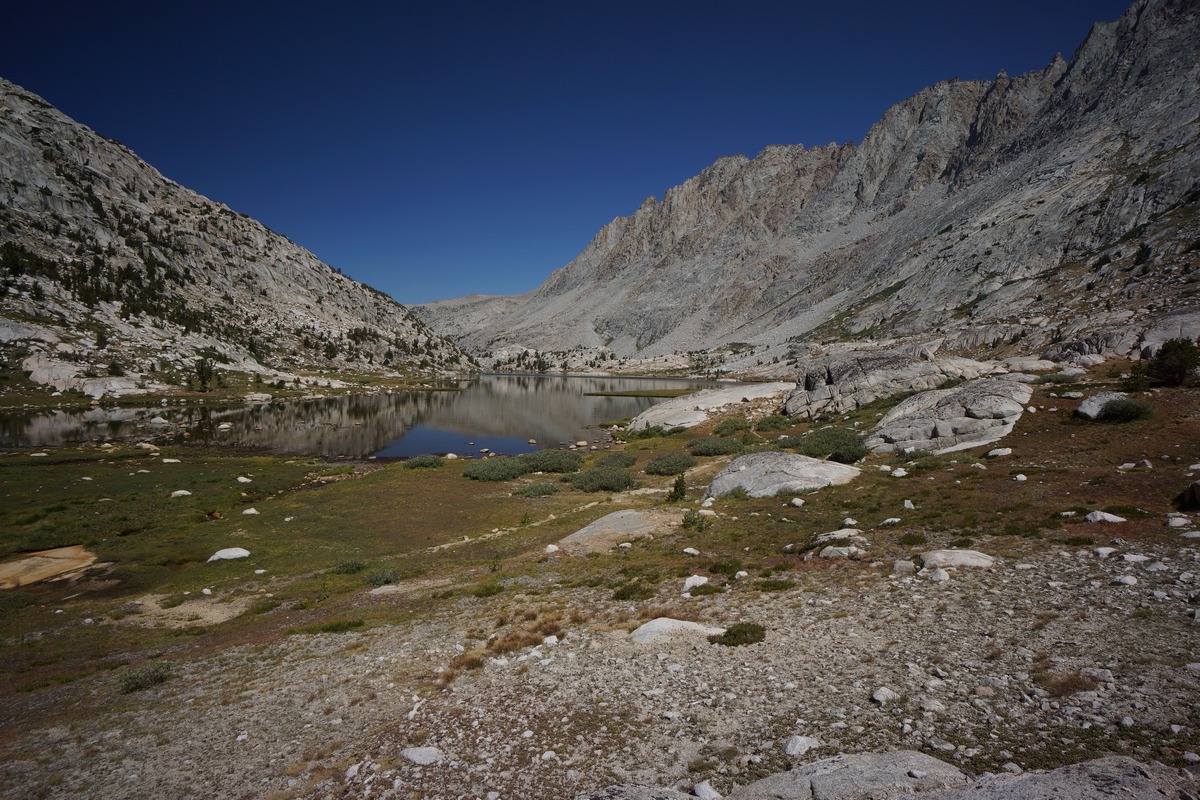
South end of Evolution Lake looking north
The first views of Evolution Lake from the south end are nice. I stopped here for a snack. I was actually eating today, at least in small doses. The jagged peaks of Mt. Mendel and Mt. Darwin to the east were impressive.

Middle of Evolution Lake looking south
The middle section of Evolution Lake nice too, but less impressive than the southern side. There weren’t many established campsites in this area. I passed by a couple of rangers, I believe, on horseback with a team of horses in tow, carrying gear. Looked like they were going to do some trail maintenance. Well, my feet could use some maintenance. The blister on my right heel seemed to be getting worse. I’ll deal with that later when I get to camp.
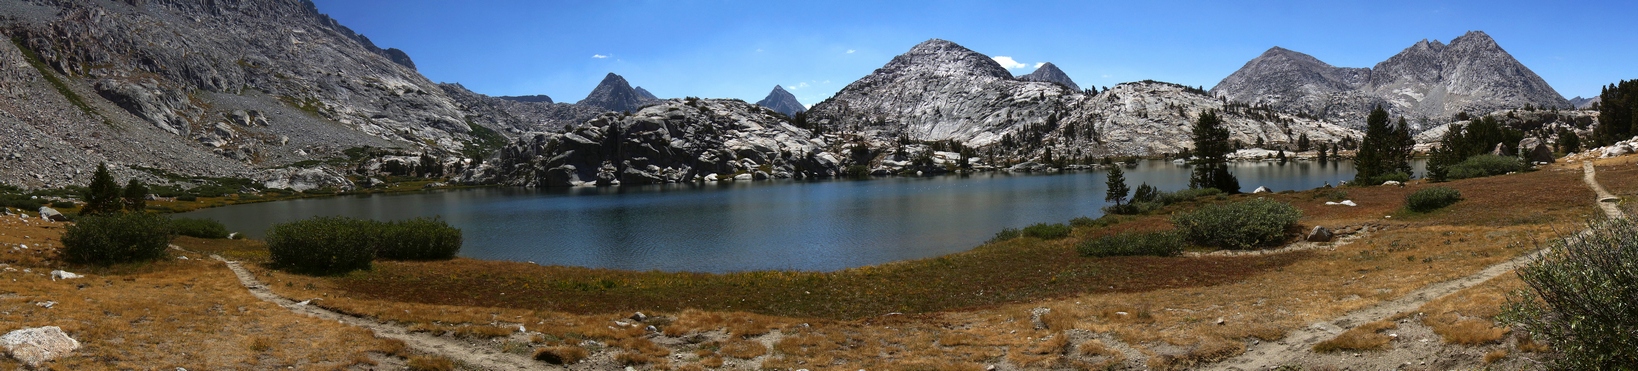
North end of Evolution Lake looking south
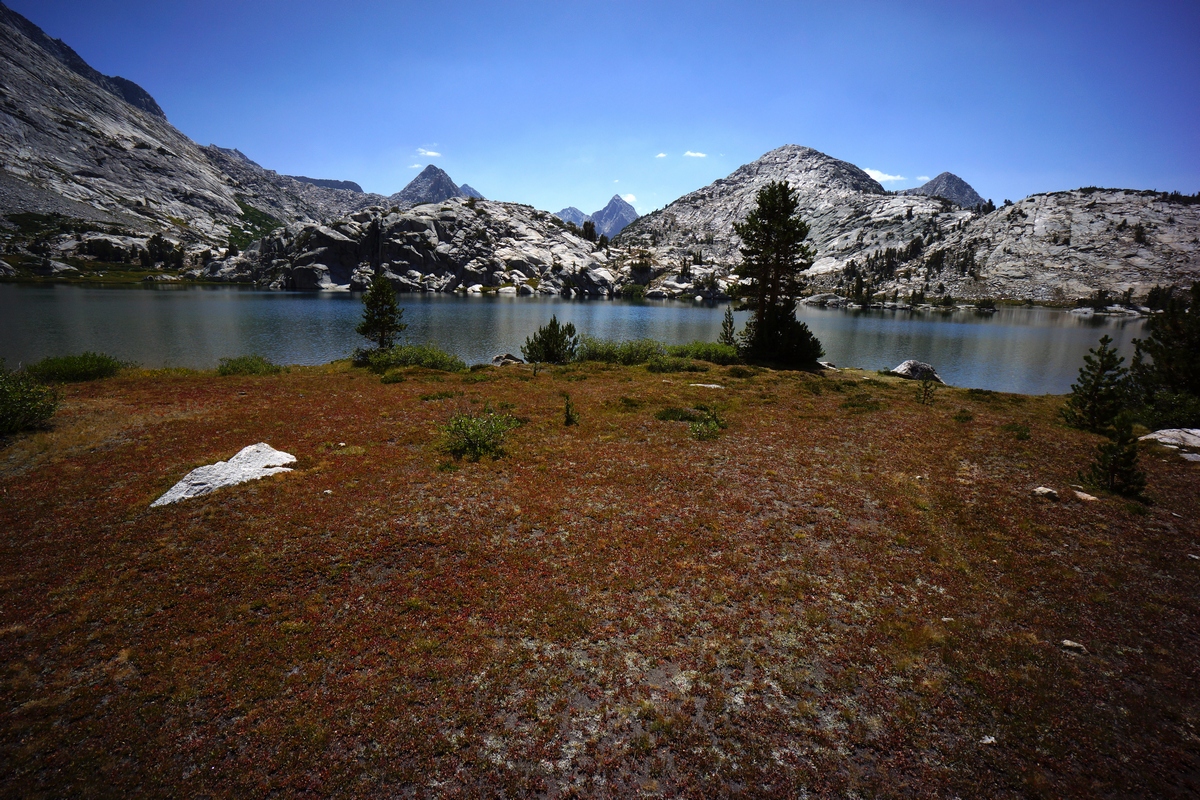
Evolution Lake
The northern end of Evolution Lake is where it’s at. There were more people here hanging out around the lake as this appeared to be the best view of all. I’m glad I got to see the lake since I didn’t get to see Ionian Basin. This would definitely be the spot to camp, if you can stand camping near a ton of other people. Me, I’m headed up to Darwin Bench today.
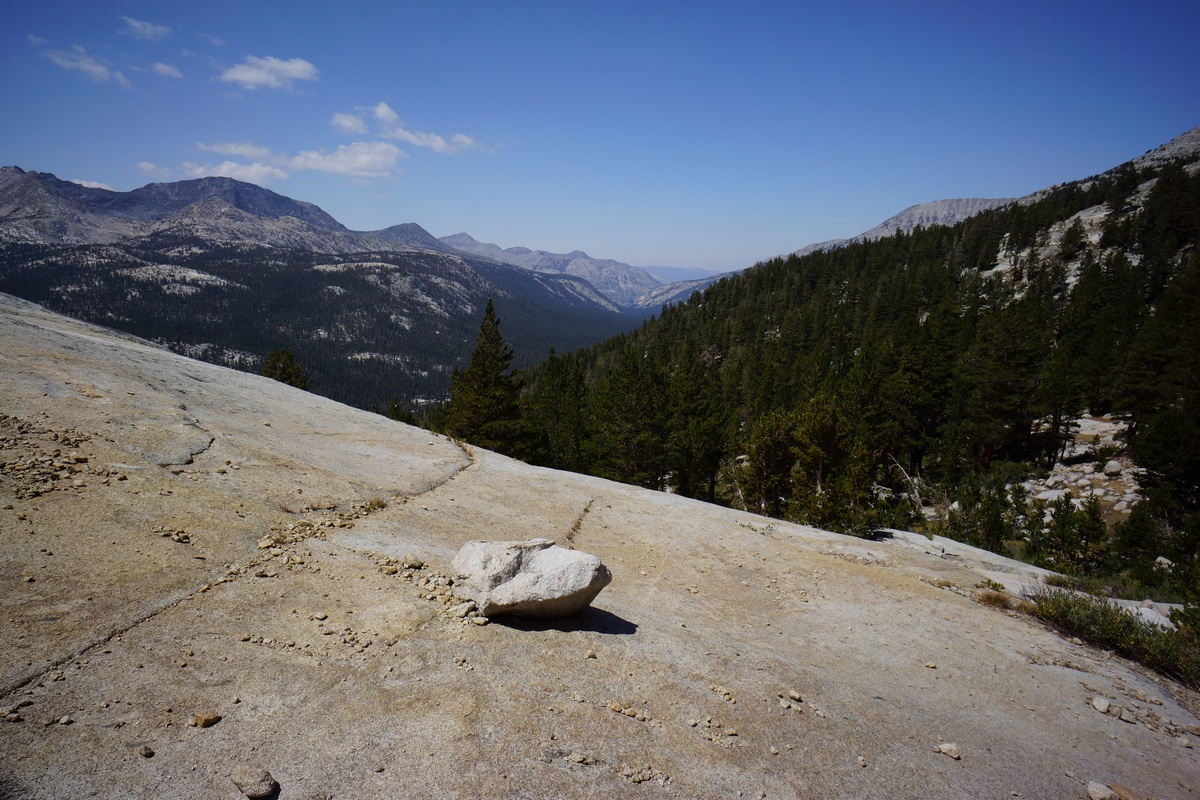
Overlooking Evolution Valley

Hiking up to Darwin Bench

View from lower Darwin Bench
After passing the lake, I knew I’d have to start climbing uphill soon. I wasn’t sure what to expect for an existing trail leading up to Darwin Bench, but I figured there had to be something. I was right. At the last moment before the trail starts heading down some switchbacks, there’s a very obvious trail junction with a path leading up to Darwin Bench. It quickly peters out though, and you’re left with a very faint, but super manageable path uphill. There’s probably a couple of different paths up at this point, and it really doesn’t matter which way you take as long as you follow the creek uphill. There’s an occasional cairn marking the way through this section.

Lower Darwin Bench looking north

Beautiful scenery near the top of the hike up Darwin Bench and all throughout this area. I didn’t see anyone up here once I reached the lower lake, so I decided to set up camp on the east side. There’s a nice spot with some decent cover and good views. It was only about 1:15pm now, so I still had a lot of time left to enjoy the day.
When I went down to the lake to get water, I noticed the bottom had a lot of algae. The lake was shallow around the shoreline here on east side of the lake. I was careful to not stir any up as I filled my bag. On the way back to my campsite, I noticed a backpack hanging over the edge of a rockface by a trekking pole. Huh, I wonder how long that’s been there.
After getting water and doing some other camp chores, I headed off to explore the lake a little. First things first, though. I need a bath! I passed a couple of small waterfall pools along the way up the creek that looked enticing, and that’s where I headed.
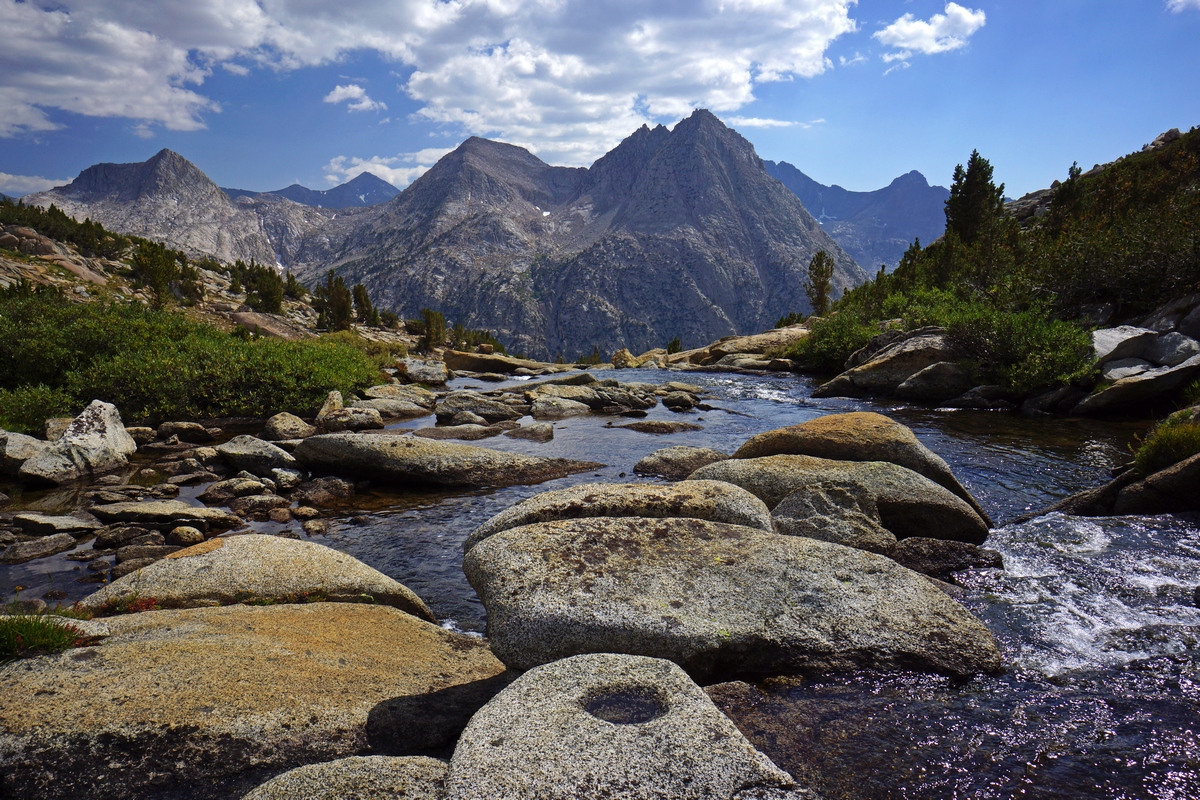
My view while I washed up in the creek
At the waterfall pool, a scared away a bunch of small trout as I entered the water. It was cold, but nice to clean off. Definitely one of the most scenic places I’ve ever bathed. No soap in these creeks, of course, just rinsing off. It’s amazing how much better that makes me feel out here. The cold water really gets your blood pumping, even long after getting out of the water.
After cleaning up, I headed up to the lake outlet where I saw some small trout earlier. These guys are really alert though, and they know you’re coming from a mile away. I had a bite, but didn’t catch anything. They mostly ignored everything I threw at them, which was just Mepps spinners and rooster tails. Oh, and a Crickhopper, which normally slays bass here in Michigan. But they ignored that too.

Defeated, I headed off to get some pictures of this beautiful area. There were a couple of small hills and high points near the southerly edge of the bench that I gravitated towards.


After exhausting my stay down by the lake I retreated to my campsite for the evening. Today was a really good day all around. I sat around camp all evening in awe of where I was. When the sun set, I followed suit.
Day 5 – Thursday August 25th, 2016
Miles Hiked – 7
Elevation Gain – 1650′
Route – Darwin Bench to Muriel Lake
I slept pretty poorly for the first few hours last night, but much better the second half. Once again, more condensation in my tent this morning and a very calm night. At least the weather is predictable here.

Today my plan is to go over Alpine Col and over to Tomahawk Lake, if I make it that far. While packing up my gear, I noticed 2 guys climbing up a steep rock chute right above my camp. They were just dots at this point, but I could see them up there and hear the rocks tumble down as they made their way up. I wonder if they were climbing Mt. Mendel?

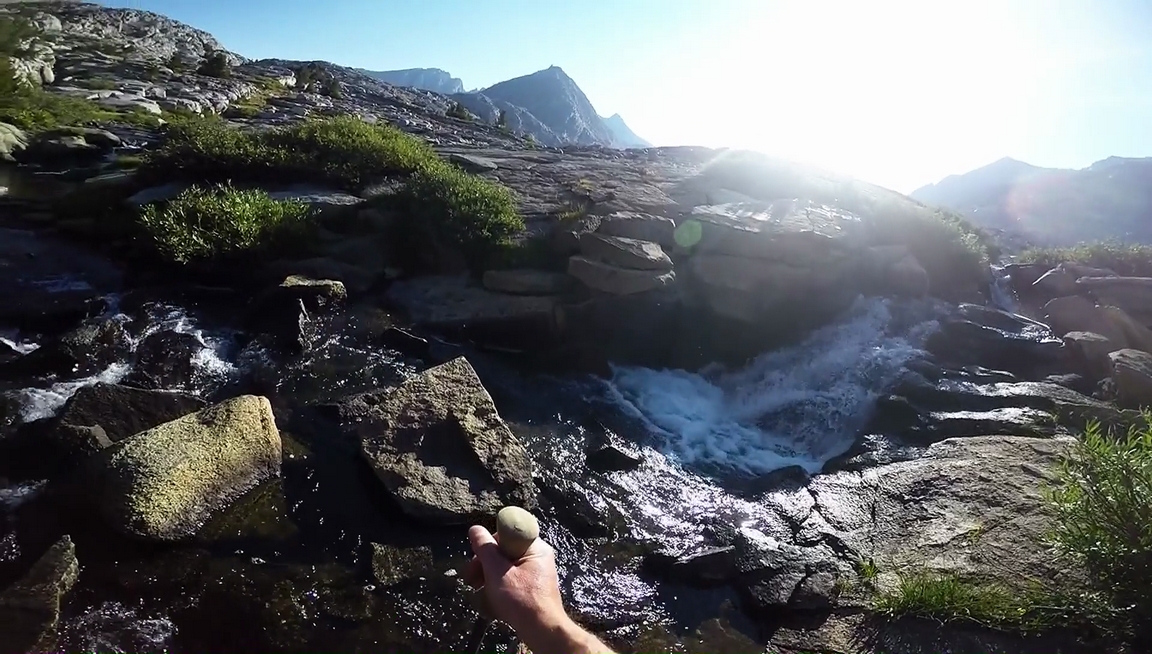
Darwin Bench, around 11,250′
After leaving camp, the trail follows the lake briefly. There is a trail here around the lower lake on Darwin Bench, but north of the lake there’s a ton of streams that converge here and in this chaos, the trail is lost. I’d bet there’s one leading off into Darwin Canyon and up over Lamarck Col, but I did not see a trail for the rest of the day after this point along my route up and over Alpine Col.

Route up to Lake 11,540

Lake 11,540

Looking down on Darwin Bench from Lake 11,540
After passing the area where all the streams converge, it was time to find a line up to lake 11,540. It’s a climb of about 250′ up some rocks slabs, choked with a little vegetation. I ended up following the creek flowing out of lake 11,540 up the hill. Near the top though, the path along the creek becomes narrow and was no longer the easiest route up. I skirted the hillside to the east and climbed over some rocks to reach the top and gain my first view of lake 11,540.
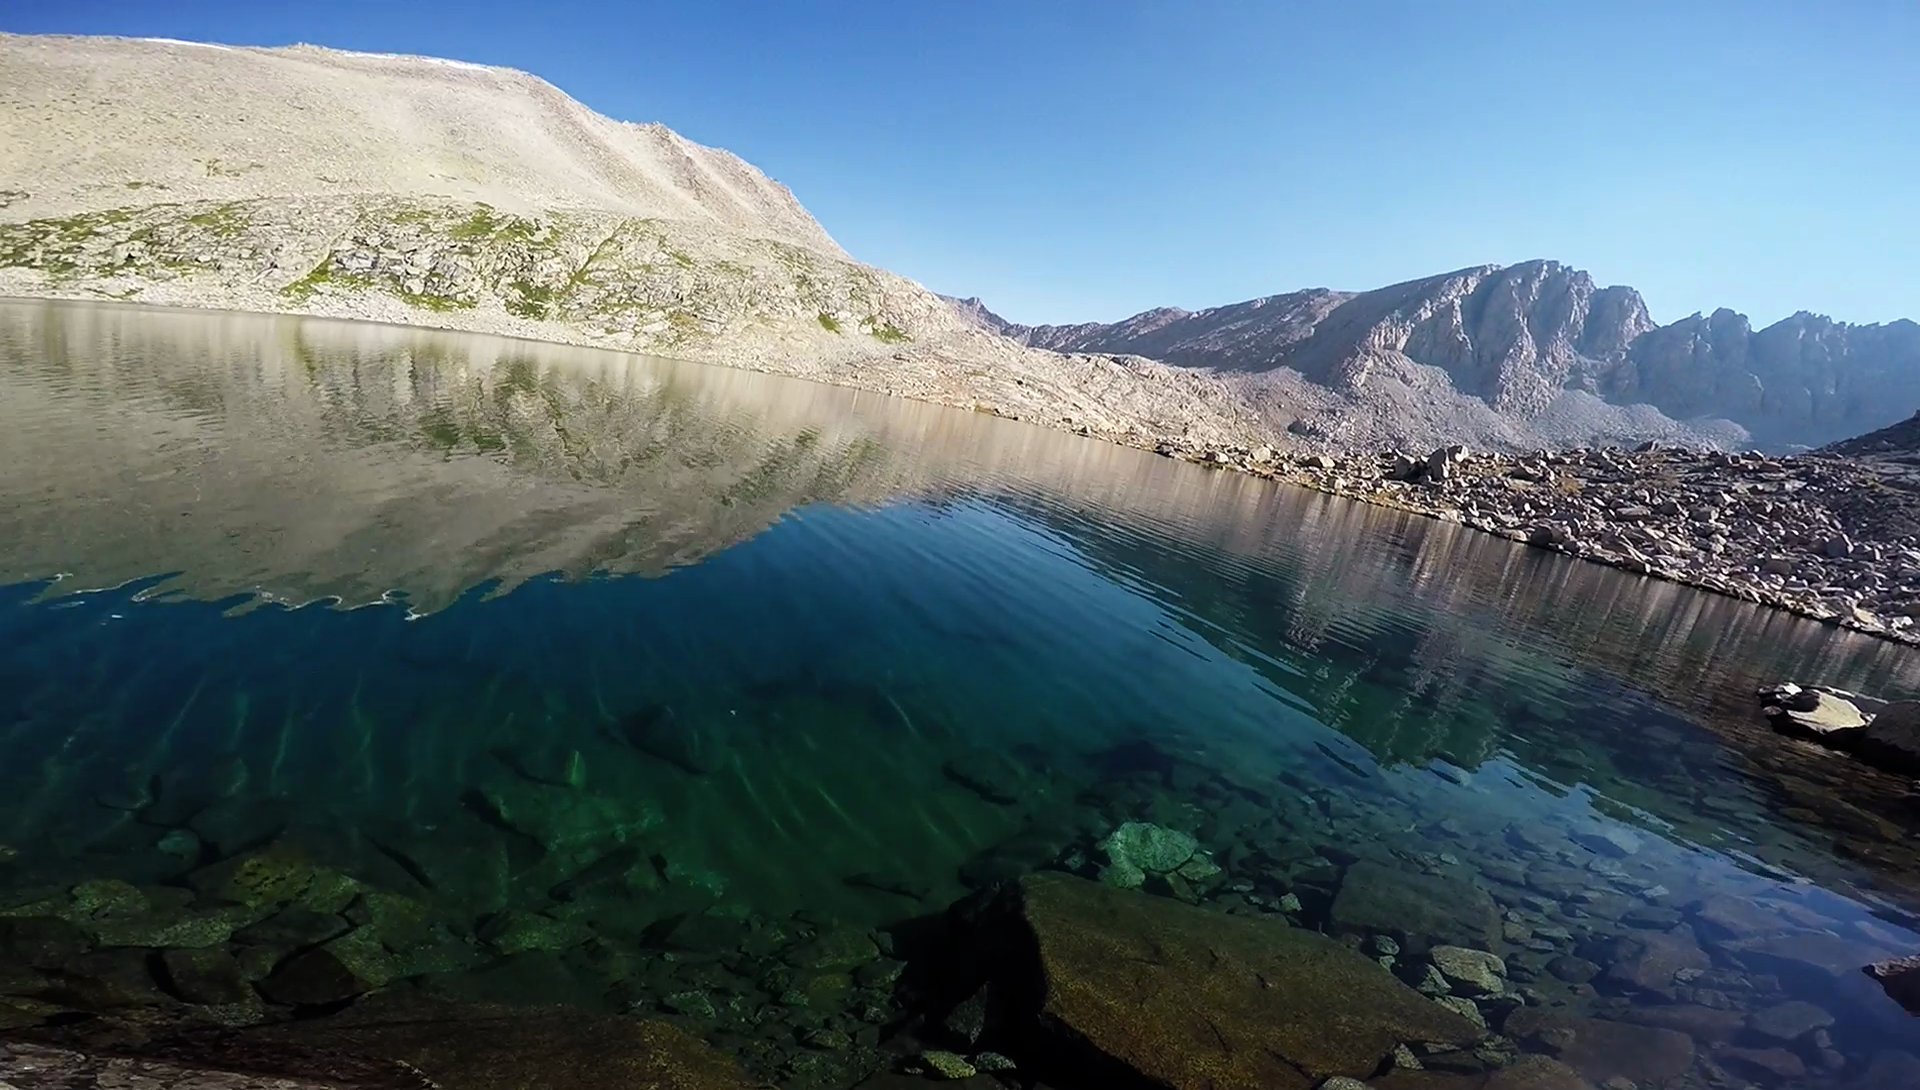
Lake 11,540 reflection

This is the section that forced me uphill
While I did not check out the north/west side of lake 11,540, the south/east side appeared to be the best path. However, along the northeast side of the lake I ran into a bit of a snag. The path along the shoreline abruptly stops due to a cliff butting up to the lake itself, with no way around it other than backtracking a bit and climbing up and over it. Without any other option, I reluctantly headed up the steep mountainside looking for a route around the cliff.
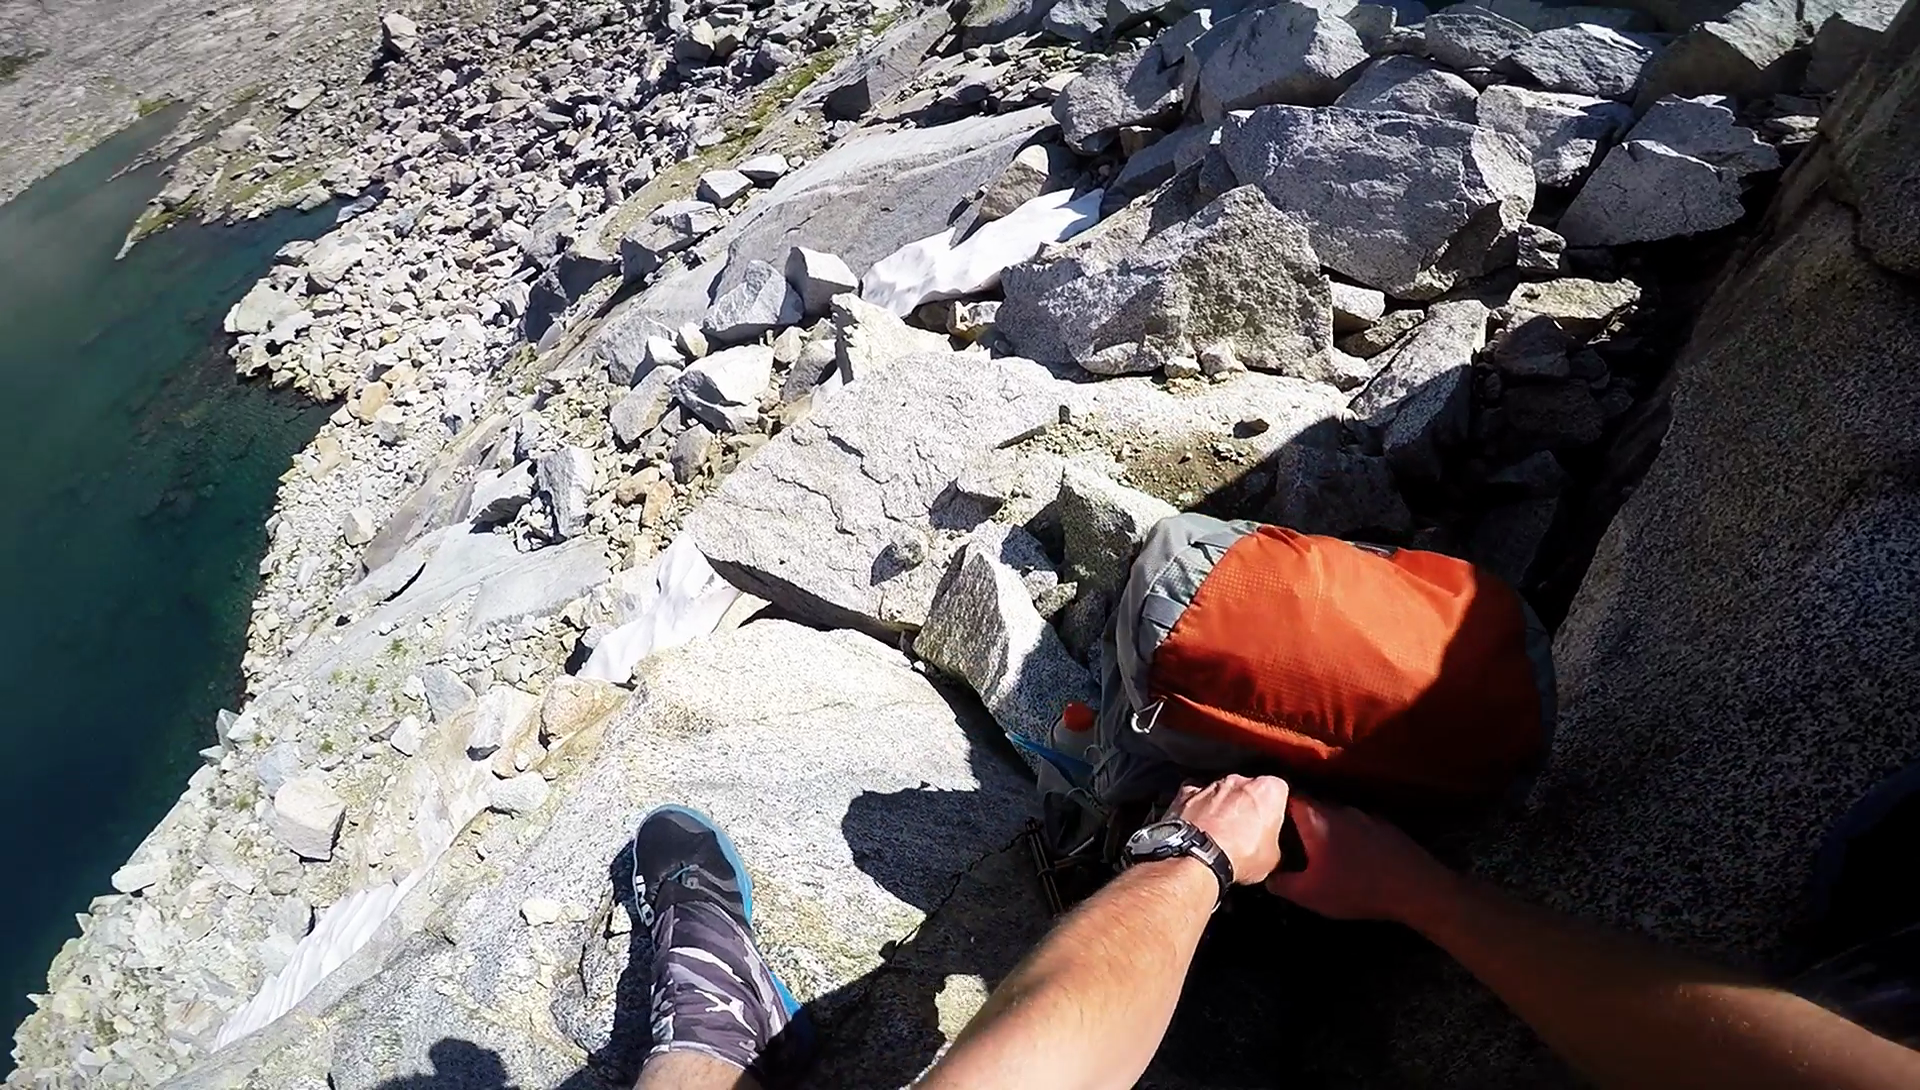
Lowering my pack while down climbing the slopes along lake 11,540
The climb around the cliff was not as easy as I’d hoped. It was steep and there was no obvious line around it. I was working my way along a narrow path along a cliff when that dropped down to a lower section, requiring me to remove my pack and lower it down. Then, without my bulky pack on, I was able to maneuver around this obstacle and keep going. Much of the talus was loose here due to the grade of the slope. At one point, I stepped on a rock that moved, causing my foot to slip and my leg then became wedged in between two rocks. I lost my balance and fell over, with my leg pinned between the rocks. This caused a large scrape on my leg, but it could have snapped my leg had I fallen the other way. Whew.

Eventually I made it around the cliff and back down to the lake. Looking back the way I came along the shoreline, it was only a couple hundred feet of cliff along the shore that I had to work my way around, but it took much, much longer than I thought it would. The depth of the lake next to this cliff only appeared to be a couple of feet deep at the max, but there was no avoiding getting in the water. Because of this I chose to go up and around the cliff. Looking back though, I would seriously consider just getting in the damn lake and walking along the cliff. Keep this in mind when moving through this area.
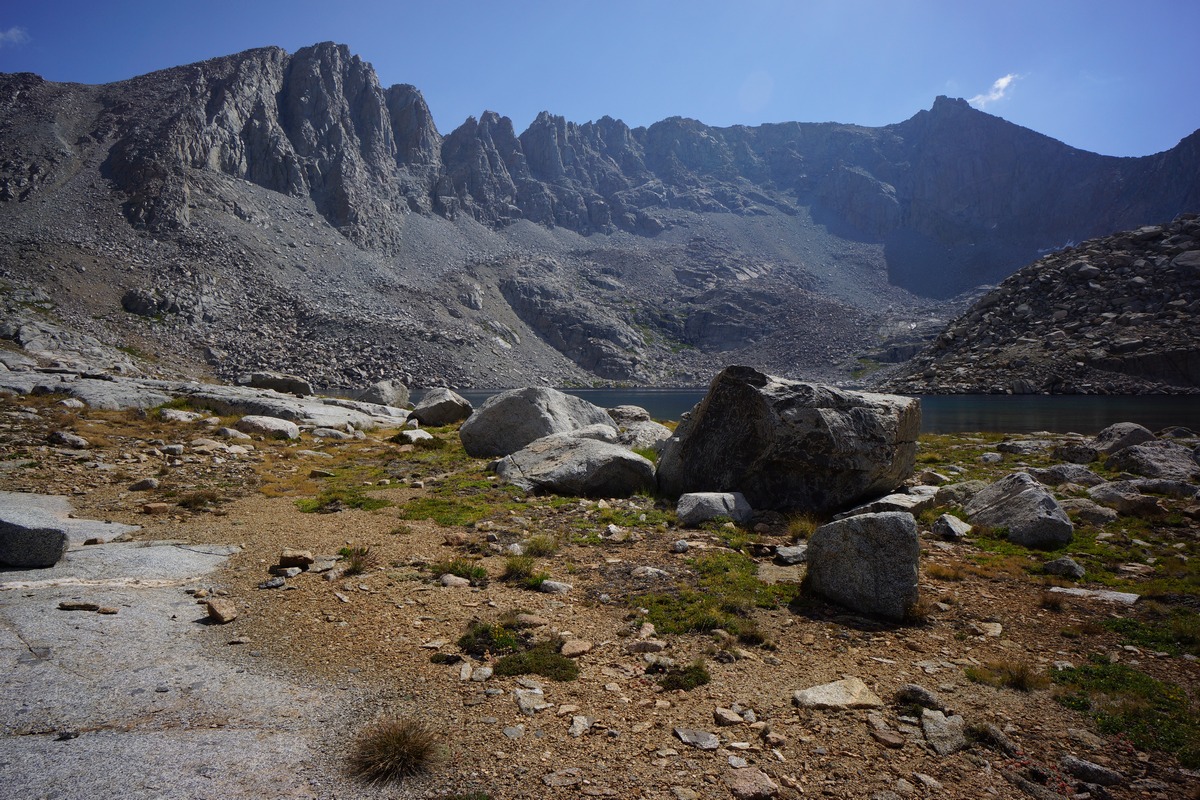
In between Lake 11,540 and Lake 11,546 looking east
My route now passes in between lake 11,540 and lake 11,546. Good views through this stretch. It may have been possible to setup a one man tent here, but of course, I had more distance to cover today. Just a thought for someone passing through here.

The route up to Lake 11,910

Looking back at Lake 11,546 & 11,540
Past the section in between the two lakes, my route then climbs about 400′ up to lake 11,910. This section featured some really large slabs of granite. Higher up, pools of melt water lay in the shadows with small pockets of snow alongside them.

Lake 11,910
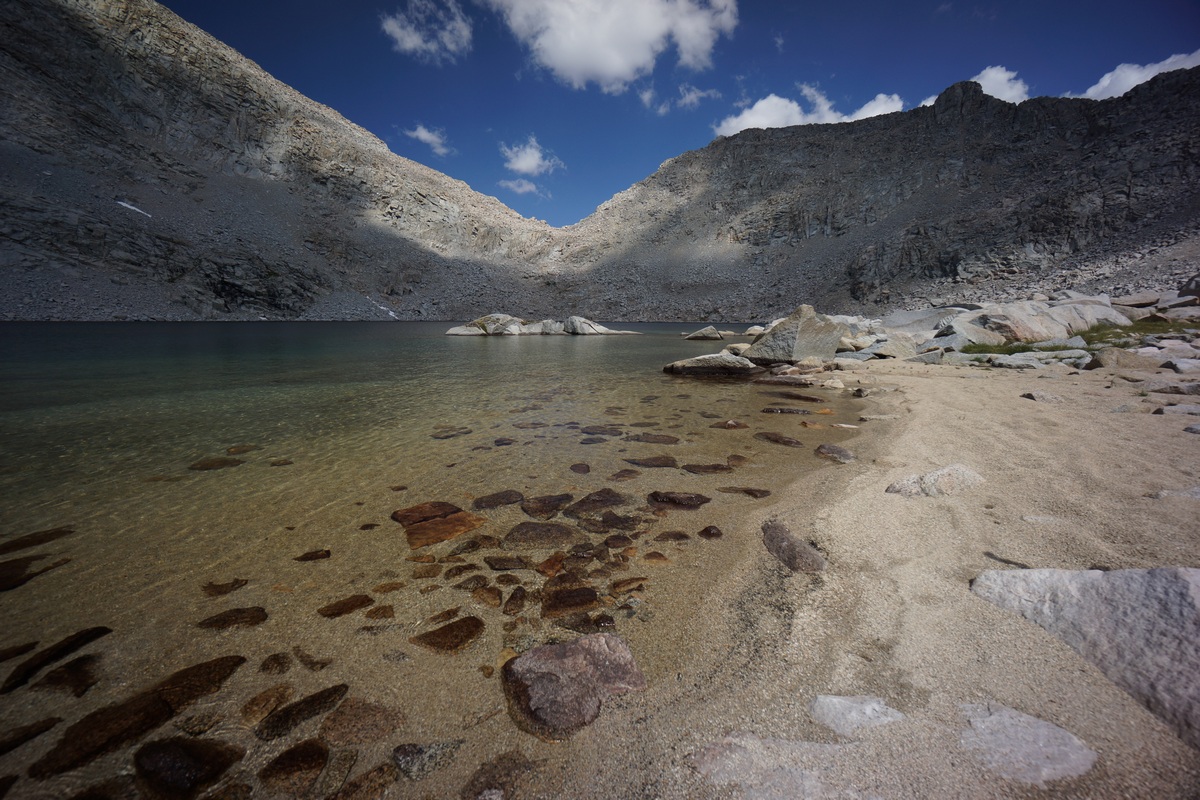
Amazing that this sandy beach exists here among an otherwise boulder-filled shoreline
About halfway through the eastern side of lake 11,910 there was a small sandy beach. The water was crystal clear and had a tropical look to it. Stunning, actually. But no time to stop and enjoy this, or those no-see-ums will have chewed my arms and legs down to the bone.
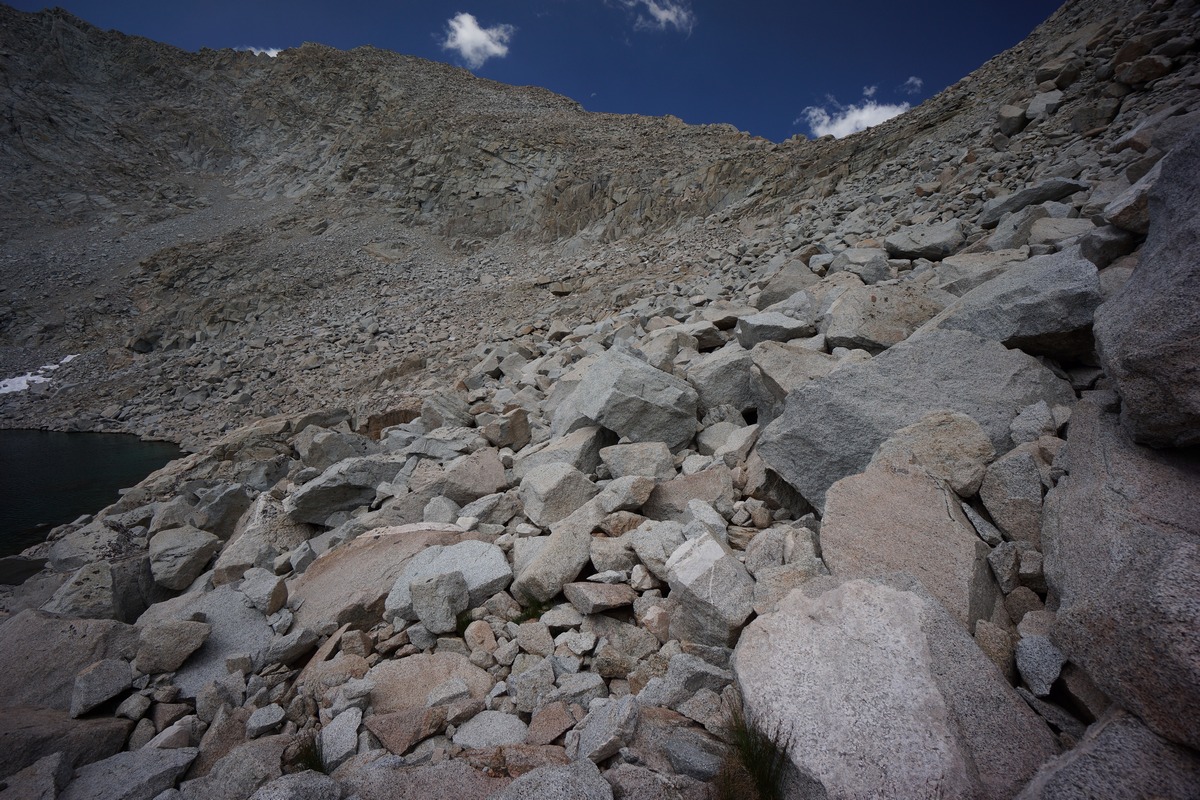
It only gets worse from here
Almost the entire hike from the midway point around lake 11,910 on to lower Goethe Lake consisted of boulder hopping. These boulders were manageable along the lake, but as I’d find out later going over Alpine Col, this was nothing in comparison to the large boulders on the Goethe Lakes side. There were tons of no-see-ums in this stretch too, and they were relentless.

My route up

Lake 11,910
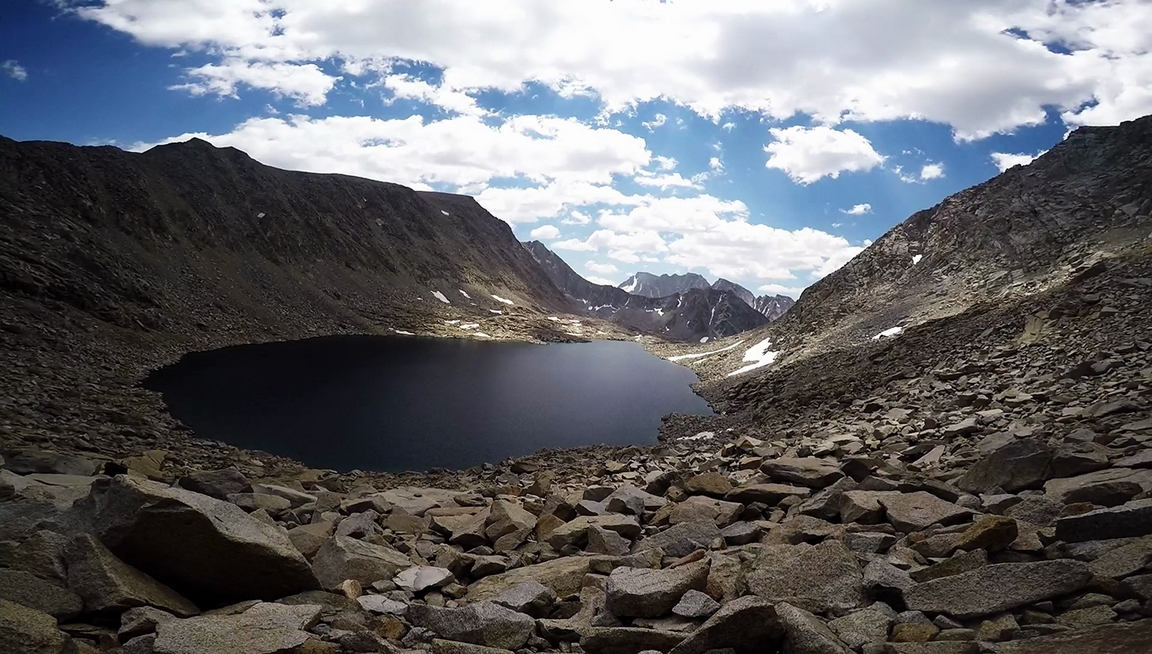
Looking down on Lake 11,910
Now on the northern side of lake 11,910, it was finally time to start heading up Alpine Col. I had read some notes about going over this pass before heading out here. Those notes basically said to angle up above some small sections of grass before you’re directly underneath the pass. From there, you’ll see 3 rock faces with sections of talus in between them. Choose the one on the right. From there, the path to the top is relatively straightforward. Those notes seemed to be spot on for me.
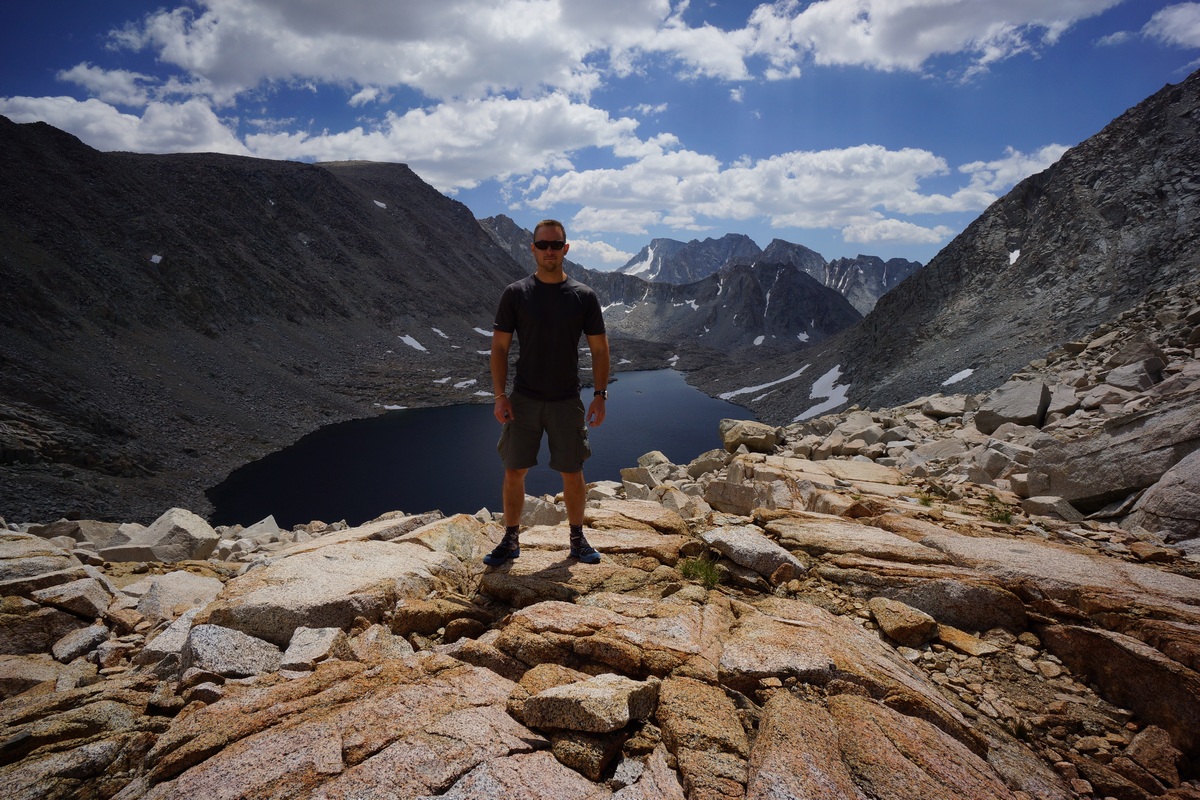
At the top of Alpine Col
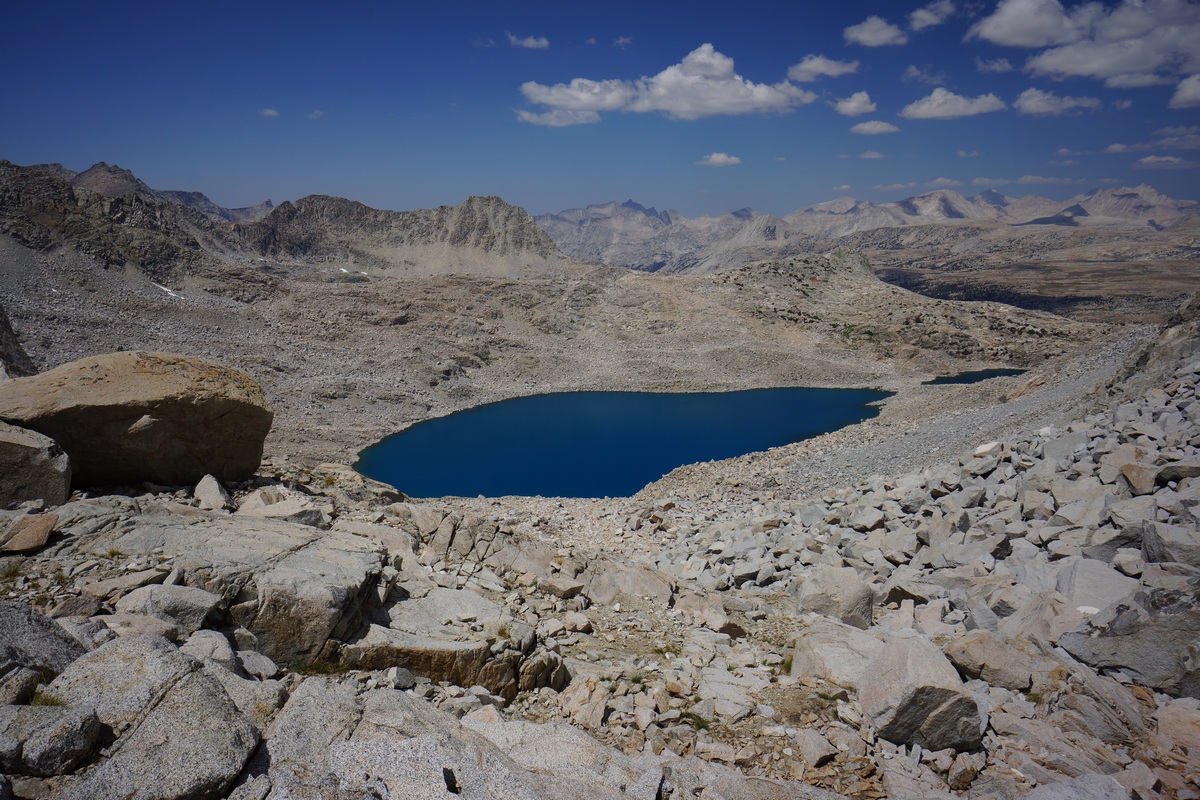
Looking down on upper Goethe Lake from Alpine Col
On the top of Alpine Col, I rested for a while and took this opportunity to refuel. Awesome views from the top in both directions. From Alpine Col, you can’t help but feel isolated and alone. There were no use trails here and almost no signs of human intervention.
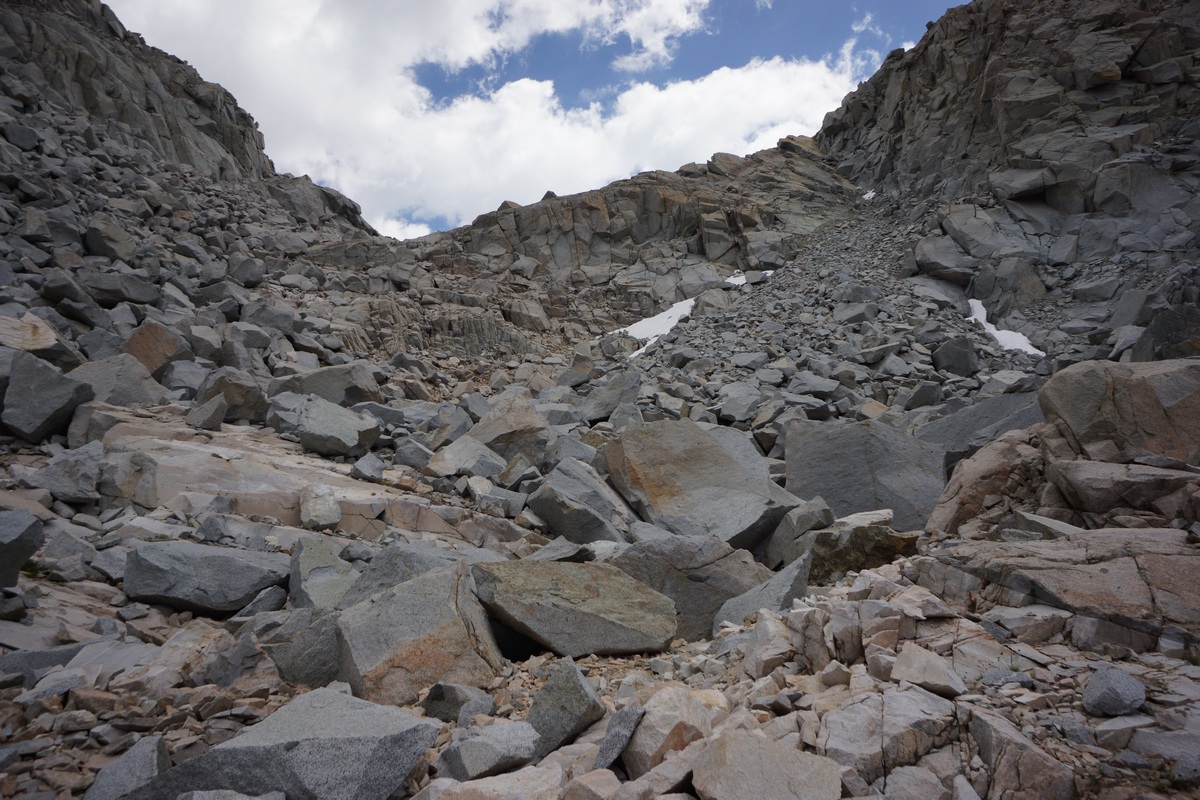
Looking back up at Alpine Col

Now it’s time to descend Alpine Col to Goethe Lakes. The path down was a nightmare. Giant boulders everywhere, and steep in several sections. These boulders ranged in size from a beach ball to a large SUV. Imagine the space in between a couple of SUV sized boulders piled up together. Negotiating these boulders required a lot of patience and care with every step. I normally have my camera hanging from my neck when I hike, but I had to put it away going down Alpine Col. I didn’t want it bouncing around and getting in the way, or falling and breaking it. As a result I got few pictures through here. Most of the ones I’m posting through this section are snapshots from my GoPro footage.


Steep drop off around 12,000′
The top section was very steep and required some time to find a feasible line down. The best route appears to be one that angles left on the way down, as the right has even larger boulders. Dark clouds were building above the pass and it looked like it could potentially rain. The next section was not as steep as the route I just descended, but the boulders provided no relief in the difficulty of the route. Around the 12,000′ mark, there’s a steeper drop off of about 200′. If you go right, it looks even steeper and the boulders look larger. So naturally, I went left.

Coming down a rock chute

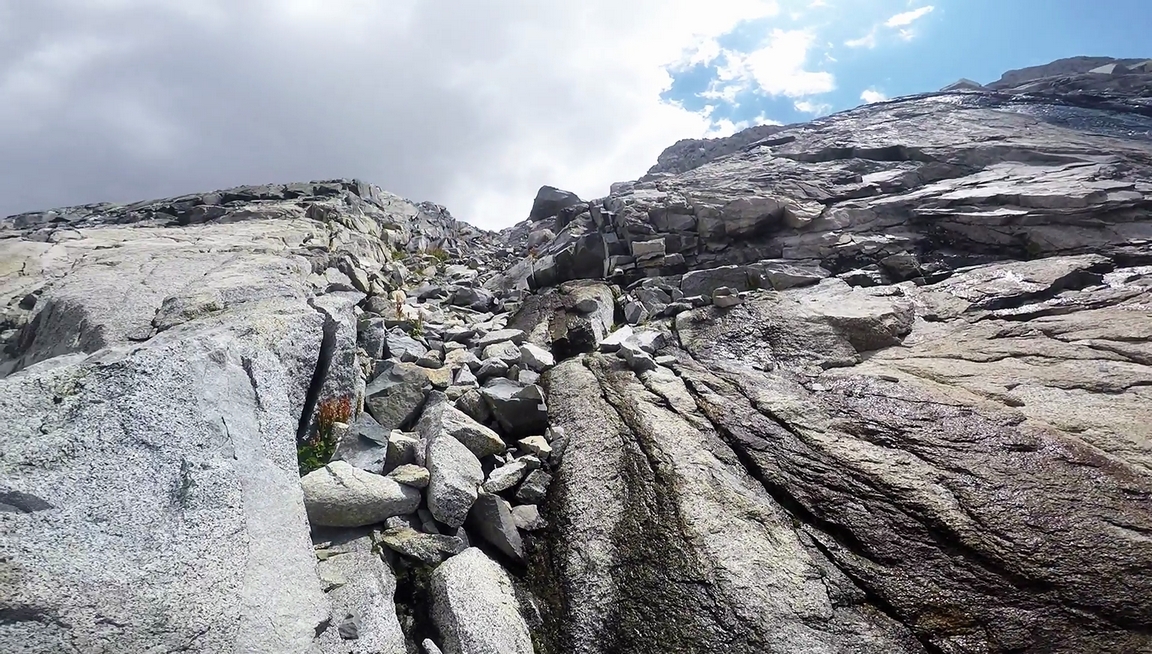
Looking back up the rock chute I came down
Now working my way west along the 12,000′ mark, I began to realize that this route is not very good either. It was more of the same, large boulders and steep slopes. At one point, the only way I could see to continue was to traverse this section of slick rock which happened to be sitting above a rather large drop off. Water was running down a section of rock a couple of feet wide, with algae on it making it very slippery. I didn’t dare walk across it standing up, but I did need to cross this area to keep going. By crab crawling on all fours I was able to cross this slick rock. That worked, but lead me to a steep rock chute shortly after. This was the only way down from where I was, and so I had no choice but to traverse it. Each step knocked rocks down the chute and caused me to slide down hill.
I continued west along my line around the 12,000′ mark for quite a while looking for a feasible route down. I started angling downhill and west, and ended up hiking over the first moraine shown on the map west of Alpine Col, farther than I wanted to go. After that I came to a another steep chute that was very loose. This one was even looser than the last one, and as a result the remaining rocks in the chute were smaller. This allowed me to turn sideways, dig in my heels and just do a controlled slide down. I got a lot of debris in my shoes from this, but it was the only way down. It appeared I was done with the worst of the descent from Alpine Col now, but definitely not done with boulder hopping just yet. I still had a ways to go to the lake, and a sea of boulders was strewn across my route as far as the eye could see.

The only patch of grass for miles
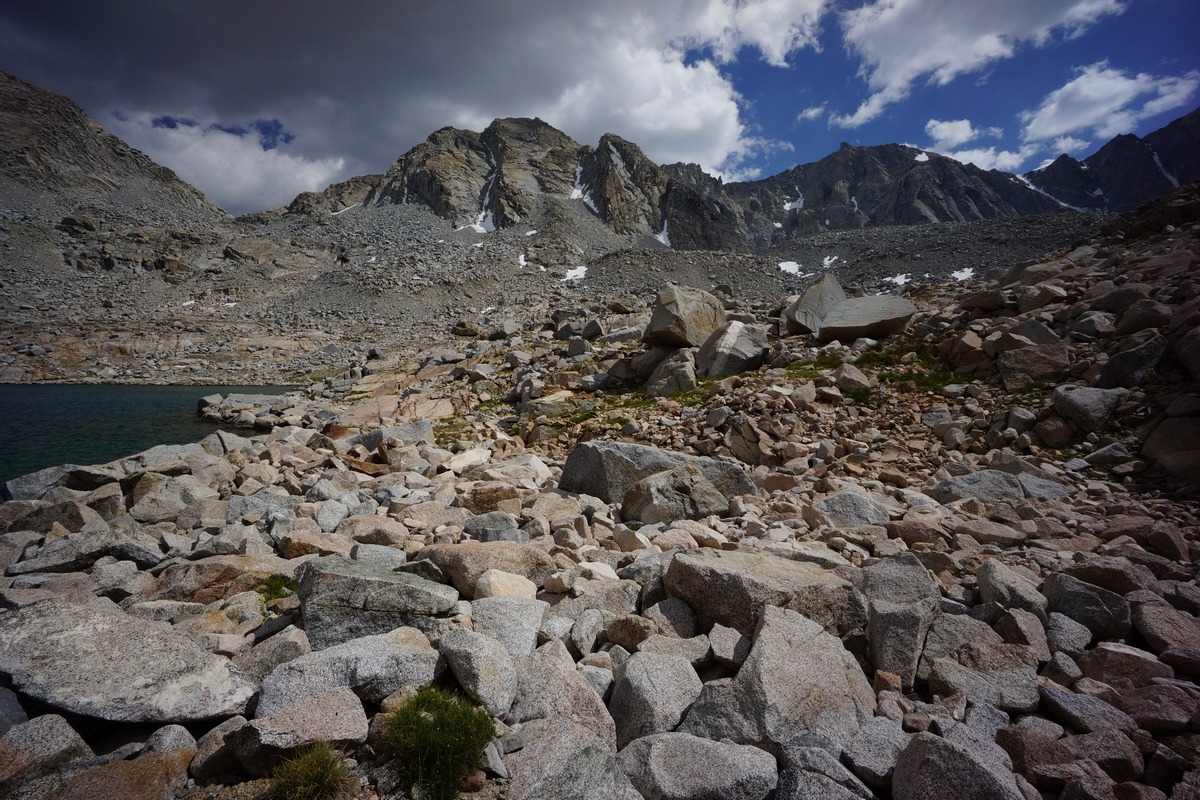
East side of Goethe Lake looking back at Alpine Col on the left
Finally, I made it to upper Goethe Lake. I let out a loud victory cry, unable to hold back my enthusiasm for being off the pass. Even though I reached a small section of grass, the terrain moving forward appeared to be more of the same large boulders piled around the lake. I stopped and dropped my pack on one of the boulders near the lake and took a break. More of a mental break than a physical one, although I was dog tired too. Think about the mental strain that comes with needing to make sure every step is right for hours on end. That’s one thing you really can’t prepare for. It was really nice to be able to relax my mind for a couple of minutes here. Having just gone through the roughest section of my entire hike, I didn’t seem to mind the no-see-ums as much on this side of the lake as I did by lake 11,910.
East side of upper Goethe Lake

Traversing Goethe Lake. That’s Mt. Humphreys beyond lower Goethe Lake in the distance

I was glad to be done with the worst of it, but looking at the terrain ahead of me, it was clear that I was not out of the woods yet. The general consensus online was to take the west side of Goethe Lakes, as the east side has huge boulders. The east side was still a pain in the ass.
I guess there is no good way down Alpine Col on the Goethe Lakes side, from what I can tell. I think that many who have done Alpine Col and wrote about it online have done it in times when there was more snow, quite possibly making this route easier. Make no mistake, this route is NOT for the faint of heart. I’m not saying this route should be avoided altogether as it’s totally feasible with the right experience and mind set, but do not even think about doing this route if you have any qualms about boulder hopping for several hours on end without any breaks in the terrain. It sucks, but damn is it beautiful.

In between upper and lower Goethe Lakes

Lower Goethe Lake with Mt. Humphreys in the distance

Looking back at Goethe Lake
The boulders didn’t let up until I reached the lower Goethe Lake. Finally, I was walking on dirt and grass. From memory, I want to say I spent a solid 5 hours working my way through that nightmare of a boulder field that people call Alpine Col. However, looking back at upper Goethe Lake and the cirque behind it was breathtaking.
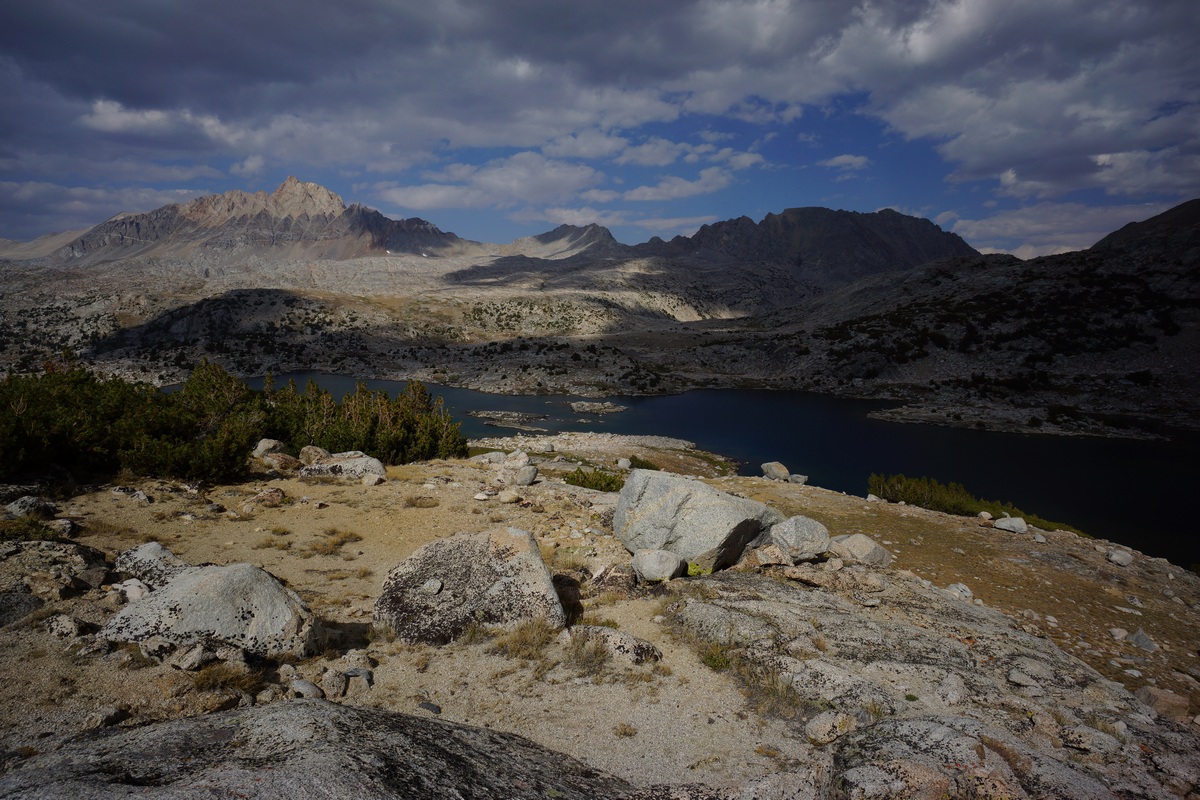
Muriel Lake & Mt. Humphreys

Mt. Humphreys dominates the skyline
After passing lower Goethe Lake, the landscape really opened up and flatted out before reaching a rock outcrop above Muriel Lake. From here, there was a great view of Humphreys Basin and Muriel Lake to the north, and Goethe Lakes and the cirque with Goethe Glacier to the south. Scenery wise, this would have been an excellent place to camp. However, the dark clouds to the south still threatened rain. Being as exposed as it was, it was windy too. It was quite a walk back to the lower Goethe Lake from here as well, so it wasn’t ideal in terms of proximity to a water source. I kept moving downhill to Muriel Lake, bummed about not being able to stay at this otherwise beautiful place to camp.
On my way down to Muriel Lake, I saw 2 guys crest a ridge coming from Wahoo Lakes. They were headed towards Alpine Col, and so I asked the first guy if that was his plan. He said, “No, the guy I’m with is 84 years old, he’s not going over that. But he did 30 years ago!” I When I passed the 84 year old guy, I was shocked to see how good he looked. If I had to guess I would have said he was 60 years old. He barely had any wrinkles and had no physical impairments. I was tired and worn out from my hike today, but after seeing this guy out here I told myself to shut up and quit whining. I wanted to say to him, “You’re like the Jack LaLanne of hiking!” I’m sure he would have gotten the reference. Oh, and they both made comments about me going over Alpine Col in trail runners, basically saying I’m crazy doing so without the ankle support of boots.
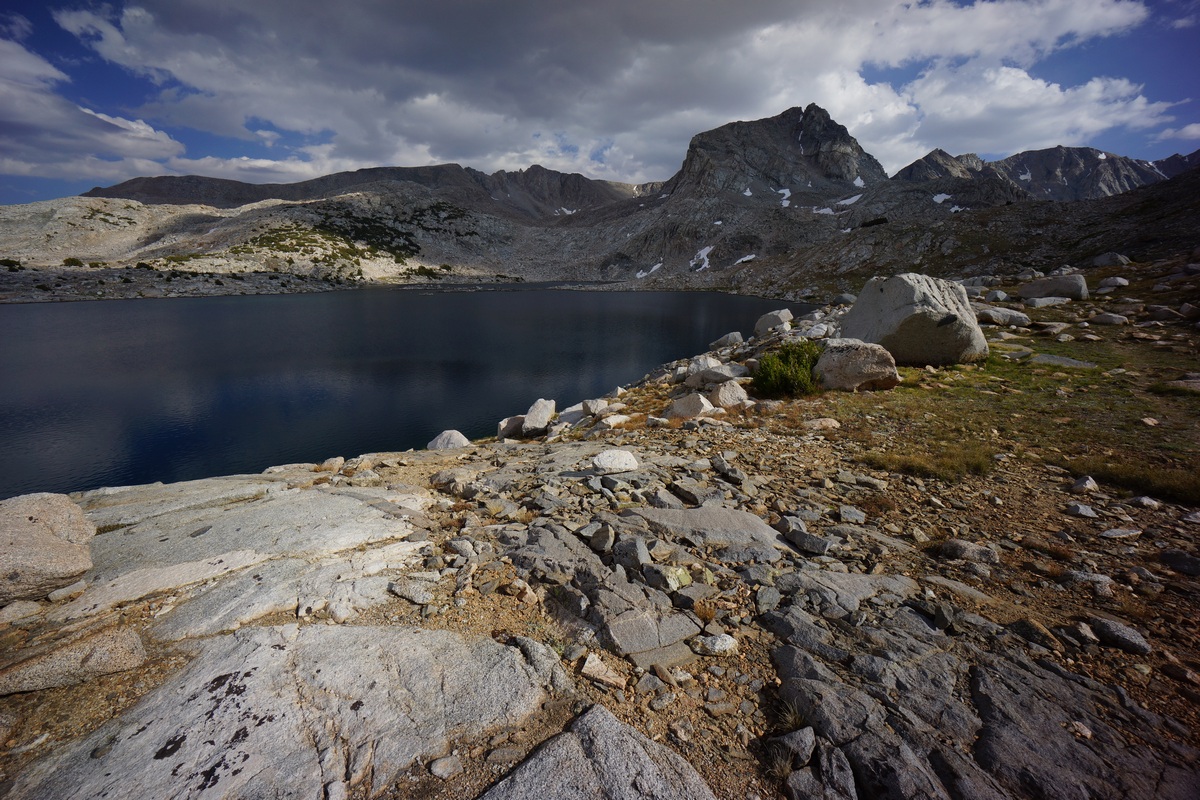
Muriel Lake
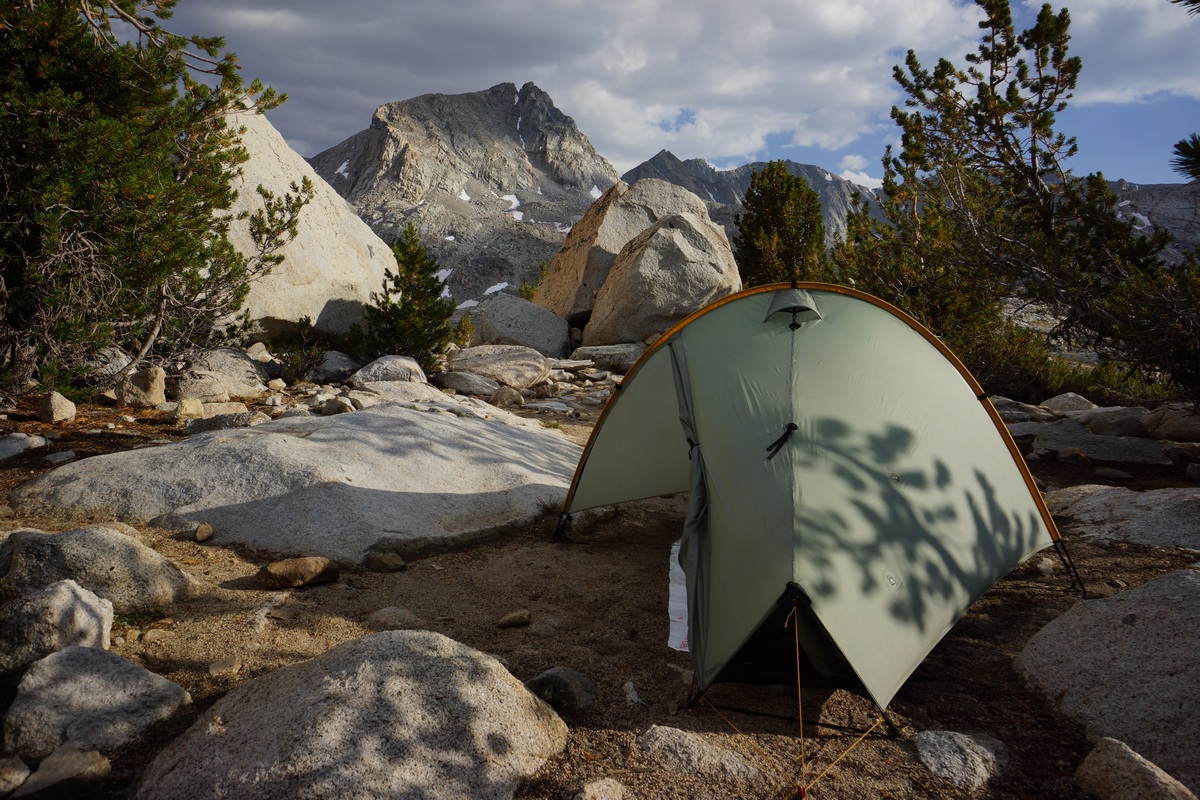
Camp above Muriel Lake
The hike down to Muriel Lake was easy, with a solid trail to follow now. When I arrived at the lake I was a little surprised to see nobody camped here. That’s great news for me though, as I had the entire place to myself. I found a small flat area among some small trees and a few large boulders to set up my tent. From here, I had a pretty good view of Muriel Lake and Mt. Humphreys.
I didn’t eat much today. Not because I wasn’t hungry, but I was so involved in the route over Alpine Col. I mean, who wants to stop in the middle of terrain like that and eat? I just wanted to keep moving and get out of the boulder field before it started raining. But tonight, I was ready for dinner. I had a tortilla with pre-cooked bacon and cheddar cheese, as I did most nights. Simple and delicious, and last forever in my pack even in fairly mild temperatures.

Mt. Humphreys

Muriel Lake
After eating, getting water and doing all my camp chores, it was finally time to relax. There was some small brook trout in the lake but I didn’t bother to throw in my line. Instead, I hung out near camp enjoying the expansive view of Humphreys Basin. At this time of day the light wasn’t great over the basin, but Mt. Humphreys was perfectly illuminated. The view of Mt. Humphreys from Muriel Lake was pretty impressive. While walking around near camp, I spotted another backpack stashed in a little opening below a few boulders. It was an older model pack, and looked like it was full of gear. Why are so many people leaving their backpacks behind out here?
Day 6 – Friday August 26th, 2016
Miles Hiked – 9.31
Elevation Gain – 1226′
Route – Muriel Lake to Elba Lake
This was the first morning that I had no condensation in my tent. Finally, I could put it away dry. I heard some coyotes howling last night in the distance. My legs were a little sore for the first time this trip as well. Not surprising after what I went through yesterday.
The views into Humphreys Basin were not great as it appeared to be filled with a thick haze or smoke. It looked like forest fire smoke to be honest. Huh, hope this doesn’t get worse, and hope there isn’t a fire nearby. Either way, this doesn’t bode well for photography.


There were a couple of trails here in the Muriel Lake area, and I followed one towards Piute Pass. I could have just dropped downhill, cut across the valley west of Summit Lake and head uphill where I could intersect the trail, but I chose to stay on trail. While the terrain was open and grassy in the valley below, it also looked like much of it was wet and marshy. I figured I’d just stay on trail here even if it meant adding a little extra distance.

Trail to Piute Pass from Muriel Lake

View of Humphreys Basin from Piute Pass
The trail to Piute Pass was well worn and easy. However, with the haze in the basin, I didn’t take many pictures.


From Piute Pass, I headed northwest into Humphreys Basin. The trail remains solid through this section. Humphreys Basin, which was a massive open area, was mostly grass and dirt with less rocks and boulders than my last few days, a welcome change. I made good time through this area. I started to see more people here too. I ran into a group of people along the trail and it was at this point that I realized I had gone a bit farther than I intended to. I was planning on leaving the trail somewhere south of Lower Desolation Lake, and head towards Tomahawk Lake. I had to backtrack a couple of minutes to avoid going up a steeper slope covered with thick vegetation.

Mt. Humphreys

Now back on track, my off trail journey for the day began. Fortunately, this was some of the easier off trail hiking I did on this trip. Huge open fields with little in the way of obstacles. Not necessarily the most spectacular views of the trip, but being alone in the middle of such a vast open area and surrounded by distant peaks like Mt. Humphreys certainly set a different mood. I was enjoying today’s hike, and just felt really good overall!
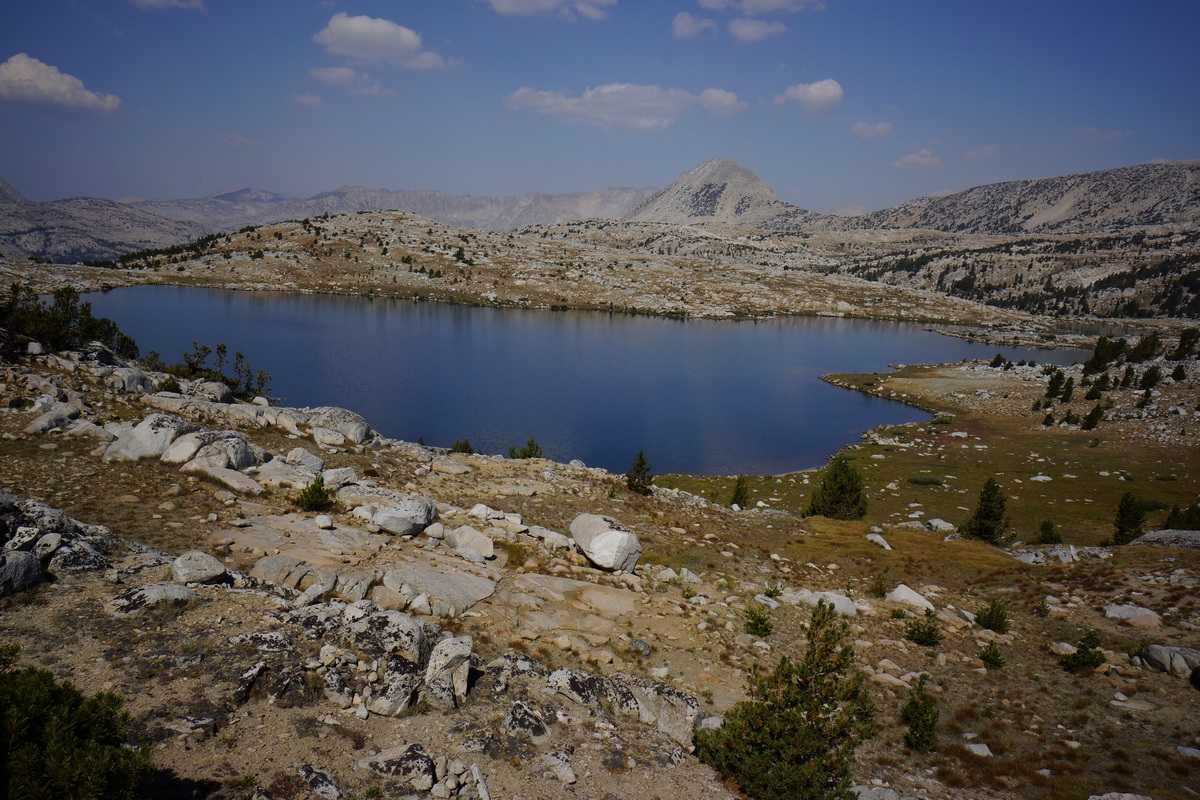
Tomahawk Lake

When I reached Tomahawk Lake, I had a pretty good view of it from the hill around 11,200′ to the south. I had planned on dropping down to the lake and walking along it’s western shore, but instead I chose to stay high above the lake and work my way around the slopes to the east. This saved me some ups and downs. Staying west of the long ridge southwest of Desolation lake near the 11,400′ mark, I made my way towards Mesa Lake.

Glacier Divide from Mesa Lake’s south shore

Mesa Lake with Mt. Humphreys in the distance

West shore of Mesa Lake
I took the western shore around Mesa Lake. There was a nice section of sandy beach here along the shore, and the deep blue waters sparkled in the sunlight. Just the kind of place that looks perfect for swimming, until you remember just how cold the water is. I also saw some crap here along the shoreline that looked like it came from a coyote, only bigger. Mountain Lion? There was a lot of hair in it.
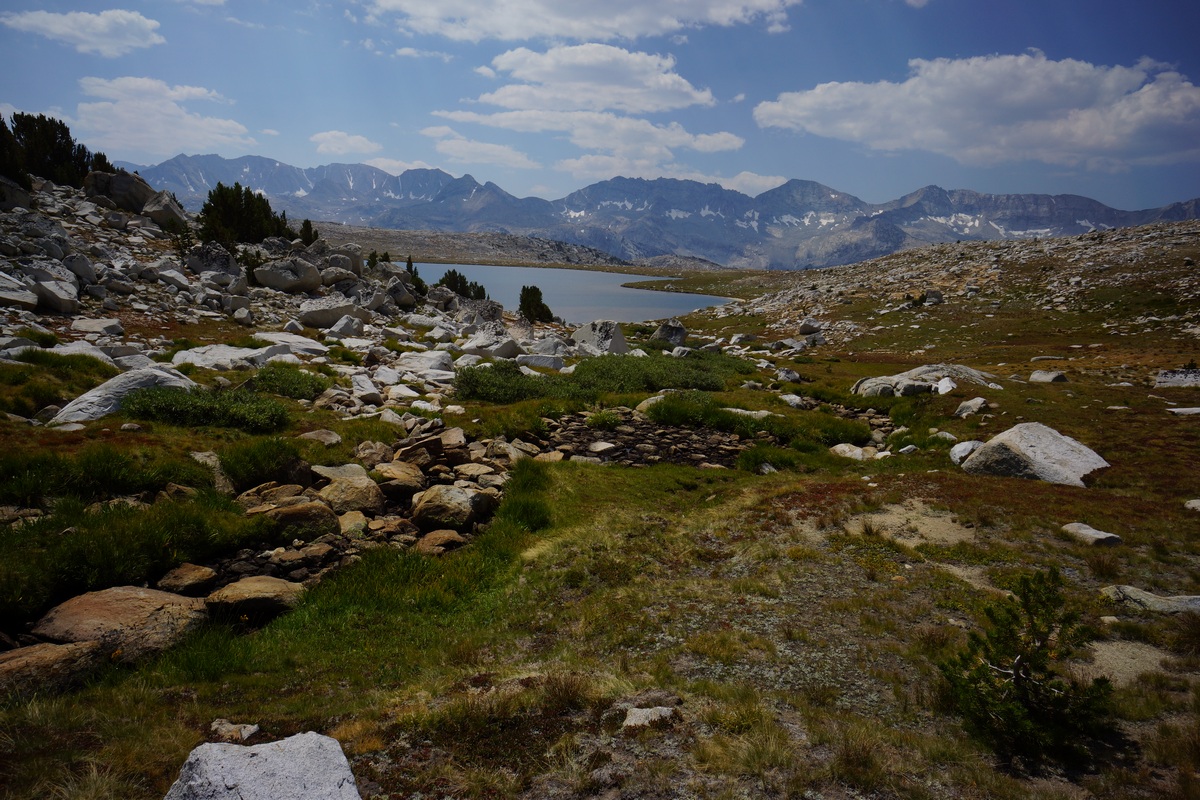
Looking back at Mesa Lake and the Glacier Divide
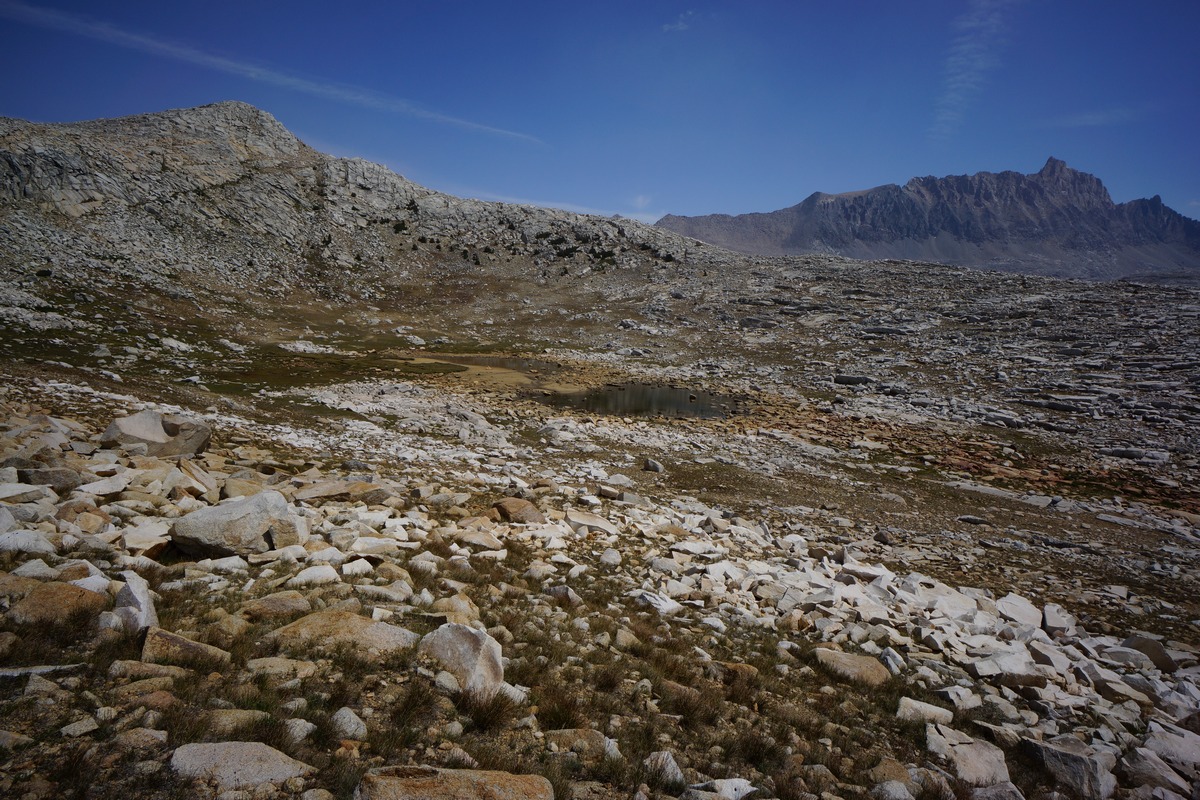
Looking down on the lower of two shelves below Carol Col. Mt. Humphreys in the distance
Past Mesa Lake, there was a decent trail to follow, at least for a little while. The trail faded as I made my way up the slopes leading to Carol Col, also called Puppet Pass. This section was not too difficult, and it was only a couple hundred feet up to the pass from here.
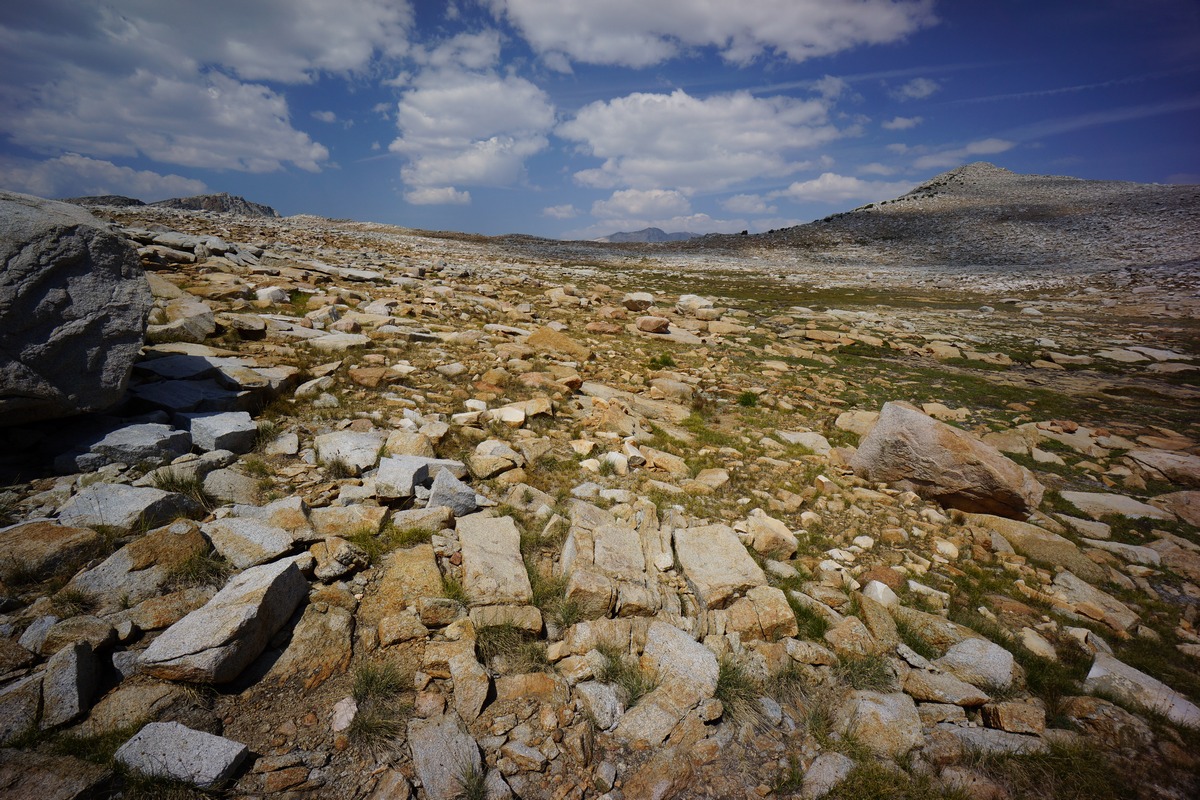
On the upper shelf below Carol Col. The pass is the low point on the horizon, dead center.
Up on the last shelf below Carol Col, the landscape consisted of smaller talus strewn about a somewhat soggy field. Carol Col, while not very distinct, can clearly be seen from here. The final approach was super easy.

View west from Carol Col
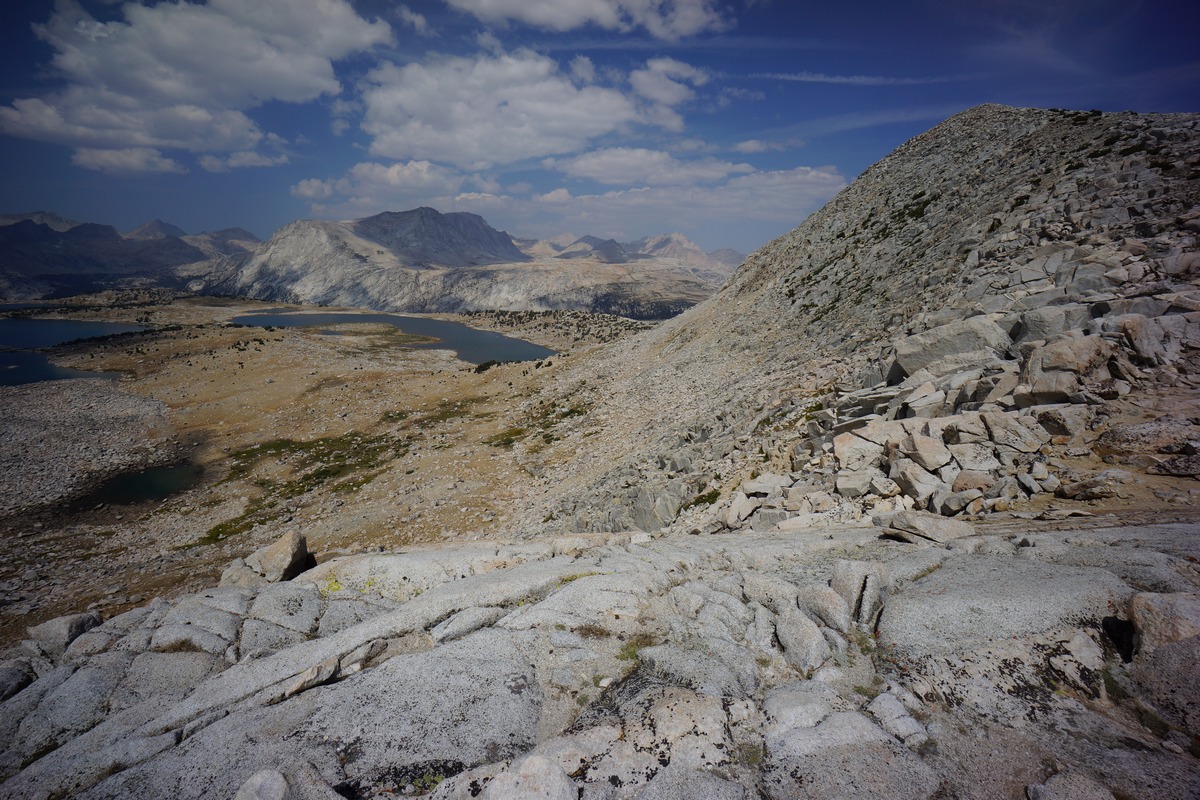
View east from Carol Col
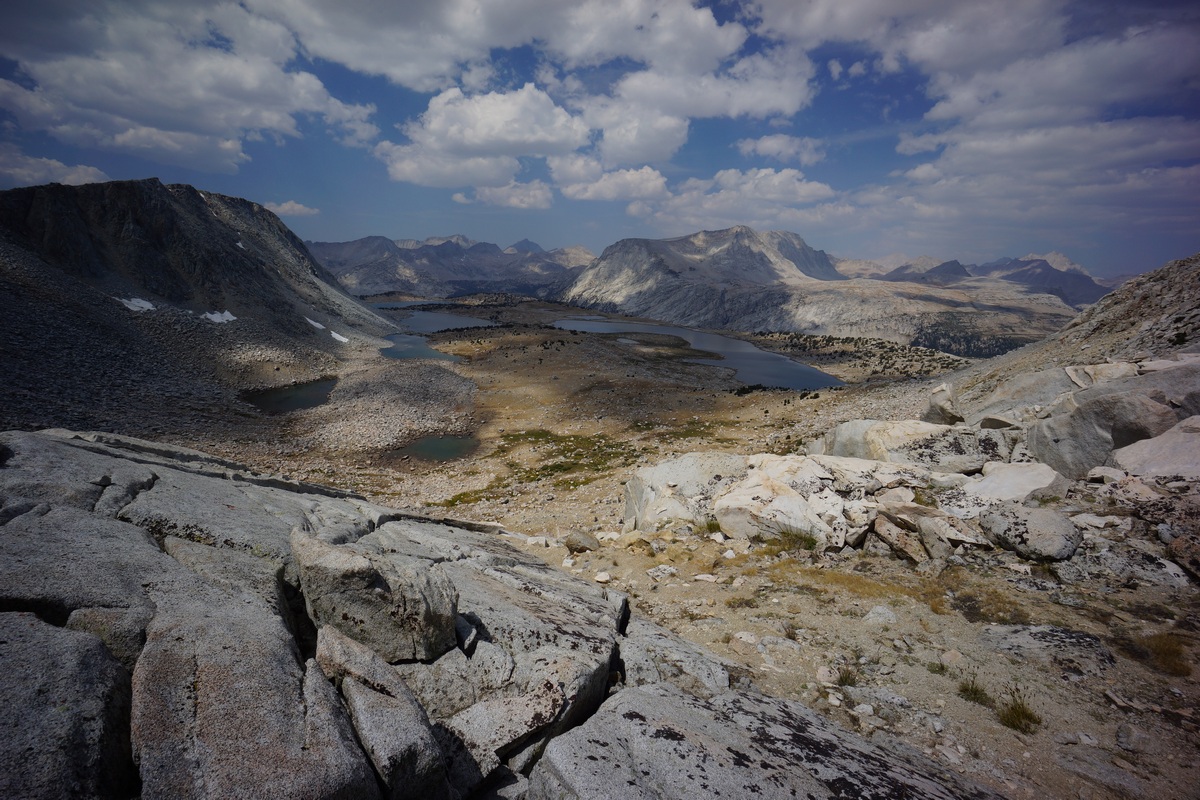
Looking north/northwest from Carol Col
The view from Carol Col is awesome. Clearly though, going down the Puppet Lake side is going to be much harder. For now, I stopped to eat and take pictures. My favorite views are typically from mountain peaks and passes, although peaks reflecting in a lake of turquoise blue water is right up there too. Enjoy this moment while I can!

When it was time to descend the pass towards Puppet Lake, I ended up taking the wrong path down twice. I didn’t make it too far before realizing this was probably not the right way. The path looked steep, too steep. I backtracked and kept looking. I found the best path down starts from the extreme northeast side of the pass, south of point 12,225′.
Coming down the pass was hardest near the top. The best route follows an obvious rockface down hill, but the rockface isn’t reached until you’ve descended 200′ or so. Also, when taking the path I took from the top, you must angle west a little in order to reach that rockface. Until then, there were some large boulders to negotiate along with some tricky sections, but nothing as bad as Alpine Col.
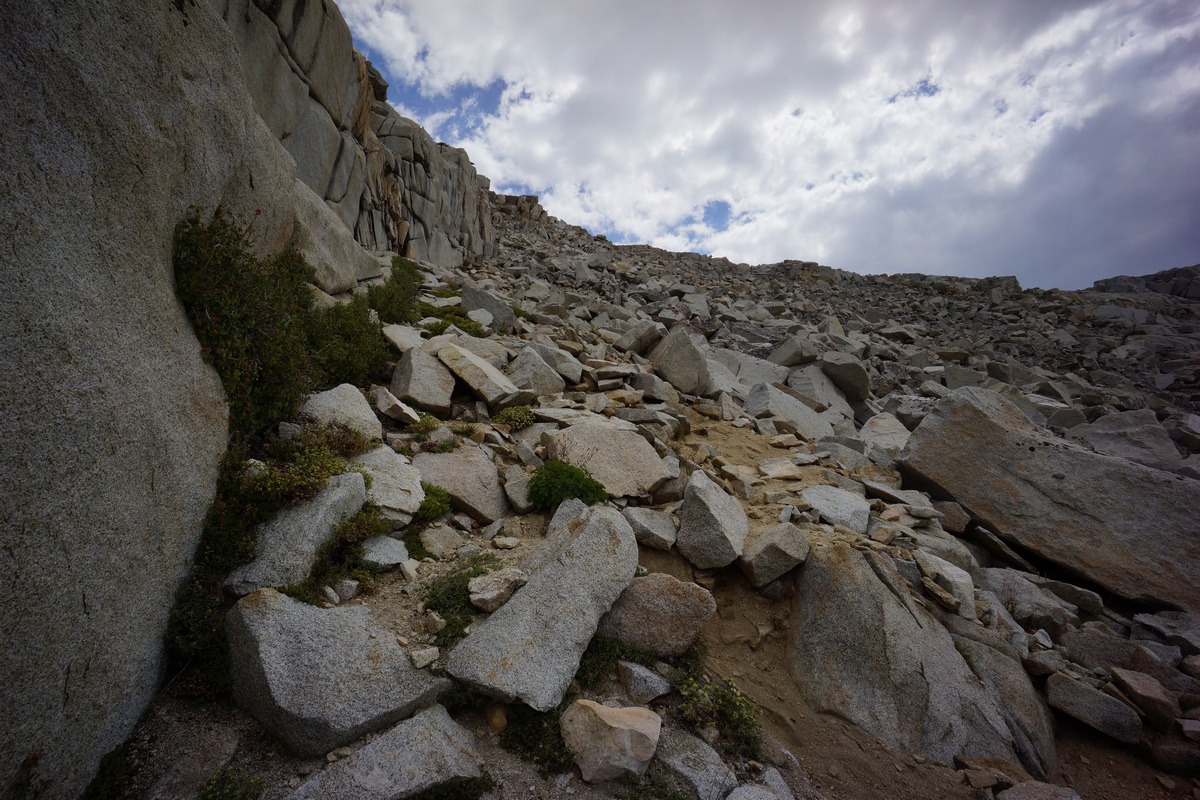
Follow this rockface
Once you’ve reached the rockface, it looks like you can take a high or low route. The high route hs you pretty much walking on top of the rockface, and this left me with some uncertainty about getting down from said rockface later on. Therefore I chose the low route, which basically follows the base of the rockface. This is what I recommend. This keeps you out of the worst of the boulders and gives you good landmark to work with.
After working my way past the rockface, the going became a littler easier. From here, it was more boulders to hop downhill. A couple of guys were heading up the pass now, and I stopped to chat with them. They had been fishing too and we exchanged info on our experiences so far. They had camped at Elba Lake, directly north of Puppet Lake, and said the fishing was good near the outlet. They also said there were some good campsites near the outlet. They had a dog with them, and I wasn’t sure how that dog would be able to make it up to the top of the pass considering some of the sections I had to go through.
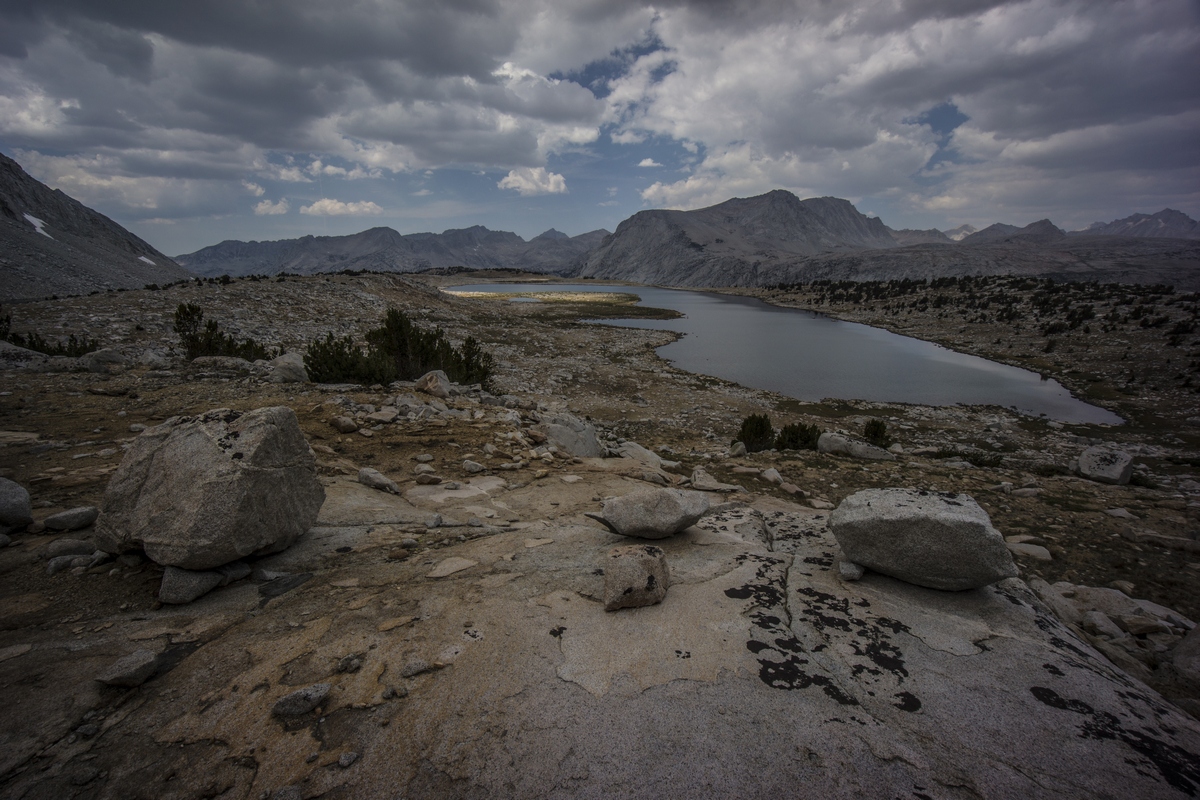
Puppet Lake
Instead of just walking down to Puppet Lake directly from here, for some reason I worked my way around the slope east of the lake. This was a mistake as the entire hillside was more big boulders. I would not recommend this. I started dropping down towards the lake as soon as I could, but by this time I had already traversed the worst of it.

Puppet Lake
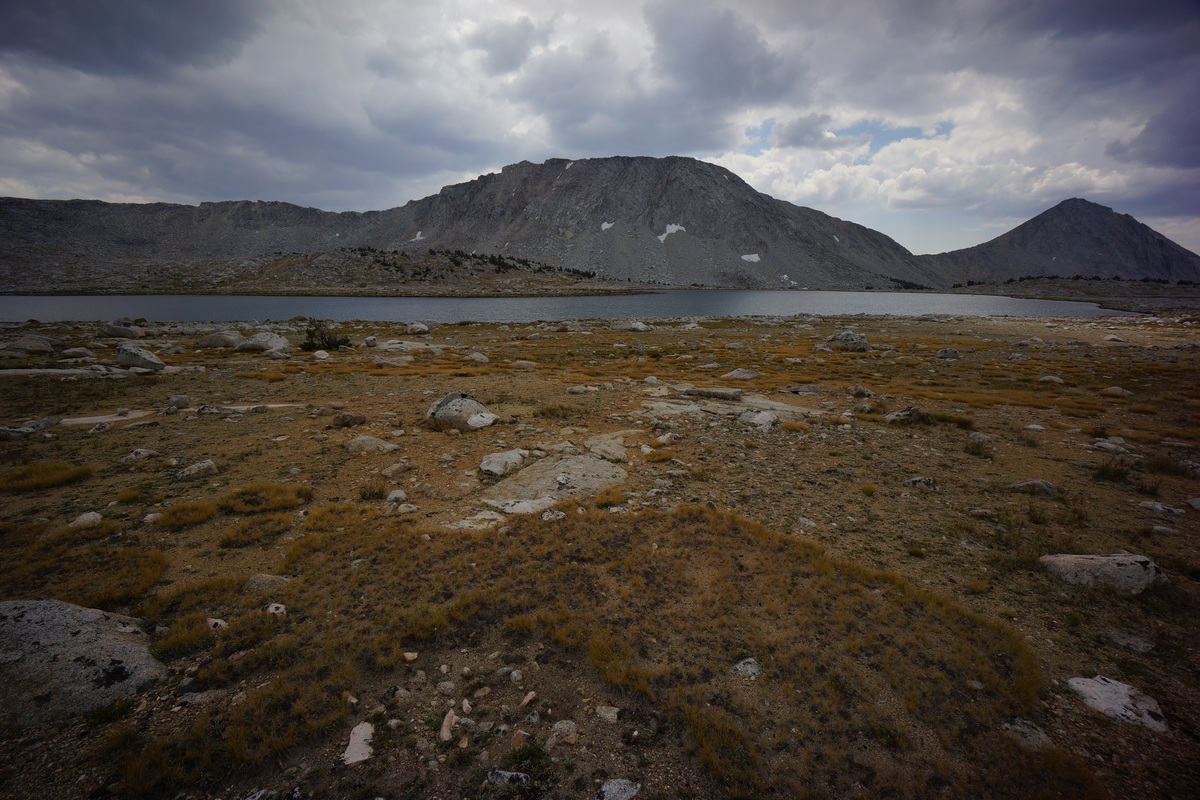
East side of Puppet Lake
Once I got down to the shores of Puppet Lake, I started looking for potential campsites. I wasn’t sure where I wanted to camp exactly, but was considering here or Elba Lake, going on the recommendation of the guys I passed earlier. With no great campsites in sight near Puppet Lake, I kept moving. I’m sure there are plenty of campsites here but I just didn’t see anything that caught my eye. I was kinda bummed about passing by Puppet Lake since I heard the fishing was good here.

Elba Lake
Past Puppet Lake, I found a clear trail heading downhill towards Elba Lake. Thankfully the trail was here, as this section was a lot steeper than I was expecting. It started to sprinkle a bit on my way down, but quickly tapered off.
At 10,900′, Elba Lake had more trees around it now than Puppet Lake did. I also found lots more people camped here. There were none at Puppet Lake, actually. I worked my way from the southern shore of Elba Lake east, and then around to the northern side of the lake. There were people camping in the areas the guys I had passed earlier mentioned, so I had to keep moving. There was a clear trail around both sides of the lake which made it easy to hike, but I wasn’t seeing a lot of good campsites near the water. There were a lot of places I could camp, but not a lot of places I wanted to camp. Finally, I just took a spot well off the trail and away from the lake. It was windy and still looking like rain, so I figured the trees here might provide the cover I need.
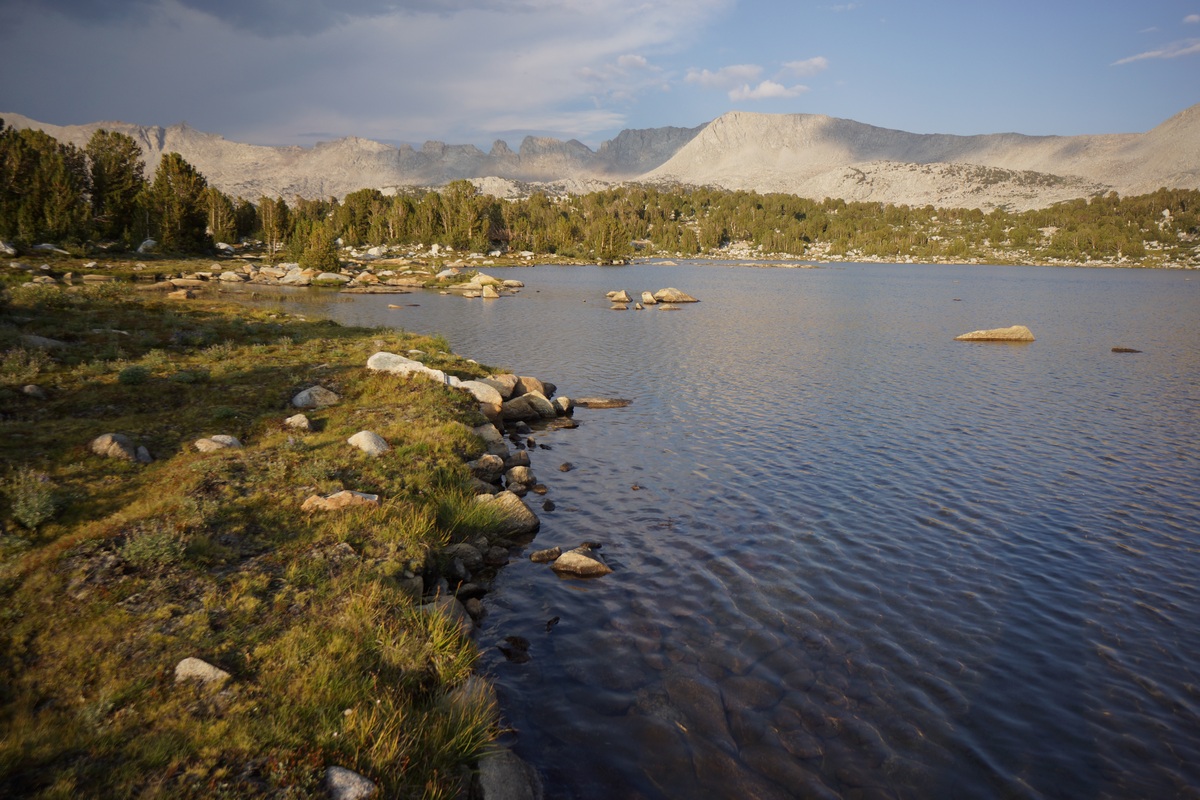
View from Elba Lake’s north shore looking east
After setting up camp, I headed down to the lake to do some fishing. Again, no luck. For some reason these trout want nothing to do with my mepps spinners. In my past experiences fishing in alpine lakes, fish bite anything shiny. Hell, they’ll bite a damn hook by itself! Not this trip though. Good thing I didn’t bring all my stuff to clean and cook fish: stove, fuel, frying pan, spatula, scrubbing pad, zatarains fish fry breading, cooking oil, etc. I hike without a stove most of the time actually.

Camp 200 hundred yards from Lake Elba

View northeast from camp
I didn’t really care for this campsite much compared to my others so far. There were much more scenic campsites along the lake, but the best ones had already been taken and I guess I just settled for this one. I didn’t have a great view of anything, there were a lot of people around, I wasn’t close to the water and the fishing was not good here, at least for me. If I could do it again, I would have looked harder for a good spot to camp by Puppet Lake. The skies had been threatening rain for much of the afternoon and evening as well, so tonight I pretty much just waited for darkness so I could go to bed. I looked like some serious rain was moving in, but it avoided my exact locale and I never got wet.
Day 7 – Saturday August 27th, 2016
Miles Hiked – 6.8
Elevation Gain – 1634′
Route – Elba Lake to Granite Park

I awoke to clear blue skies again this morning. The haze and smoke that were plaguing my long distance views yesterday didn’t seem to be a factor today. It ended up being a calm night with no rain, and no condensation this morning. Today, I planned to camp at one of the Royce Lakes, making a somewhat short day and giving myself time to explore and fish.
The trail form Elba Lake to Pine Creek pass was rather uninteresting. From Elba Lake’s outlet, the trail drops down roughly 280′ into the valley below. You’re below tree line now, although it’s still pretty open. Still, you can’t see much.

On the shelf below Pine Creek Pass, looking south towards Elba Lake
At around the 10,640′ mark, the trail starts climbing up again. The trail reaches a flat shelf around 11,000′, where the views start to improve.

View north from Pine Creek Pass
After another 100′ or so, I was at the top of Pine Creek Pass. I stopped here to take some pictures, and then eat some food. Two other hikers came up Pine Creek Pass and they stopped to chat with me for a while. Martin & Maria were their names, and they had a base camp at French Lake. Nice people, great to talk to. Martin was a former mountain guide with experience all over the world. It turns out they were heading up to Royce Lakes too, and possibly beyond. They planned to return to their base camp later tonight. Martin had a map of the area that was maybe 1:100,000, so I showed him my map of the area that was 1:24,000, and let him take some pictures of it.

Looking north at point 12,245… the mountain with the zigzagging veins running through it
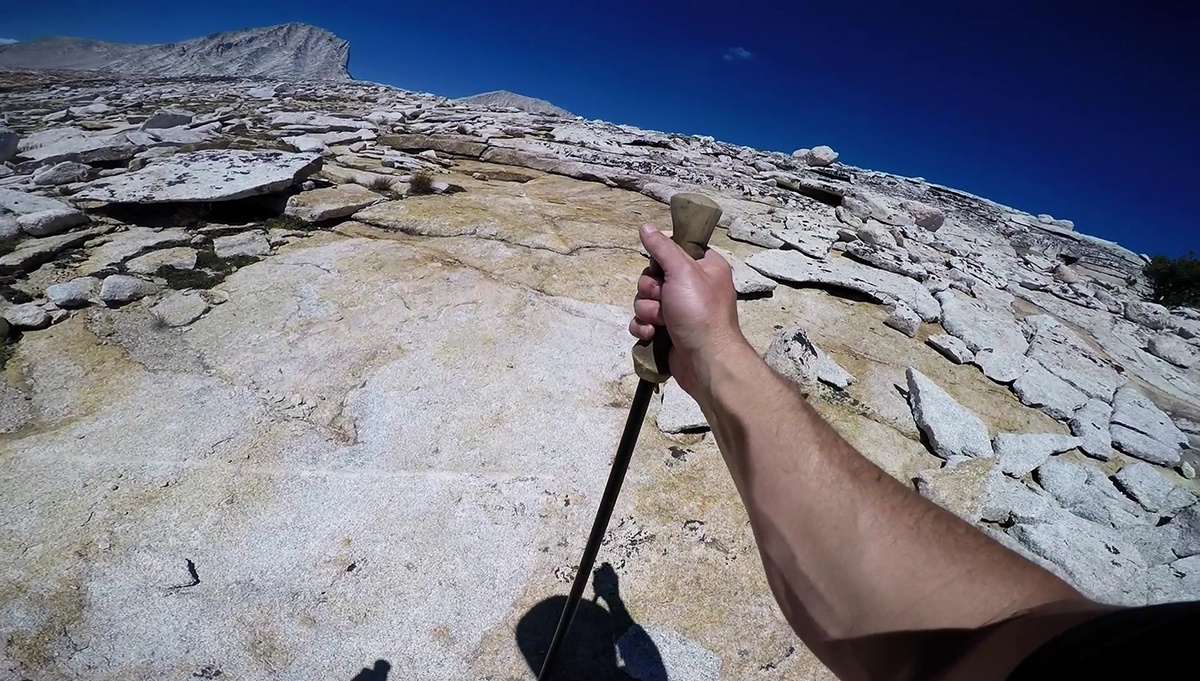
Hiking up to Royce Lakes from Pine Creek Pass
My route up to Royce Lakes was off trail from here. Fortunately, this part was pretty easy. There were few large rocks and boulders to deal with, as the terrain was generally just dirt and small rocks. Some sections of granite slabs too.

Miriam & Royce Peaks reflection


I hiked up the hillside until I reached a shelf with a small pond. The reflection of Royce and Miriam Peaks in the water was stunning. Such beauty for such a lackluster spot on the map. This is a perfect example of why I like to explore off trail!

Miriam Peak on the left, Royce Peak in the center. Royce Lake #3 center, #4 to the right.
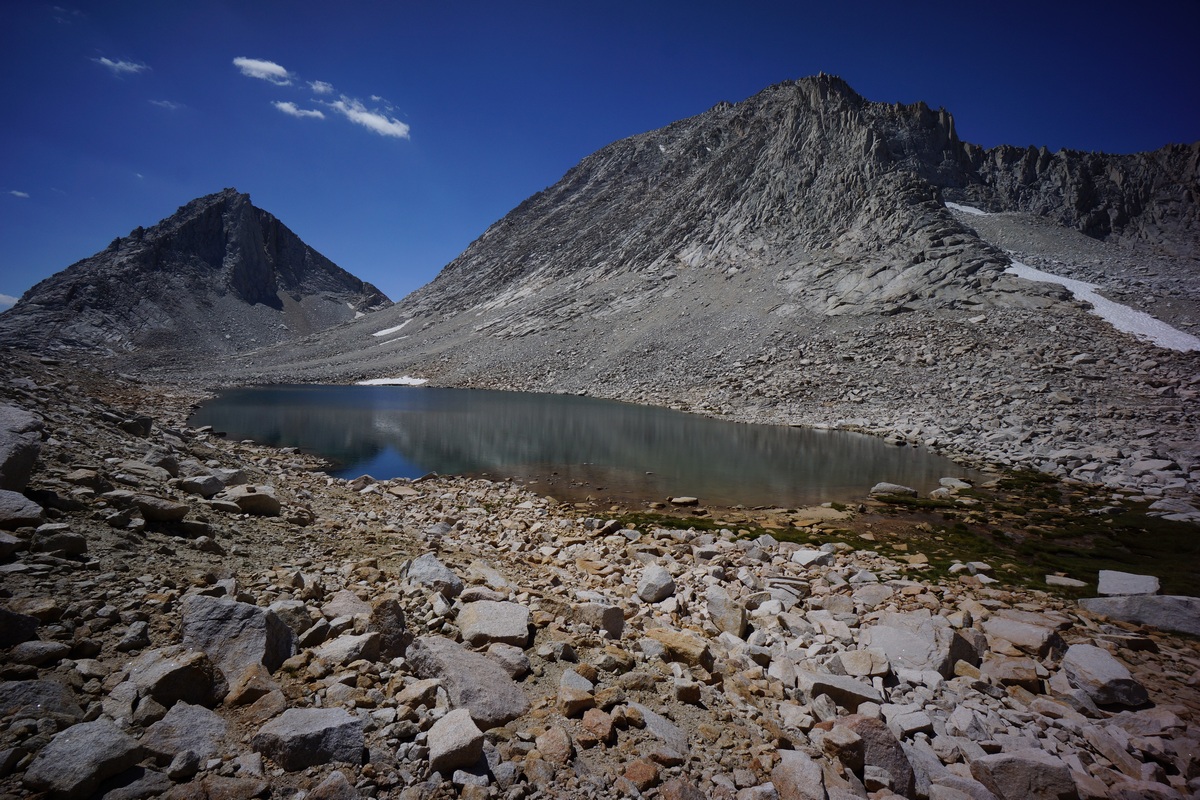
Royce Lake #3
After passing the unnamed lake, I could see Martin and Maria in the distance. Instead of going down to Royce Lake #2 (I believe the lowest lake is #1 and the highest is #5), I stayed high above the lake and just hiked towards Royce Lake #3. Somewhere near Royce Lake #3 I finally caught up to Martin. We stopped to chat again briefly before parting ways again.

Royce Lake #3
I then hiked down to lake level when I got a chance. When I reached the lake, I found myself on the extreme north side. Great views of Miriam Peak from here.

Campsite at Royce Lake #4 south shore
Between Royce Lakes 3 & 4 would be a good place to camp. In fact, there’s a great spot closer to Royce Lake #4. It’s a flat, sandy area free of rocks and perfect for a tent, maybe two. However, it was early in the day and I couldn’t see myself spending the whole day right here, even though it was beautiful. The shoreline wasn’t great for fishing. It was really rocky in general, and didn’t seem to have good access to fish-able waters. To get to the deep water, you’d have to hike over some huge boulders.

Royce Lake #4
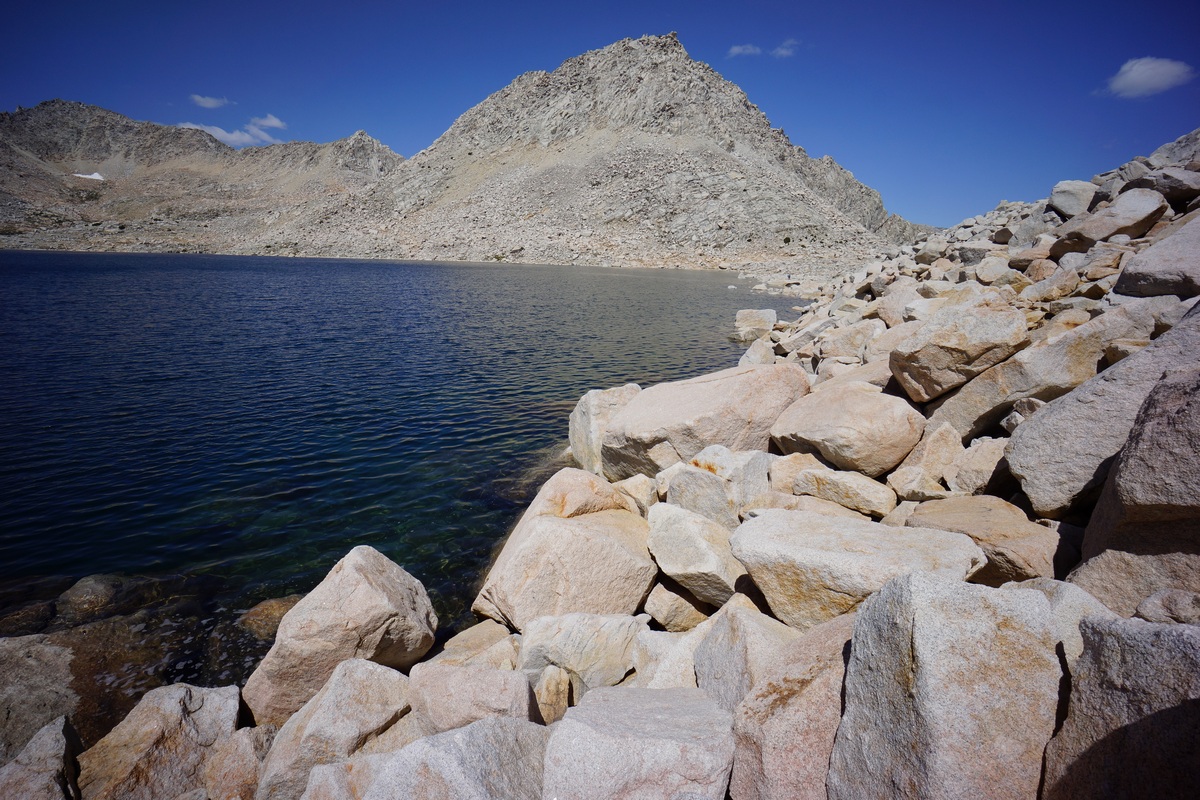
Boulders along the shore of Royce Lake #4. Peak 12,470 in the center
I kept moving around Royce Lake #4. The first half of the lake was fairly easy to traverse, with small rocks along a flat shoreline. After the midway point or so, the boulders became larger and they were stacked more steeply. Not the kind of stuff I want to be dealing with all day if I was camping nearby.

Royce Lake #4 from Royce Pass. Feather Peak on the right, Royce Peak center, Miriam Peak left
At the northeast end of Royce Lake #4 lies Royce Pass. Here, I saw Martin & Maria again eating lunch in the only shade in the area. They mentioned trying for Italy Pass today. I had seen another possible campsite nearby, but this one looked less appealing than the last one I saw in terms of access to the lake. I was also considering checking out Royce Lake #5. With all the large boulders in the area now, I was thinking that I should probably just abandon that idea. I was now thinking of camping in Granite Park tonight instead of Royce Lakes, and considering my route options from here. I didn’t know about Royce Pass before I left as I didn’t have it marked on my map. Instead, I was considering an off trail route from Royce Lake #5 down into Granite Park. This looked roughly equal in terms of steepness on the map, this route would not lose as much elevation. It was tempting, but I decided to head downhill from what I now know to be Royce Pass, which sits between Treasure Peak and point 12,470′. This is also the way Martin chose moments earlier.
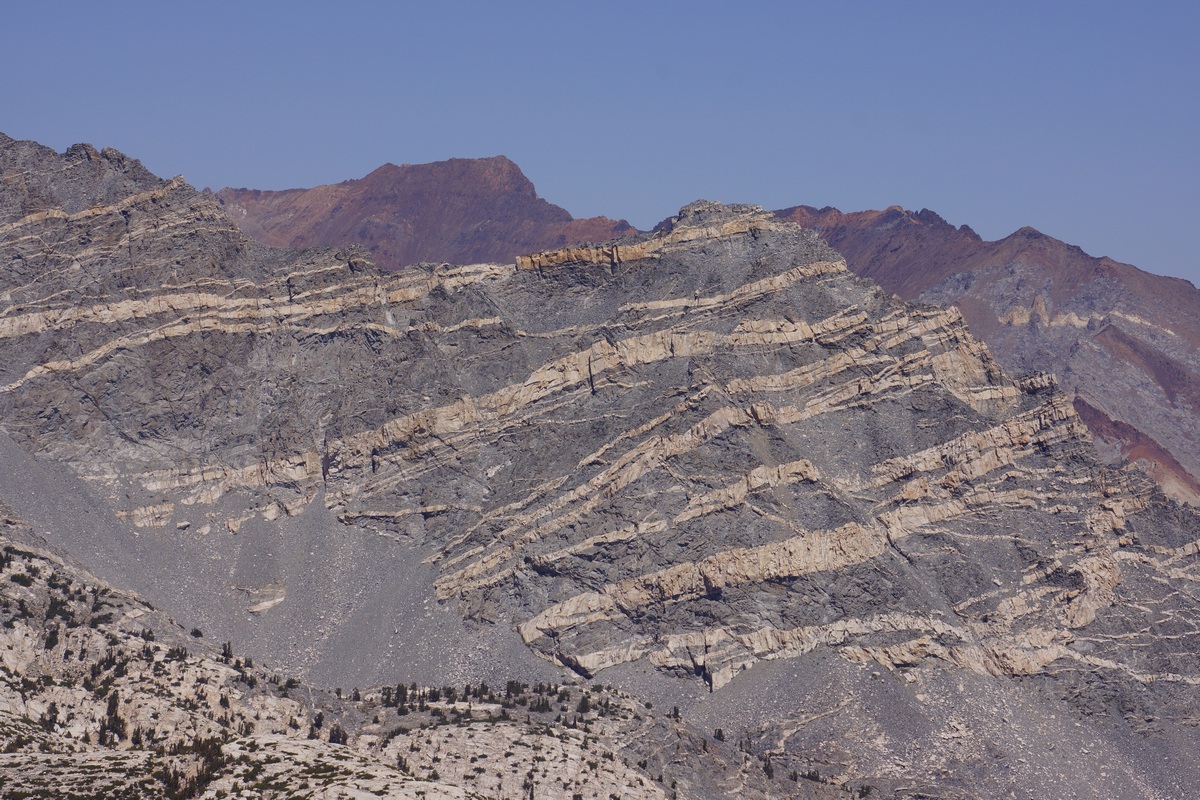
Peak 12,245
Before heading down the pass, I took some pictures. One peak stands out from the rest in the interesting geological area. Marked 12,245′ on the map, this peak is made up of a predominantly dark colored rock, but with veins of lighter colored rock zigzagging through it. Pretty unique looking. Actually, when I look back at the picture I took of this same peak from the Pine Creek Pass area, I can see that the light colored veins are a feature of the entire ridge line all the way up to Bear Creek Spire. I don’t ever remember seeing another mountain quire like this one.

View northeast from Royce Pass

Owens Valley in the distance
Another interesting thing about Royce Pass is that it offered my first solid view of the eastern Sierras. I could see down into Owens Valley, somewhere around 4,000′ at the floor, from my position here at 11,750′. Mt. Whitney borders Owens Valley too, making it “one of the deepest in the US” according to Wikipedia. Then, what’s deeper?
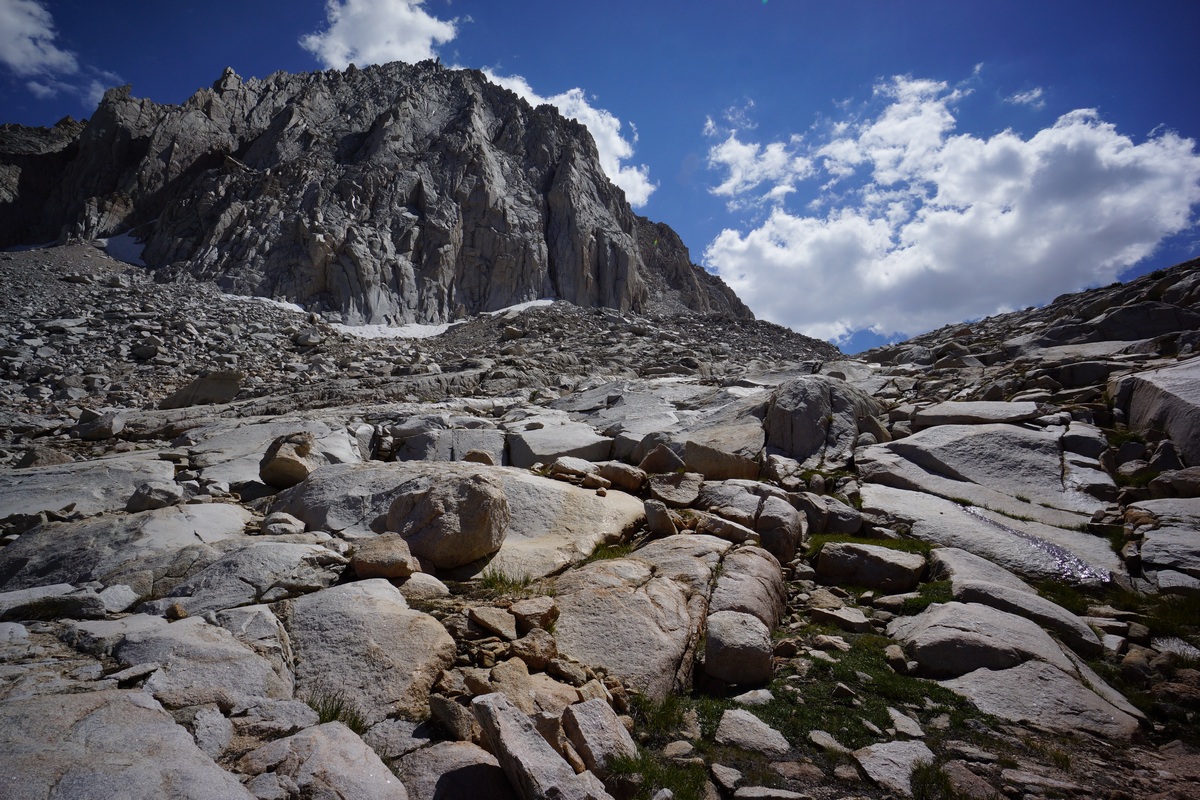
Looking back up at Royce Pass. Treasure Peak on the left
Descending Royce Pass was easy. There was nothing technical about it, and no large boulders to traverse. I made good time going down.


Treasure Peak reflection
Following the ridge line down from point 12,470′, there was a tiny pond around the 11,150′ mark. This looked like a viable route over the ridge line, and would save me from dropping down to about the 10,600′ mark. There were even some use trails now leading the way as I approached the pond. It turned out to be another off trail gem, and another one of my favorite photos from the trip. But then again, I have so many favorites!
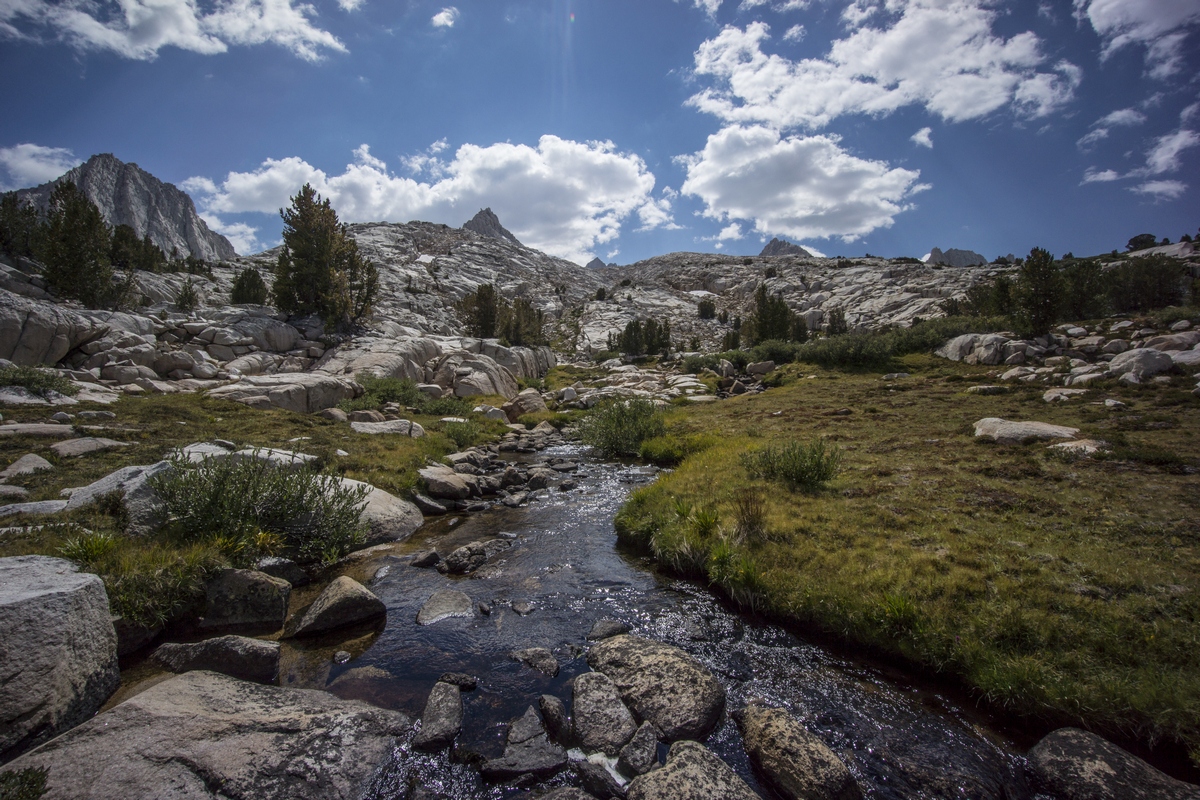
Hiking up to Granite Park

Past the little pond, I dropped downhill a very short distance and met up with the main trail running through Granite Park. Everything about this area was beautiful. The farther I hiked, the more spectacular it became. I was really enjoying my hike today and definitely glad I made the decision to visit Granite Park instead of camping at Royce Lakes. Around this time, I saw Martin & Maria heading back towards their base camp. They didn’t make it to Italy Pass, but they seemed more than happy about just being in Granite Park.


I camped on the sandy spot below

Granite Park campsite
I took my time hiking through this area, stopping anywhere I could to take pictures. I only hiked about 3/4 mile from the tiny pond earlier before finding a campsite I couldn’t pass up. From the trail, I could see a large flat sandy spot below, perched above a chain of small lakes. I headed down to check it out, and decided to make it home for the night. This was my favorite campsite of the trip.

After getting water and snacking, I headed down to the lake to wash up. It had been a few days now since I’ve got in the water completely, and so it was time to take the plunge once again. Damn it’s cold, but it makes you feel sooo good when you’re done. Not only do I feel cleaner, but it really gets your adrenaline flowing being in that icy water. I sat by the lake afterwards soaking up the sun and drying out. Just another surreal way to spend an afternoon.


I did try fishing the small lakes by camp, but once again, no luck. The fish looked especially small here anyway. While exploring the other side of the lake I was camped alongside, I noticed another couple and their dog near their tent. They were actually very close to my camp, but completely out of sight. I wonder if they saw me change out of my underwear earlier by the lake when I was washing? I really thought I was alone up here. Later, I noticed that another person had set up camp near the outlet of the lowest lake in the chain on this shelf as well.

Back at camp, it was time for dinner. Another tortilla filled with pre-cooked bacon and cheddar cheese. This was probably the best tasting one all week for some reason. I think my appetite was improving, which is always a problem for me on these long hikes. And as luck would have it, I realized that I had an extra bacon/chz wrap, so I ate two of them tonight. Bonus meal!
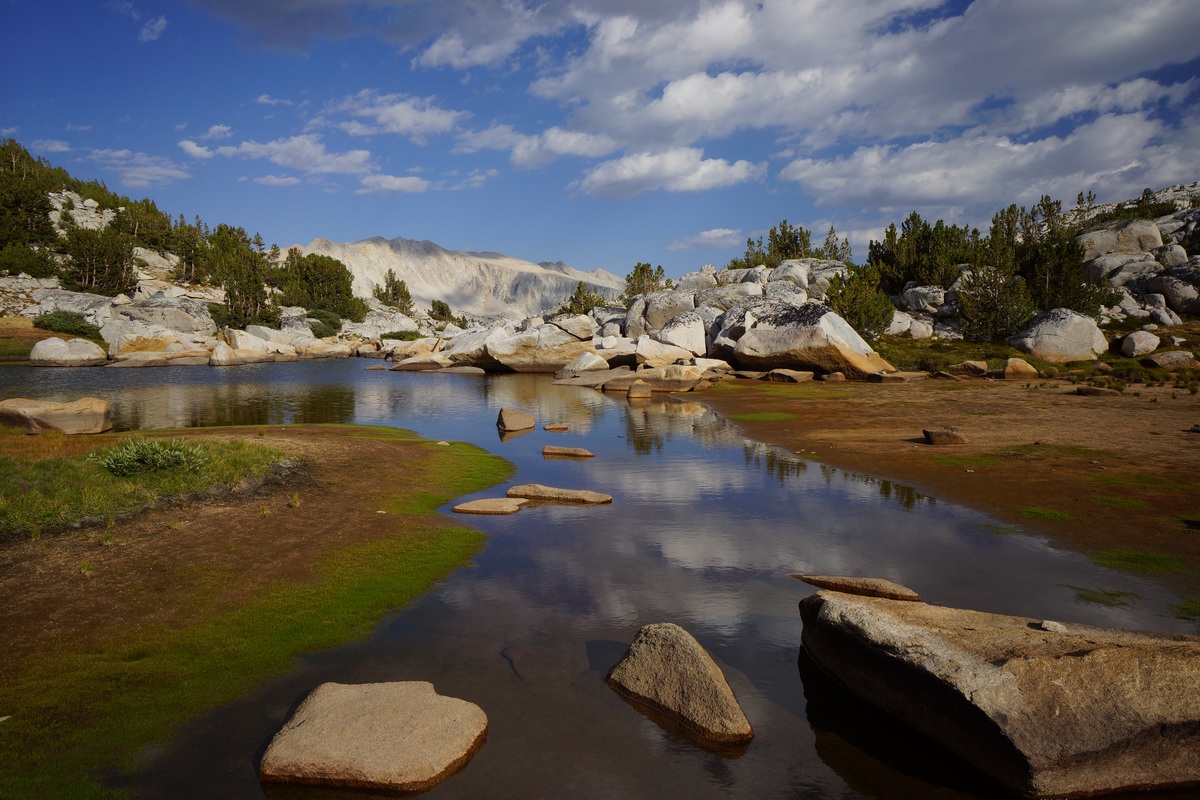
Today was one of the best days of my hike. Greta scenery, great weather, and a bad ass campsite. What more could I ask for? I went to bed happy tonight, and felt like I was startling to settle in to being out here. It definitely takes a couple of days to adjust physically and mentally.
Day 8 – Sunday August 28th, 2016
Miles Hiked – 7.69
Elevation Gain – 1782′
Route – Granite Park to Vee Lake

The Milky Way was very bright last night once again. I could see it often throughout this hike, something I never see at home due to light pollution. This morning was clear and calm again, with deep blue skies. Another great day to be in the mountains! Today, I’ll hike over Italy Pass, skirt the mountainside to Dancing Bear Pass and drop down into Bear Basin, where I’ll camp at Vee Lake.

Granite Park

Reflection on a lake in Granite Park
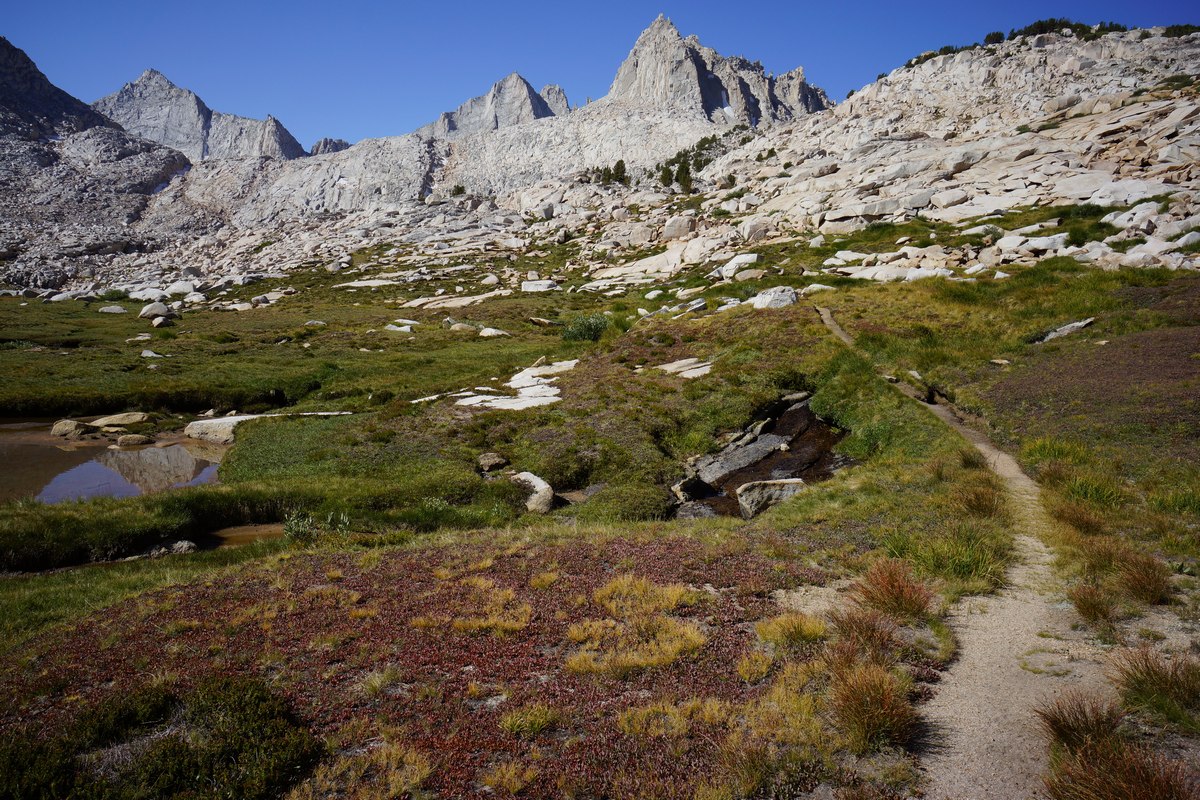
Trail through Granite Park


I rejoined the trail after packing up camp and headed uphill towards Italy Pass. The trail ascends a series of shelves which contain several small lakes. The landscape continued to impress today, with spectacular reflections of the mountains in almost every pool of water. Jagged peaks dot the horizon in all directions. The hike was not difficult at all through this area either. The trail was well worn and easy to follow, and nothing was too steep.


Italy Pass is the obvious low point

Hiking up Italy Pass
Above the 11,600′ mark, the trail winds away from the lakes for the last time. I saw a couple of other solo hikers come down Italy Pass and pass by me. Below the final approach to the pass, there was a tiny little creek bed, with just a trickle of water coming down. It was grassy and had fewer rocks alongside it, and led the way to the top. Italy Pass was both beautiful and easy, a rare combination.

Looking north to Mount Julius Caesar from Italy Pass

View from Italy Pass
On top of Italy Pass, I took a short break. I love cresting the top of a pass and seeing a whole new world open up beneath me. I always found the top of mountain passes interesting. Often times, different rocks can be found up here than at lower elevations. Looking in one direction, the mountain looked as if humans had paved it with some large stones and then weathered over time. Looking towards Mount Julius Ceaser, you can see all of the rocks are aligned in the same direction, pointing towards the sky. Then I picked up a few pieces of trash some thoughtful hikers left behind up here. Come on, people.
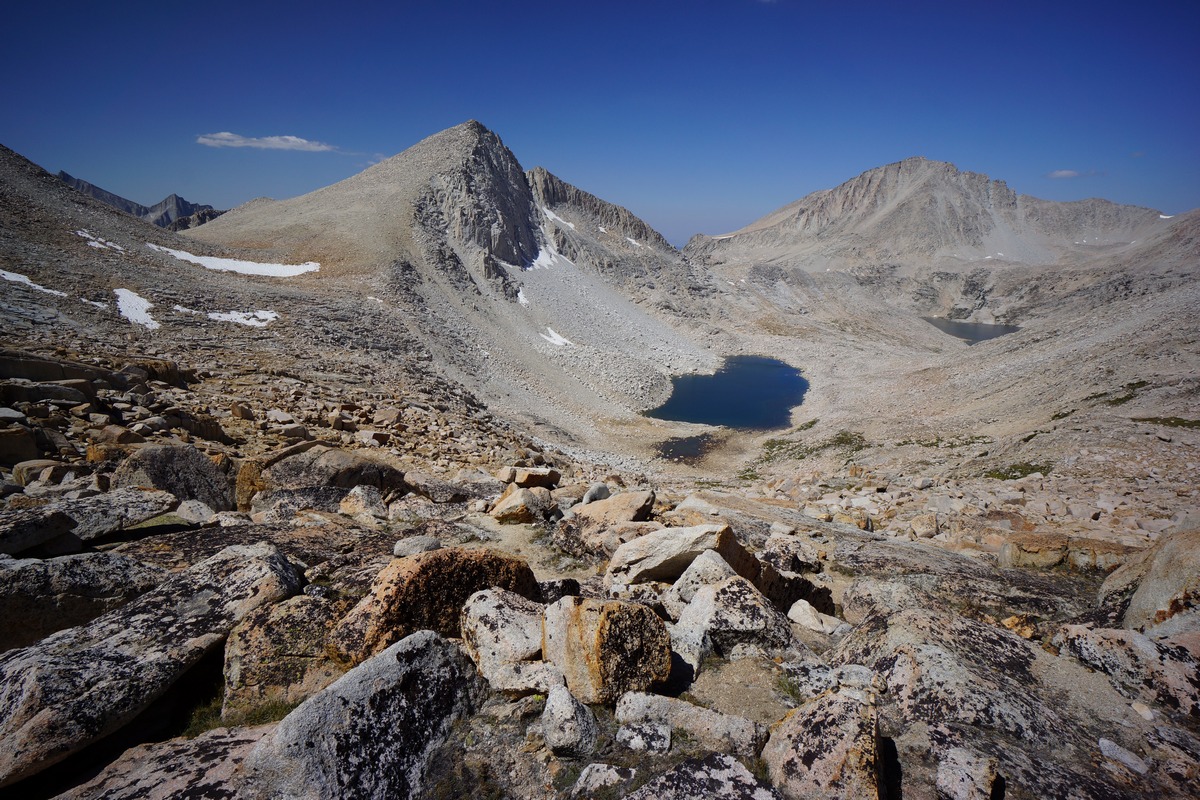
Skirting the mountainside towards Dancing Bear Pass, above the long patch of snow on the left. Jumble Lake below
Heading down from Italy Pass wasn’t too bad. I originally planned on dropping down much farther towards Jumble Lake than I actually had to. I was surprised at how easy the route looked going from Italy Pass to Dancing Bear Pass. It looked much easier in person than it did on the map. Usually, the opposite is true.

This section didn’t have much in the way of giant boulders, which was nice. The rocks were smaller in size and there were a few patches of snow here and there. Great views as well. I even passed a campsite up here, a flat spot with no rocks just large enough for a one man tent. It also seemed like there was a use trail here, but it faded away often. It was not really needed though as the terrain was open enough and easy enough to not be a problem regardless.
Below Dancing Bear Pass there was a large patch of snow that remained. I stayed north of the snow, where the route looked easiest. The climb up the pass was short and simple.

Dancing Bear Pass
Dancing Bear Pass is an interesting one. It’s a long, flat area in between two peaks. Most passes have a bunch of rocks piled up and generally are just more rugged. Towards the middle of the pass, it’s actually very sandy. Since the pass is so long on the top, you can’t really see much from the middle.
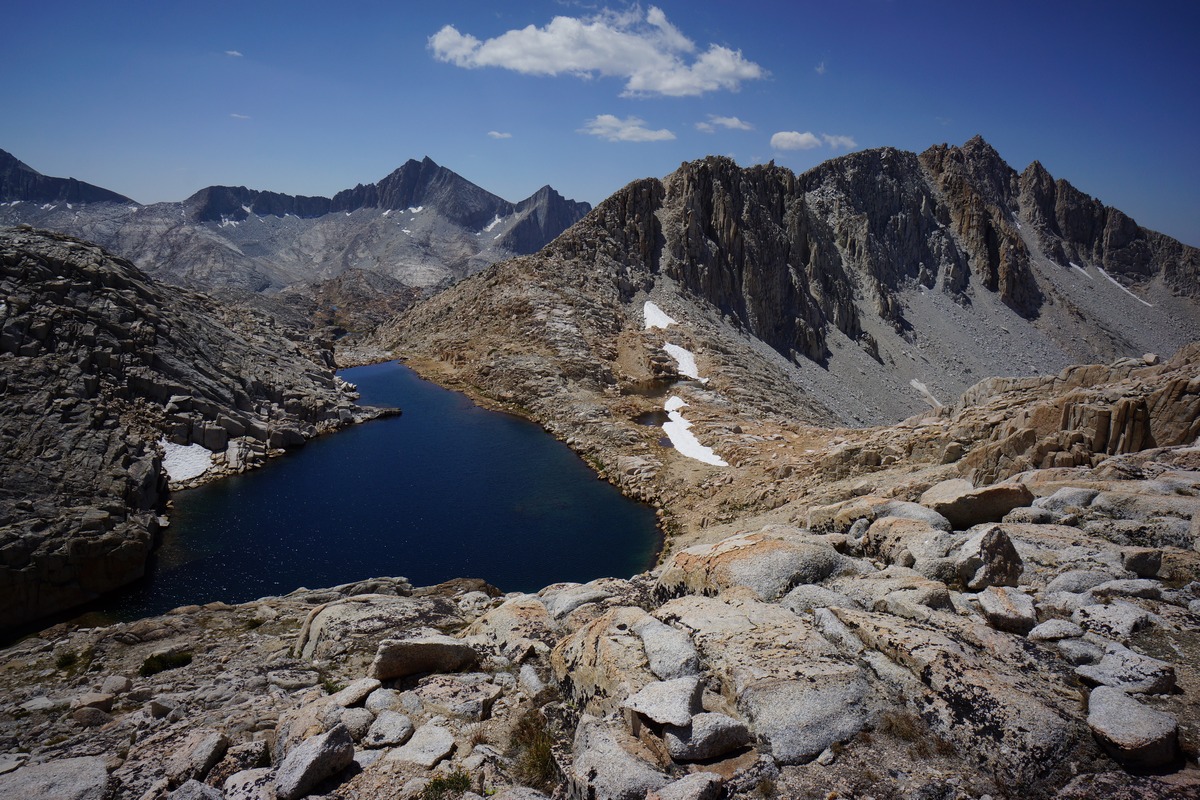
White Bear Lake from Dancing Bear Pass
Bear Basin panorama

Exiting Dancing Bear Pass, I had my first view of Bear Basin. Seven Gables can been seen clearly in the distance. I stopped here to take a food break. While doing so, I heard some yelling in the distance. I scanned the horizon and saw a couple of guys above White Bear Lake. One of them was waving his arms. I waved back, and I think that was the purpose of the yelling… to say hello. Well, hello back, and glad you aren’t injured or something, because that’s what I was thinking at first. I watched them drop down towards White Bear Pass, and eventually they headed down the pass towards Lake Italy.
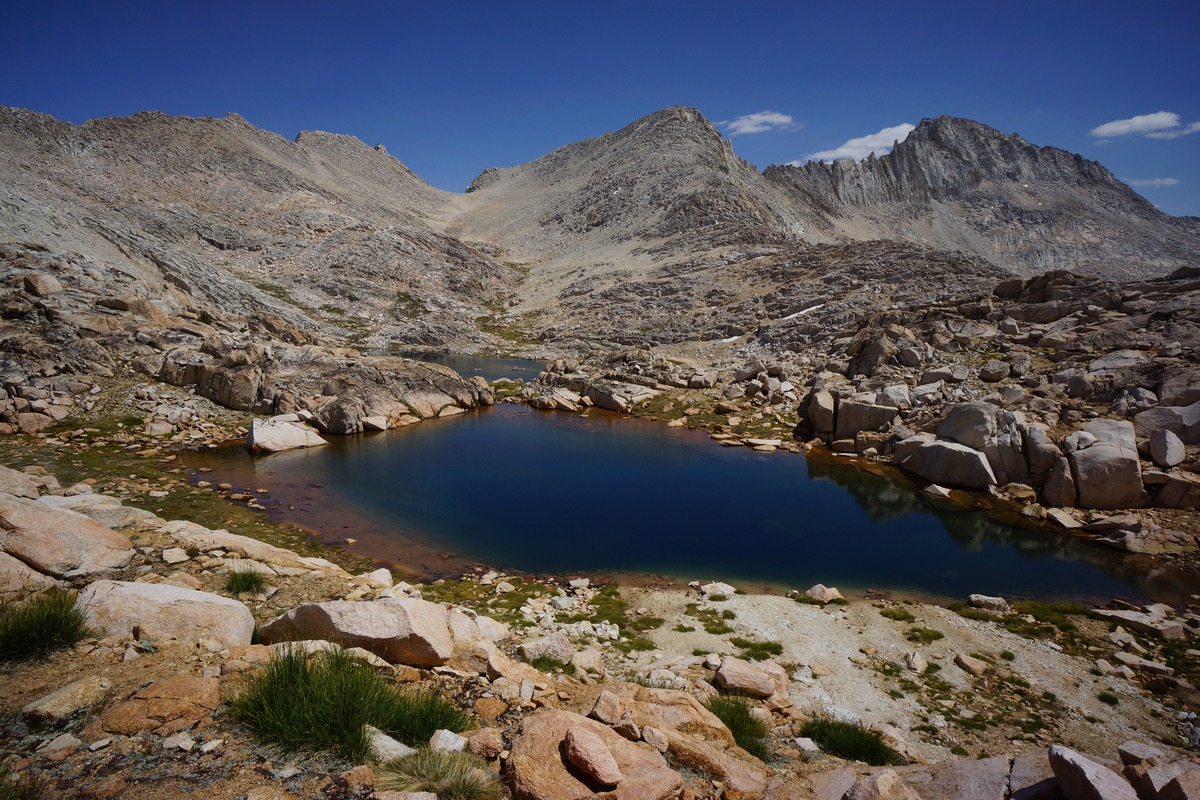

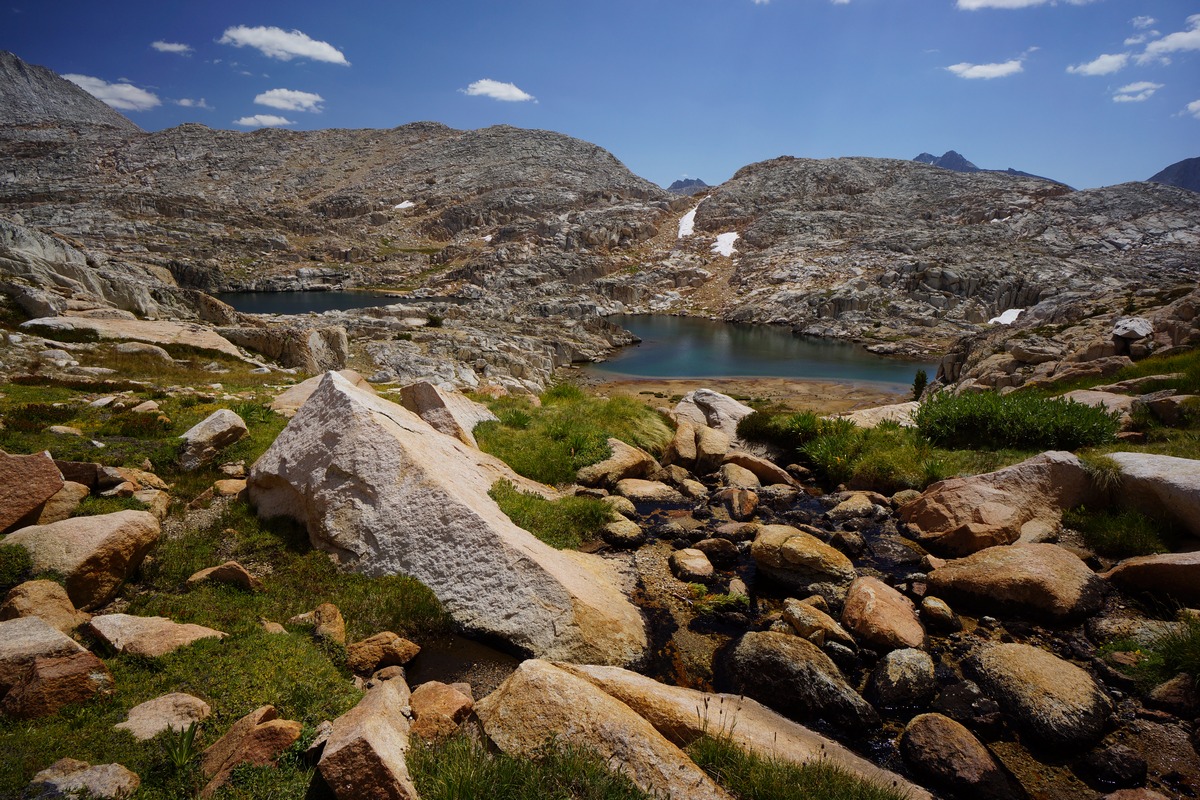
Big Bear Lake
It was a short hike down Dancing Bear Pass to the knob above White Bear Lake, near the area the guys where yelling from earlier. I hugged the eastern side of the knob as I made my way downhill towards Big Bear Lake. Light use trails exist, but nothing you can count on to take you from one place to another. Most of my hike through the area would be considered off trail.
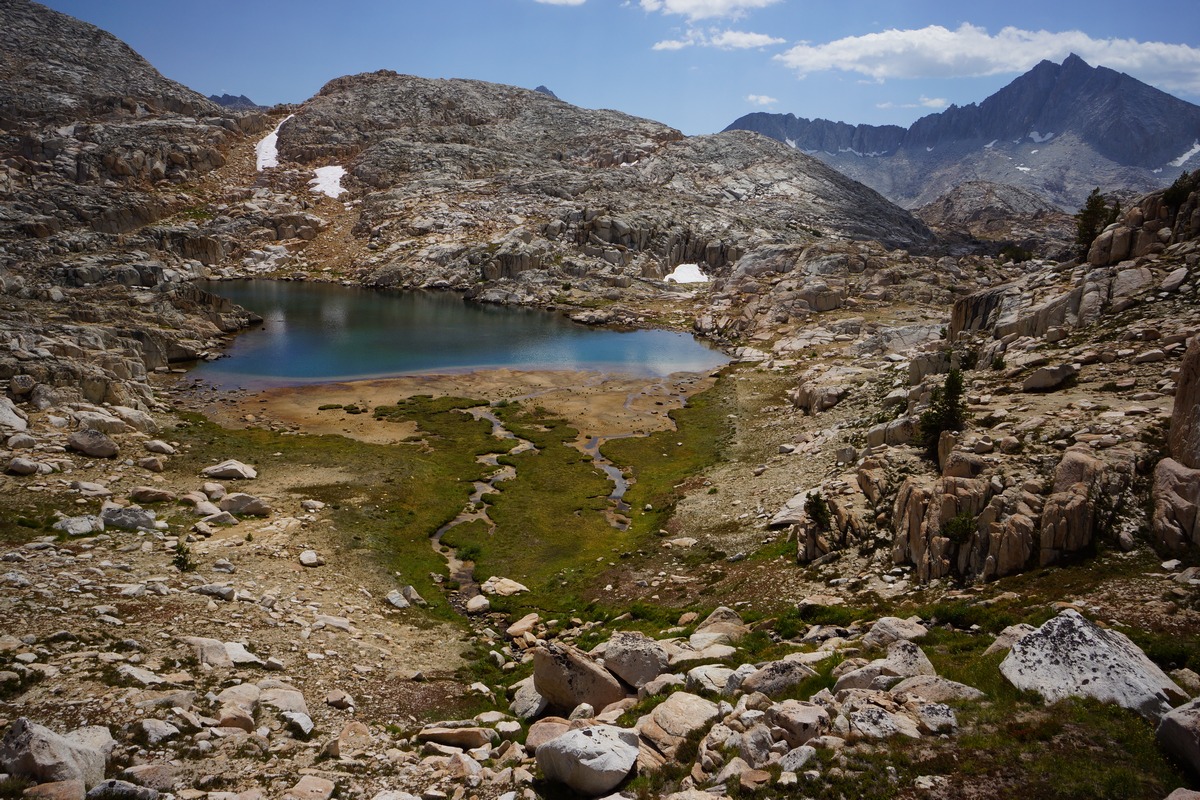
Big Bear Lake & Seven Gables

Big Bear Lake
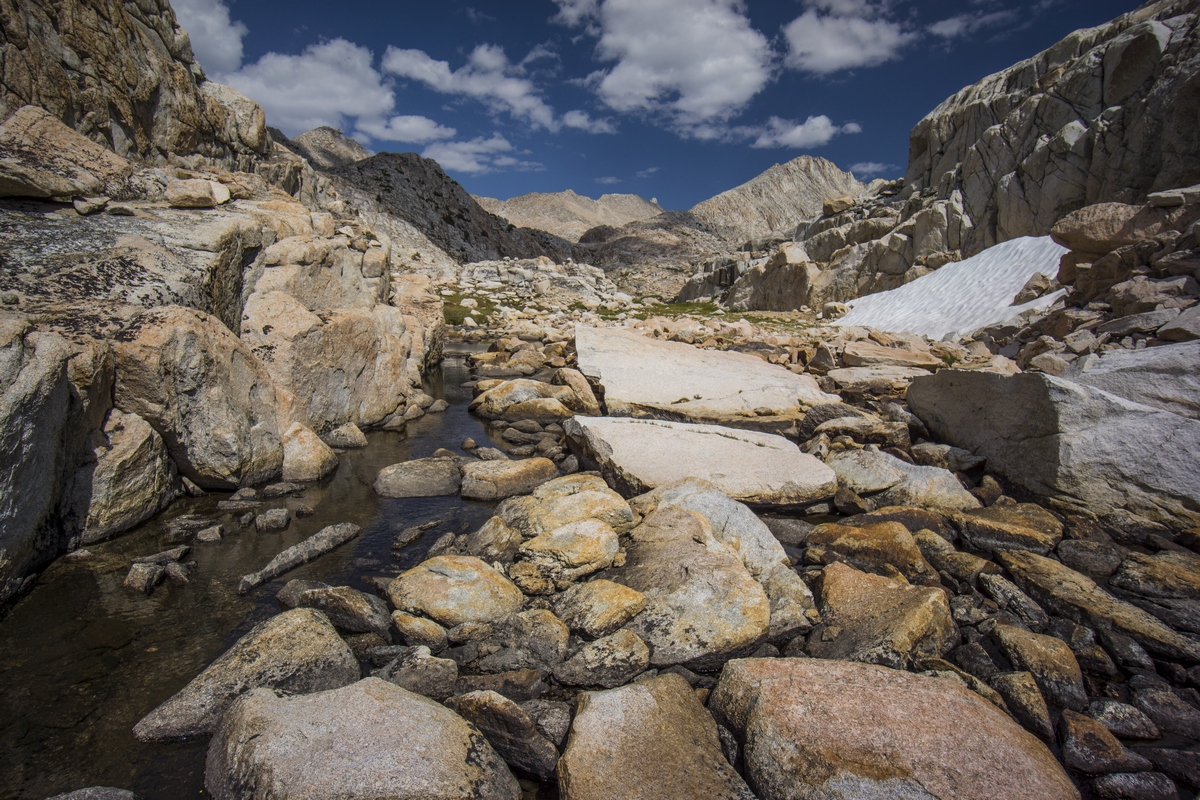
In between Big Bear and Little Bear lakes
The hike through Bear Basin was awesome. I thoroughly enjoyed the entire route through the basin. My only regret is not having more time to spend here and explore. I got the impression that few people visit the area, exactly what I was looking for. The terrain wasn’t as tough as other places, with large area of grass and flatlands, along with some occasional boulder fields of course. At least, it was fairly easy along my chosen route. There were only a few sections where I was forced to work my way through large boulders.
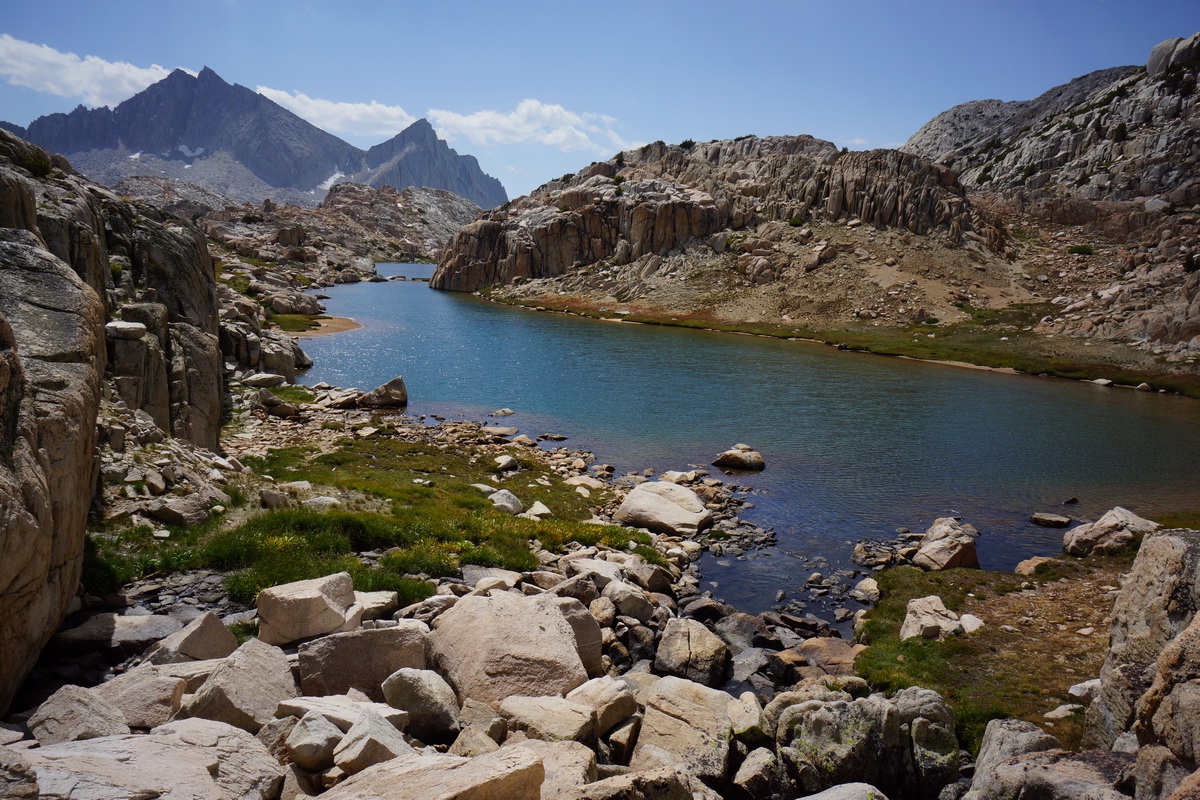
Little Bear Lake
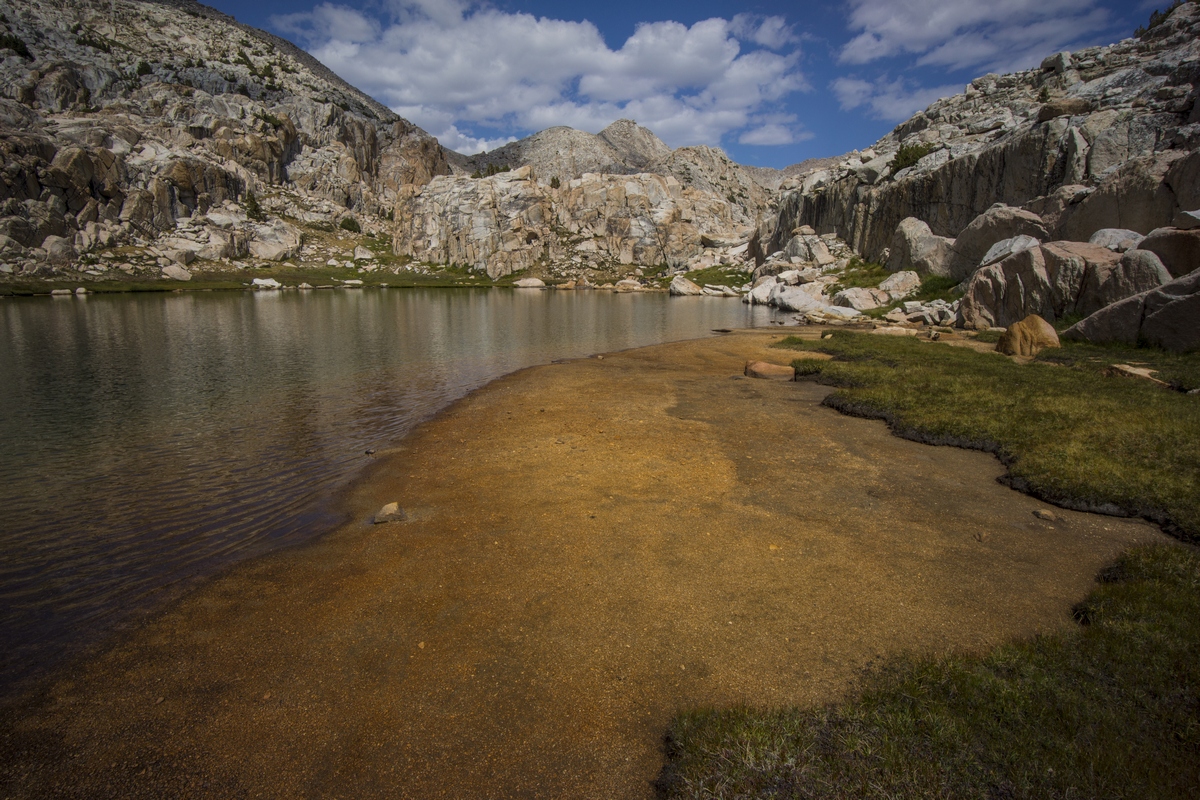
Little Bear Lake

Little Bear Lake
Little Bear Lake was particularly appealing to me. Coming from Big Bear Lake, the outlet drains into a narrow little canyon where the stream runs underneath some boulders. After hiking through this short section, Little Bear Lake comes into view with Seven Gables in the distance beyond the west end of the lake. This area looked appealing to camp at, but I had my mind made up already for Vee Lake.


In between Little Bear Lake and Vee Lake lie more tiny, unnamed lakes that offered spectacular views as well. For anyone interested in photography, I would try to fit more time in here as I could not walk very far without finding something to shoot. I also saw a marmot bumbling around in this section, one of a handful I’ve seen this trip.
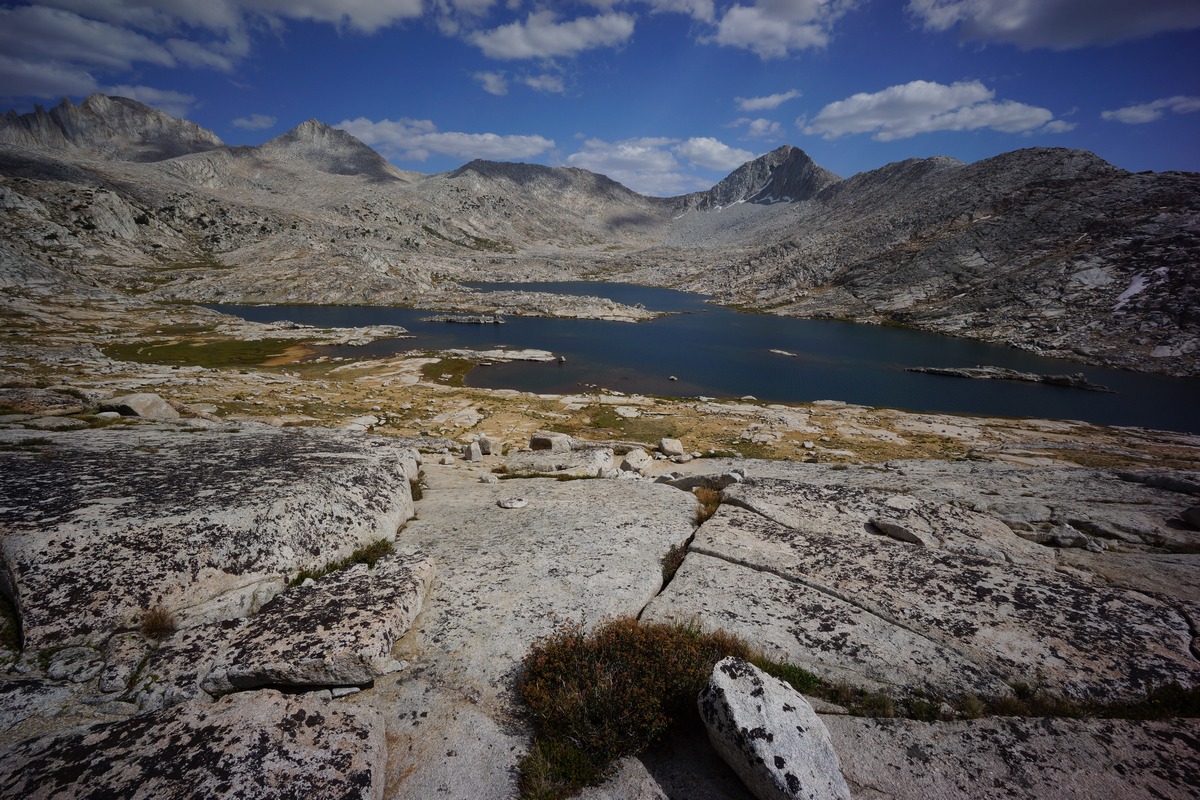
Vee Lake
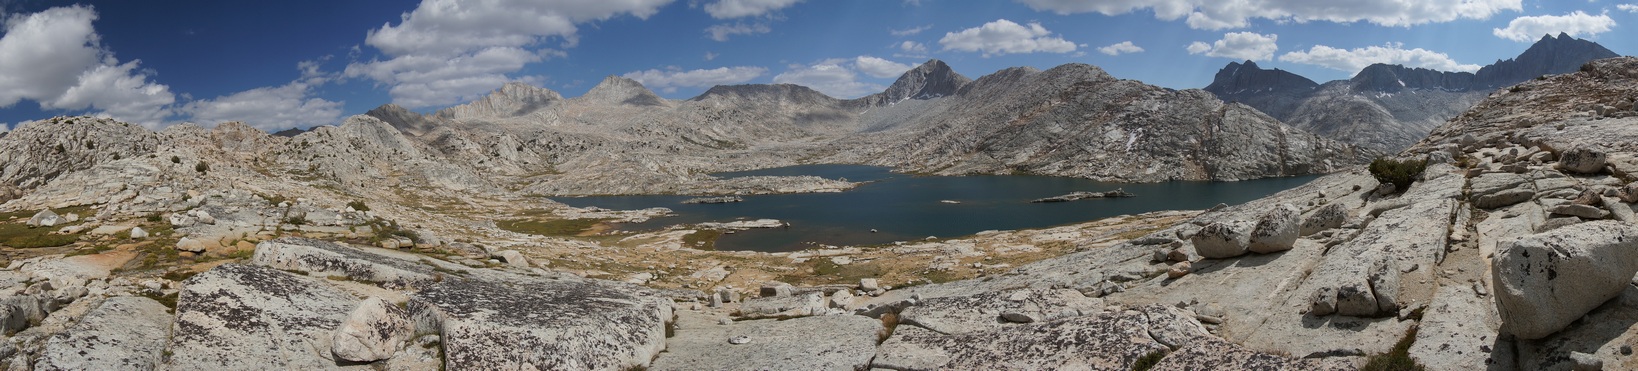
Vee Lake panorama

When I got my first glimpse of Vee Lake, I realized how large it actually was. I dropped down almost 200′ to get to the lake, and quickly realized that there weren’t many good campsites. Not that the view wasn’t good, but there was nowhere to camp that offered any “amenities”, such as places to sit or protection from the wind. And right now, it was really windy.
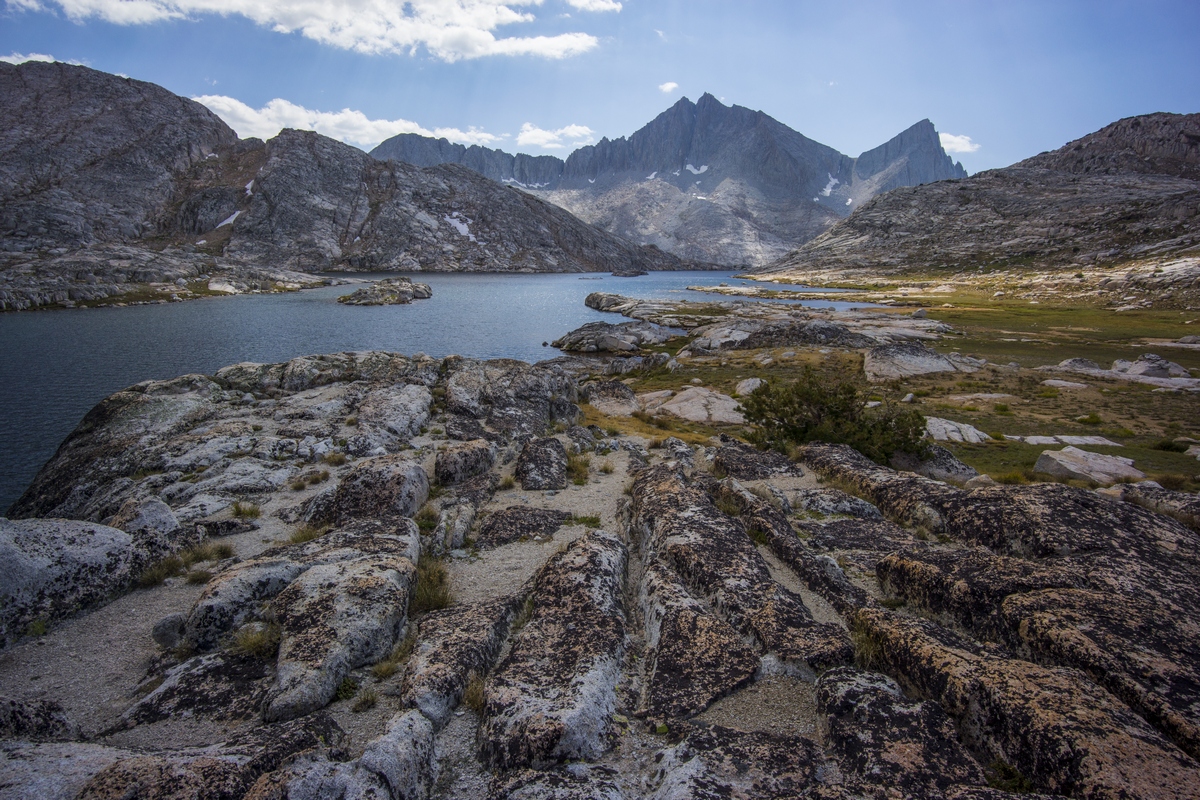
Vee Lake
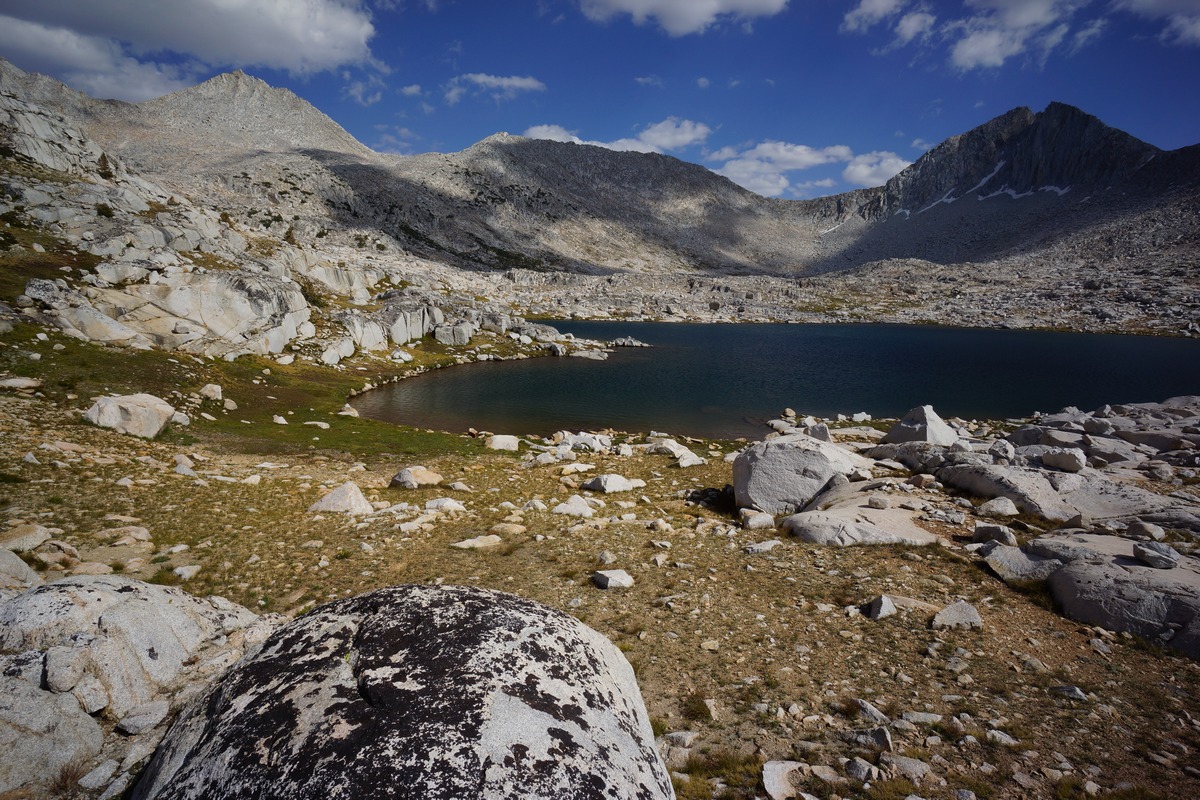
On the eastern end of the northern spoke of the “V”, there was a large grassy field that I was thinking could be a potential campsite. When I got there though, it was really soft and soggy, not a place you’d want to camp. I kept walking around the lake, towards the inside of the “V”. Again, I saw no previously used campsites, although I did not make it all the way to the inside of the “V”. It was just too windy here to consider it. After having my tent blown over by wind in the middle of the night twice before, I have a strong distaste for windy campsites. I turned around and went back to the northern shore, near where I originally came down to the lake.

Vee Lake campsite
I found a flat spot to place my tent here on the northern shore of Vee Lake. It was windy here too, but probably less windy than the little peninsula in the inside of the “V”. I figure the wind will just die down when the sun sets as it has done every day since I’ve been here. After getting my tent set up, I walked the shoreline for a bit taking some pictures. I then noticed another guy camping on the peninsula in the center of the “V”, just past where I was checking earlier. I wonder if he was there when I was over there and I just didn’t see him, or if he moved in right after I left the area. Either way, he can have that constant wind that was coming directly across the lake from the direction of Seven Gables. Plus, less distance for me to cover in the morning tomorrow when leaving from this spot.

Golden Trout
Now it was time to try my hand at fishing once again. I headed down to the lake and found a bit of a peninsula that jets out into the water, with deep water alongside it. First cast, bam! Landed a 10″ Golden Trout, my first Golden ever. Caught it on a mepps #2 spinner with a gold blade. Awesome, the fishing is going to pick up, I thought. I got my GoPro out and attached it to my headband, hoping to get some fishing action on tape. After that though, no bites all night. I moved around several times and switched lures, but that was the only fish of the night. Since my 10 day non-resident fishing license cost me a staggering $47, I dubbed this fish the $47 trout.
I try to do the right thing by buying these non resident fishing licences, but I know many people don’t buy them out here and I can understand why. $47 is way too much for a 10 day licence. I firmly believe that states need to lower these prices to encourage more people to buy the licences. Chances are, you’ll never get caught out here, especially in places like this well off the beaten path. But if you expect people to do the right thing, then give them some incentive to do so! Don’t rape us with those insanely overpriced fishing licences, and then wonder why people don’t buy them.
Done with fishing, I headed back to camp to wait for the sun to set. With no fire, I found myself going to be shortly after sunset each day this trip. Thankfully it was summer (the best season!) and there was actually some day light to work with. When I do my annual desert hike in January, the sun sets at 5 something. With no fires, that’s a looong night to spend in the tent. At least this was more manageable.
Day 9 – Monday August 29th, 2016
Miles Hiked – 8.96
Elevation Gain – 1274′
Route – Vee Lake to Marie Lake

Morning day 9
Just as I thought it would, the wind died down last night right after the sun set. It was a calm and very cold night, the coldest yet. It was 31°F in my tent when I checked around 4am. Amazingly though, within 15 minutes of the sun rising, I was perfectly comfortable in shorts and a t shirt!
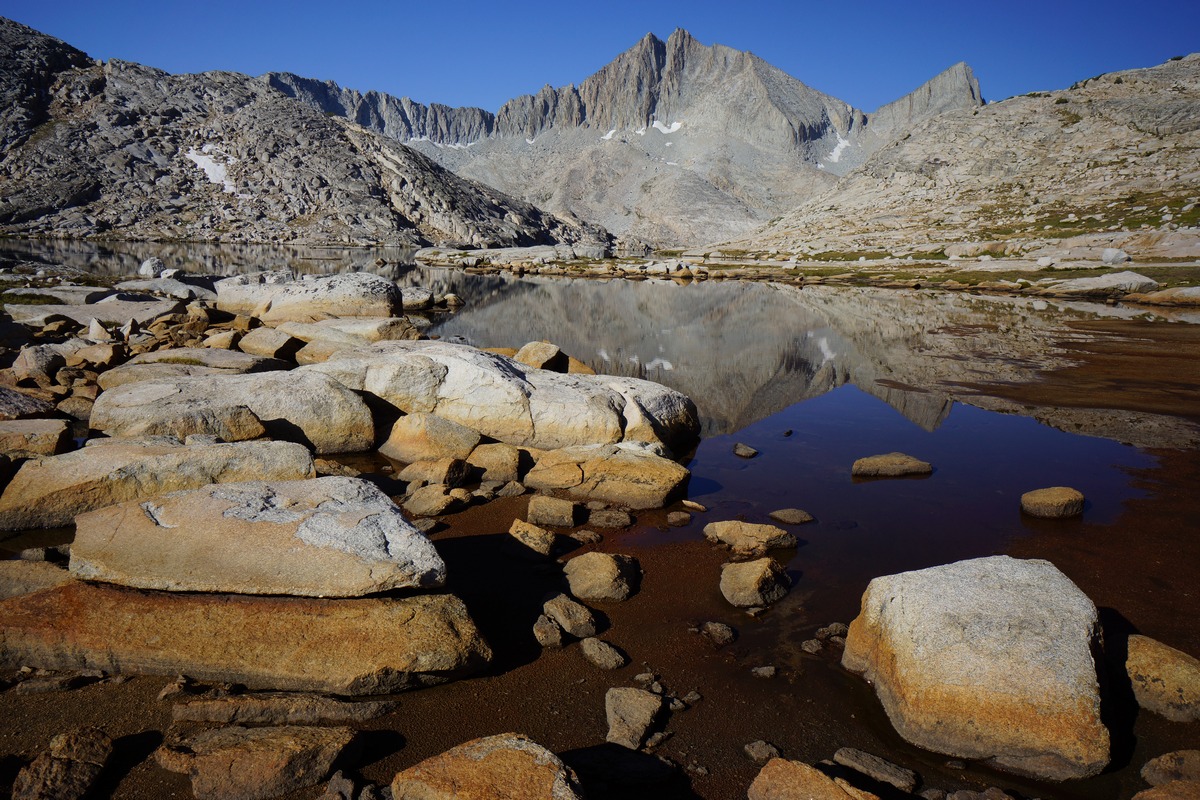
Seven Gables reflection on Vee Lake
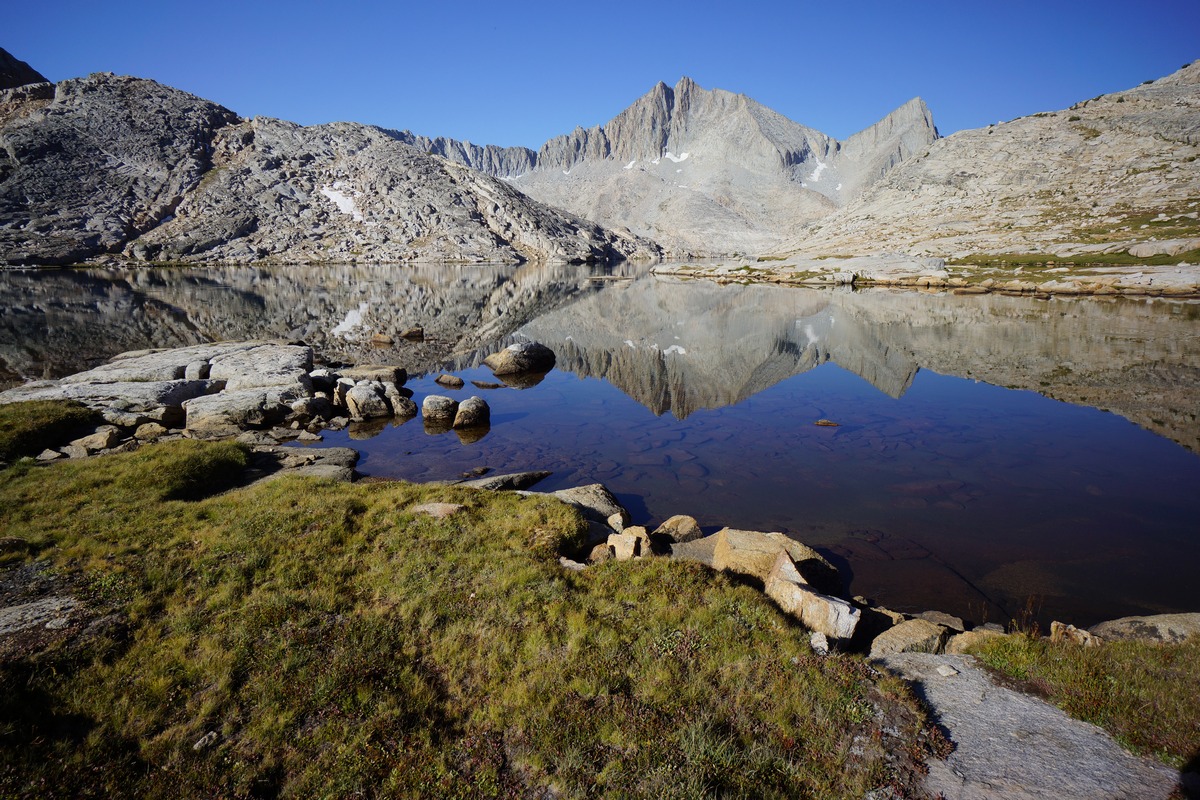
Today my plan is to hike down the outlet of Vee Lake to the Seven Gables Lakes area, then follow that downhill to East Fork Bear Creek. Follow that down to the PCT/JMT junction and then head to Marie Lake for my final night in the Sierras.


Seven Gables near the outlet of Vee Lake
After packing up camp and heading out, I took my time hiking around Vee Lake. The water was calm and provided an excellent reflection of Seven Gables.

Looking south towards Seven Gables Lakes
I hiked towards the outlet of Vee Lake. There was a spotty trail along the shoreline which quickly faded away where outlet starts draining downhill. I saw no trail or cairns to help me navigate down. It wasn’t super hard, but it was slow going. There was a myriad of tiny streams crisscrossing the hillside, with some thicker shrubs along some of these streams too.
Once down into the Seven Gables Lakes area, I was expecting to find a trail. I didn’t. There were some very occasional cairns, but nothing solid to follow the entire way through the valley. At least not that I saw. I stayed west of the creeks and lakes. Not saying that’s the best route, it’s just what I happened to choose based on what I saw.


It was actually a little chaotic down here in the valley. There were tons of little streams flowing from every which way. There were also many small hills and rock outcrops to navigate around, and it made it tough to just look at the terrain and choose the best way through it. It’s obvious which direction I need to go, but which is the best path through the obstacles in front of me? It wasn’t tough terrain, but slightly time consuming from a route finding perspective.

I ended up hiking west of the lowest Seven Gables lake, but later I saw what appeared to be a trail to the east of the creek flowing out of the lake. Later, where the canyon narrows near point 10,851′, I found myself up on a small set of cliffs where I had to backtrack in order to get down. Great view from the cliffs though. It looks lake a lake from above, but the map shows a river.
Down by the water I saw from above, I saw some prints in the muddy shoreline that could have been mountain lion. They were too big to be a coyote and didn’t appear to have claws. Not bear prints either. Despite the fact that these prints were here, it would have been my choice for a campsite if I were to stay in the area overnight. I found this area to be the most scenic of part of this morning’s hike.
The canyon narrows…

I still wasn’t sure if I was on the right or wrong side of the creek when I reached the point where the canyon narrows. There was no easy way across it, so I just kept moving downstream. I took an awkward path over a rocky ridge at the narrowest point of the canyon, and found myself about 40′ above the creek below. The narrow section was only a few hundred yards long, and then the landscape widens again.
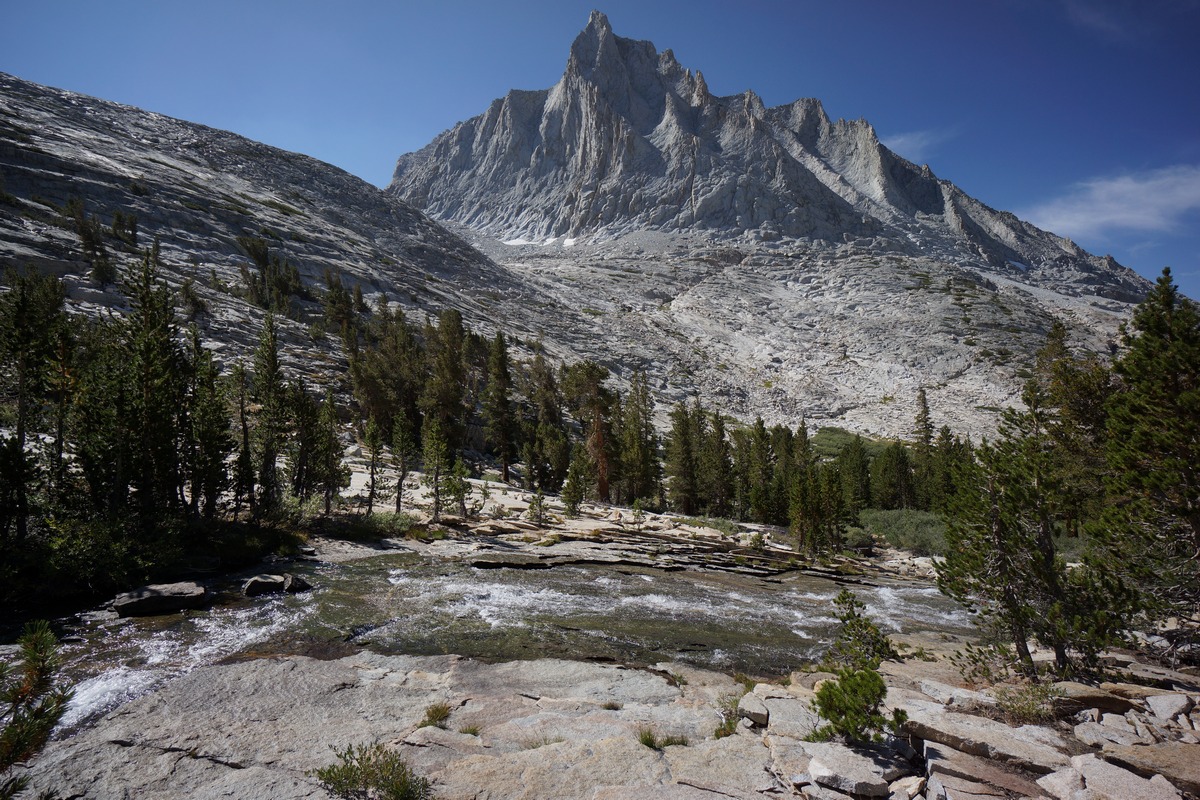
Upper East Fork Bear Creek

Looking west from East Fork Bear Creek
From here on out, the trail was extremely spotting for a while. I know I need to follow the creek downhill,but there wasn’t much in the way of cairns or markers to let you know you’re on the right path. The best route appeared to alternate between the two sides of the creek, requiring semi-frequent crossings. Nothing that you can’t hop rocks across, but without cairns or trail markers, it’s easy to continue on well past an area where you should have crossed. This meant hiking through thick bushes, boulder fields and all sorts of other obstacles when I missed the “right way”. Needless to say, the next couple hours weren’t necessarily fun.

East Fork Bear Creek
The top section of East Fork Bear Creek was the worst. The middle section got a littler better. I passed a European guy in this section going uphill, and man, I did not envy him at the moment. The long slog uphill alone is enough, but he’s carrying a 65 pound pack. He was headed to Vee Lake, and like Martin 2 days ago, was only carrying a 1:100,000 map. I let him take some pictures of my 1:24,000 map of the route from here to Vee Lake and gave him some info on my hike through the area before we parted ways.

The smell of pine trees was refreshing!
There was a short section where the trail headed uphill again, working it’s way around a hillside. After this section, which is roughly halfway between the PCT/JMT and the point where the canyon narrows at the top, the trail started to become more solid. Finally, something to follow and I can start to cover some miles. The pine trees were getting larger now, and the smell was a refreshing reminder of life below the treeline.
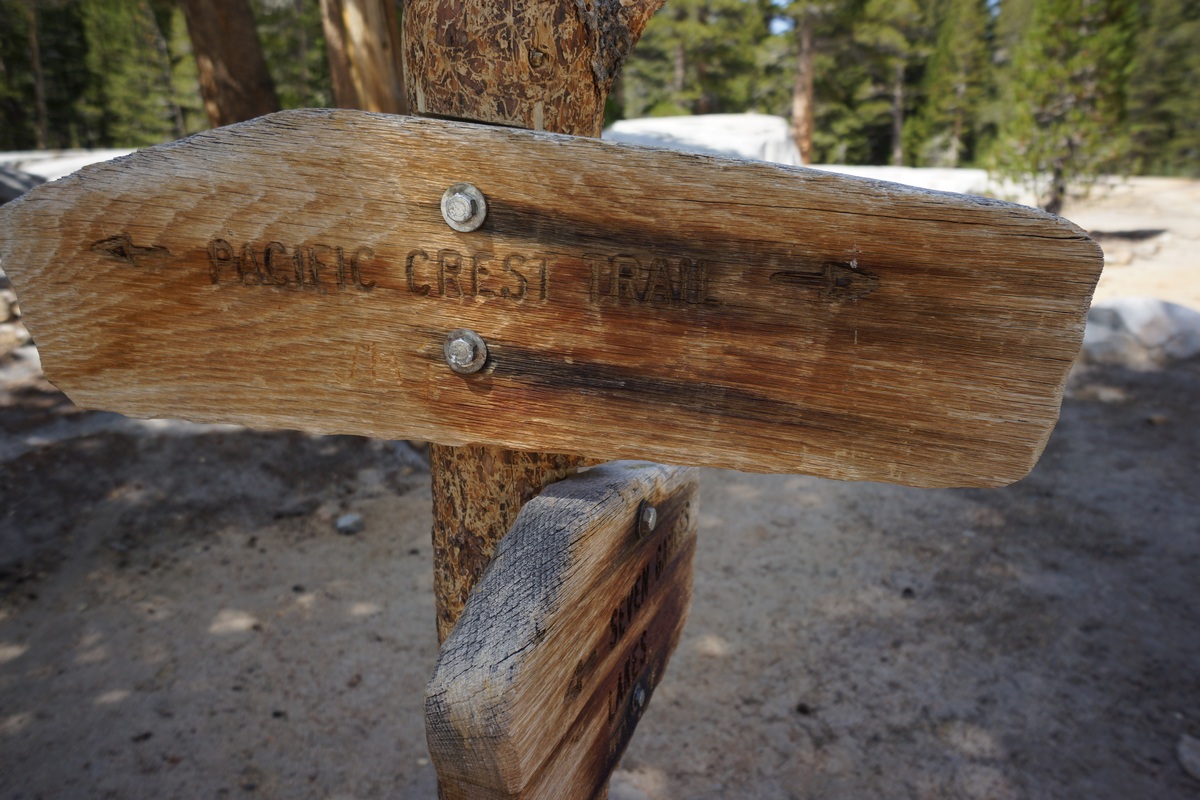
Back on the PCT
I made great time through the bottom half of East Fork Beak Creek and eventually hit the PCT/JMT. There was an easy water crossing here, with rocks strewn across the creek. The trail seemed massive to me now since I haven’t seen anything this well maintained in several days. Almost like a 4 wheeler path.


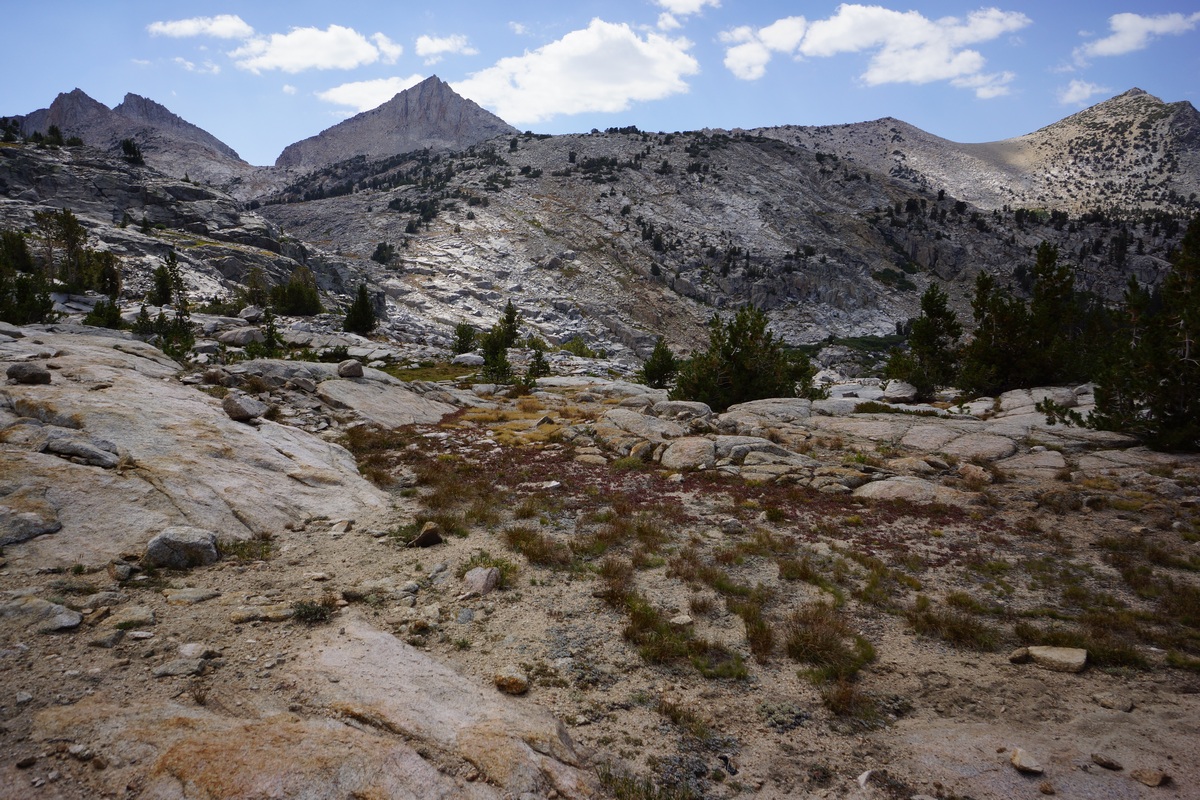
Nearing Marie Lake
I made great time moving along the PCT/JMT. For the first mile or two, there wasn’t much to see. Then, the trail winds through some nice meadows as it nears Marie Lake. I didn’t see a single person the entire way to Marie Lake, which was maybe 3 miles.

Trail around Marie Lake
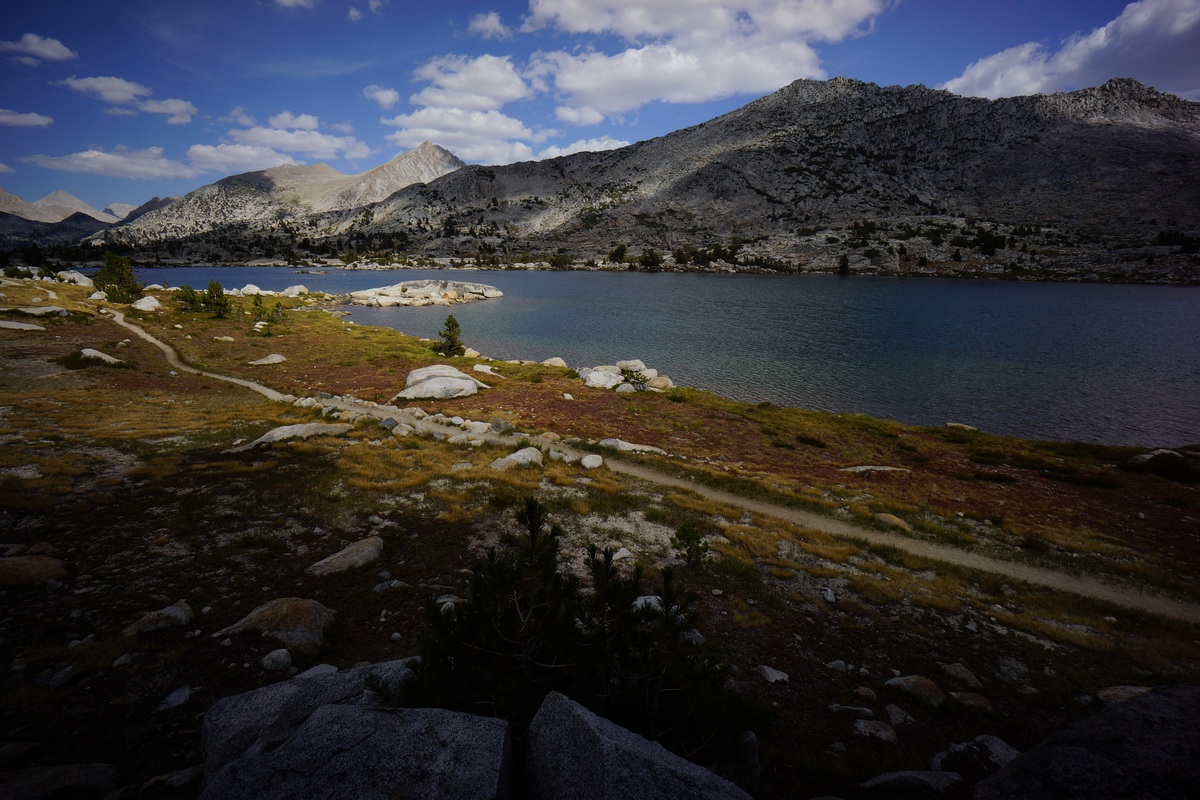
Marie lake
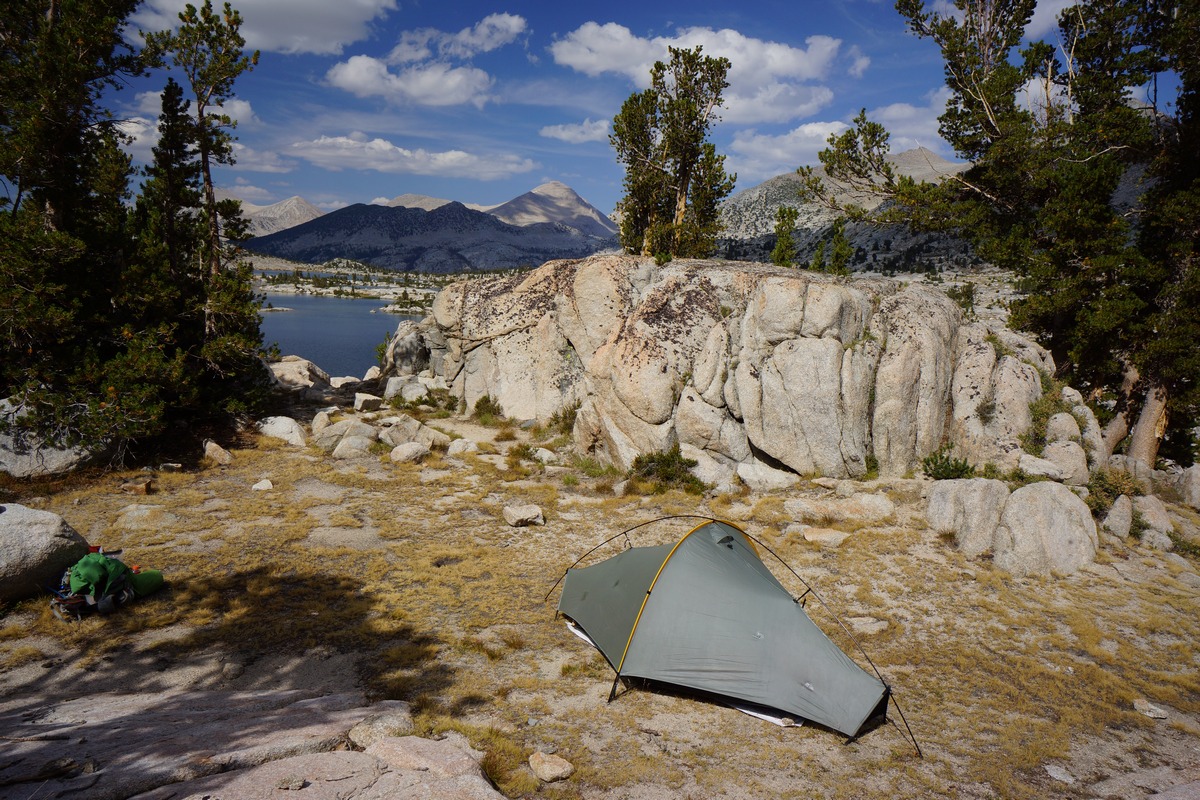
Camp above Marie Lake
I saw a few people at Marie Lake when I got there. They were all basically congregated near the large peninsula in the center of the lake. I kept moving towards Seldon Pass, thinking I could grab a campsite near the pass so I’d have less distance to cover tomorrow morning heading back to Florence Lake. I didn’t see much, but then I found a great spot perched above the extreme southern end of the lake, near the inlet. This was also directly below Seldon Pass, so it was perfect for me. The only downside was that my campsite required a bit of a walk down to the water.

After setting up camp, I set up my GoPro on the tripod to do a time lapse of the clouds moving over Marie Lake. I had tons of GoPro batteries left since my solar charging panel was working so well, and didn’t mind setting it up and just running it til the battery dies.
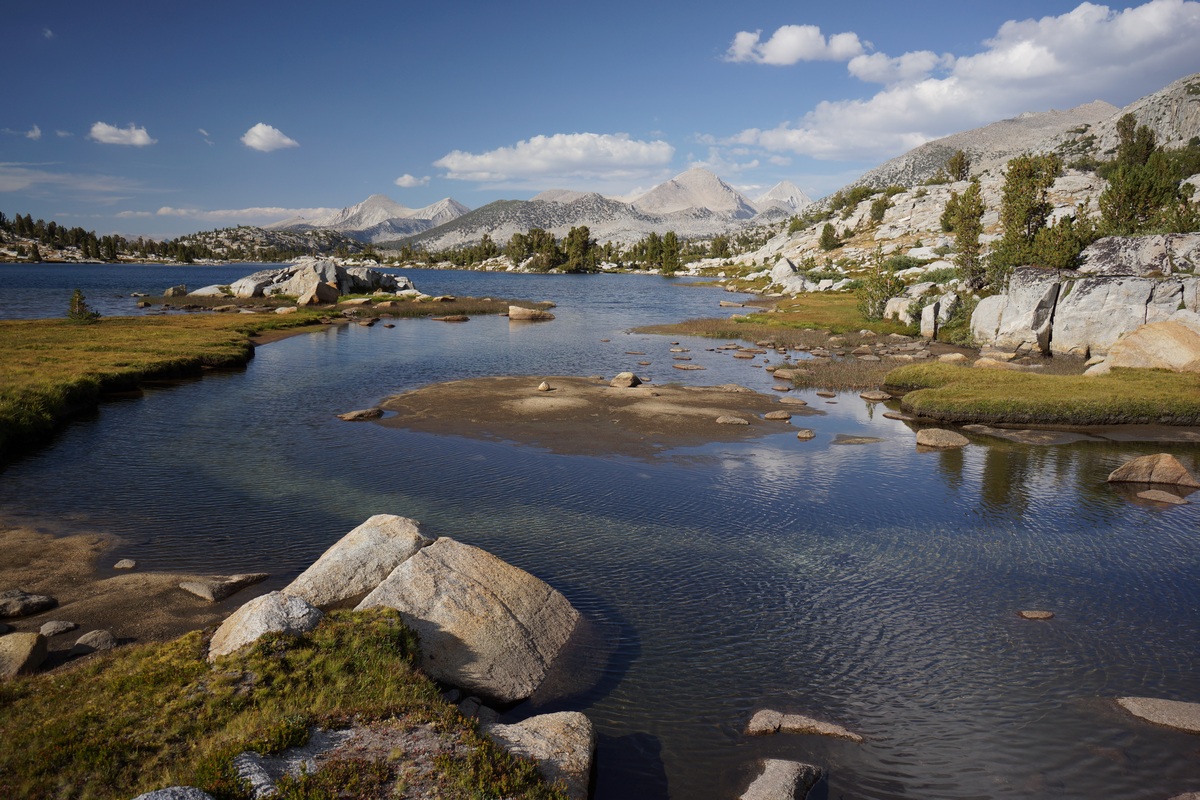
Channel near Lake Marie’s inlet
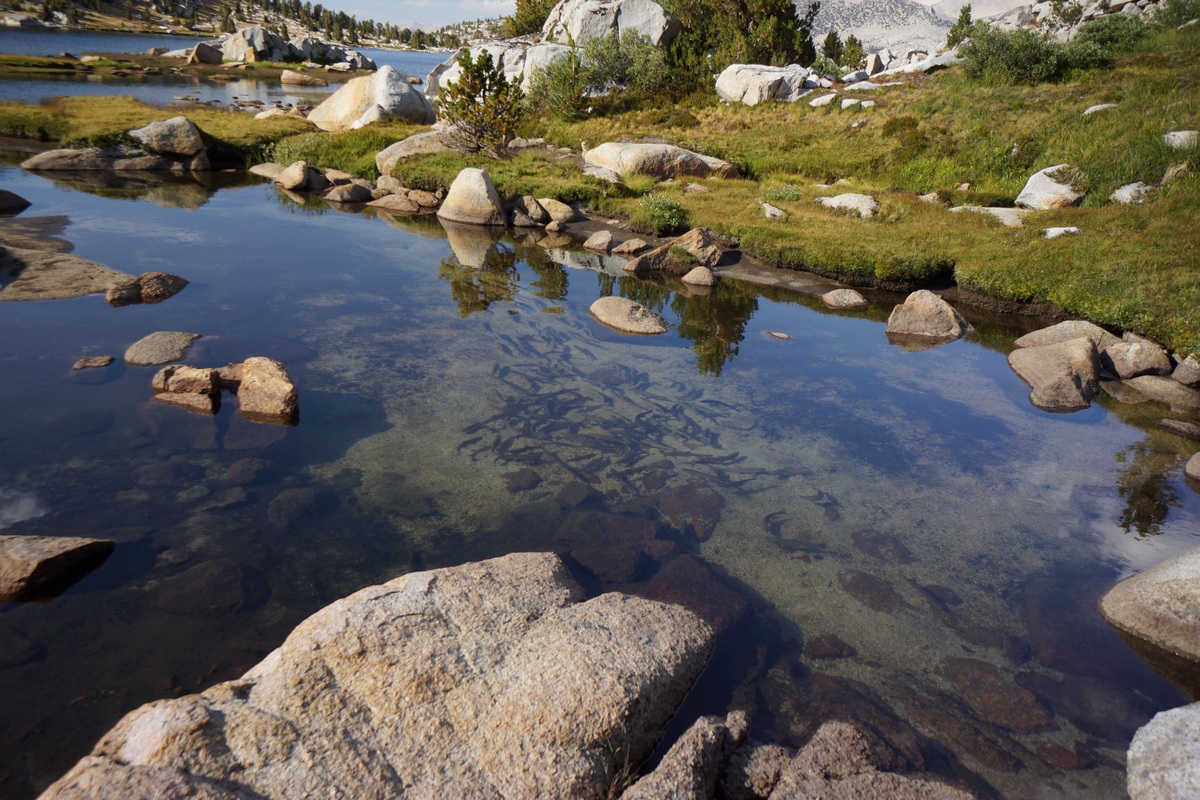
I already scared away many of this fish by the time I got close enough to take this picture
While the GoPro was doing it’s thing, I went down to the lake to fish. The shoreline was pretty poor for fishing on this side of the lake. The shoreline was soggy and wet, and the water was shallow in many areas. I could see a clear, distinct channel running through the lake coming from the inlet, so I had a closer look at this. The shoreline here was soft and soggy too, but I could see tons of fish sitting in the channel. Following that channel to the inlet itself, there was a pool filled with hundreds of trout! They got spooked as I approached, but hey, they’re here!
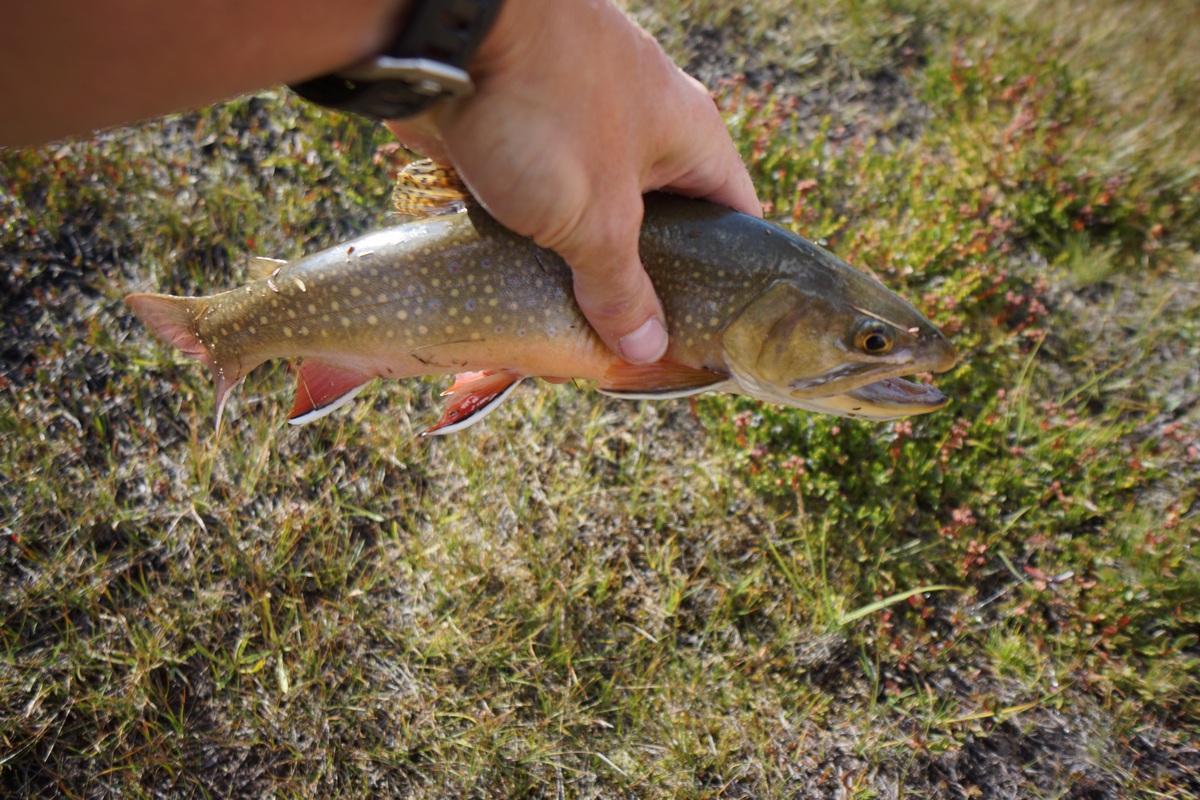
Brook Trout
I went back to the channel, away from the pool by the inlet and proceeded to cast. Before long, I had caught a couple of 12″ brookies. I’m glad I caught these fish, because I didn’t really want to call that golden I caught last night the $47 fish. I had fun chasing these fish around for a few hours, and I think I ended up with 4 on the night. I caught them all on the same mepps #2 spinner with the gold blade.
Back at camp, it was time to reflect on my hike as sun set on my final night. I was feeling great for being out here for 9 days. I wasn’t overly tired, sore, sunburnt, hungry, anything. I just felt good. Of course, I was really looking forward to a hot meal and a shower.
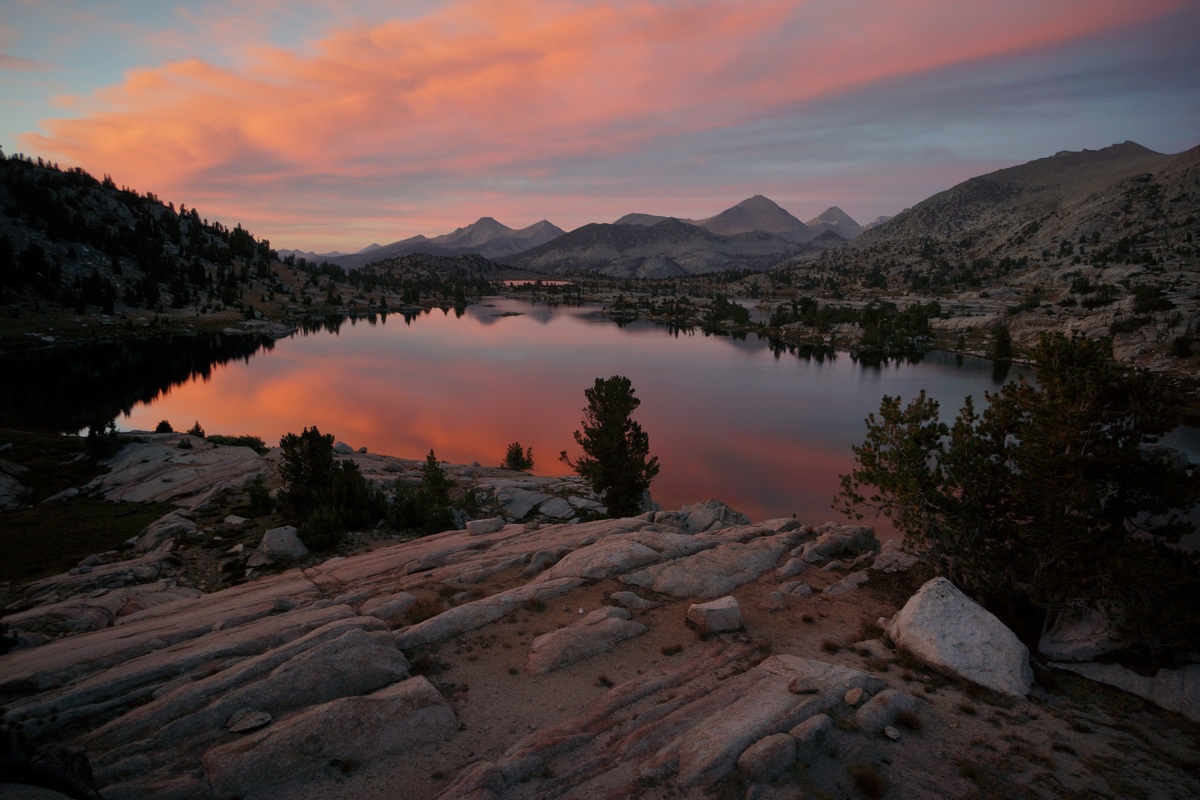
Sunset over Marie Lake

Firey funnel cloud thing
I was treated to an incredible sunset tonight filled with lots of red and orange, reflecting over Lake Marie. There was also this weird looking “funnel cloud” very nearby that ended up turning red as well. That was interesting. All in all, a great way to end my last night out here.
Day 10 – Tuesday August 30th, 2016
Miles Hiked – 12
Elevation Gain – 780′
Route – Marie Lake to Florence Lake
I woke up at 6am today, much earlier then the the rest of the days on the hike. I want to make it to Florence Lake by 11am so I can catch the Ferry. Otherwise, I’ll have to wait until 1pm for the next one. I was on the trail by 6:55 this morning.

View south from Seldon Pass
The climb up Seldon Pass wasn’t too tough, but as I’ve said before, there’s nothing like a mountain pass in the morning to get the blood pumping. The view from Seldon Pass was better in the direction of Marie Lake then Sallie Keyes, but at this time of the morning, the lighting wasn’t up to par yet to take many pictures. Besides, I was on a mission to get back to Florence Lake, and since I wasn’t sure exactly how long it was going to take, I had to get moving.
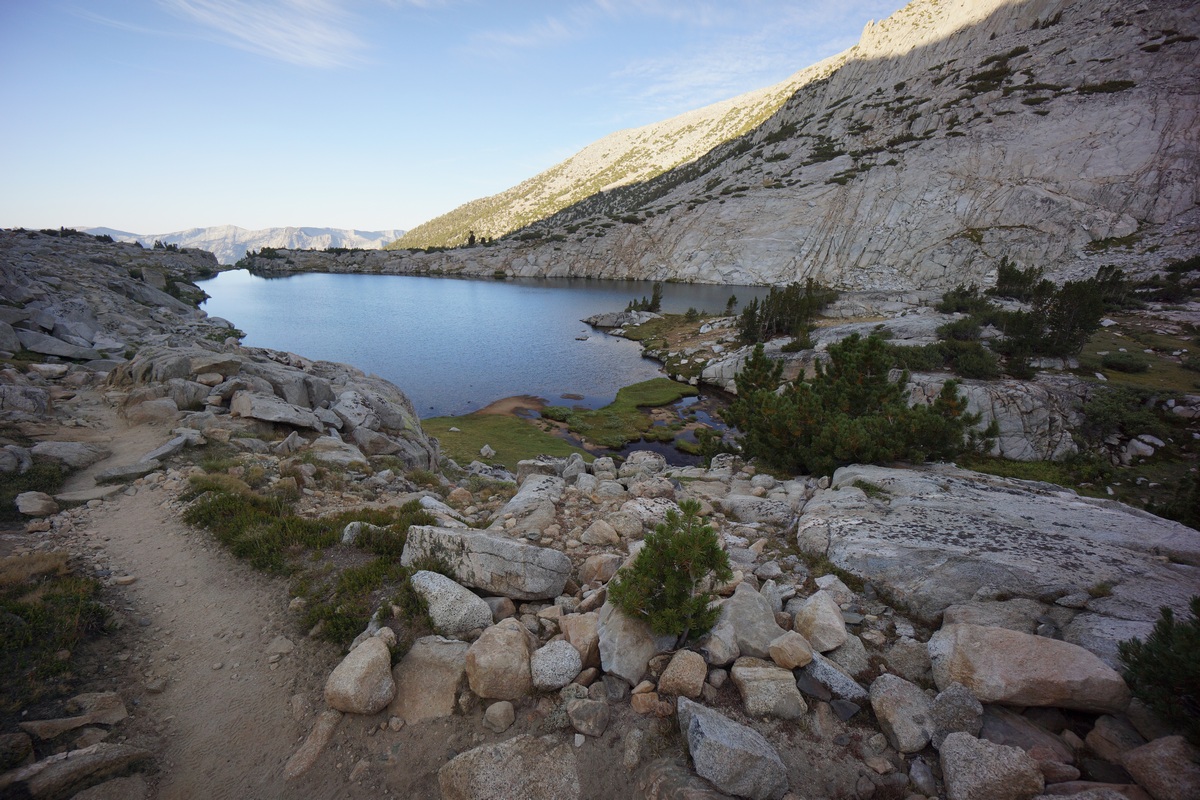
Heart Lake

Sallie Keyes Lake
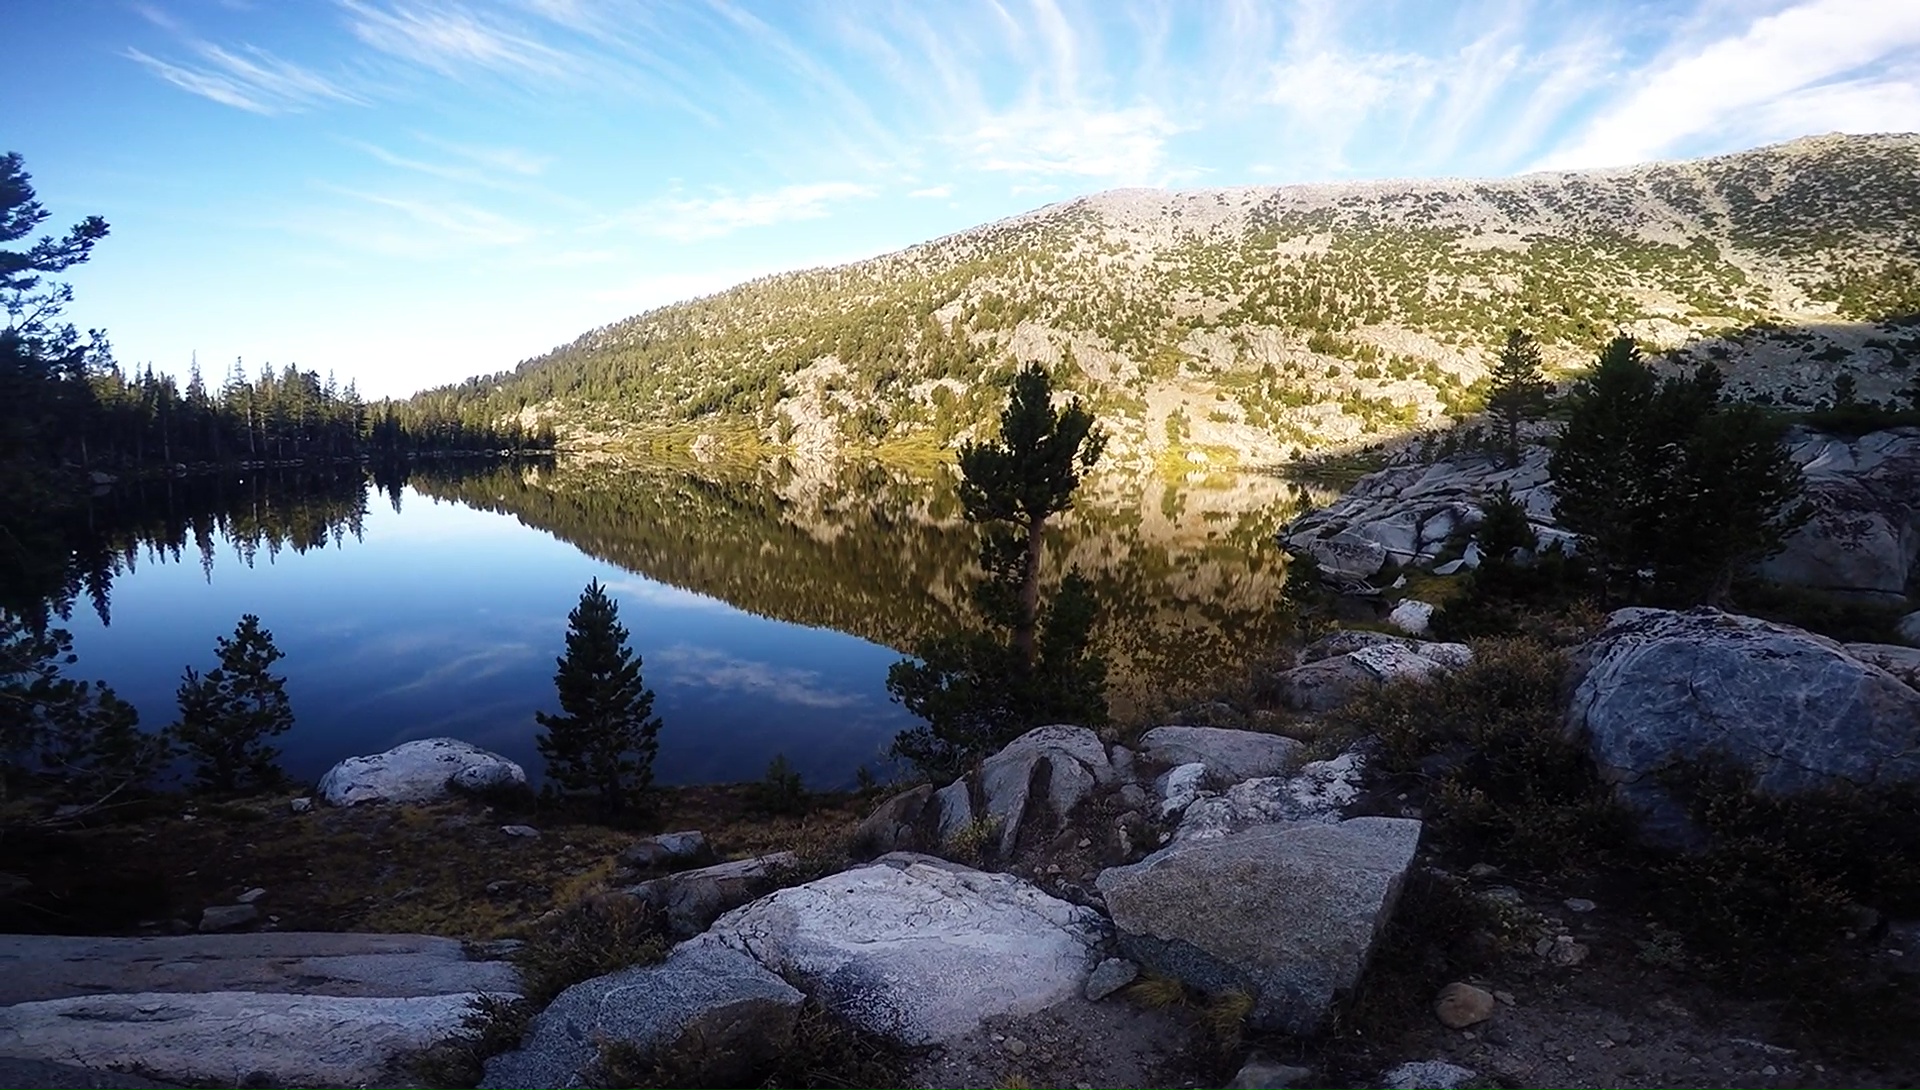
Sallie Keyes Lake
I stopped only briefly along Heart Lake and Sallie Keyes Lakes to take a few pictures, and moved on as quickly as possible.

First rays of sunlight hit Sallie Keyes Lake
There were a few people camping neat lower Sallie Keyes lakes, but nowhere else along this morning’s hike. Sallie Keyes Lakes looked so different then the lakes I’ve grown accustomed to in the high country. These lakes were surrounded by tall, thick pines and I thought I could have been at 5,000ft if I didn’t know any better.

Long stretches of unimpressive scenery
After Sallie Keyes Lakes, I really hauled ass. I was already fast walking all morning, and I stepped it up a notch from here on out. I was guessing this hike would be about 12 miles, and I was hoping to do it in 4 hours flat. Fortunately there was a very good trail today all the way from Marie Lake on, and it was all basically downhill. I was keeping a close eye on the time, and it was going to be close.

One of the only meadows in an otherwise uninteresting stretch on the trail
There was not much to see after passing Sallie Keyes Lakes. There were few meadows, and few distant views. You’re basically in the forest the entire way with nothing super interesting to see. That’s fine with me, since I don’t have time to stop and enjoy the scenery anyways. I’m really glad I didn’t choose to hike up this way in the beginning though. I didn’t even consider it, to be honest. 4,000’+ of elevation gain with a full pack on day one, when you’re not acclimated yet… not my first choice in routes. Still, I saw several people making this slog uphill. I’m just glad I’m going down!

Entire mountainside full of manzanitas
After crossing Senger Creek, the trail heads downhill steeply. Here, there’s a series of switchbacks that wind through an entire mountainside of manzanitas. All I could think about was my hike in the Sierras Ancha Wilderness, AZ in May, and some of the nightmare off trail sections there where I was hiking through thick patches of manzanitas. I have a big scar on my shin from one of them now, and have a new respect for that plant.
I continued to fast walk down the switchbacks until they ended, and it was just s teep trail through the forest again. Coming down, there’s a trail that leads off to the left and the right. The one that heads left is the official PCT/JMT, but heads southeast and away from Florence Lake. The other trail, heading right, is a “shortcut” trail that just runs directly south and joins up with the main trail running through the Blaney Meadows area. I went right as this was the obvious route for someone heading back to Florence Lake.
Now done with the worst of the downhill and on generally flat ground, I started to run a little. I had about an hour left to get back to the lake and it still looked a long ways away. Running with a backpack on is not fun, with the extra weight and having it flop around. Straps tend to come lose on your pack making it even more awkward. To make matters worse, I was running on about 500 calories for the day. I literally had no time to stop and eat, as I was realizing every minute counts.

Running to Florence Lake
I alternated between running and fast walking for much of the last hour. It was going to come down to the wire, and so I was running the last section. You can’t see the ferry until the you crest the final hill, and when I did, the boat was halfway across the lake already. I looked down at my watch and saw it turn form 10:59 to 11. So, he must have left at least 5 minutes early. I waved my armed and yelled at the top of my lungs before I realized he either can’t see/hear me, or he doesn’t care. Great, I just busted my ass for 4 hours to get here on time, just so the ferry could leave without me. Now i have to wait another 2 hours for the next one.
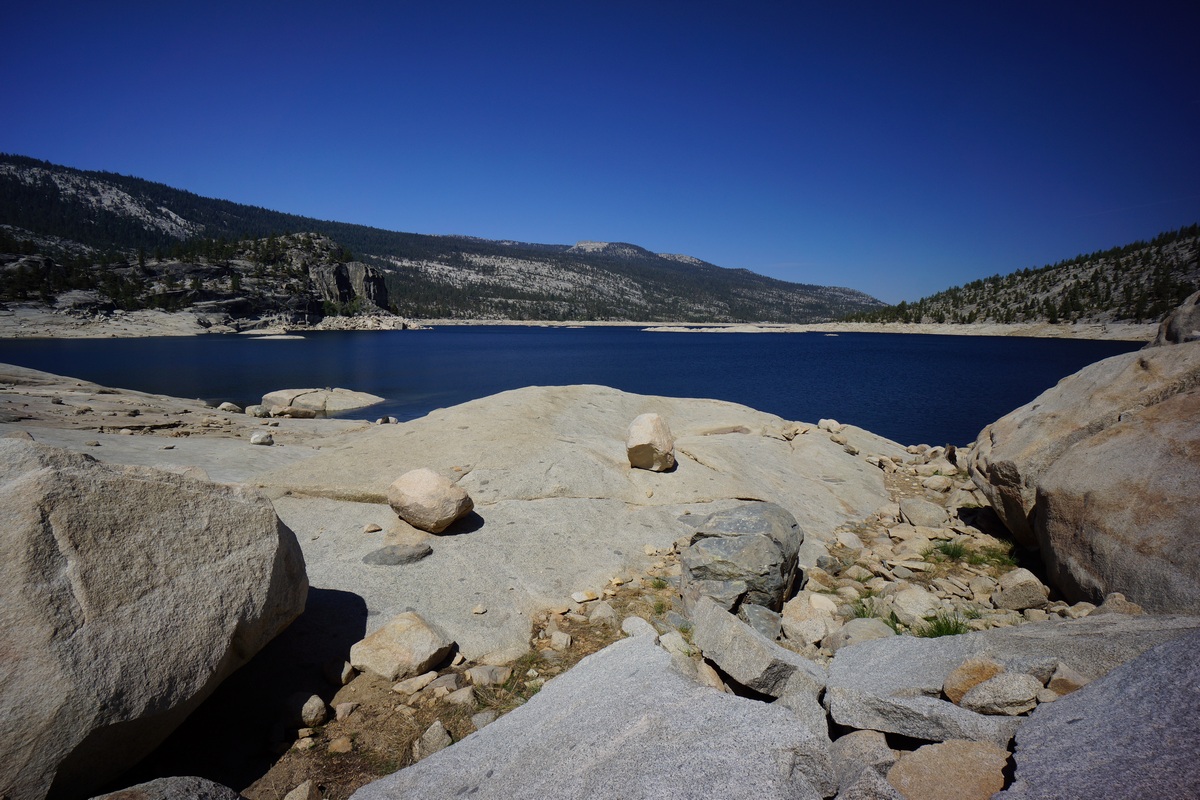
I had the same view of Florence Lake as I waited almost 3 hours for the ferry
I took refuge in the only shade in the area and took a nap. I was too pissed off to do anything else. I had plans to get back to Fresno early and actually have time to do something today, but now that’s not going to happen.
Eventually, other hikers started pouring into the area. We all moved towards the dock before 1pm, waiting for the boat to come. When 1pm rolls around, we still don’t see him coming. 1:30 hits, and still no boat. One of the other guys said there was some sort of phone at the top of the hill that can be used to call them, so he went up there to ask what’s going on. He came back and told us that there was a lot of wind on the other side of the lake and that their dock blew away. They said they would try to send out the boat again later this afternoon, but could not give us a time as to when they would be here to pick us up. Oh man, really? So now, I’m thinking I should just hike around the lake back to the car. It’s another 4 miles or so, but would require a little backtracking form here. Plus, I know as soon as I leave to do that, the boat will come. I considered it but stuck with my instinct to stay and wait for the boat. I pulled out my fishing pole to kill some time, and sure enough, just as I did that, we could see the boat on it’s way.
When the boat arrived, the captain was complaining that someone called and complained that he hadn’t shown up. He said something like, “Alright, who’s the one who called and complained that I wasn’t coming? I’m pissed now, you put me in a bad mood. I was busy chasing our dock that got blown away”. I turned and said to one of the other hikers “Ha, he’s pissed? I was here at 11am and he had already left. I’ve been waiting here for almost 3 hours”. Later on the boat, he admitted to leaving 5 minutes early. He said I was supposed to use the phone to call them before I had crested the hill above the boat docks so they know I’m close. Well, that was never explained to me. If it’s that important, it should be something you mention while everyone is on the boat, not after we’ve docked and people have already walked away. Apparently, that’s when he does the explanation of the phone bit. I mentioned what I went through this morning, doing 13 miles in 4 hours and running with my pack to get here on time, and the captain says “Oh, you must be a really good hiker”. Really? You smug little bastard. Kind of a crappy way to end a great trip.
Final Thoughts
I would not start my hike from Florence Lake again. I’d rather just not deal with the ferry ride, or the long scary drive on Kaiser Pass Rd. I’d rather start somewhere like North Lake where I can start at 9,000’+ instead of 7,000 at Florence. Logistically though, it’s more difficult, but that would be my ideal approach to the area.
Many of my past hikes were ones where I created a route and never wavered from it. It feels good to create a plan and stick to it, but this hike taught me some valuable lessons in flexibility. My 3rd day here forced me to re-evaluate my route when the weather turned bad. I ended up chopping off the Ionian Basin section as well as the Sabrina Basin section. I had a feeling that my exit plan from the Sabrina Basin area was going to be tough, and was unsure of the danger level. I chose a safer route and worked in an extra day to either take as a zero day or to spread out between the remaining days. This layer of flexibility was something I am not used to, but I enjoyed. I supposed I forced myself to do shorter days this hike and focus on enjoying the area instead of just covering ground.

How my feet looked everyday. The Inov8 Roclite 295s do a piss poor job of keeping the fine debris out.

Ace sports tape over a band-aid seemed to keep my blisters at bay
My Inov8 Roclite 295 shoes were a major let down. They let way too much fine debris into the shoe to be viable for most types of terrain. Damn you Inov8, bring back the Roclite 315s! These shoes allowed me the “opportunity” to perfect my blister care methods though. Putting a band aid over the blister and then putting Ace sports tape over the band aid seemed to work wonders for me in terms of preventing the blisters from getting worse and minimizing the pain.
As always, questions and comments are welcome!
If you found my trip report useful, please don’t hesitate to leave a comment! Alternatively, if you feel you have any information you’d like to share with others regarding this hike, please feel free to leave that below in a comment as well.
Sierra Ancha Wilderness, AZ – 30 Mile Loop Hike May 2016

Overview
View All Photos | Sierra Ancha Wilderness Video on Youtube
- Location – Sierra Ancha Wilderness, AZ
- Park Administration – Tonto National Forest
- Fees & Permits – None
- Travel Logistics – Flew into Phoenix, rented a Toyoa Yaris
- Length Of Time Hiked – 3 Days, 2 Nights
- Miles Hiked – 30
- Trail Type – Loop
- Trailhead – Parker Creek
- Trail Difficulty – 6.5/10 (not including off-trail segments)
- Fires Allowed – Yes
- Solitude – 7.5
- Scenic Beauty – 8
Notes
This trip was a bit different for me. I had about a week to plan it, and hadn’t had a chance to do any training. I’ve only been lifting weights since my return from Big Bend in January, and hadn’t even had the time to do that during the previous month. The week leading up to the hike, I got in about 4 hikes of around 6 miles with a 45 pound pack and did stair climbs one day with a 45 pound pack.
The route I planned out winds in and out of the Sierra Ancha Wilderness, within the Tonto National Forest. It was somewhat difficult planning loop hike through. The geology of the area and way the trails are laid out make it better suited for day hikes or point to point hikes instead of loops, unless you don’t mind either hiking large parts of the same trail twice, road walks, or huge elevation gains/losses. I identified a lot of areas I wanted to see here but in the end, it was impossible to make a loop out of them.
Sierra Ancha Wilderness 30 Mile Loop Hike – Map & GPX Files
[sgpx gpx=”/wp-content/uploads/gpx/Sierra_Ancha_Route_Hiked.gpx”]
Getting There
I flew out to Phoenix after work on Friday. The plane left Detroit around 4:15 EST and I landed around 5:50 PST. After picking up my backpack from baggage claim and the rental car, I headed out. The car was a little Toyota Yaris, only $57 out the door for Friday-Monday. I stopped at a gas station and picked up a couple gallons of water, and stopped at a Culvers to grab my last hot meal for a couple of days.
Now, I headed east on 60 towards Globe. This is my second trip to Phoenix since hiking a big 92 mile route in the Supes in 2014, and I can really appreciate the view of the Superstition Mountains after hiking the entire ridgeline on my last day of that hike. Driving along 60 provides great views of the Superstition Mountains and has access to the Peralta trailhead, which I still have yet to visit. I hear it’s one of the busiest trailheads in Arizona.
The drive along 60, 188 and 288 is very scenic. Unfortunately it was getting dark quick and by the time I hit 188, I couldn’t see anything. I turned onto 288, crossed the Salt River and started heading uphill again. Even though it says the pavement ends, the surface is just as good as the pavement elsewhere on the road, and it wasn’t rough anywhere. I made it to the Parker Creek trailhead, right off hwy 288, around 8:45pm.
I decided to sleep in the car tonight. Big mistake. The Toyota Yaris drivers seat is almost impossible to sleep in. The stupid headrest is tilted forward at a ridiculous angle, preventing you from leaning your head back at all. It was a long night, and always, part of the adventure. That’s what I tell myself, anyways.
Day 1 – Saturday May 21st, 2016
Miles Hiked – 11.49
Route – Parker Creek Trailhead to Edward Spring

Parker Creek Trailhead
I couldn’t sleep and just woke up at 5am when the sun rose. I filled my water bladder, water bottles, ate breakfast, etc and finally got on the trail around 6:30am. The sun would barely have risen yet back home.
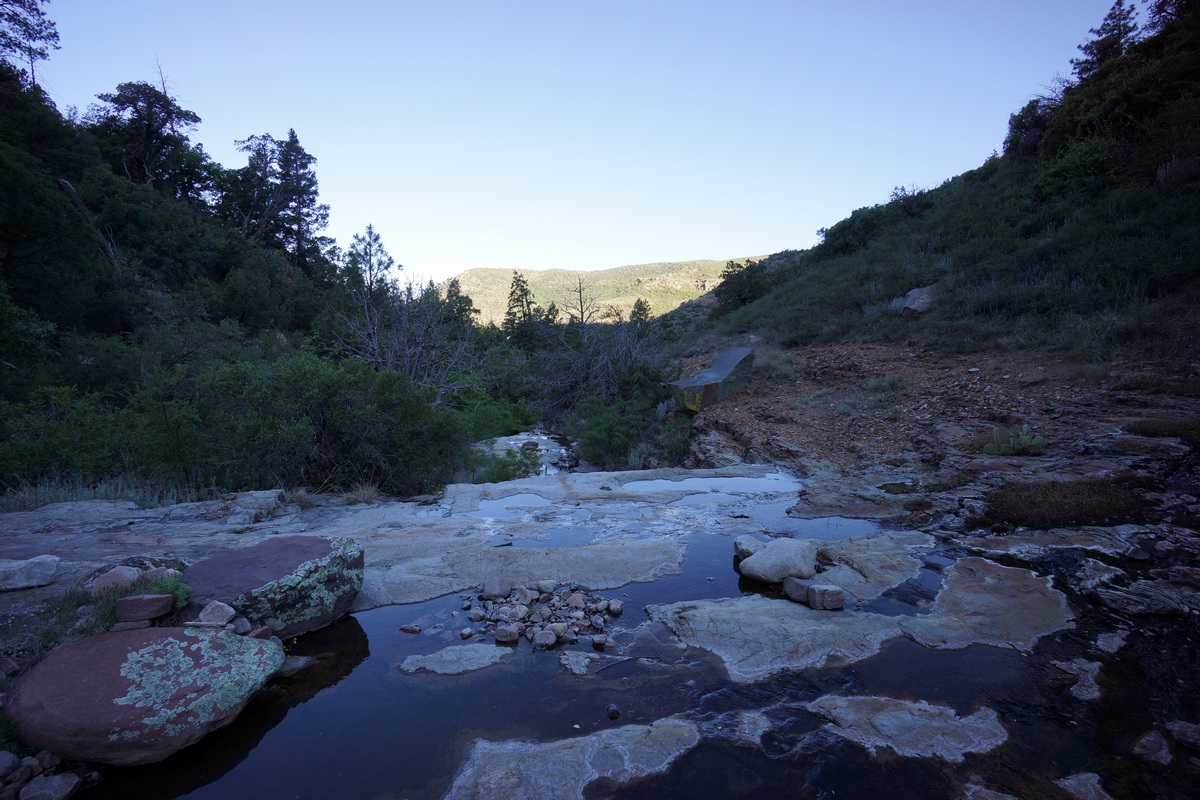
Water above the dam on the South Fork Parker Creek
The Parker Creek trail starts climbing immediately after leaving the parking lot. The trail skirts the highway for a little while before the road turns west and the trail turns east up South Fork Park Creek. The trail here is a steady incline and runs alongside the creek, which appeared to be dry. Then, I came across a small dam which was channeling water somewhere. Above the little dam, there were small pools of water. Little did I know, this would be the most water I’d come across the rest of this hike.
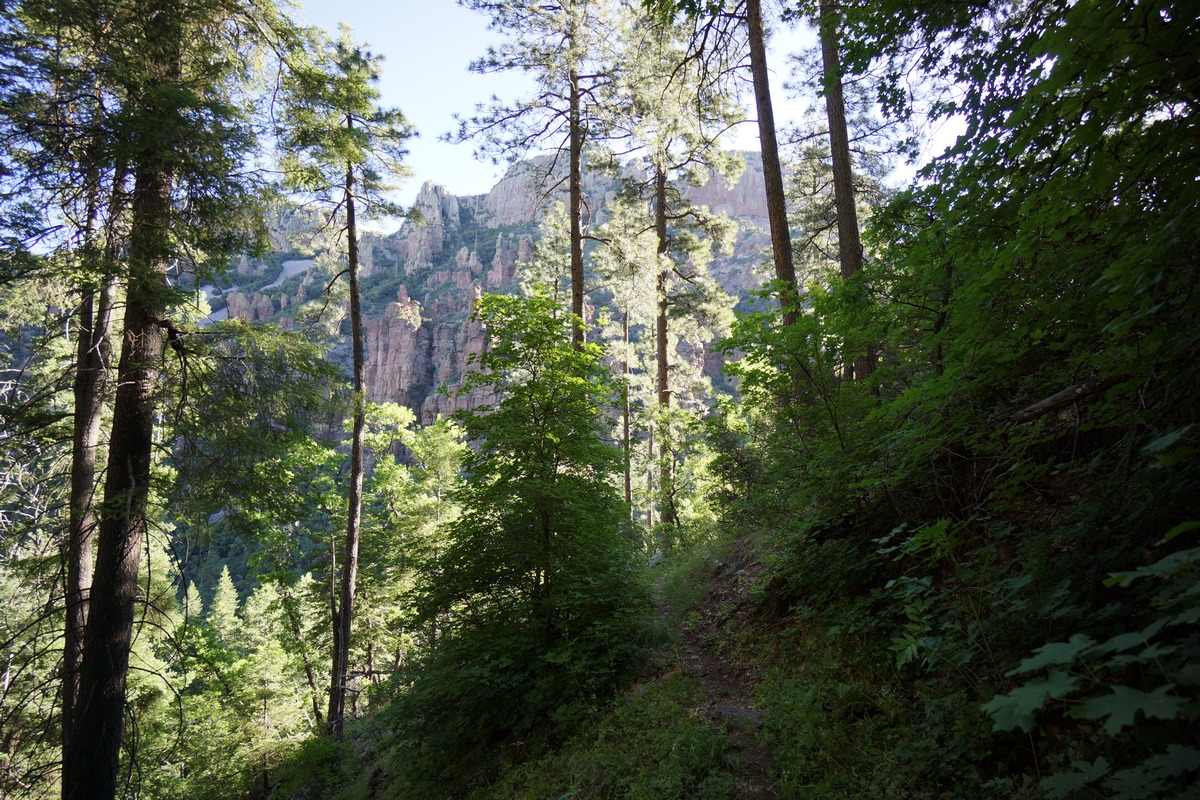
Parker Creek trail starting to climb

Scree slope along the Parker Creek trail
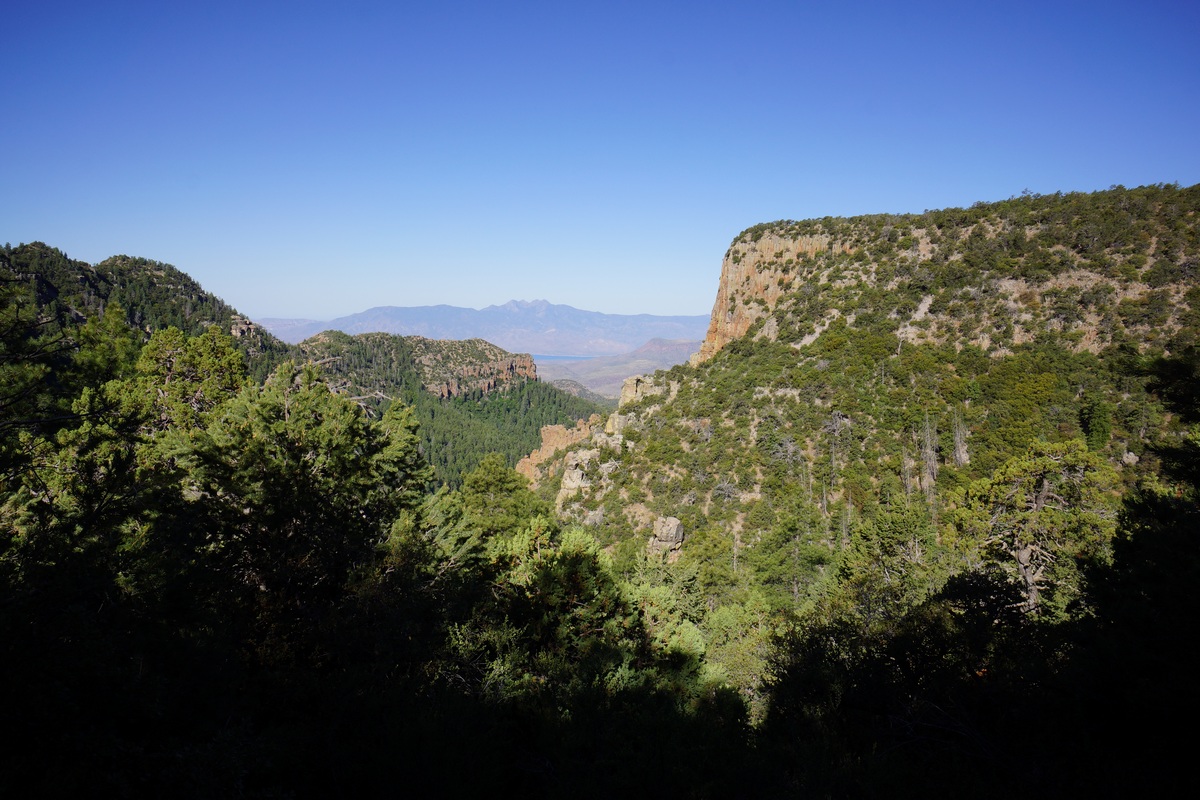
View from the Parker Creek trail below Carr Ridge
Past the dam is where the trail really starts to climb. But with the climb comes my first elevated views of the surrounding mountains. The trail crosses a scree slope for a few hundred feet, which provided some good views as well. In the distance, I could see the Four Peaks and Theodore Roosevelt Lake.
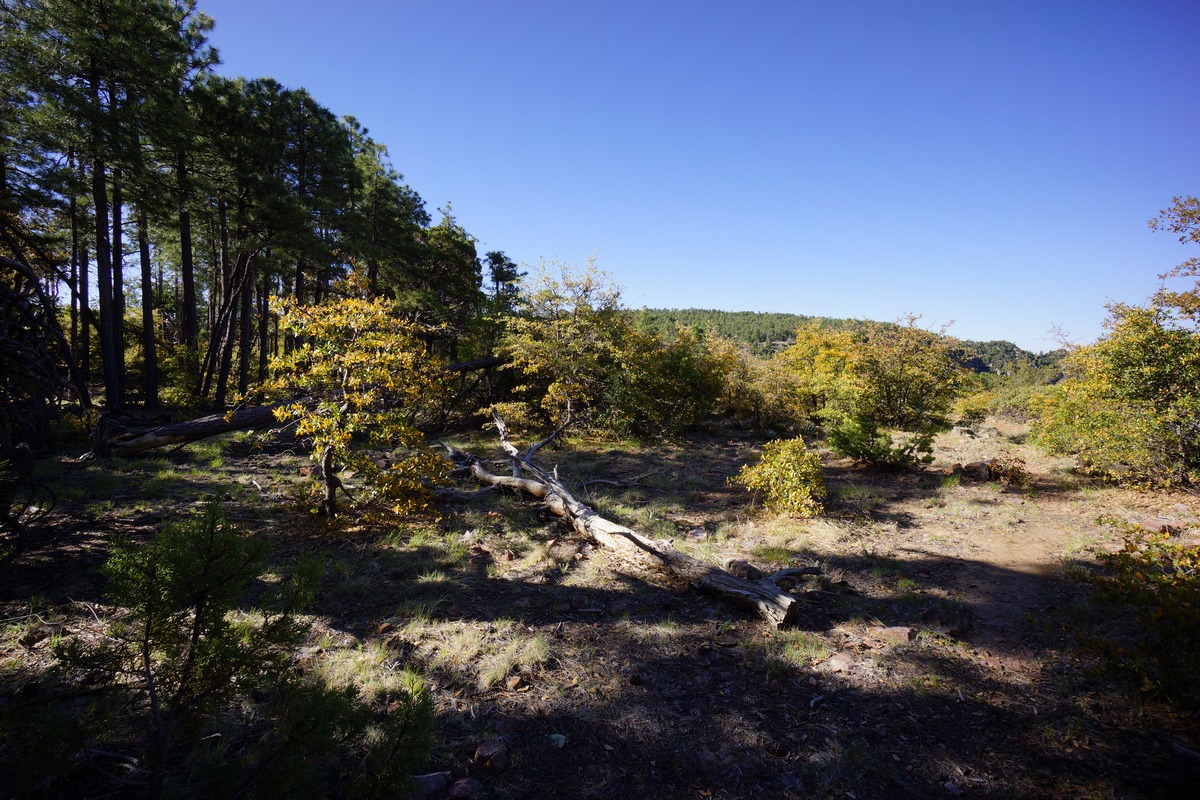
At the saddle on Carr Ridge just north of point 6896. Not much of a view.

Coon Creek Canyon
There’s a couple of good views up along the Parker Creek trail, but once up on top of the saddle, there really isn’t much to see except trees. There’s a couple of campsites up here, but nothing special. I kept moving and dipped down into the next valley. Lots of green here, unlike my other Arizona hikes which have been at lower elevations. Very cool.
From here, I’m headed up Aztec Peak. The trail loses a bit of elevation as it makes it’s way past Mud Spring, which appeared to be dry. The trail splits off to Carr Trailhead or the Rim Trail. I’m headed towards Carr TH. The trail gains 400ft elevation and emerges into an even greener environment, full of lush grasses and trees.
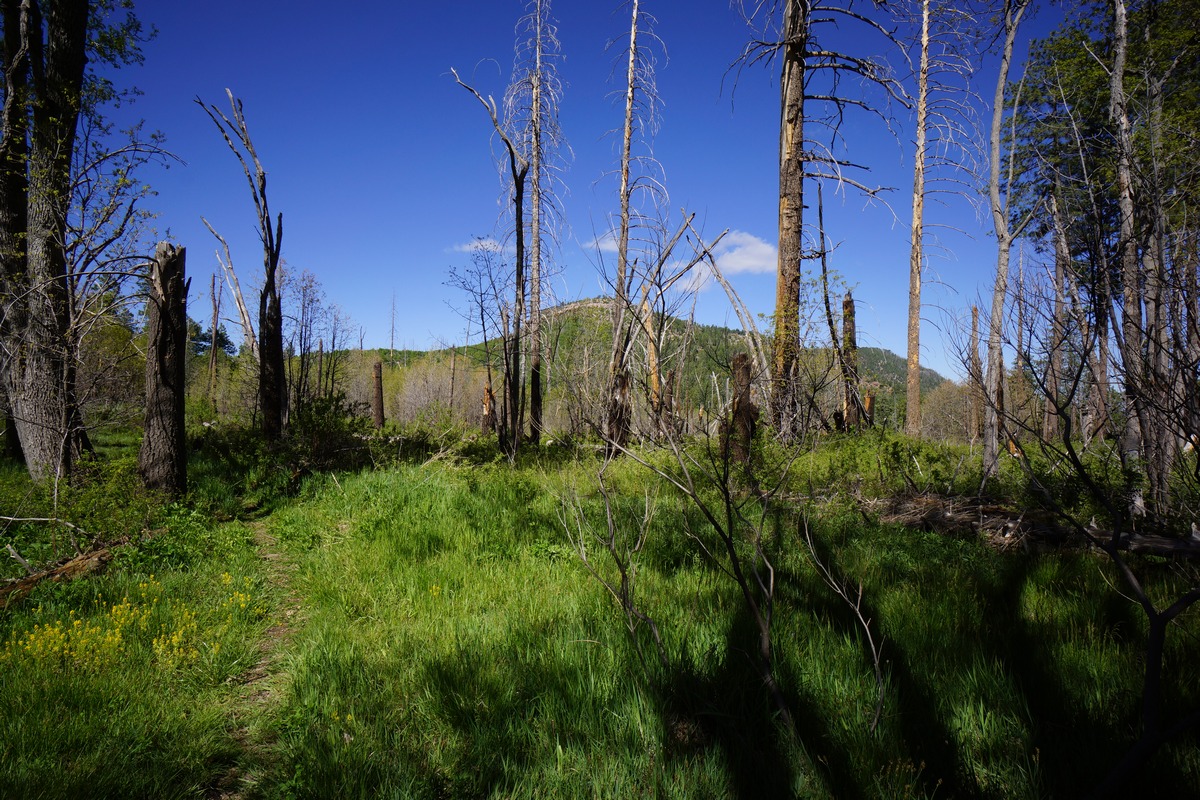

Aztec Peak in the distance
It’s a short road walk along a FR 487, a 4×4 road, before passing the Peterson trailhead. Eventually the trail heads back into the forest. It wasn’t long before the trail passes through a large open meadow that looked like it could have been Michigan, with grass that green. I was not expecting this in Arizona.

Next the trail passes through an area ravaged by fire and downed trees. There were a lot of large trees that requires maneuvering to get over. It looks like it’s been a while since this trail has seen any maintenance. But I could say the same thing about several stretches of trail in the Sierra Ancha Wilderness.

As the trail nears the top of Aztec Peak, the lack of trees make for some pretty good views. The last couple hundred feet up Aztec Peak were really nice.
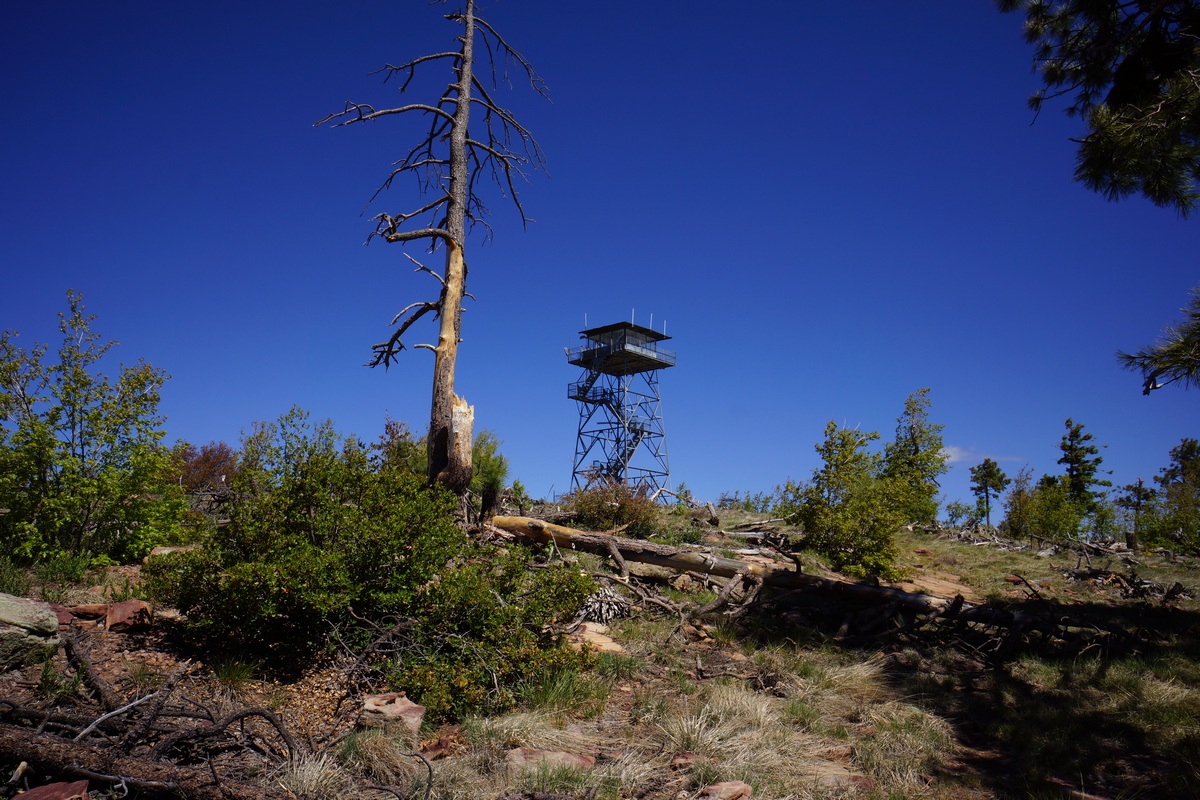
The fire tower on top of Aztec Peak

View from the fire tower. The op level is blocked off
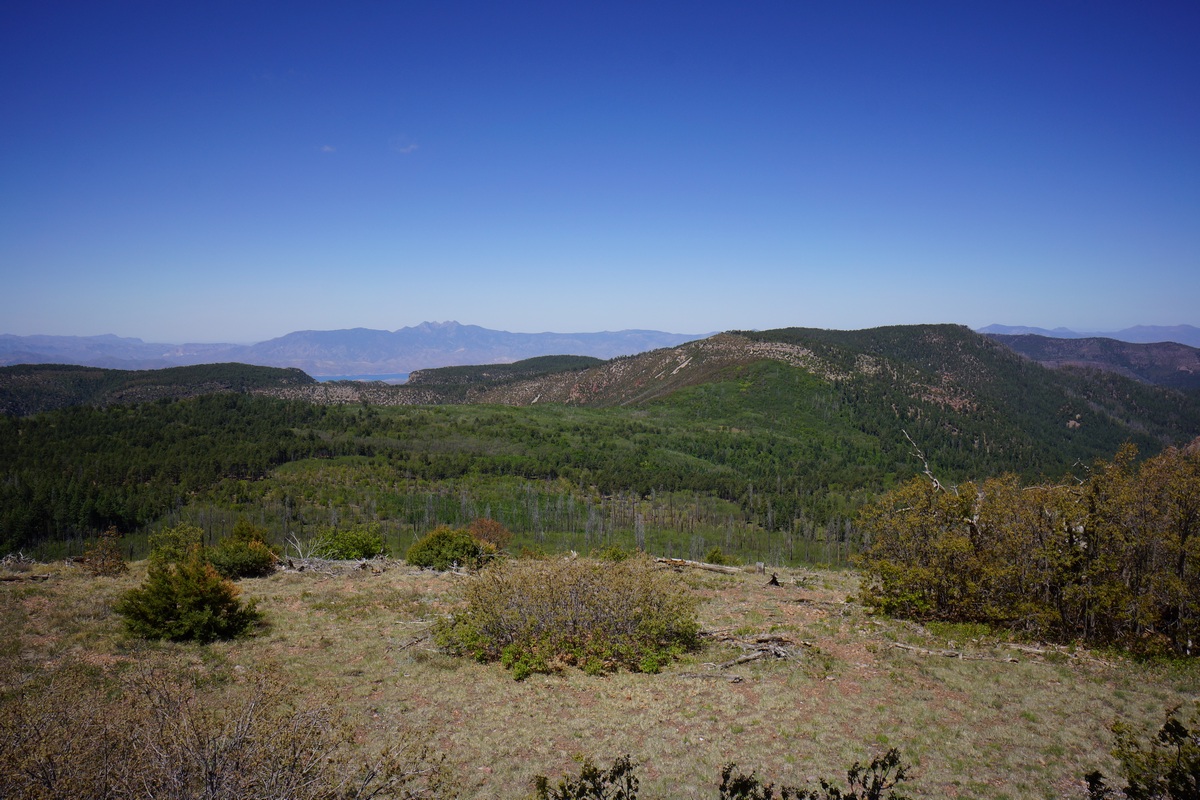
Looking southwest towards the Four Peaks from the fire tower
On top of Aztec Peak, it was pretty windy and much cooler. I went up the fire tower only to find that the top level was inaccessible due to the hatch being locked. It was extremely windy up here, maybe 50-60 mph, so I only took a couple of pictures and headed down.

View from Aztec Peak


After that I went to check out the red rock cliff edges along the southeast side. This area was really cool. Long, distant views from a variety of comfortable seats on the rocks provided a great place to stop and eat lunch. At 7748′, this is the tallest point along my hike. I had 4G service up here too. If it weren’t so damn windy, it’d be a great place to camp too if it weren’t for the road that runs up here. FR 487 runs up to the top here and it looks like Aztec Peak gets a fair amount of use. There were two different vehicles that came and went while I was up here, along with a pack of ATV riders.
After finishing my food I headed down Aztec Peak along FR 487 for a short ways before jetting off onto the ridge that heads towards Murphy Peak. While hiking along FR 487, I was an object in the road. It was an iphone, 65% charged, with a cracked screen and very dusty. I bet it fell out of the pocket of one of those ATV riders that just passed through here only 10 minutes ago. I set the phone alongside the road, propped up against a rock, so it could be seen more easily if they come back to look for it.

Looking back towards Aztec Peak
FR 487 takes s sharp, hairpin turn right where the ridge to Murphy Peak looked the most accessible. Judging by the beaten path out onto this ridge, I’m going the right way. I left the road behind and started my off trail adventure. The trail quickly faded away, but the terrain was pretty open and not to difficult to traverse besides some downed trees.

Murphy Ranch below

View east from point 7662

View northeast from point 7662

Next my route has me going up point 7662′. The approach from south/southeast is cliffs, so I worked my way around the more gentle southwest slope. Once on top, I had a pretty good view of Murphy Ranch from some interesting rocks. Some rocks were pitted, others looks like they had warts. Another section had light colored veins running through it. Really great views to the east from these cliffs.
Near Murphy Peak

The ridge I descended down Murphy Peak
I continue my hike north to Murphy Peak, the second tallest point on the hike at 7732′. It was pretty easy going up to the top, but trees obstructed the view. From here I headed down a ridgeline that will intersect trail 150. This section was steep but pretty manageable, then levels out. Before long I found trail 150 and was on my way down hill along the north side of Murphy Ranch.
I followed trail 150 a ways before leaving the trail and continuing in a straight line towards my destination, Edward Spring. This next off-trail section was among the two toughest challenges on this hike. The vegetation was thick and often thorny most of the way down, with steep slopes near the top.
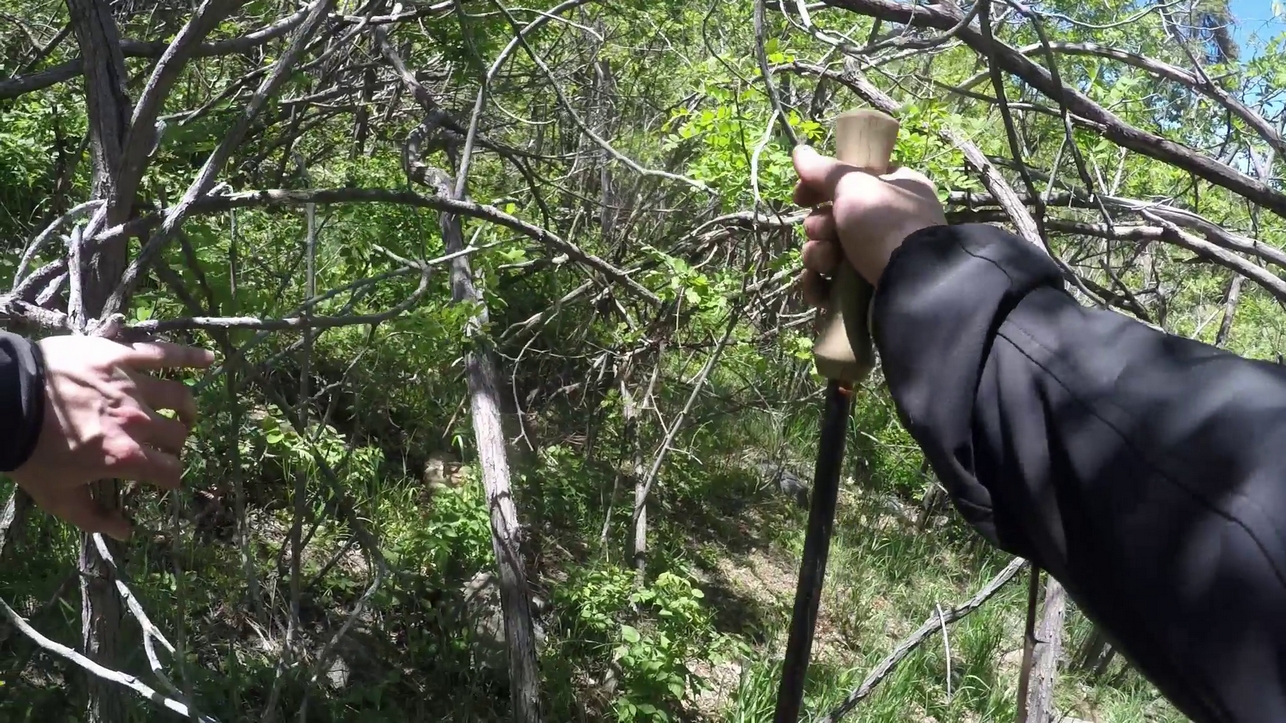
Just a taste what is was like off-trail between Murphy Ranch and Edward Spring
Just as the trail was getting steep, the vegetation was becoming impenetrable. I had to backtrack a little and find a way around the thick patches of trees, shrubs and bushes. I found a game trail that got me past one of the thickest spots, but quickly lost it. I found the best strategy to be to follow the faint little game trails where you can and just do your best in between the game trails, through the thick stuff. While dipping down into a small drainage along the way, I scared up an what I believe to be a bull elk, judging by the overall size of the animal and the size of it’s antlers. It wasn’t that far away, maybe 150 ft, but he bolted before I got a good look at him.

Off-trail between Murphy Ranch and Edward Spring
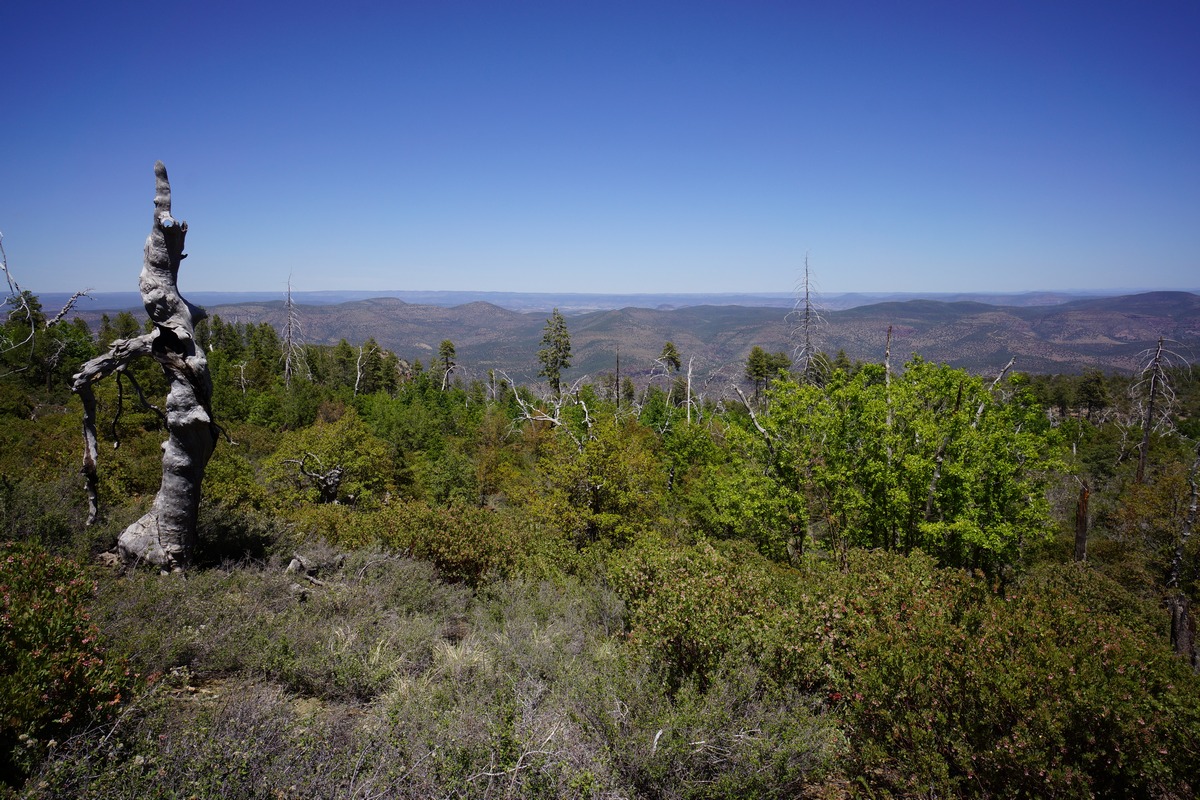
Still off trail-between Murphy Ranch and Edward Spring
There were a lot of Manzanitas through some stretches, and along with the other plants they did some damage on me. My arms fared alright since I had a longsleeve shirt on, but my shins took the brunt of the damage despite having pants on. I wouldn’t recommend anyone following this route, unless you’re slightly crazy like me. It took me about 1.5 hours to go 1.6 miles off-trail.

Looking west into the upper Pueblo Canyon area

Looking east into Pueblo Canyon
I was hot, hungry, thirsty and tired by the time I made it to trail 141, just a short distance from Edward Spring and some amazing overlooks above Pueblo Canyon. I first went to check out the views from the cliffs, and see where I could camp in close proximity to said views. I couldn’t find the proper pair of trees to hang my hammock from near the cliff’s edge, but only a short 2 minute walk back to my campsite closer to trail 141 will suffice. I found Edward Spring to be completely dry.
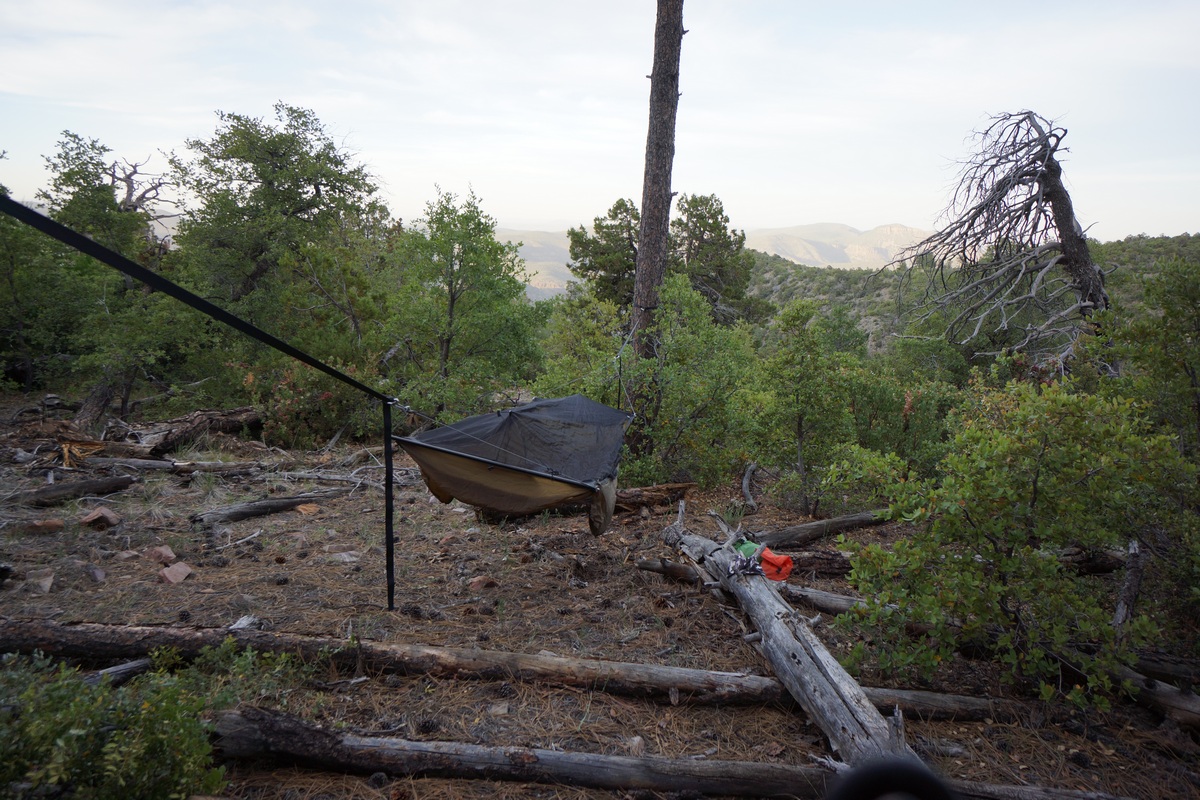
Camp near Edward Spring
After getting my hammock set up around 2:15pm, I took, a 45 min nap. Today was only supposed to be 8.9 miles or so, but ended up being 11.5 miles and 4000 feet of elevation gain. The route I draw out on the map, no matter how detailed I think it is, always seems to fall way short of the actual distance hiked that day.

Pueblo Canyon
After my nap I headed over to the cliff’s edge with some food and my camera. I explored along the edges for a while, looking for that perfect shot of Pueblo Canyon. I spent most of the afternoon just lounging around on the cliffs, enjoying the beautiful scenery and silence. It was cool to have such an amazing place all to myself, during what seemed like prime hiking weather. From what I can tell, this place doesn’t get a ton of backpackers.

Sunset at Pueblo Canyon
After watching the sunset to complete an enjoyable evening I headed back to camp. I didn’t set up my tarp above the hammock since there’s no rain in the forecast for the foreseeable future, so tonight’s full moon lit up the sky throughout the night. I went to bed at 8pm, right after it got dark.
Day 2 – Sunday May 22nd, 2016
Miles Hiked – 13.19
Route – Edward Spring to Asbestos Point

Sunrise over Pueblo Canyon
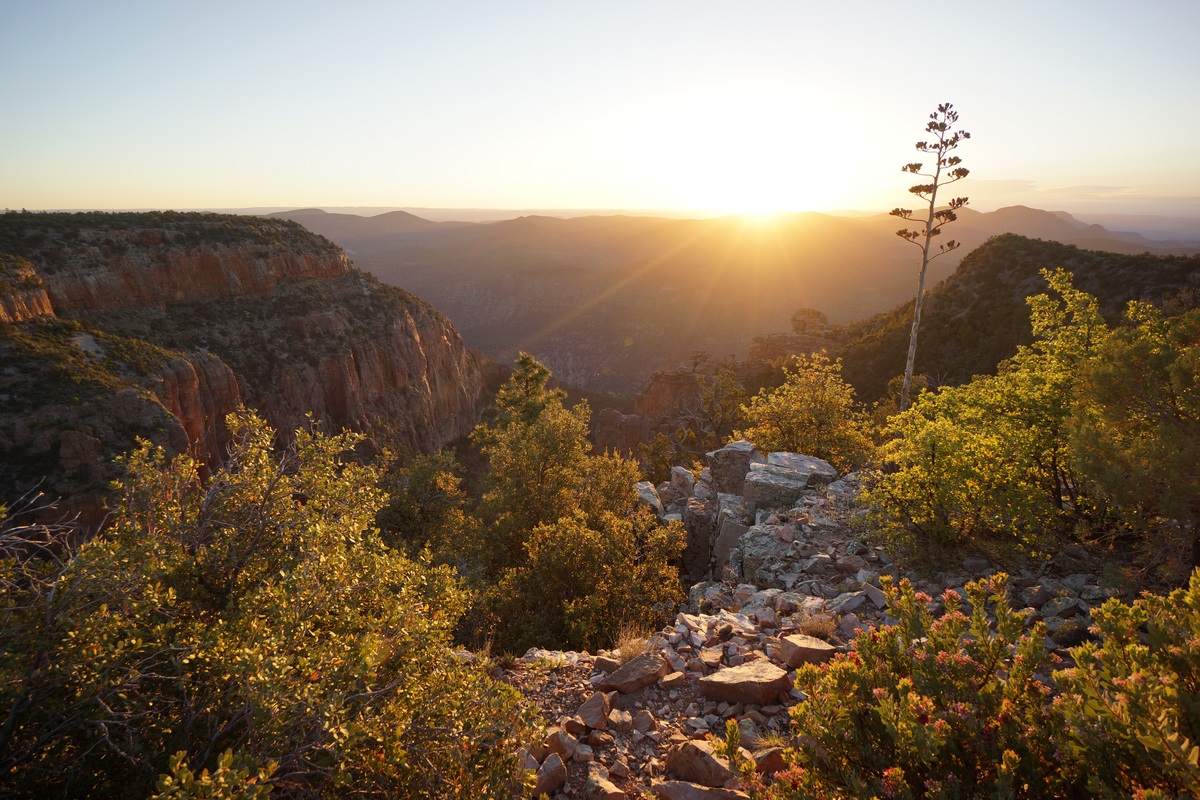
I woke up at 5am today, and just barely caught the sunrise. I headed over to the cliffs overlooking Pueblo Canyon just as the sun peaked over the horizon. Really nice sunrise from this spot.
After getting my fill of pictures, I headed back to camp to finish packing. I snacked on a few items this morning, but didn’t want to eat a full breakfast until I know for sure I’ll have water from Cold Spring. I’m running low on water, having drank more than I expected yesterday.

Hiking in between Edward Spring and Cold Spring
Trail 141 was a little overgrown in spots but overall pretty easy to negotiate. The hike to Cold Spring was about 1.2 miles of easy walking.

Bones only a few feet from Cold Spring

Cold Spring

Looking northeast down into Cold Spring Canyon from Cold Spring
When I reached the spring, I saw a pile of bones from a large animal a few feet from the water. As for the spring, I was pretty disappointed. It was a pool maybe 18″ in diameter and about 2 inches deep. I really should have brought my MSR Miniworks water filter so I could have filtered out the mud and debris a littler better. I brought my SteriPen Opti and Gatorade bottles instead. I ended up digging the pool out a little deeper to get my bottle mostly submerged, but of course, had to let the water settle first. It took a long time to filter this water. I chugging a liter now and filtered 5 more to finish out the hike, unless I come across more.

Hiking the Rim Trail
I left Cold Spring Canyon after getting my fill of water and continued on towards trail 139, the Rim Trail. My maps show the trail climbing out of Cold Spring Canyon more abruptly, but the trail I followed skirted the contour lines a little more. This stretch had been burnt in the past so maybe the trail was re-routed. It eventually intersects the Rim Trail which I continued south on.
There were occasional vistas along the Rim Trail but usually only where the trail traverses around the edges of canyons like Cold Spring Canyon, Devil’s Chasm, and some unnamed canyons. Of course, if you have the time and are willing it looked like there’d be some killer views from some of the ridges above these canyons but that would be all off-trail. Since I know I’ll be doing some serious bushwhacking this afternoon to get to Zimmerman Peak, I had to pass.
Sometimes the trail was well beaten and others it was practically non-existent. There were a couple spots along the Rim Trail where it got so faint that I lost it. I saw a couple of piles of bear crap through this area, and some were pretty large.

Finally, good views from the Rim Trail
The landscape changes a bit when the trail turns the corner into Coon Creek Canyon as it’s a south facing slope. Here, there’s more cacti and shrubs vs pine trees. At least the trail now skirts the edge of the cliffs more and there is more to see. The last couple of miles were a little dull to be honest.

Almost stepped on this rattlesnake before he moved under that shrub
With the new environment come new dangers. I came within 3 feet of stepping on a rattlesnake. It was in the sunlight in the middle of the trail, but just beyond a small patch of shrubs obstructing my view of the ground. 2 minutes ago, I was just thinking about how I had somehow never seen a rattlesnake yet on any of my hikes, no joke! And now here I am looking at one. There was cliffs on one side and dense shrubs and thorn bushes on the other wise, so it was hard to get around him. I quickly moved past when he had his head turned the other way, as he tried to move aside as well. I made it past him, but coming so close prompted the tell-tall rattle sound. Cool, but now I need to really watch out for those guys.

Coon Creek Canyon
Eventually I hit the Parker Creek Trail (160) where i had passed through yesterday, but went up to Carr TH from here. This next .65 mile section to the top of Carr Ridge is the only part of trail I’ll be repeating along this figure 8 style loop. It was almost noon now and I was getting warm in the sun.
Soon enough I was at the top and took a break in the shade. I ate a little food too but not much. Like I often complain about, I wasn’t hungry when I really should have been.

Carr Ridge
After lunch, from here on out it’s all off-trail. I heading in a southerly general direction down the Carr Ridgeline to Zimmerman Peak. I’ve been told there’s some wicked patches of Manzanitas near Zimmerman, but so far the terrain is pretty open with only large, well spaced pines to worry about. As I go farther south, the pines thin out a little and there’s other types of vegetation to contend with, but it’s still easy going. The first 1.5 miles or so was not an issue at all. There’s remnants of a barbed wire fence that runs along the very top of this ridgeline, which just so happens to follow almost the exact path of the route I drew at home based on the topography. How convenient, this made a great marker to follow when needed. Between this and the game trails that weave around the pockets of vegetation, it’s not too hard to make your way through here.

Looking south

The closer I get to Zimmerman, the more difficult it becomes. There’s beginning to be some really great views as well. I didn’t take as many pictures as I’d like’d to have through here.
Wading through manzanitas
Near point 6936 is where the going got really tough. The manzanitas were so thick it was crazy. Instead of going up the ridgeline and over the summit of point 6936 I found it easier to skirt the western hillside. However, once I emerged south of point 6936 the manzanitas became even worse. There was a sea of them all down this ridgeline as far as I could see, and no game trails running through them. Also, they were swarming with bees on the little flowers, so I had to wade through bees as well. This was one of the most difficult sections of the hike. My legs and shins were taking a a real beating.


Looking northeast
After much effort and lots of cuts and scrapes I made it down the ridgeline below point 6936. It was a little easier going up this next hill, the last one before Zimmerman Peak. Closer to the top of this hill, I saw another rattlesnake. I spotted this one a little farther away, but it was essentially head level since I was going uphill. Not a good place to be. I gave this one some room and went around it.

View southwest from Zimmerman
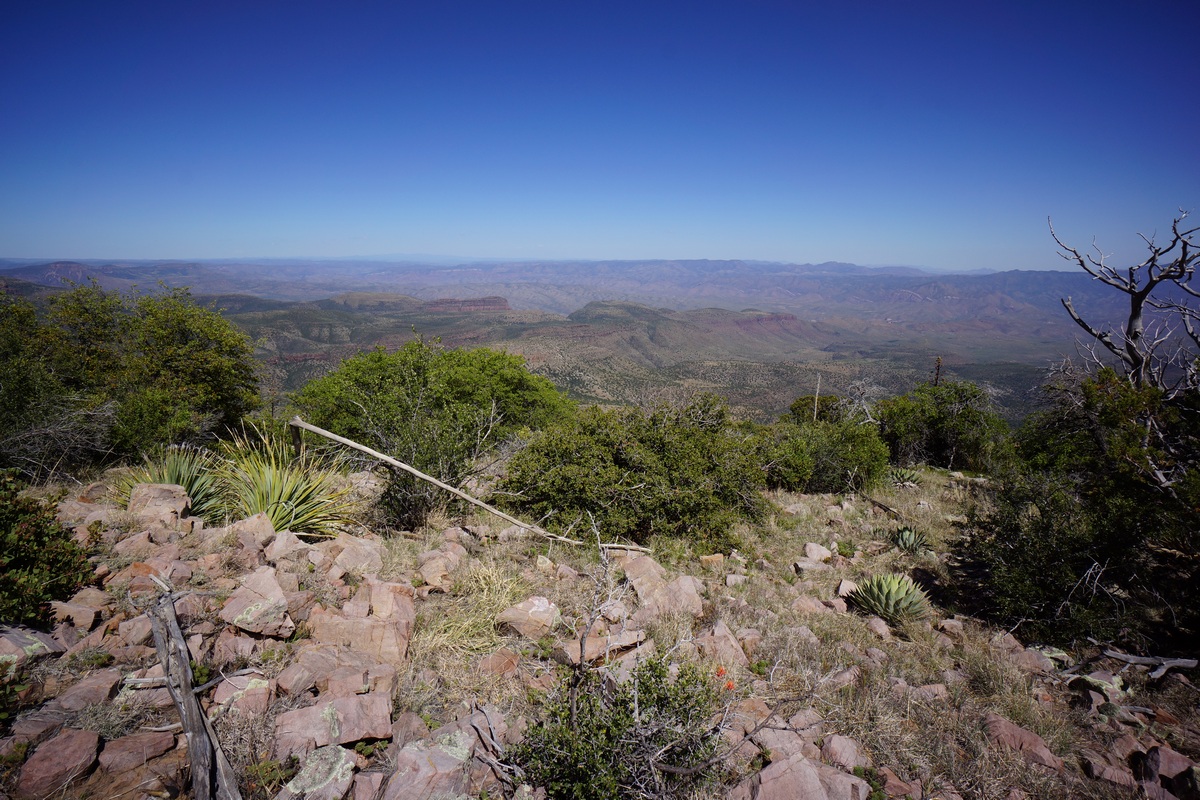
When I reached Zimmerman Peak I was rewarded with some really awesome views. I stopped for a while to rest, take pictures and look for a spot to camp, if that was even going to be possible.
After a little searching I determined that it was probably not possible to hang my hammock up here. Bummer I guess, but I didn’t really want to have to do any more off-trail hiking tomorrow morning if I can get it out of the way today. So, down to Asbestos Point.

View of the ridgeline that leads to Asbestos Point. It looks much easier from this angle
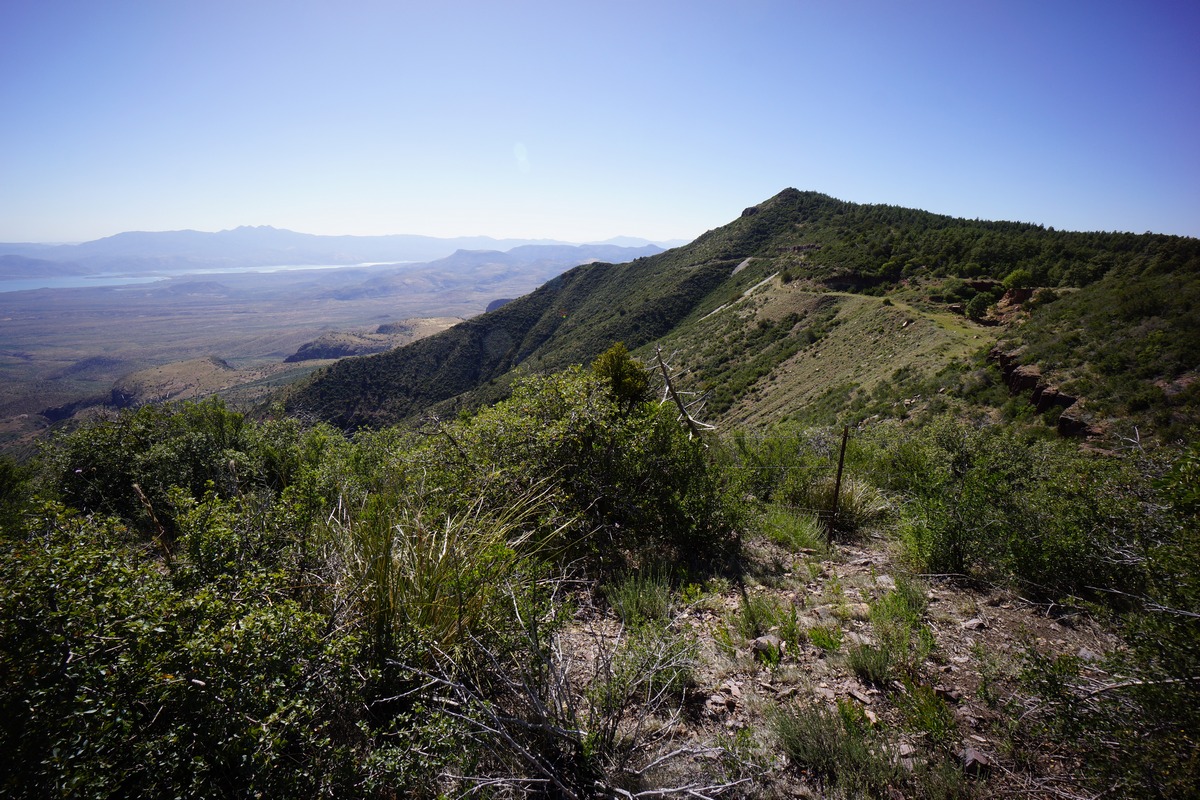
Asbestos Point
The first bit of trail down Zimmerman Peak was the steepest. This part leads down to Zimmerman Point, then down the final ridge to Asbestos Point. That same barbed wire fence is still running down the center of this ridgeline and continues to be a good marker to follow. Eventually I hit FR-489, the 4×4 road that runs up here to Asbestos Point. After what I just hiked through it’s hard to believe there’s a road near here. I followed it a few hundred yards up to the top of the ridgeline leading up to Asbestos Point.
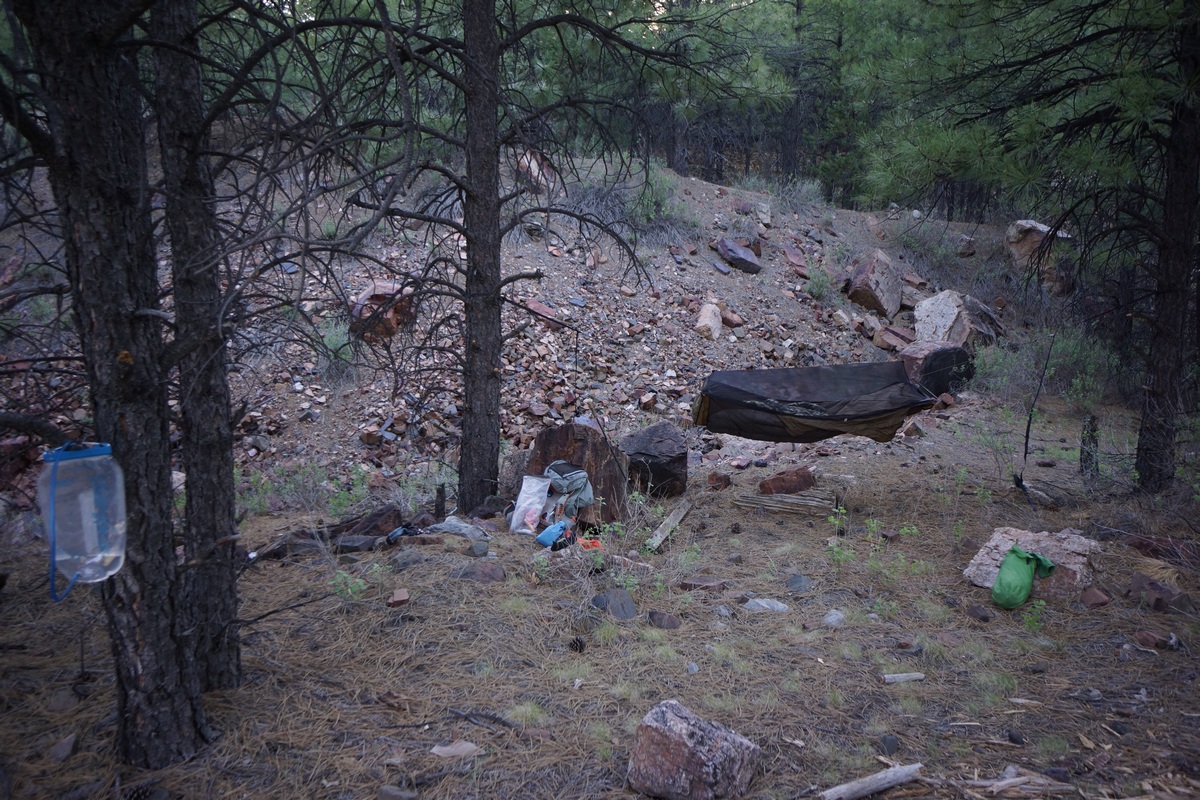
Campsite near Asbestos Point
Now I could look for a place to camp. There’s more pine trees here to hang from, but I’m not seeing the right trees that will give me a view from my hammock. That’s alright though, because it’s still pretty windy and I’d rather have some cover. I found a spot that fit my needs not too far away, and just a short walk from some great views to the south. It was about 4pm now.

After getting camp setup, I hopped in the hammock to relax for 20 minutes. Afterwards I headed over to the area where they used to mine for asbestos along the cliff’s edge. There were a lot of mosquitoes out though and I had to put on my headnet. There was an old bulldozer sitting at the end of the road near the edge of the cliff, as well as numerous other mining artifacts laying around.

Asbestos mine entrance

Inside the asbestos mine


The sides of the cliffs had several mine entrances exposed and uncovered. They probably figured that the fact that it’s an asbestos mine will keep people out. Wrong! I went in a couple of them a short ways, just to get a peek. I was careful not to kick up any dust, took a few pictures and headed out. Check that one of the bucket list.


After making my way around the mountain and it’s mines, I headed back to camp to finally eat some dinner. It would have been really nice to have a fire and heat up my bacon cheese pita sandwich thing, but I didn’t want to go through the trouble just for this sandwich, when it’s windy and dry out and I don’t even need the warmth. I ate almost two of those but didn’t have a great deal of water left. Now it’s ration mode until I get back to the car in about 15 hours. I think I had about a half liter left by the time I went to bed later tonight.


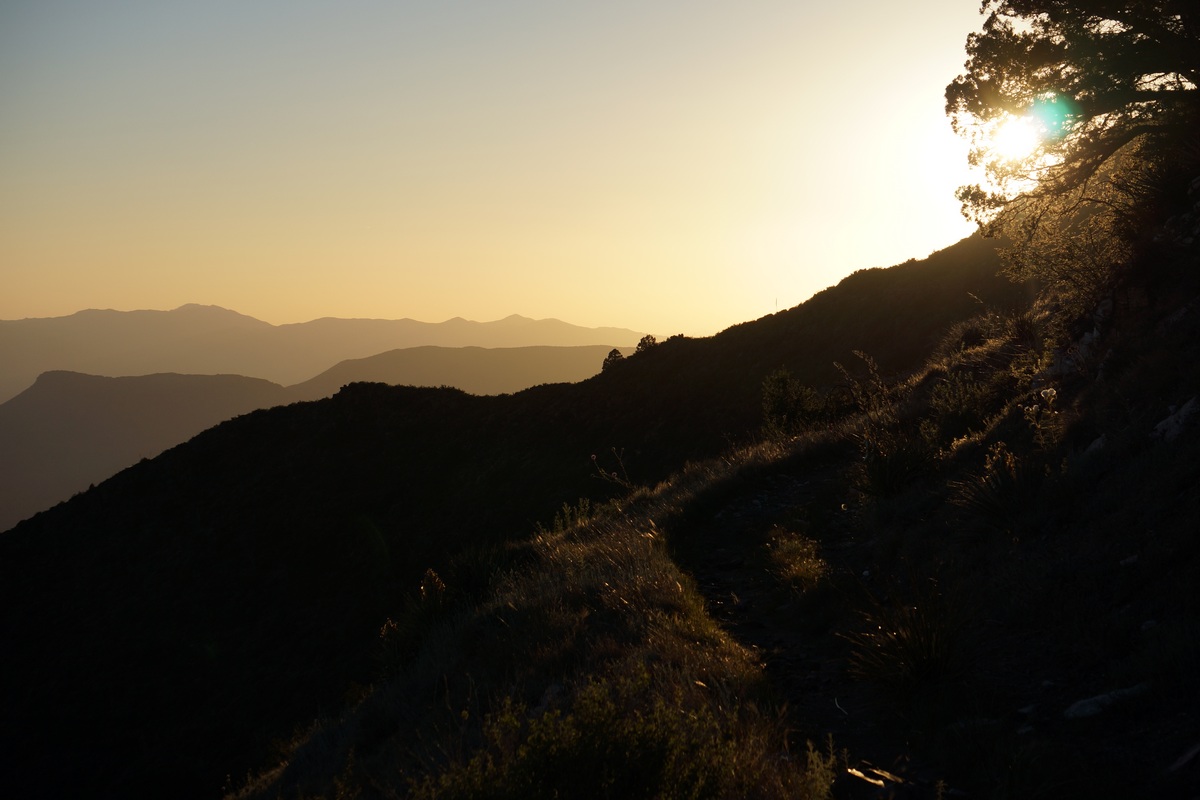

After dinner I headed back towards the cliffs edge for the sunset. It would have been much better up on Zimmerman, but that wasn’t in the cards. I took some pictures and enjoyed the sunset as my final night here comes to an end. Dead tired, I headed back to camp to get some rest.
Day 3 – Monday May 23rd, 2016
Miles Hiked – 4.51
Route – Asbestos Point to Parker Creek Trailhead

Sunrise from Asbestos Point
The wind died down last night and it ended up being pretty calm. I slept pretty good. Once again, I was up at 5am to catch the sunrise.
After packing up camp and barely eating anything for breakfast I headed out. Today should be an easy hike, mostly downhill along FR-489 and then a short road walk back to my car at Parker Creek Trailhead.
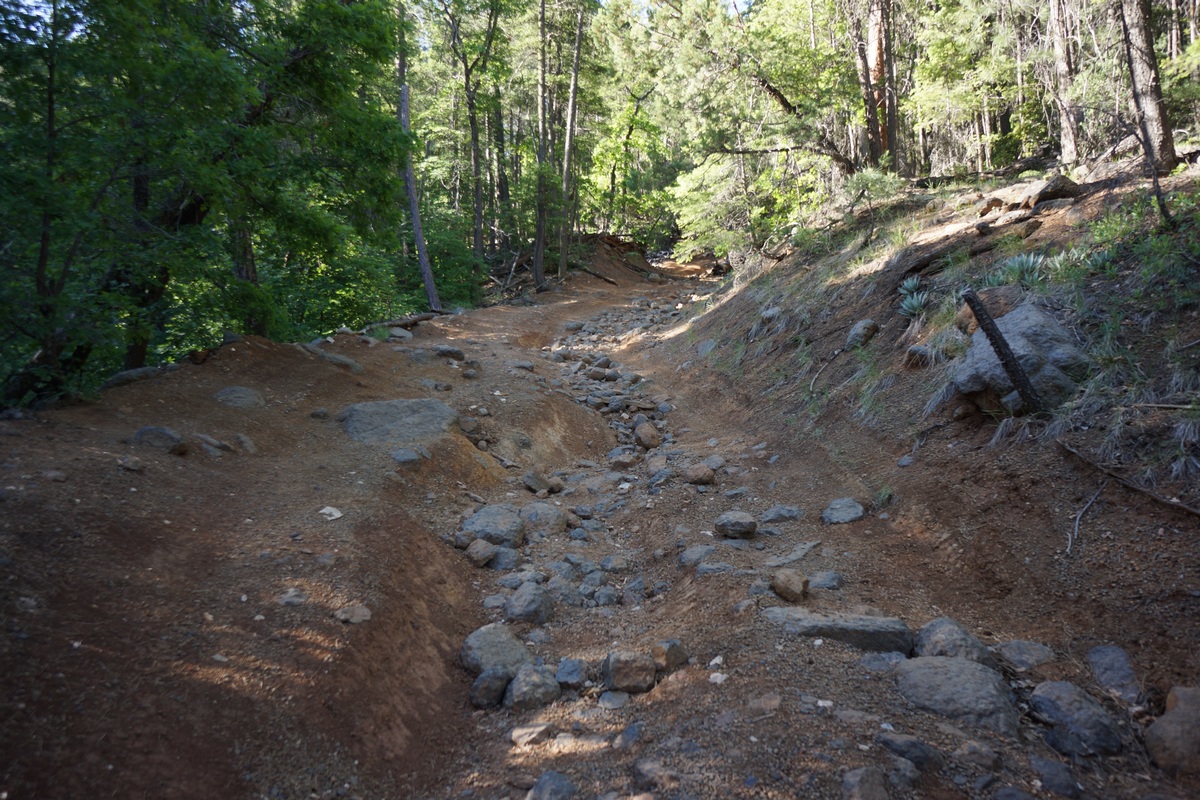
Not even close to the worst of what this road was like
At first, the road looks alright. Eventually though, this thing had ruts like 3 feet deep. I mean, no problem for me, I can just walk around them. But driving up this road seems insane. I wonder how much use this road gets. I know people make it up to Asbestos Point and camp, there’s plenty of toilet paper up there to prove it unfortunately.
Going down this road was uneventful and fast. Fine with me a I have a plane to catch this afternoon. I passed Pocket Spring on the way down which I could hear running water from, but I didn’t go to check it out. Farther down, Parker Creek was flowing closer to hwy 288.

Where FR-489 dumps out into hwy 288
When I did finally reach hwy 288, I had a 1.33 mile road walk north to my car. The first thing I did when I got into my car was chug water from the extra 1.5 gallons I had sitting in there. After changing clothes I was on my way back to Phoenix to catch my plane.
Final Thoughts
It was great to get out and do this hike, I really needed to get away. I’m hoping this will be just the start of a busy summer, my favorite time of year. It was awesome to visit Arizona when things are in bloom and a little greener. This was my 4th trip to Arizona but my first outside of January and March when things are a little more brown.
I was pretty tired from this hike but on the other hand, I only had 1 week to prepare for it. Considering that, I think I did pretty good physically. The first day had 4000 feet of elevation gain, but it wasn’t as bad as I thought it would be. I did lose 7 pounds on this hike in just 4 days, but I’m kinda getting used to that. I am going to look into appetite stimulants and see if that’s something that can help me get more food in my body during these hikes.
The Sierra Ancha Wilderness, and surrounding Tonto National Forest, has some awesome views. In my situation, being solo, only a loop hike would work for me. I could have put together a much better route if a point-to-point was an option.
The off-trail sections of this hike were pretty tough at times. Sometimes I wonder why I choose to do this stuff, when I’m poked, cut, bruised and battered from bushwhacking through all that madness. Somehow, the harder a hike is for me the more rewarding it feels I guess. And that’s one of the things that can be hard about hiking solo sometimes. Nobody else will ever truly know what you went through, what you saw and how you felt, despite your best efforts to describe it with words or pictures. It can be a powerfully motivating experience though, revitalizing the mind and soul. I’m ready for my big summer hike… I just need to figure out where!
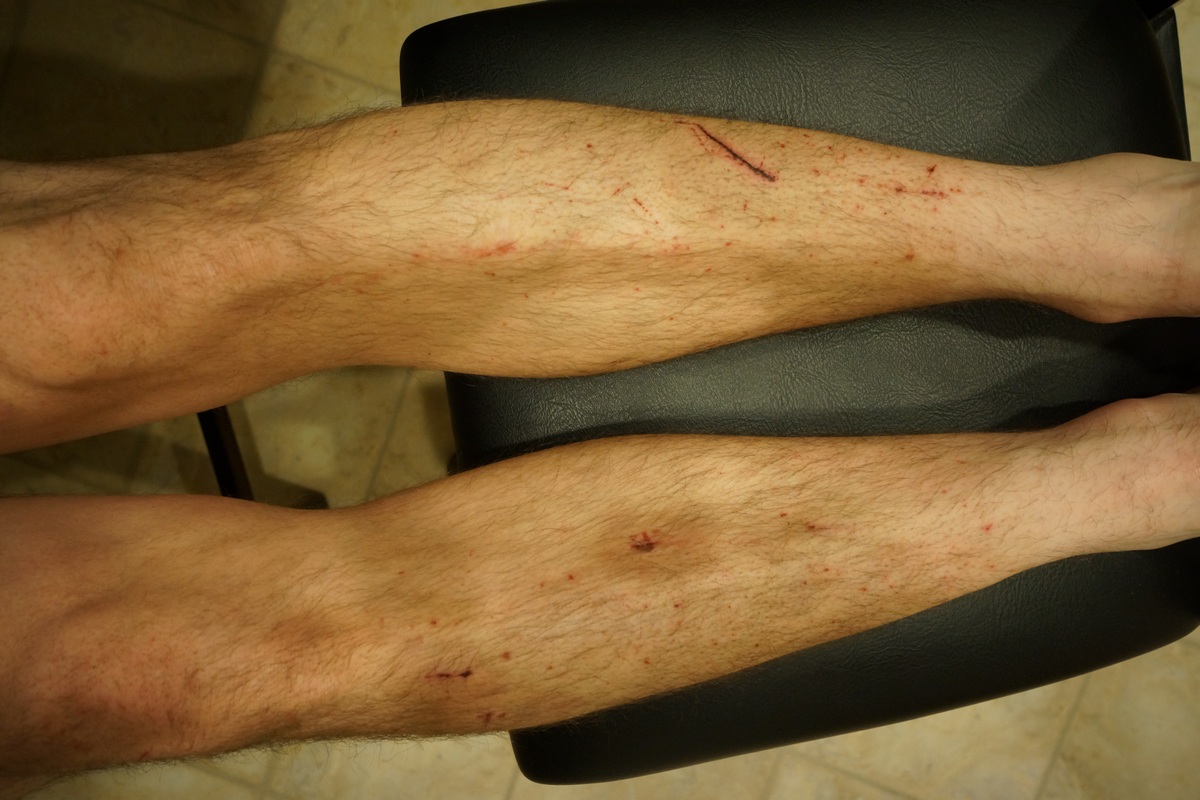
Damage done from off-trail hiking
As always, questions and comments are welcome!
If you found my trip report useful, please don’t hesitate to leave a comment! Alternatively, if you feel you have any information you’d like to share with others regarding this hike, please feel free to leave that below in a comment as well.
[tcb_comment_count]Pigeon River Country State Forest, MI – January 2015 (Trip Report)
Overview
- Location – Pigeon River Country State Forest, MI
- Park Type – State Forest
- Miles Driven To Destination – 500 miles Round trip
- Length Of Time Hiked – 4 days, 3 nights
- Miles Hiked – 11
- Trail Type – Basecamp, off trail
- Trail Difficulty – 5/10
- Fires Allowed – Yes
- Solitude – 7.5
Notes
If you plan on camping in the backcountry (on State Forest land, but outside of a state forest campground), the Michigan DNR (Department of Natural Resources) requires you to fill out a camp registration card. You need to fill it out in PENCIL and leave this card where you camped, tied to a tree or secured in some other way. This system is pretty dumb if you ask me. You need to carry a card for each camp you stay at, and a pencil… who brings a pencil backpacking? And why on Earth do they want you to leave it in the woods where it will likely be destroyed by the weather long before any DNR officer ever finds it? Regardless, you can print out your camp registration card (they are free) by opening the link below:
http://www.michigan.gov/dnr/0,1607,7-153-30301_30505_30731-31303–,00.html
Getting There
Many of the “roads” on the map in the Pigeon River Country State Forest aren’t really roads that you can drive on. These roads may have been old logging roads, but now are only passable by 4×4 vehicles with a high clearance. Many of these roads have downed trees blocking the path, or even new trees growing in the road. Some of the roads on the map simply weren’t there as well. Google earth showed roads on the map that were not there when reached that area.
From I-75, Sturgeon Valley Rd. coming from Vanderbilt is the main access road for the southern portion of the state forest, and Webb Rd through Wolverine is the main access road for the northern section.
Day 1 – January 2nd, 2015
Miles Hiked – 1.5
Route – Parking spot at Chaffe Rd & Osmun Rd to camp near Little McMasters Creek
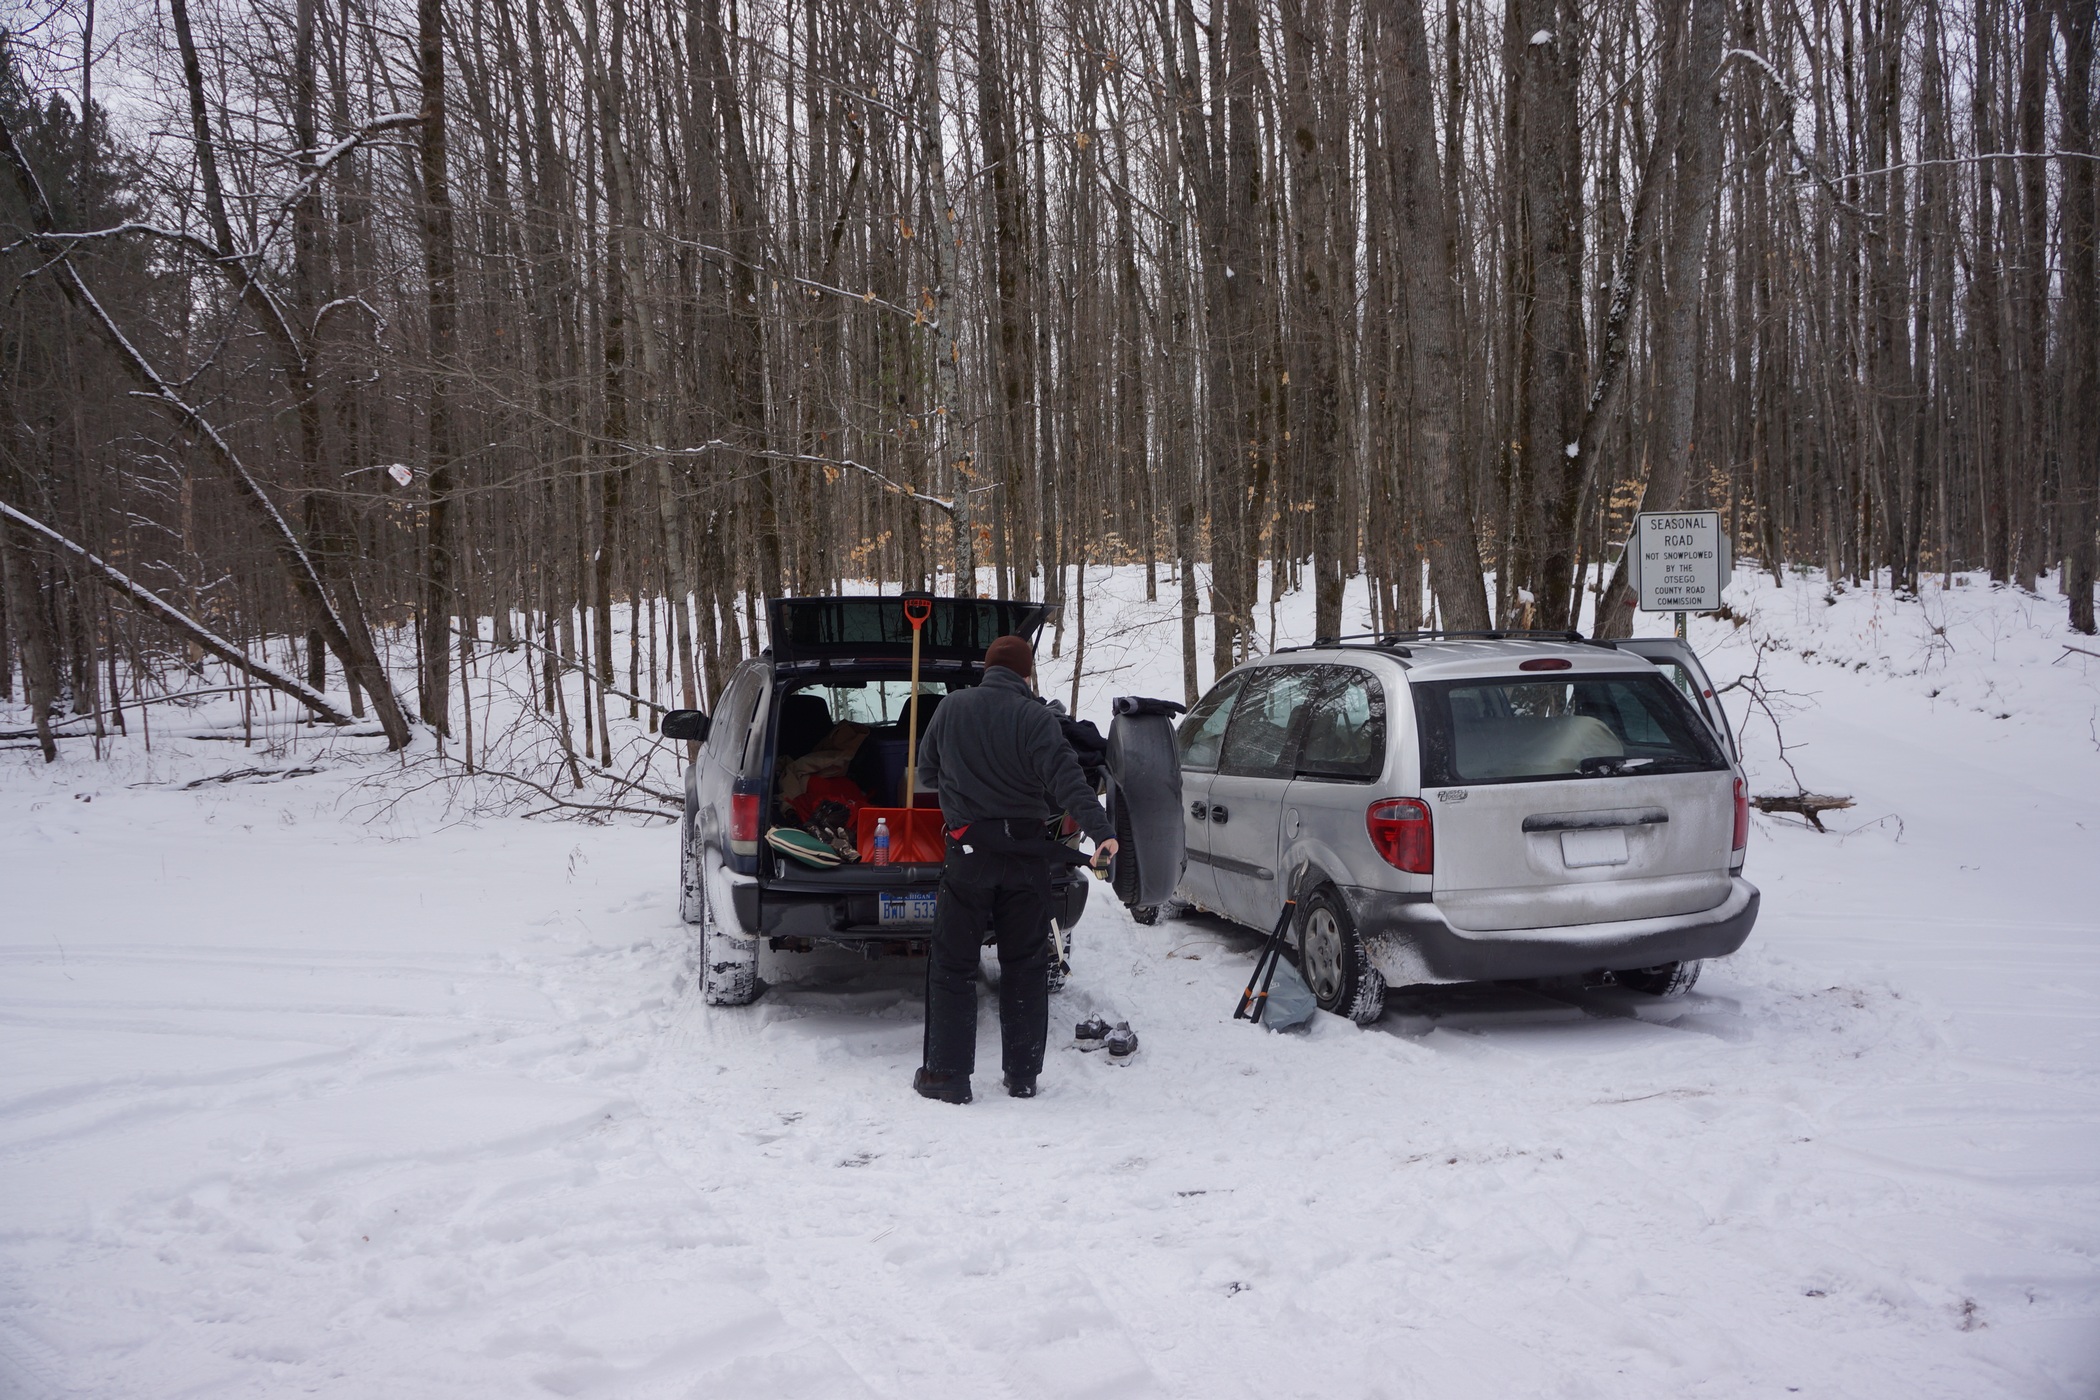
Parking at Osmun Rd & Chaffe Rd
We arrived at our parking spot at the intersection of Osmun Rd and Chaffe Rd later than anticipated due to my car GPS taking us down some ridiculous route down non-existent roads. There was no parking area, but the intersection was very large and provided enough room to park two vehicles without being in the way of anyone driving down the road. Since we saw no tire tracks in the snow on any roads for the last 30+ minutes, we figured this spot would be acceptable. Actually, we tried driving east on Chaffe a ways first to see if we could park farther down, but quickly found that this would not be possible with one of the vehicles in our convoy due to huge ruts, downed trees and steep hills.
We loaded up our gear and started walking around 2:30, much later than I hoped. Fortunately, this trip is not about hiking a ton of miles and moving from camp to camp, but instead we planned on setting up a basecamp and just exploring the area. Before leaving home, I used Garmin Basecamp and Google Earth to pick an area that would be suitable for camp. From our parking spot, camp was mostly a straight shot down Chaffe Rd, and then off trail a short ways.
We saw elk tracks almost immediately after leaving the car behind. In addition, we also saw coyote and rabbit prints in the snow along Chaffe Rd. This section was hilly, and would be very hard to drive up in all but the beefiest 4x4s. Right now there was about 2 inches of snow on the ground, but we were expecting a few more inches this weekend. The walk was pretty quick and eventually the road ended. From here, we cut a path through the forest towards the area I had picked for camp. After a short distance, we reached a large clearing. The area had clearly been logged, but also seemed to have a lot of downed trees. Little McMasters Creek flowed through here, originating from this marshy area according to the map. We saw cattails and other signs that told us the ground we were walking on wasn’t completely solid. We headed towards the treeline once we had the chance.
As soon as we exited the logging area, we found ourselves in a thin stretch of cedar swamp lining the edges of the marsh. In the summer this probably wouldn’t have been a great place to camp, but right now it looked pretty decent as soggy areas were mostly frozen and there were obviously no bugs that typically plague these areas. There was a flat spot with good cover from the trees for Bryan’s tent, good space between the trees to hang my hammock (first time using one!), and an uprooted tree that would provide a good wind block for our fire. Most importantly, the close proximity to water. The creek was about 100 yards from camp which was very convenient. Yup, this is it, home for the next 3 nights.

Marshy area with Little McMasters Creek flowing through it
Now about 3:30, it was time to start setting up camp. Daylight is scare this time of year, and we had about 2 hours of light left to work with. Marc didn’t have to worry about setting up a tent, since he planned to hike back to the parking spot each night and sleep in the back of his minivan. Instead, he went to town on gathering firewood. He brought a hand saw and loppers which proved invaluable throughout the trip.
I mentioned that I would be sleeping in a hammock. I have been dying to try one for the last 2 years and finally have the chance to after receiving one for Christmas. The Grand Trunk brand hammock has no mesh bug liner or anything fancy about it, but for this trip it should suffice. I had ordered the Grand Trunk Funky Forest tarp to use with this hammock a few days earlier, but apparently UPS doesn’t deliver on New Year’s Eve or New Year’s Day, only air mail. Needless to say, I didn’t receive it in time. I had to use some lightweight blue tarps I bought at REI. The largest tarp I had was a little too short for the hammock but I had multiple tarps with me. For the first night, I just used one tarp overhead and one below me to set my gear on.
Bryan and I decided to go out for a short walk after setting up camp. We headed through the cedar swamp towards the east end of the marsh. Not far from camp, we picked up some coyote tracks that led right where we were already going, so we followed them. At the end of the marshy area the tracks ran along the top of a small burm or levee, separating this area from another large open marshy area to the east, which had a very thin line of trees blocking the view. The creek flowed from one open area to the other through a gap in the burm.
Once the sun went down it was time to get a fire going. I tried lighting the fire with some cattails and a spark from my firesteel, but that was a no go. Most of the wood was a little wet and snow covered, so the fire took some effort to get going. Finally, I was successful using a lighter and the stalks of the cattails, constantly feeding the fire with stalks since they go out fairly quickly. Now it was time to cook some italian sausages for dinner. How could they possibly be any better? Try eating them on cheesebread with shredded cheddar cheese sprinkled on top. No noodles in a bag for me!
After eating dinner and hanging out for a while, Marc headed back to his van. He was hesitant about sleeping in a tent this weekend since the temps were forecast to be in the low single digits on night 3. To each his own I guess.
The moon was nearly full and illuminated the marsh by our camp. The crisp air, dead silence and stillness of the night was very peaceful. I actually had the feeling of being in a remote location despite this being the lower peninsula of Michigan. There was a good chance we were the only ones sleeping out here tonight, as this place isn’t all that crowded with hikers and backpackers in the summer either. In May of 2013, I hiked the High Country Pathway, an 80 mile loop trail that runs through this area, and I didn’t see a single hiker. I highly doubt there will be anyone out here now.
When I went to brush my teeth tonight, my toothpaste was almost frozen. I had been trying to keep my water and any food that I planned on eating soon warm by putting it in my pockets, but I guess I’ll have to do the same for toothpaste and contact lens solution.
Tonight was going to be interesting. First night in a hammock, and I have never slept in temps this low (around 13 tonight). I gave my 0 degree bag to Bryan, and I took the 20 degree bag. I planned on sleeping in my clothes for extra warmth. I don’t have an underquilt to use under the hammock, so I used two inflatable sleeping pads (Thermarest ProLite and Klymit Inertia X-Frame) instead to block heat loss from below. We’ll see how the night turns out.
Day 2 – January 3rd, 2015
Miles Hiked – 4.1
Route – Logging roads, off trail
My first night in the hammock wasn’t the greatest. I had to get up once to put some more slack in the straps for the hammock so it wasn’t so tipsy. The extra slack helped a lot. My feet were cold but I was only wearing 1 pair of sock liners and one pair of smartwool socks. Tonight I will add another pair of smartwool socks, that ought to help. Also, as I had anticipated, not being able to turn over and lay on my stomach or sides was annoying.

Freshly fallen sow
There was a dusting of snow overnight, which was on my gear below me. Not too much so no big deal, but I’ll have to address that later. Right now I had to concentrate on warming up my feet, they were very cold! I ran up the hill behind camp and did a bunch of jumping jacks at the top and ran back down. That wasn’t enough so I used my hands to massage the feeling back to my toes. Definitely going to need to have wood ready for a fire tomorrow morning.

Built this to keep the firewood from getting buried in snow
After Bryan got up and we both ate, we started gathering more firewood. Then we realized that the snow coming later today and tomorrow is just going to bury our wood, so we decided to make a bit of a shelter for the firewood to keep it dry. There was a ton of great wood around as there were many downed trees near camp, so finding all the materials needed was easy.

Not the prettiest solution but for such short notice, it will suffice

After building a storage area for our firewood, I decided to beef up my tarp system to keep me and my gear protected from the snow. I repositioned the tarp over the hammock to be closer to one tree than the other, then added a second tarp on the exposed end. Also, I placed another small tarp over my gear below. This was a pretty ghetto solution but functional, and the best I could come up with on short notice. After all, I started planned this trip only 5 days earlier.
Marc finally made his way back to camp by late morning. My MSR Miniworks water filter wasn’t pumping water, so when Marc returned with his Katadyn filter we were finally able to fill our water bottles. I’m not sure what the problem was with mine, other than the fact that it was cold out, and I have never used it in temps this low yet. I have been using my SteriPen Opti for the last 2 years due to it’s smaller size and weight.


We were anticipating several inches of snow over the next few days and thought it would be nice to have a bit of shelter overhead while we sat in front of the fire, so we made a quick lean-to. There weren’t many downed pine or cedar trees around though so we were short on roofing materials. Still, it will act as a wind block and provide at least some protection from the snow.
Once we were done with improvements to basecamp, we headed out for a day hike. We didn’t have any set location to head to, we were just out wandering around for the most part, following anything we thought may be interesting. We headed south from camp, which took us up hill and into a large clearing with a single huge pine in the open. There were a few sets of coyote prints here, which we followed through the field. At the other end of the field was a huge pine tree, alone out in the open. We then entered the woods again, following a faint pathway between the trees.
Eventually we ran into an old logging road, which we followed until it dead ended into another logging road. This road actually showed up on my GPS and was Little McMasters Creek Trail. The road had tons of animal prints on it, including coyote, deer, and elk. We took a right and followed the road a ways until we came across a field to the west. On the other side of the field, the land looked more hilly, and we decide to head that way.
There was no trail or road to follow now, so we cut a path trough into the woods through unbroken snow. There was maybe 3 inches on the ground, so it wasn’t too difficult to walk through. It was slippery in spots, especially going up and down hills. It was nice walking through here but with three guys, I am pretty sure we scared off any animals that were around. Several times we came upon some extremely fresh tracks, deer mostly.
The temperature was warming up today and was forecast to be around 32 for the high, which would be the high for the entire trip as well. We were pretty warm from climbing up the hills with all our layers on, so we took a break to cool off before breaking too much of a sweat.
After our break, we started heading in the direction of camp. The GPS showed a nice loop forming as we cut a direct path back. There were occasionally some logging roads the we crossed but eventually stopped following them as they would often curve and lead us away from camp. The woods weren’t extremely thick but there were a lot of smaller trees that were perfect for eye poking. It was nice to finally make it out of the woods and back into the large field with the lone pine tree near camp. From here we followed our tracks back. Today’s hike was 2.5 hours and about 4.5 miles.
For dinner tonight I had some bacon, sausage and flatbread with olive oil drizzled on it, among other snacks. I cooked the bacon and sausage in aluminum foil over the fire. After losing 15+ pounds in 8 days on my hike in the Wind River Range this summer, I was determined not to lose any weight this trip. It took me 3 months to gain that weight back in the gym. This time, I brought 9 pounds of food for 2 full days and 2 half days, and was not having any problem chowing down like a madman. One of my favorite things about hiking is eating a bunch of good food (fatty animal meats for instance) I normally wouldn’t get to eat at home because I try to eat healthy. Out here, I need all the calories I can get!
We were getting some flurries this evening but nothing serious. I weren’t sure exactly when the bulk of the snow was coming but knew it was sometime tonight or tomorrow. Our firewood storage structure was full of wood and ready to fuel the fire tonight and tomorrow morning. After waking up with freezing feet this morning, I wanted to make sure I could get a fire going in the morning asap.
While sitting by the fire we heard several coyotes howling in the distance. Between breaks in the clouds we could see that moon was now almost full too. Now, it was time for Marc to hike back to the van for the evening. I’m sure glad I didn’t have to do that every night, especially after dinner. Speaking of after dinner, it was time for more food… chocolate to warm me up before bed!
Day 3 – January 4th, 2015
Miles Hiked – 3.7
Route – Logging roads, off trail
I slept much better last night. I was more used to the hammock and was more comfortable in it. I added an extra pair of smartwool socks to keep my feet warm, and put my feet and legs into the arms of my rain jacket. Sounds silly but this has worked for me in the past on cold nights. Actually though, last night wasn’t that cold, it was the warmest while we were out here, with lows in the mid 20s or so. This morning was much more bearable.
About 2 inches of snow fell over night. Good thing I added the extra tarps to my setup, that helped keep the snow out. I was getting some condensation buildup on the inside of the tarp though. This freezes and falls on my sleeping bag throughout the night, especially when I would shake the tarp to knock off snow that has accumulated on the outside. Even so, I was dry all night so I can’t complain.
Our 3 sided firewood storage area allowed some snow in but not nearly as much as without it. I got a fire going and started cooking some bacon bacon for breakfast. Afterwards, Bryan and I filtered some water from the creek.
Marc showed up a little earlier this morning, and we then proceeded to gather firewood for tonight and tomorrow morning, which we anticipate to be the coldest of the trip.

Little McMasters Creek flowing through a large open area. Much of this was soggy and partially frozen.
We headed out for another day hike around noon. This time we thought we would follow the marsh east. We hiked through the woods along the marsh for a while before trying to venture out into the open area, which looked more like a normal field now than a marsh. However, it wasn’t long before my foot went through a soft spot on the ground and some water got into my boot. We headed back into the woods where the ground should be more solid. This was true for a short while, but eventually we reached an area where there was pools of water pretty much everywhere as we were basically still in a cedar swamp. We decided that it wasn’t worth walking through this area and headed back towards the way we came.


Overlooking a logging area just west of Canada Creek Ranch
On our way back towards camp we hit Little McMasters Creek Trail again, north of where we hiked it yesterday. We walked south on this road for a short while before heading east through a field. We saw some human footprints in this field that were probably a day or two old, as the prints were visible but had new snowfall on them. I figured they led into the Canada Creek Ranch which was not far from here. We decided to follow them and see where they went. The footprints led us down a series of logging roads, fields, and pathways in the woods before we reached an area that had been logged. Since the Canada Creek Ranch is private property, we figured this would be a good place to turn around since we were pretty close to it now.
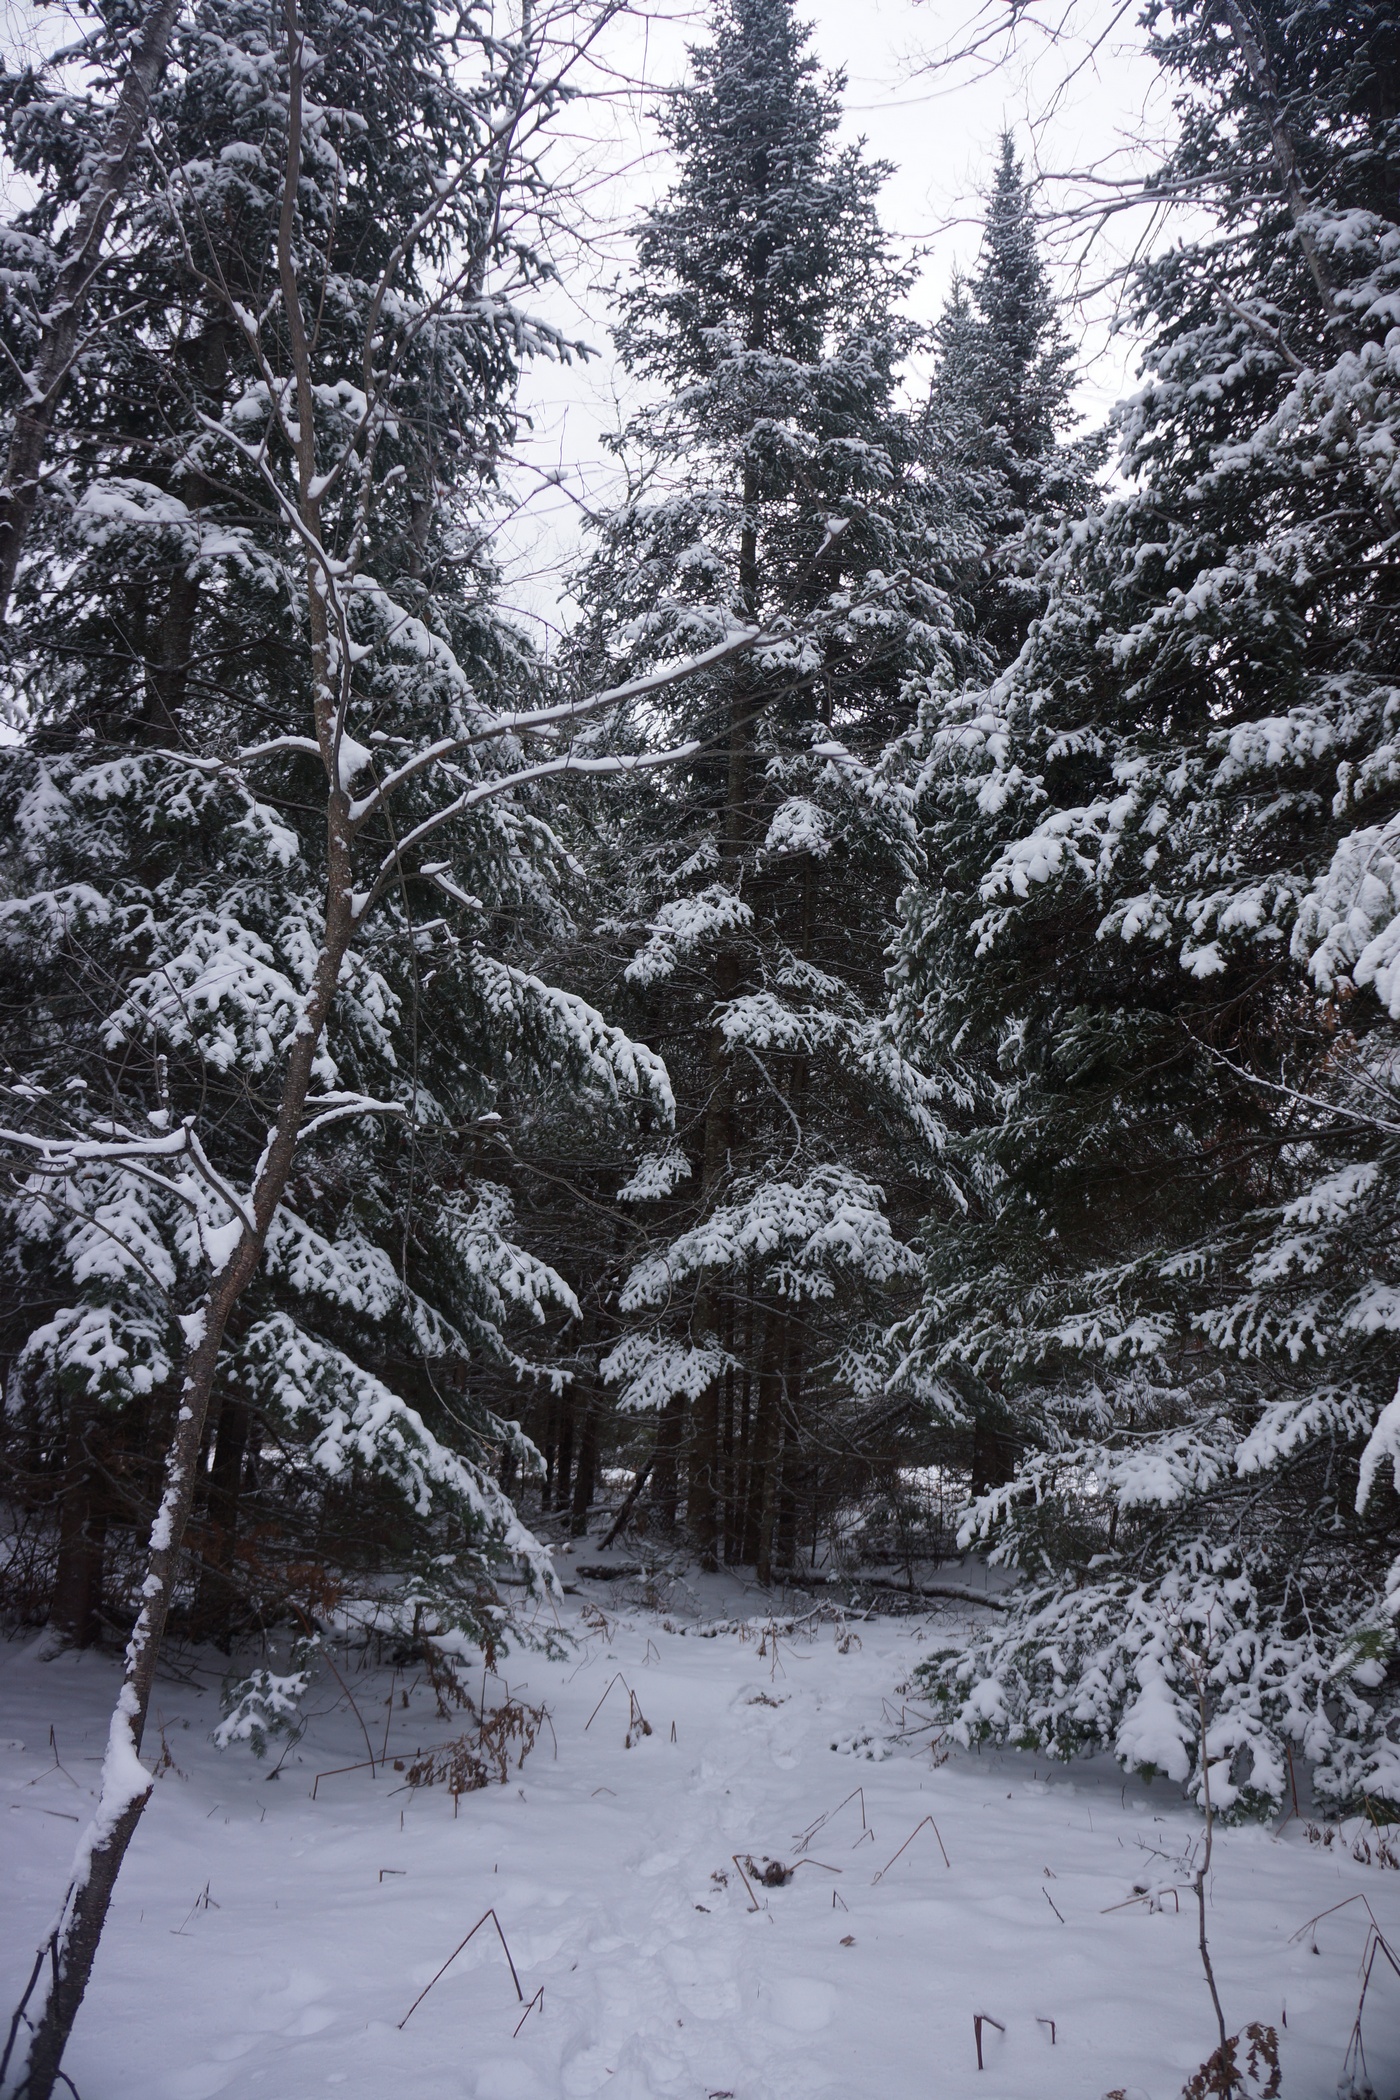
Walking among these snow covered pines was beautiful

The hike up to this point was very pretty with lots of huge, snow-covered pines. This was what I was envisioning for a winter hike. The snow was coming down a little bit here and there all day long, never very heavy at any time though.
We returned back to camp in mid afternoon. The temperature was really starting to drop. A few minutes of sitting and I was cold. It was hard to stay warm now since we weren’t moving. After eating some food and relaxing for a while, we headed out for another short hike. This time, we wanted to head north, which meant crossing the marsh. We didn’t want to cut through it near camp, so we headed west a ways before turning north, hoping to go around any wet areas. However, this area was looking pretty thick and we decided that it wasn’t worth the effort. Instead we just headed back to camp again, this time for the night.
We got the fire going early tonight since it was so cold now. There was intermittent wind in addition to on and off flurries. We hovered by the fire for warmth all night while we cooked dinner and waited for bedtime. This was definitely one of those times when you didn’t want to leave the fire. It’s easy to forget how cold it is just a few feet away. My watch can read the temperature, but apparently not when it’s this cold. Everything else on the watch was functioning properly, but when I left the watch out in the cold for a few minutes the temperature wouldn’t register. After warming it up with my hands for a few seconds it read 14 degrees, so I know it was colder than that. It was only going to get colder as the night goes on.
Day 4- January 5th, 2015
Miles Hiked – 1.6
Route – Camp near Little McMasters Creek to parking spot at Osmun Rd. & Chaffe Rd.
I did everything I did the night before to stay warm, but my feet were cold again tonight. My body was mostly warm despite a few shivers throughout the night. All in all, the night was pretty tolerable though considering it was likely several degrees below 0 with the wind chill. We got a few more inches of snow overnight bringing the total up to 6-8 inches.
The worst thing about today was that my boots were frozen. I had shoved my gloves into the boots and put them under a tarp, but they were quite solid when I attempted to put my feet in them. I had to piss so bad after being in the hammock for 10 hours, so I just forced my feet in there so I could get out of bed. I immediately lit a fire and began thawing out my boots, and my feet. It’s amazing how quickly those boots sucked out any remaining heat that was left in my feet. I spent a good 15 minutes regaining feeling in my toes before moving on to other chores.
Bryan had to be back downstate by 6pm for work tonight, so we tried to pack up camp as quickly as possible this morning. He wasn’t feeling good from something he ate yesterday so he didn’t cook any breakfast. I was going to cook some sausage links but decided to save time and just eat a Metrx bar.
Packing up camp was a pain because every time the wind blew, huge clumps of snow would fall on me and my gear. Once I packed the tarps I had no protection from the falling snow, which got inside my backpack and over other things. The good news is that it was so cold that the snow wasn’t wet at all, and it was easy to shake out. The fire was essential for warming my hands every so often.
We left camp around 10:30 this morning. Marc was sleeping in his van, so there was no need for him to come to camp this morning. Instead, we would hike back to him and our vehicles. This was a lot easier a few days ago when there was less snow. Now, there was a good 8 inches in spots, and the hike back was rather hilly. Bryan was worn out from not eating any food over the past day due to his stomach, so he was having trouble with the walk back. Good thing it’s only 1.5 miles. Felt like 5 miles though.
Once we reached our vehicles, Marc was there to greet us. He had to jump start his van this morning with Bryan’s truck. It sure was nice having two vehicle here this time. Bryan’s truck read 3 degrees outside, and this was at 11:30. I wonder how cold it was at 6am?
We took a different route back to Sturgeon Valley Rd, the main road leading back to Vanderbilt and I-75. I was concerned about Marc’s minivan making through the unplowed roads but we made it out without issues. Woohoo, first winter camping trip under my belt!
Final Thoughts
This trip was more of a learning experience for me than anything else. I wanted to see what it was like and what it takes to camp in cold weather. Specifically, what gear I found useful and which I could do without. The first thing I would leave behind next time is the shovel. I was envisioning more snow and the need to dig out an area for the tent, near the campfire, etc. Unless there was at least a foot of snow on the ground or the snow was hard and icy, I don’t see a need for it in this area. Maybe in the mountains but not Michigan’s Lower Peninsula. I definitely need to get a longer rain jacket too as mine is shorter than my insulation jacket below it. It’s a tight fit with all those layers on.
Sleeping in the hammock was comfortable overall, much more than sleeping on the ground. When sleeping on the ground I felt like I was waking up every 20-30 minutes when my arm or leg would go numb from laying on it. Coming up with a rainfly setup for the hammock is my next challenge.
The Pigeon River Country State Forest is, in my opinion, the most wild area in Michigan’s Lower Peninsula. We didn’t see anyone else out here, not even tire tracks in the snow on any state forest road. Lots of animal tracks as expected but with three guys traveling together I didn’t expect to see much. It was kind of discouraging seeing all the “roads” that criss cross through this area on the map, but in reality, many of these roads aren’t used at all, since they are impassible by car or simply non existent. I have been through this area twice before in the summer, and never saw any hikers either time. This time was no different, didn’t see a soul. Not surprising given the weather.
As always, questions and comments are welcome!
If you found my trip report useful, please don’t hesitate to leave a comment! Alternatively, if you feel you have any information you’d like to share with others regarding this hike, please feel free to leave that below in a comment as well.
Nordhouse Dunes Wilderness, MI – July 2014 (Backpacking Trip Report)

Hiking & Camping In Nordhouse Dunes Wilderness, MI
View all of my Nordhouse Dunes Wilderness pictures | Nordhouse Dunes Wilderness HD video on Youtube
- Location – Nordhouse Dunes Wilderness, Michigan
- Trail – Varied, and mostly off trail
- Trailhead – Nurnberg Trailhead
- Park Type – National Forest, Wilderness Area
- Fees & Permits – There is no fee to camp, but at the Nurnberg trailhead there is a $5/night fee per car, or $15 for a week
- Length Of Time Hiked – 4 days, 3 nights
- Trail Type – Off trail
- Miles Hiked – ~30
- Trail Difficulty – 4/10
- Solitude – 1 on beach and popular trails, 5 in the interior of the park
- Fires Allowed – Yes
Nordhouse Dunes Wilderness Notes
Nordhouse Dunes is the only federally designated Wilderness Area in Michigan’s lower peninsula. This isn’t really too surprising as Michigan’s lower peninsula is about as far from wilderness as you can get. I don’t believe I have ever been more than 1.5 miles from a road anywhere in the lower peninsula. Another interesting fact is that Ludington State Park, which borders Nordhouse Dunes Wilderness to the south, has the largest area of fresh water interdunal ponds in the world.
Nordhouse Dunes Wilderness Maps
http://www.fs.usda.gov/Internet/FSE_DOCUMENTS/stelprdb5151641.pdf


Day 1 – Friday July 11th, 2014
Miles Hiked – 2.1
We arrived at the Nurnberg trailhead around 6:30pm, and it was packed. The car after us took the last spot, and people now had to park down the road, past a sign saying “no parking beyond this point”. This is where Ryan had to park when he arrived about an hour later.
There where a lot of people coming and going, and it really looked the like the party crowd. One guy was carrying a cooler full of beer. I wasn’t really sure what to expect, but this was not what I was wanting to see. Regardless, we left the trailhead around 8:30pm or so.
Packed parking lot at Nurnberg Trailhead in Nordhouse Dunes Wilderness, MI
The Nurnburg trailhead parking lot actually has a trail passing through both sides of it. On the north side, near the outhouse, the trail heads towards Nordhouse Lake. On the south side, the trail heads straight for Lake Michigan, which is the route we chose. We hiked past one or two small ponds and a marshy area before reaching our first dune outcrop about 20-30 minutes later. Once over one or two small dunes we had our first view of the lake.


The sun was going down quick, and we started scouting for campsites at this point. We started heading north along the dunes paralleling the shoreline. We saw a lot of people scattered around here and there, and as expected, it took a while to find a decent site. We settled on a spot tucked in a bit of a bowl just a few yards into the first patch of trees butting up to the dunes. Bryan and I were in tents, while Ryan brought his hammock. I’ve never slept in one, let alone laid in one (the kind for overnight camping anyway). asked if I could test out the hammock, and it was pretty comfortable. Maybe someday I’ll buy one for myself.


We didn’t have much time for anything tonight after setting up camp as the sun had pretty much set. We hung out down by the water for a while before calling it a night.
Day 2 – Saturday July 12th, 2014
Miles Hiked – 10.1

After waking up I headed down to the beach for a while. Ryan joined me a while later, and finally Bryan emerged from his tent and made his way to the water. We didn’t have a set plan for today, just to explore.


I’m flying!

After getting back to camp and eating breakfast, we set off on a hike to Nordhouse Lake. It wasn’t long before we came across some dunes that looked inviting. One in particular caught my eye, with its large bowl shaped pit. We had some fun jumping into the pit from the top and taking some pictures before moving on.

Nordhouse Lake

The trail to Nordhouse Lake from where we were camped required heading back to the trailhead, since the trail we were looking for passes through the other side of the parking lot. It was just as packed, if not moreso today. We passed through the lot and continued on the trail to the lake. There were less people around now, but we weren’t alone by any means. Once we arrived at the lake, it started sprinkling. Fortunately it was light and short lived. We were rather unimpressed with the lake itself and since there didn’t appear to be anywhere that would be easy to fish (and worthwhile to do so) from on the shore, we moved on. At this point, we decided to head back to camp and explore the dunes some more.
Once we arrived back at camp, we were shocked to find another group of people setting up camp extremely close to us. Probably about 40ft separating out campsites. It was a group of about 12 or so people, some boyscouts and their scout leader(s). I consider this to be rude and bad hiking etiquette. There are plenty of campsites scattered throughout the park, and therefore unnecessary to be that close to us. Especially with such a large group of young kids. We immediately began to pack up our stuff to move somewhere else. Ugh, the nerve of some people.

Hiking south along Lake Michigan
We headed south down the beach, scoping the area for someplace more secluded to camp. Walking along the shore was easy and nice. After covering a little ground, we had to start heading inland to look for campsites. Every time we thought we found somewhere good, there were already people there. So all we could do was keep heading south.


This is the ridgeline we used to travel from our campsite up and over to the “interior” of the park.
After a while we left the beach altogether for a more accurate lay of the land. From the high ground we could see a few spots worth checking out, however, they were farther to the north. No big deal, we just back tracked a little. It turns out that we passed right by a great campsite earlier because we couldn’t see it from the beach.

Campsite for nights 2 and 3
After setting up camp, we took a quick swim in Lake Michigan. It was pretty cool at first, but not bad after a few minutes. However, a few minutes was good enough for me, I’m nice and cool now. The weather was starting to look pretty crappy now as the skies grew increasingly foggy. Back at camp, Ryan was taking a nap in his hammock. Bryan and I decided to head out further into the interior of the dune field and away from the lake. We figured there would be nobody out there, especially with the weather looking the way it was.

Leaving camp for the “interior”

The other side…

We headed up a ridgeline in the dune up to a high point, which we could not see past all day. Now, we could see on the other side of this ridge, sort of. The fog was getting thick and hindered our views greatly. Still, being in a place like this with heavy fog cover was pretty cool.

“Hey, is that an interdunal pond? Let’s check that out!”

We saw some water in the distance, so we headed for that. We still had not yet seen any of those interdunal ponds. From a distance, I was thinking this could be a potential campsite. Once we were up close, I could see that it was a dirty, muddy looking pond of stagnant water. Nothing like what I was expecting.

Next, we headed farther inland and up an even higher ridgeline. The top of the ridge was a knife point edge in spots and again, not what I was expecting for sand dunes. This was much more interesting to me than the beach.

We wandered around through the dunes for about an hour and a half before heading back to camp. Hopefully the weather will cooperate tomorrow.
Day 3 – Sunday July 13th, 2014
Miles Hiked – 12.5


I awoke before the others again today, and headed off into the interior of the dune field shortly after sunrise. I saw some deer as I made it to the top of the ridge. Actually, we had seen a lot of deer this whole trip. It was kind of nice to be up here alone this morning.
Once I was back at camp, everyone was up and ready to go for the day. We decided to use this camp as a basecamp and just day hike from here. Bryan and I both suggested further exploration of the dune’s interior. Ryan agreed, having not yet seen it.

We took a different route into the dune field this time as Ryan mostly led the way. It was really sunny now and shaping up to be a hot day. Still, I can’t complain about clear blue skies! The views were excellent now with proper visibility. It looked like we were hiking on an abandoned golf course with enormous over-sized sand traps. I’m sure a more skilled photographer would have a field day out here, but we still had fun taking pictures along the way nonetheless.

Shadow play

Much of the morning was spent off trail, on grassy dunes and sometimes just sand, although there were sections of trail here and there. There were a lot of ups and downs but nothing very strenuous. We saw shotgun shells here and there, reminding us that this area is open to hunting when in season.


Hognosed snake
By late morning, we were approaching a large open sand area north of Hamlin Lake. The southern boundary line of the Nordhouse Dunes Wilderness lies in this area. Continuing on our southerly path, we entered Ludington State Park land. Along the edges of this long sandy area, Bryan spotted a Hognosed snake. It looks a lot like a rattlesnake, and has a king cobra-like hood, but it’s non venomous. Bryan got some “up close” footage with his GoPro and then we left it alone.

North of Hamlin Lake


We took our time wandering towards Hamlin Lake. It was actually farther than it looked.


Once we got to the shore of the lake, we could see all sorts of people and activity on the lake. Several boats were out and many were docking on the northern shore of the lake and hanging out on the state park land, swimming and drinking beer. The scenery along the lake was very nice. Lots of soft sand dunes to hike up and down around the lake though.

Interdunal pond along the lighthouse trail

I like the tiny little arrow mounted on that stub of a post. Nice.
Our plan now was to take the lighthouse trail back to the beach, and hike that north back to camp. We had to leave the shore of Hamlin lake and heard west inland in order to hook up with the lighthouse trail. We saw lots of people along the way and there were plenty of easy trails to follow. The lighthouse trail was pretty boring though, not much worth noting at all.

Looking north from Big Sable Point Lighthouse

Looking south from Big Sable Point Lighthouse


“Check out them interdunals! “
At the end of the lighthouse trail lies Big Sable Point Lighthouse. I’ll bet you never saw that coming. This was more of a tourist attraction than anything, with a gift shop and a fee to go up to the top. We went up to the top, which offered a great view of the surrounding area. Finally, we could see some of those interdunal ponds! However, it was not quite as extensive as I thought it would be. There were some small ponds in the dune areas, but certainly not what I was expecting for “world’s largest”.
We hung out outside the lighthouse for a while after we got back down, sitting in the shade beside the building. It was a pretty warm day, and quite sunny, so it was nice to take off the boots and relax for a few minutes. One of the ladies inside gave us some leftover pizza they had, so we had a tasty lunch as well. Then, she tossed down a few apples from the window above as we headed off. Thanks for the hospitality, lighthouse ladies!

Piping Plover nesting area


The hike back to camp was a couple mile stretch of shoreline. The hiking here was very easy and straight forward. At some point we came across some fenced off areas on the beach, closed for Piping Plover nesting. The Piping Plover is an an endangered and protected bird. The feet on these little guys move fast, and they almost looked cartoonish. Or maybe cartoony? You get the point.
Once back at camp, we were eager to jump in the lake and cool off. After that, we hung out at camp for a while and relaxed before having dinner.


Once the sun had dropped a little, we hiked back to the same area Bryan and I had explored last night. We figured this would be a more interesting place to watch the sunset, with all the shadows on the dunes and whatnot. Ryan didn’t venture too far out, while Bryan and I were both in search of interesting photo opportunities that took us a bit farther out.


I found a spot to set up on a dune perched above the interdunal pond we found the night before, with Lake Michigan beyond that in the background. I hung out here as the sunset and took some pictures. What a great way to end a great day.
Day 4- Monday July 14th, 2014
Miles Hiked – 2.1
It was another nice morning when we woke up today. After a leisurely start to the morning we packed up camp and hit the trail, headed back to the trailhead. It was only a few miles at most back to the car, and there isn’t much to say about today really. I didn’t bother to take any pictures. We had already walked the trail we hiked back, so that wasn’t new. I will say that there were almost no people out here now, being Monday. It cleared out yesterday afternoon, actually. We made great time back to the parking lot which had cleared out considerably since we arrived.
Want to see ALL of my pictures from Nordhouse Dunes? Check them out here: Nordhouse Dunes Wilderness Pictures
Final Thoughts About Nordhouse Dunes Wilderness
Nordhouse Dunes is one of the better hikes in Michigan’s lower peninsula in my opinion. I’m very glad I did this hike and would love to go back, but only during the week. There are just too many people here on the weekend. The fact that this wilderness butts up to Ludington State Park is nice because it extends the area in which you can hike. Even if you want to camp out in the wilderness, hiking through Ludington State Park during the day and returning to the wilderness at night is very feasible.
DO NOT plan on hiking with flip flops here! I made this mistake of wearing them on day two much of the day as we hiked along the beach and later, through the grassy dune interior. By the end of the day, the top of my feet were swollen and tender. By day 3 (now wearing boots again), you could actually feel the tendonitis in the tendons on the top of my feet. My feet hurt for 7-10 days afterwards, preventing me from running or doing stair climbs. I recommend either a sandal with a strap of the back of the heel if you must wear a sandal, but really I liked wearing my full grain leather boots (Zamberlan Vioz GT). They provide the necessary foot support for sand and also kept all of the sand out of my feet, when used with long pants. That was part of the reason why I chose to hike in sandals on day 2, so that I could wear shorts. Without long pants, sand can easily get into the boot.
I didn’t explore the northern or western parts of the park at all, we ended up staying on the east on south side. So, next time I could check that out if returning. Those sections seem to be heavily wooded though, and even swampy in the western section.
As always, questions and comments are welcome!
If you found my trip report useful, please don’t hesitate to leave a comment! Alternatively, if you feel you have any information you’d like to share with others regarding this hike, please feel free to leave that below in a comment as well.
[tcb_comment_count]Planned Hike – Superstition Wilderness, AZ

Well, I am going on another backpacking trip in a few days. The weather sucks here in Michigan right now so my timing couldn’t be better. I guess you can’t skip winter every year. Anyways, my escape is the Superstition Wilderness of Arizona, a 160,000 acre tract of land within the 3 million acre Tonto National Forest. I’ll be hiking 6 days and have a 88 mile route planned. I will also be going solo for this trip, which I haven’t done since the Porcupine Mountains.
After experiencing some pretty painful knee pain during my last hike in Linville Gorge, NC, I started looking into reducing my pack weight. I’m going to go into more details on this in another post, but so far I’ve shaved off around 8lbs! The biggest weight savings came from a new backpack and making a lightweight tripod to replace my bulky 2lb’er.
Along with reducing my pack weight, I modified my exercise routine. I did some research on knee pain related to backpacking, and realized that I may not be working out my hamstrings enough. I do squats for my quads regularly, but seldom do deadlifts. This may cause a muscular imbalance leaving the hamstring weaker than the quads, causing knee pain going downhill. I don’t really like doing deadlifts though, especially before a backpacking trip because I can’t run for several days afterwards. My lower back is just too sore. But then I read about SLDLs (stiff leg deadlifts) and realized that these target the hamstrings much more aggressively than regular deadlifts. I’m doing much less weight but my hamstrings are still pretty sore the next day, and my lower back doesn’t hurt as much. Probably due to lifting much less weight. The consistently foul weather has prevented me from running as much as I usually do, so I’ve been doing more stair climbs instead. I loaded up my backpack with 50 pounds and do around 30 minutes up and down my basement stairs. Trust me, it’s a great workout!
I also added a joint supplement to my diet. I have been taking Osteo Bi-Flex twice a day for the last month, and will be bringing it on my trip as well. It’s 2 main ingredients, glucosamine and chondroitin, are supposed to help build and lubricate cartilage. I can’t say whether or not they work just yet. All I know is, I never though I’d be taking a pill with a name like Osteo Bi-Flex until I got my AARP card. Sure does make you feel old.
This hike is going to be about twice the length of anything I’ve done so far, but I’m excited as hell. With a lighter pack, lighter footwear (wearing my Merril Moab Ventillators instead of my Zamberlain Vioz GT boots), and an improved exercise regiment, I’m hoping to cover more ground and with less effort. Either way, it’s sure to be an adventure. I’ll get a trip report up as soon as I can!
Backpacking The Linville Gorge Wilderness, NC – Oct 2012
Linville Gorge Wilderness Backpacking Overview
Complete Linville Gorge Wilderness Photo Gallery | Linville Gorge Wilderness HD Video
- Location – Linville Gorge Wilderness, NC
- Park – Pisgah National Forest
- Trail Hiked – Custom Loop (Based on the ITAYG loop)
- Miles Driven To Destination – 1320 miles Round trip
- Length Of Time Hiked – 5 days, 4 nights
- Trail Type – Loop
- Miles Hiked – 33.22
- Trail Difficulty – 8/10
- Fires Allowed – Yes
Download a GPX file of my hike (right click and choose “save as”): Linville Gorge Loop Hike
[sgpx gpx=”/wp-content/uploads/gpx/Linville Gorge, NC – ITAYG Loop Oct 2012.gpx”]
Add 1.32 miles to the trip total above for a total of 33.22 miles.
Get a printed topographical map of the above GPX route here: Linville Gorge Wilderness Topo Map
Linville Gorge “Is that all you got” loop hike map
Linville Gorge ITAYG Loop Topo Map
Below is a screenshot of the flow rate of the Linville River prior to and during our hike. Before I left for my trip here, I was trying to determine at what flow rate is the Linville River not safe for crossing at Devil’s Hole. I couldn’t find any information on this, so I decided to share my findings. Although I did not personally make it down to blue hole (read about that on day 2), other hikers told me it was NOT safe for crossing.

This chart may be helpful for others deciding when the river is and isn’t safe to cross at Devil’s Hole
Although my cousin Bryan had been following some of my previous hikes, after seeing pictures of my latest trek in Colorado he decided that it was time to give backpacking a try. He was open to hike anywhere, and I suggested the Linville Gorge Wilderness. Located in North Carolina and less than 12 hours away, I figured this would be a good hike to squeeze in before winter.
I’ve had the Linville Gorge Wilderness on my list for the last year or so, and already had bits and pieces of information together for a trip here. I had been looking at a trail dubbed the “is that all ya got” loop”, or ITAYG. This is basically a combination of trails in the Linville Gorge that form a large loop. I added in a side trip to Sitting Bear Mountain and Gingercake Mountain to the route as well.
Day 1 – Monday October 8th, 2012
Miles Hiked – 3.4
Route – Spence Ridge trailhead to Sitting Bear Mountain
After only about 5 hours of sleep, I woke up at 2:45am and was on the road by 3:15am. From southeast Michigan, we had about a 12 hour drive ahead of us. Most of the drive was pretty uneventful, but sometime into West Virginia we encountered low clouds/ fog and rain. This didn’t really effect the drive, but little did I know we’d be hiking in it too!
Finding the trailhead took us a little while, especially in the increasingly dense fog. The trailheads weren’t marked at all. There weren’t any signs for a hiking trail or parking, anything. Most palaces I’ve been to at least have that. We eventually found the trailhead at Spence Ridge, but were now a little behind schedule. By the time we got all our gear packed, boots on, food from the cooler packed, etc it was around 3:45pm. There were 2 other cars parked here when we left, which was a good sign to me that it wasn’t going to be very crowed. Not that I was expecting it to be in this weather, it was forecast to be 34 and raining tonight.
To reach Sitting Bear from the Spence Ridge TH, we would have to hike about a mile back the way we came on Table Rock Rd and meet up with the trail near Hawksbill Mountain. I turned on my GPS, but it couldn’t find signal before we left the car. I figured it would have picked up the satellites while hiking the road, but it didn’t. Once at the Hawksbill TH, we left the road and hit the actual trail. A few tenths of a mile later, my GPS finally got signal. I estimated the mileage from the car to this point to be about 1.5 miles, and I made it a point to remember to add that figure to the total trip mileage shown on my GPS at the end of the trip. Shortly thereafter, we saw the split for the summit of Hawksbill Mountain and decided to check it out, even though there was no chance of a view. We didn’t stay at the top very long since there wasn’t much to see, and headed back down after about 15 minutes.


Now back on the main trail, which I believe was the Jonas Ridge trail, we headed for Sitting Bear Mountain. Everything was pretty wet at this point. We were basically in the clouds and the moisture seemed to be just collecting on the leaves. Then the wind would blow and water would fall from the leaves. I don’t think it actually rained, but either way, everything was wet.

After gaining about 200 ft in elevation and then losing 400+, we were nearing Sitting Bear. The trail became increasingly steep at this point, until using our hands became necessary. This was one of the steepest sections of trail we’d face on this trip. The slippery wet leaves and roots were not making the ascent any easier either. Once past the steep climb, Sitting Bear Mountain levels off somewhat. We roamed around for a while, somewhat disoriented due to the ever present fog until we finally stumbled upon the campsite. It was large enough to fit 2-3 one man tents, had a fire pit, and was only 30ft from the cliff’s edge. This would have offered a sweet view but the clouds never lifted while we were here.
It was 6:30 or so by the time we rolled into camp, and we weren’t going to have much daylight left. This was Bryan’s first backpacking trip, so I also had the added responsibility of showing him how to set everything up. He was borrowing my Alps Mountaineering Zephyr 1 and my older Thermarest sleeping pad, as well as Lisa’s Sleeping bag ( Silver City Eureka 30°F, same as mine) and her Osprey Crestrail 65 backpack. That’s right, I said he borrowed her backpack. Bryan didn’t want to spend a ton of money on gear since it was his first trip. And rightfully so, but he still needed the backpack. I figured that Lisa’s backpack would fit him and should be pretty comfortable. It was also red, and didn’t look girly at all. It also offered us the opportunity to make several jokes about the hip belt not fitting his womanly figure right.
Now that the tents are up and the gear is stowed away out of the rain, it was time for dinner. It was nearly dark now, and I opted not to try for a fire. Everything was too damp, better luck tomorrow night. Tonight we cook on the stove, and a 1/2 pound burger is sure to please. Gotta love first night meals! The only thing that sucks is how long it takes to cook, and you can only cook one burger at a time. Then you must clean the greasy pan, so a fair amount of drinking water can easily be used, especially if one isn’t careful. No matter how much of a pain burgers may be to cook in the wild, they beat noodles in a bag hands down!
It was getting very cold now and we headed for our tents not long after 9pm. I normally sleep pretty hot, but tonight I had to wear my long johns and a pair of socks to stay warm in my sleeping bag.
Day 2 – Tuesday October 9th, 2012
Miles Hiked – 8.7
Route – Sitting Bear to Conley Cove

When I woke up at 6:30, the sky was crystal clear. A short walk out to the cliff’s edge revealed a fog filled gorge. This reminded me of the amazing sunrise on my last day in the Dolly Sods Wilderness of West Virginia a few months prior. It was at this time that I realized that I had forgotten my tripod. Crap! Oh well, there are worse things I could have left behind.


When the sun peaked over the horizon, the clouds followed. Within 30 minutes of the sun rising, the entire sky was covered with the same dense fog that lingered last night. It was pretty strange watching the sky become overtaken by the fog… I assumed it would have just “burnt up” like it did in the Dolly Sods. So, another great view ruined. I was hoping to get some pictures up here as I’ve read about and seen some amazing photos taken from Celestial Point and Sitting bear. I was pretty disappointed with this as I like to take a lot of pictures.


As the sun rose, we explored the area and searched for photographic opportunities. However, the fog was just too thick and we eventually gave up. We hiked to Gingercake Mountain, but this was uneventful too due to the fog. There were a few different trails that split off the main trail to Gingercake Mtn, but we decided to get back to camp and pack up instead.

Back on the trail, the hike down Sitting Bear wasn’t quite as bad as I remembered it yesterday going up. Still, it was very wet and slippery. Once past the steepest section of trail on the entire trip (although there was other sections that certainly rival this), the fog made the forest below look rather eerie. Bryan was playing with his Go Pro camera now at this point, and we made good time through this section on our way to the Devil’s Hole trail junction.

We made it about a third of the way down to the Linville River along the Devil’s Hole trail when we encountered a group of 5 or 6 hikers coming up from the river. I assumed they had just crossed from the other side, but they said that they were going to cross from this side. Once they got down to the river they decided that the water was too high and fast flowing. They said they were part of some group and they had rules that they follow for safety, and wouldn’t cross without a PFD. They suggested we might be able to cross since we looked more “in shape”. They also had an injured hiker in their group, so they suggested that we make up our minds now… go down and try to cross, or go back up and go ahead of them since they were going to be moving slowly. I decided that it was not worth hiking down the rest of this steep trail to MAYBE be able to cross here. While it was no where near as steep as Sitting Bear, this trail was not going to be fun hiking up, and it’s much longer. We headed back uphill ahead of the other group. Time for plan B, crossing at Spence Ridge, where I parked my car.
After making it halfway back up the trail, Bryan realized he had left his camera on a log somewhere further down hill at a previous resting point, and had to turn back to get it. Of course it had to happen on a steep trail! The hike up seemed shorter than the hike down somehow, and before we knew it we were back on the Jonas Ridge trail.
From here we headed back to the car. It was a very odd feeling to be back at my car in the middle of a hike, but I guess that’s what happens when things don’t go as planned. I am glad we had a plan B in mind, and still happy with my decision to turn around at this point. Getting back to the car allowed us to top off our water, get a few things, eat lunch and sit down on the fence in the parking area. Also, I was able to track the distance of the same section of trail that my GPS wasn’t able to count towards the total trip miles due to it taking an hour to find the satellites. This section, from the area where my GPS came alive near Hawksbill Mountain to my car ended up being 1.32 miles. So, I’ll just have to remember to add 1.32 miles to my total for yesterday and the trip total as well.

Now it was a straight shot down to the river from here, where there is a foot bridge and no worry of high river levels, although the bridge was underwater twice in the last month due to flash floods. Water levels were not THAT high for us though, so we should be safe. The hike down to the river was short. We passed a smaller “waterfall” near the bottom of the gorge, and then all of the sudden you could hear the roar of the river in the distance. It was a welcome sight to finally see the river.


We hung out near the bridge for about 45 minutes exploring the banks and taking pictures. Bryan is an avid fisherman, and loves the water. I do as well, but but this is really his thing. I prefer high places and picturesque vistas, so I was really hoping to have views on Hawksbill & Sitting Bear. Bryan was much less disappointed. Nevertheless, we were both enjoying ourselves. And you know what? The sun even popped out for a second for the first time on the hike! That was short lived though, and soon it was cloudy again.

Once we crossed the Linville River, it felt as if we had entered a whole new phase of the hike. It felt great to finally be in the gorge! The terrain here is extremely rugged, and I now see why it would not be possible to bushwhack your way from Devil’s Hole to Spence Ridge along the East bank. I thought this might be an option for a plan B or C in the event the river was not crossable, but quickly disregarded it after some research. The sides of the gorge are extremely steep and are lined with large boulders, jagged rocks, and mini caves. In many cases, there didn’t appear to be any way up and over the ridge, your only option is to follow the river.

Heading downstream now, we passed some kayakers in the water. They asked us how far up Conley Cove was, and after referring to my topo map I concluded it was only a few tenths of a mile down river. This was good news for both us and the kayakers; we were going to be camping in the Conley Cove area and that was their take out point. I was relieved to hear that because, if you couldn’t tell from my previous trip reports, I don’t like crowds. These would be the last people we’d see until mid day on our 4th day.

Our campsite at Conley Cove. There were about 4 more campsites in the area.

View from our campsite at Conley Cove
As the kayakers began carrying their kayaks all the way up the Conley Cover trail, we began to hunt for campsites. There were several decent ones in the area, all near the river and large campsites with fire pits. One thing I have to say about Linville Gorge is there is A LOT of trash at almost every campsite. This is easily the most trashed place I’ve ever hiked. Some campsites had crap and toilet paper just sitting on the ground as we passed by. Disgusting! Anyways, we took the southernmost campsite and began to set up camp. My tent was wet when I set it up but it quickly dried in the breeze. Bryan’s sleeping pad, bag, and tent were still pretty soaked at this point. The campsite just to the North of us had plenty of firewood, so we grabbed that and began the hunt for tinder. Everything was still a little damp at this point, but I was confident a fire would be no problem tonight. Our site was close to the river, and you could hear a pretty load constant roar which is always nice for getting to sleep at night!

Fog lingers in the gorge as night falls.
Tonight was the first time we had to filter water, so I showed Bryan how it’s done and then let him have at it. It was completely cloudy still at this point, but didn’t look like rain. After topping off our H2O supply, I sat down to write in my hiking journal. This was the first time I carried one, and the first time I wrote in it since I was too busy the night before. At 7:15 it became too dark to write, so I decided it was time for a fire. I first tried to light the fire with charcloth and a spark from my firesteel, but it just wasn’t catching the tinder. I then added some cotton balls slathered in petroleum jelly which did the trick… sort of. The fire burned a bit and then went out. I probably spent 45 minutes messing with the fire before finally giving up and resorting to using a lighter. Even still, the dampness of the tinder and kindling were a problem. Eventually I got the fire going after building and elaborate platform suspended over a small pit to allow for airflow underneath. This worked very well and the fire was blazin’ in no time. That’s good news because tonight was italian sausage night, and I didn’t plan on using my stove. We roasted them over the fire and had another delicious hot meal.
Day 3 – Wednesday October 10th, 2012
Miles Hiked – 9.3
Route – Conley Cove to MST river crossing site just outside of the Wilderness zone on the south end of the gorge
I awoke today at 7am to clear blue skies. What a relief… no more clouds and fog! All of our equipment was dry now, and would stay dry the rest of the trip. Breakfast today consisted of a whole wheat bagel, metrx bar, and some dried fruit… great energy for the trail, and damn will we need it today!


The condition of the trail kept getting worse as we went on today. Contrary to our hike to this point, there were many downed trees over the trail and thick vegetation that made it difficult to follow. We “lost” the trail several times, and found it again only after continuing in the same general direction for a while. Lots of obstacles around every corner, and pretty slow going in general. I expected this section of the trail to be among the easiest parts of our whole hike, due to it being generally downhill and close proximity to the river.


As we progressed downriver, the river itself became less rugged and eventually began to widen out some. The trail was still crude in many spots, with occasional sections of “relief” where the trail was flatter, wider and more obvious. We ran into a snake along the leaf covered trail sometime around mid afternoon, just before reaching the junction of Pinchin trail. We later identified it as a Black Snake. Bryan was fooling around with his GoPro camera, sticking it in the snake’s face until he struck the lens. This was entertaining for a few minutes, but it was time to get moving again.


Shortoff Mountain
Soon we were at the Blue Hole and Daffodil Flats campsites, which were decent sites but nothing spectacular. We kept moving and soon we found ourselves on Leadmine trail. Lots of ups and downs here, and some were quite steep. It was around this point that my left knee starting hurting on the downhill stints. I’ve had my knees hurt going downhill before, but never like this. I blocked out the pain and pushed on through this relatively boring section of the hike. The trail distances itself from the river here, and although it gains some elevation there was only one point where we had a decent view of anything. This trail had a lot of hoof prints and horse crap on it too.

Bryan climbing up a steep section of the Leadmine trail

View of Shortoff Mountain from the Leadmine trail
It early evening by the time we rolled into camp today. We took the campsite between the dirt road and the river just outside of the wilderness boundary, near the MST crossing point. There was a lot of trash here too, and it was very obvious that people drove here all the time and camped because there were plenty of fresh tires tracks in camp. There were old tires and all sorts of garbage in and near the river, as well as the carcass of a dead deer that was really stinking up the place. The river did not look like it was very shallow from our camp though, so we had to scout along the banks for a better crossing point for the morning. Downstream didn’t look promising, so we headed upstream a few hundred yards and found a pretty obvious crossing point, complete with blaze marks on trees on both sides of the river. Bingo, here’s our spot. Nice and shallow, maybe knee deep at the deepest from the looks of it. Good, one less thing to worry about in the morning.

Campsite outside of the wilderness boundary near the MST river crossing
Tonight I constructed my fire in the same manner as the night before with similar success. Tonight though, I “cheated” and used my lighter. I was too tired to want to mess with the fire much, and since we were going to be cooking hot dogs I wanted the fire NOW… I was hungry!
Today was a hard day and in my opinion, we didn’t see much. I don’t mind the hard days, but I like to be rewarded with awesome views or something unique to explore. The stars were very bright tonight though, and I know that tomorrow is going to have some great views in store as we climb back out of the gorge.
Day 4 – Thursday October 11th, 2012
Miles Hiked – 8.8
Route – MST campsite to the Chimneys

Linville River MST Crossing Point
Got up at 7, packed up camp and ate a quick breakfast. My knee was still hurting today, and I took some Ibuprofen to help with any swelling before heading over to the crossing point. The sun was just coming into the gorge at this point, and I could tell it was going to be a beautiful day! We dropped our packs at the bank of the river, took off our pants and boots, and put on our water shoes for the crossing. I went first, with Bryan and his GoPro filming behind me. The deepest part of the river was the banks on both sides, about knee deep. The water was cold, but after a minute in the water the numbness becomes pretty bearable. The rocks weren’t too slippery either. The width here was maybe 200 feet, with the center portion being the shallowest. Once across, we toweled off, got dressed and headed on our way.

The hike up Shortoff Mountain

The path up shortoff was pretty clearly marked near the river, but quickly disappeared. We had to bushwhack our way up the hillside for a while until we finally reached a defined trail to follow. We were now on the MST trail (Mountain to Sea), and things looked a lot different here than on the other side of the river. The landscape was scarred from a fire that rolled through here a few years ago. The soil was a lot drier, and almost desert like scrub growth everywhere. It was an interesting environment, especially compared to the rest of our hike through the Linville Gorge. As we gained a bit of altitude, our view of Lake James improved. We were completely exposed to the sun here though, and it was getting pretty warm. We took a quick break under a small patch of shade when we could and ate some snacks. Dried strawberries and jerky, mmm!

Towards the top of Shortoff Mountain, we we beginning to see some excellent views of not only Lake James but now the Gorge itself for the first time on our trip! This was what I was waiting for, and what we should have experienced on our first and second days had it not been for that damn fog. Our paced slowed considerably at this point as I wanted to explore every little trail that looked like it might be heading near the cliff’s edge. I had my Sony Nex-5 out shooting as many pictures as I could. I brought several batteries, so my only real limitation was the 16GB card. I still hadn’t deleted a bunch of pictures from my Colorado hike in August, so eventually I had to stop and do that. Between switching lenses, filters, etc I spent much more time up here than I was planning to.Still, this is what I came here to see, and to hike right past this stuff would defeat the purpose of going. Time justified!

One of my favorite views of the trip. Many AWESOME campsites near here.


The views were awesome to the north, you could see all the way up the Gorge past Hawksbill Mountain from here. It was nice to be up to the ridge now and look down at where we came from. The river looks calm from up here, a far cry from the raging torrent that was thundering down the northern section of the gorge when we crossed at Spence Ridge. The leaves were just beginning to change colors, but from up here everything still looked pretty green.There were a LOT of excellent campsites up here too. Possibly the best ones I saw throughout the entire trip were up here on Shortoff, but as much as I wanted to camp here, we needed to cover more ground today.

View from Shortoff as we ate lunch

A flat section on the top of Shortoff had a small pond, I was not expecting that. I didn’t remember seeing anything on the maps or reading about anything there in the forums before I left. We stopped for lunch on a series of rocky ledges once we started descending Shortoff. We now had a different view of the gorge ahead with Table Rock dominating the landscape. While we sat here and ate, we saw another group of hikers pass by. These were the first people we’d seen in nearly 48 hours.

Back on the trail, I was feeling pretty sluggish after eating. My knee was starting to hurt from the descent into Chimney Gap, which was a nice hike otherwise. I’m glad we didn’t plan on camping at Chimney Gap though, because this site had nothing to offer other. The climb out of Chimney gap and up into the Chimneys was pretty steep, much steeper than it looked on the topo. For a while, the trail follows a water runoff path that carved it’s way into the dirt forming a gulley about 2 feet deep and 18 inches wide. Those are always fun to walk through. We were whooped by the time we got to the top, but we were very close to our intended campsite and the scenery was spectacular up here.
I saw a small trail lead up a ledge above the main trail, but after climbing up there I saw a tent setup there already. As far as I knew, there was only one campsite up here in the Chimneys, and I was pretty bummed it was taken. Really, really pissed actually. I thought we were going to have to hike all the way to Table Rock from here and camp near a parking lot. Then we bumped into about 8 rock climbers a few minutes down the trail, and they said that wasn’t their spot, they were just here for the day, parked at Table Rock. They said they didn’t see any other campsites. However, our luck would turn 10 minutes later as we found another campsite that was available, and a very badass one at that. I was excited as hell, and had everything set up in 15 minutes.


There was so much to see and explore up here! From our campsite, just through the trees about 20 feet was a sheer cliff with an excellent view of the Pisgah National Forest to the east. We passed a ton of rock formations on the way to camp that I wanted to go back and check out. And right above our campsite was another set of rock formations that we just begging to be climbed. Plenty of cliffs and high points, along with many interesting rock formations created endless photo opportunities, especially as the sun dipped closer to the horizon. Watching the sun go down from my spot high up on the rocks overlooking the gorge, well, this is what I was waiting for. Bryan really appreciated the views up here too, he was loving it. He was shocked by the beauty of it all, and finally could understand why I like taking the high route whenever possible.


I took well over 100 pictures tonight alone. As the sun set, I sat on a rock near the cliff’s edge overlooking the gorge an took out my journal. I wrote until it was too dark to see, and then by headlamp for a little bit. Today was a really hard day, as was the whole trip, but it’s moments like these that make it worth every step. We had a great fire and ate tortillas with pepperoni and cheese for dinner. It was nice not having to cook tonight. Time to eat the last of my sour patch kids and my once per trip dessert, a fudge brownie.

Campsite at the Chimneys

While we were sitting by the fire, I thought I heard a rustle in the bushes near the large boulder that we set most of our gear on. We didn’t see anything though, and the noise went away, so that was the end of that… until I went to look for my socks that were drying out on the boulder. One was missing, and was nowhere to be found. I searched for a while but to no avail… it was gone! Mouse? We’ll never know.
Looking to the east again from the cliff nearest to our campsite, many “city” lights could be seen in the distance. During the day, you could hardly tell there was any development down there except for a few small areas, but at night you could really see the lights. Not only that, but the stars were bright too. In the distance, you could hear a train go by quite often, and much louder than you’d expect up here. Oh well, it was an awesome day and I went to bed happy.
Day 5 – Friday October 12th, 2012
Miles Hiked – 3
Route – Chimneys to car (Spence Ridge TH)


A little late for flowers? Not complaining…
I got up at 6:30 this morning and packed up camp while waiting for the sun to rise. It was cold out, as every morning was, so I had my metrx bar and bagel in my pockets to warm them up before attempting to eat them. It’s always easier to eat food when it’s not half frozen. It was somewhat cloudy as the sun rose, but this made for some beautiful colors in the sky. Bryan and I snapped some pictures and chatted with a local who had hiked here from Table Rock this morning to take a few pictures himself.

View of Linville Gorge from Table Rock

Looking north from Table Rock
After the sun rose it became very cloudy and looked like it might rain. We decided to try and haul ass back to the car, but I still wanted to summit Table Rock on the way. It was a short hike to the Table Rock trailhead, which had a few cars in the parking lot when we passed through. The hike up to the top wasn’t bad, and we were alone at the summit. Great views of the entire gorge, especially the views to the south. We co9uld still see Lake James from here. After 25 minutes or so we descended, and ended up missing the MST on our way down. We went the wrong way on another trail for a few minutes before catching my mistake, and backtracked to find the MST again.
After leaving Table Rock, it was all downhill from here. Bad news for my knee, which was still hurting. This section of the trail was rather boring and didn’t offer much to keep us interested. No mat ter though, at this point we were gunning for the car and ready to head home. I am never ready to leave, except for the last day.
When we finally arrived at the car, I was greeted with a flat tire. I’ve known about this slow leak for a while, and was prepared with my 12v air compressor that I keep in my trunk. Also, I popped the hood to check my oil before leaving and noticed that an animal had built a nest on top of my valve cover. He probably found my engine bay on the day we arrived in an effort to stay warm. At least nothing was chewed up, I’ve heard some horror stories about hikers returning to their vehicle only to find that wires under the hood have been chewed through by some type of animal. I changed in the parking lot, and realized now that I forgot my sandals. I always try to air out my feet on the drive home since they’ve been trapped in boots for a week.
It felt great to get in the car and sit in a comfortable seat. However, my car is a stick shift, so I use my left leg to operate the clutch. That’s the knee that’s been hurting for the last few days. Driving home was actually pretty painful. Bryan couldn’t drive a stick, so I had to tough it out… for 650+ miles. Even after I got back home, my knee hurt for 3-4 weeks. It’s feeling fine now, but it makes me wonder if I am going to have more problems with it in the future. I have some big plans for the next few years, and want to stay as healthy as I can.! I might look into joint supplements if this continues, but for now I don’t have any hikes planned during the winter.
Final Thoughts
I really underestimated the difficulty of the terrain here. I thought this place was going to be a walk in the park, but it ended up being an ass kicker. There were some sections of trail here that were steeper than anything we encountered in Colorado (except Snowmass Mountain). The Linville River trail was really over grown and hard to follow i spots, especially with the downed trees. This was one of the dirtiest backpacking destinations I’ve visited though, lots of garbage strewn about. Mainly at the campsites, but damn it was a lot. I’m glad I didn’t bring my fishing pole this time.
If I were to come back here, I would really want to camp up on Shortoff Mountain. I would have stayed a night there on this trip had I known they were such great sites. The fog robbed us of what would have been some amazing views on days 1 and 2, but our day 4 made up for it. Bryan did really well, the best of anyone I have brought with me so far. He kept up a good pace and didn’t complain. That’s a good hiking partner in my book.
Complete Linville Gorge Wilderness Photo Gallery
As always, questions and comments are welcome!
If you found my trip report useful, please don’t hesitate to leave a comment! Alternatively, if you feel you have any information you’d like to share with others regarding this hike, please feel free to leave that below in a comment as well.
[tcb_comment_count]
Four Pass Loop – Maroon Bells Wilderness, CO Aug 2012 (Backpacking Trip Report)
Maroon Bells Wilderness, CO – Four Pass Loop Backpacking Overview
Complete Maroon Bells Wilderness Photo Gallery | Maroon Bells Wilderness HD Video
- Location – Maroon Bells Wilderness, CO
- Park – White River National Forest
- Trail Hiked – Four Pass Loop
- Miles Driven To Destination – 2980 miles Round trip
- Length Of Time Hiked – 6 days, 5 nights
- Trail Type – Loop
- Miles Hiked – 38 (includes summit of Snowmass Mountain)
- Trail Difficulty – 8/10
- Fires Allowed – Yes
Download a GPX file of my hike (right click and choose “save as”): Four Pass Loop – Maroon Bells Wilderness, CO
[sgpx gpx=”/wp-content/uploads/gpx/Maroon Bells Trip 2012.gpx”]

The Maroon Bells Wilderness caught my attention this spring when planning a backpacking trip during the month of May. I had read about the Four Pass Loop and after seeing some incredible pictures of this place, and I knew this was one hike I couldn’t pass up. There was too much snowfall on the ground still in May, and instead I hiked the Gila Wilderness in New Mexico. However, I would not have to wait long for my chance to hike here. I decided that the Four Pass Loop would be my destination of choice for my mid summer trip after my plans for Isle Royale fell through yet again. The plan was to hike the Loop, but camp an extra night at Snowmass Lake and summit Snowmass Mountain on the extra day. It would be a step above all my previous hikes in most aspects, especially elevation. Wikipedia has this to say regarding Altitude Sickness: “It is hard to determine who will be affected by altitude sickness, as there are no specific factors that correlate with a susceptibility to altitude sickness.”
The area we planned on hiking lies in the Elk Mountain Range in the Maroon Bells Wilderness, just outside of Aspen, CO. This is within the White River National Forest.
Prior to this trip, the highest elevation I’ve hiked t was 10,643ft (Black Mountain, Gila Wilderness, NM). This trip would raise that number by 3,455ft if I can summit Snowmass Mountain, 14,098ft. If not, the Four Pass Loop is comprised of four mountain passes between 12,400 and 12,500ft, so I’ll still surpass my highest elevation by more than 1,850ft anyways. I didn’t have a problem with the elevation in New Mexico this past May, but this was going to be the real test!
My girlfriend was coming with me on this trip. I was a little concerned with how she will handle the elevation, as well as the rigors of a big hike like this. She had gone with me on my trip to Manistee River last fall, a really easy hike, but that was her only prior backpacking experience. She was short some gear and had to buy rain pants, hiking boots, socks, sleeping bag, and a backpack. There was no way she could use my crappy High Sierra backpack I have as a “spare” for a trip like this. In fact, she used it last year at Manistee with maybe 20 pounds in it, and even that was uncomfortable. The only gear I had to buy for this trip was a few more OPsaks so the critters can’t smell our food. I didn’t even have to make a last minute trip to REI for something… nice.
Getting There
I won’t bore you with much details of driving here, it was pretty uneventful. Almost 1500 miles of farmland is enough to put anyone to sleep. We left Detroit on Saturday July 28th and drove about 15 hours before stopping in North Platte, Nebraska. We assumed that there would be plenty of hotel rooms available, but every hotel was pretty much booked. There were a few events going on, such as a soccer tournament. We had to settle for a smoking room at a Days Inn I think it was. It smelled awful, and apparently pets are welcome in the hotel because we heard dogs barking all night. It was pretty ghetto, but it was either this place or nothing since there were no other towns around.
The next day, we only had about 4 hours left to Denver where, where we planned on staying with Lisa’s friend. It was a pretty gradual rise in elevation the rest of the drive. We were relieved to finally see the Rockies about 30 miles outside of Denver. We arrived early in the afternoon, so we decided to grab a bite to eat and check out the Red Rocks area just outside of town. After that, we went to bed early and tried to get as much rest as possible before setting out on the final stretch tomorrow morning.
Day 1 – Monday July 30th, 2012
Miles Hiked – 4
Route – Maroon Creek Rd. Trailhead (West Maroon Portal Parking Lot) to camp along West Maroon Creek at 10,800ft
We left The Denver area around 5:45am today after spending the night at a friends apartment, which was about 4 hours from the trailhead in Aspen. After leaving Denver on I-70w, the drive was all mountains. It was a beautiful drive and really built up my anticipation for the hike. We stopped for breakfast at the Golden Burro in Leadville, which was pretty good. Their menus were full of history of the town, which included things like Doc Holiday’s last shootout. I recommend this place if you are passing through… good food, big portions, cool atmosphere.

After leaving Leadville, we passed over the Continental Divide at Independence Pass. We stopped here for a couple of pictures, but didn’t stay long. After this, the road really winds through the mountains, and offered some great views. It was a white knuckle drive though, thanks to the swarms of cyclists on the road. These guys were all over between Independence Pass and the Maroon Creed Rd. Trailhead in Aspen. They don’t move out of the way either, they ride in the middle of the road as if they are a car. I was ready to get out of the car by the time we reached Aspen, where I was picking up my fishing license I had ordered online. I was looking for “King Sooper’s”, which I thought was some type of gas station. There seem to be no visible addresses on buildings in Aspen, but I stopped where my GPS said the address was. We got out and walked around for a while trying to find it before figuring out that King Sooper’s was actually a grocery store called “City Market”. Apparently, it’s called King Sooper’s City Market, but how the hell would anyone know that from the sign outside that says “City Market”?

After grabbing the license, we dodged about a 1,000 more cyclists before reaching the entrance to the Maroon Bells Wilderness. We paid the $10 entrance fee and were told that the overnight parking lot was full and that we needed to park at the West Portal lot. This lot was packed with cars too, but we found a spot and began to gear up. I always bring a scale with me to the trailhead so I can weigh my pack right before the hike. Mine was 52+ pounds, Lisa’s was 34. Intersecting the parking lot was a trail that headed into the woods in the direction we wanted to go, but it was not clear where it was going. So, we hiked the pavement, following other hikers we saw leaving the parking lot. It was probably another 1/3 mile or so before we reached a bus loading/unloading area where they drop off hoards of day hikers shuttled in from somewhere. We weren’t sure where we needed to obtain the free permit needed to hike here, but after following the cement pathway we came to a small building that had some info on the wildlife and whatnot. There was another hiker in here filling out a permit, but there were none left on the counter and no park employees around. It was already around 11:30 and we couldn’t wait around for anyone to get us a permit, so I rummaged through the drawers on the other side of the counter and found a stack of permits, which I placed on the counter for everyone to use.
Finally, we were on our way. Today, we were going to hike about 4 miles and find camp somewhere near 10,800ft along West Maroon Creek. I had read that there were not many campsites past this mark, unless you plan on going over West Maroon Pass.

Maroon Lake is right there by the place we got the permit, with the Bells visible from the start. It was very beautiful but I was a little discouraged by the massive amounts of people in the area. I know that the trailhead area is always the most crowded, but I was having a hard time believing we were going to have any type of solitude here. However, many of these people had nothing on their backs and were clearly only here for the day, so we figured it would clear up after Crater Lake.


View Of Maroon Bells From Crater Lake
After leaving Maroon Lake, we hiked through a short wooded section before hiking a mile or so of rocky ups and downs leading to Crater Lake. The entire way here we encountered people coming or going every minute or two, and often much more frequently that that. Crater Lake was pretty dry, evidence of the drought this area has been experiencing. Only a week prior the fire ban was lifted for the White River National Forest, which was good news for us. Who doesn’t love a good campfire?


We should have scoped out the campsites near Crater Lake while we were here, since this was our intended campsite for night 5. However, since we were not making very good time today, we didn’t stay long. After passing the lake, we began to see less and less people, which was a good thing. Although we hadn’t hiked too far, it had been a while now since breakfast so we stopped for lunch at the base of a talus field below North Maroon Peak. Here, we caught our first glimpse of a Marmot. Lisa and I had never seen one, so watching them run around on the rocks was entertaining. We also saw our first Pika in this area, and saw our last person for the day… finally, some solitude!
After finishing up with lunch, we put our packs back on and immediately Lisa noticed a large water leak coming from her backpack. It was obviously the hydration bladder as this was the only item with water in it, but upon inspection we did not see any leaks or even a wet spot on the bladder itself. We were stumped as to where the leak came from, but my best guess is that the quick connect mechanism for the bladder’s tube had too much pressure on it causing the hose to be partially open. It’s just odd that there was no water in this area, nor was it wet. We kept our fingers crossed and hoped this would not happen again, and thankfully it didn’t.


These goats weren’t happy to see us
Now late afternoon, it was pretty hot out at this point. We were both a little dehydrated, despite drinking tons of water in the morning and throughout our hike today. I had a bit of a headache, which I blamed on the elevation and dehydration. Lisa wasn’t feeling good, and was ready to stop. I wanted to make it to around 10,800ft today as I’ve read that there are not many good campsites past this mark. As we pushed on towards our destination, we encountered a few mountain goats grazing alongside the trail, maybe 30 feet away. I took a few pictures, and moved in closer to shoot a video of them. One of the goats turned and started trotting towards me, so I backed off and let them be. These guys were big, and I did not want to find out what they were capable of.


Night 1 campsite near West Maroon Creek, around 10,800ft
After leaving the goats behind, we crossed over to the East side of West Maroon Creek. I decided to start looking for a place to make camp for the night and dropped my pack to scout the area. We were just below the Len Shoemaker Ridge at this point. Leaving the trail and hiking up the hillside towards the ridge, I found a nice campsite on a hill with some good tree cover and a nice view. As we set up camp we could see several other mountain goats on the slopes South of Maroon Peak and above us near the Len Shoemaker Ridge. Great, hope these guys leave us alone!

The Len Shoemaker Ridge
Next, we headed back down to West Maroon Creek to filter some water. My MSR Miniworks water filter was usually good for 2-4 liters of water before needing to be cleaned, but the water was so clean here that I filtered 8 liters without the flow slowing down much. Of course, Giardia is still a threat no matter how clean the water looks and this water must be filtered or boiled in order to drink it. I chugged a liter of water while I was filtering, which I typically do in order to rehydrate and still leave with a full supply of water. After taking an asprin and downing that liter of water, my headache was gone.
Now it was time to hang our food. There are VERY few good places to hang food along the Four Pass Loop as most of the trees are coniferous and do not have long branches. My first attempt at a bear hang here ended up in the loss of my cordage, as it got tangled in the jagged branches of a leaning tree. I tried climbing this tree as well as the one next to it to get my rope back, but after a half hour I gave up. Fortunately I had a spare rope, but it wasn’t as long as it really needed to be. I brought a large dry sack to keep our food in, which was stored in my OPsaks. Being in the OPsaks, I didn’t worry too much about the quality of the hang as these bags seem to do an excellent job of masking the smell of it’s contents. I’ve never had a problem yet with animals getting into anything I have stored in these bags.

Eating dinner on the scree slope below the Len Shoemaker Ridge
We ate our dinner in the talus field below the Len Shoemaker Ridge, about 200ft from our campsite. I happened to glance at our camp and noticed a large buck wandering around near our tent. So far, we had seen quite a bit of wildlife and this made us think what we were in for in the upcoming days. After finishing up with dinner we had a nice fire on the rocks below our camp and watched the stars for a while, before the brightness of the moon took over. We decided to call it a day around 10 or 10:30. Tomorrow is going to be a long day with two mountain passes to traverse.
Day 2 – Tuesday July 31st, 2012
Miles Hiked – 7.5
Route – Camp to Fravert Basin

View from our campsite on the morning of day 2
I awoke on our second day to an awesome view of the unnamed peaks to the North. It was a relief to see daylight after a pretty uncomfortable night’s sleep. I felt great today, but my thermarest air mattress had a small leak in it that I thought I had patched up during my last trip to the Dolly Sods Wilderness of West Virginia. Apparently there was another leak somewhere as it was completely deflated. Then I checked my half-assed bear hang, which I was happy to see untouched. Being our first morning, and Lisa’s first hike since our trip to Manistee almost a year ago, we were pretty slow to break camp this morning. I also went down to the creek to top off our water supply which took an extra half hour. We have two mountain passes to climb today, West Maroon Pass and Frigid Air Pass, so I wanted to make sure we had enough water.

I think it was around 9am when we hit the trail today. After hiking about a half mile, we passed another group of hikers getting a slower start than us, still sitting around in camp. Around this point we began to see a ton of hikers going up West Maroon Pass, and I couldn’t figure where they all came from. Many of these people had nothing on their backs, so they were day hiking from somewhere, maybe their campsite nearby? Doubt they came all the way from the visitor’s center at this time of day. We probably passed 30 people going up to the top of this pass, way more than I was expecting.


Wildflowers line the trail up to West Maroon Pass
We hiked in and out of small pockets of wooded areas, but it was mostly low brush. Wildflowers were pretty abundant here, we passed several varieties that got Lisa’s attention. After crossing West Maroon Creek again, we crossed a few more small streams before the landscape really began to open up. The view of the mountains surrounding us was incredible, even more so as we climbed higher. We couldn’t see the exact path of the trail leading up to West Maroon Pass until we were almost near the final 1/2 mile or so ascent.

Near the top of West Maroon Pass

Looking east from the top of West Maroon Pass
Once at the top of West Maroon Pass (12,500ft), we were greeted by several other hikers. The first thing I did was pull of my boots and let my feet air out while we had the chance. It was noticeably colder and windier up here, but my feet needed to breathe. We ate lunch up here as well, and the chipmunks were already out investigating and begging for food. Obviously, they were pretty used to people, they were not afraid of us in the least. While I was sitting on a rock eating a sandwich, one crawled up my back! Crazy little bastards.

Tons of these guys up here.

Beautiful view from West Maroon Pass!

View to the west
I also took this opportunity to pull out my Sony Nex-5 camera and take some pictures. Before I left for my hike in West Virgina in June, I ordered a bunch of camera equipment that didn’t arrive until after I got back, so this was my first trip that I had took with my new graduated neutral density filters, polarizer lens, etc. I set up the tripod and got a few decent pictures, but I still need to learn/practice more. Fortunately, the beauty of this place does most of the work for you, and there is no shortage of amazing things to photograph here!

Now on our way down West Maroon Pass and northwest towards Frigid Air Pass, the trail quickly gives way to a much gentler slope. It was really nice through here, just rolling green hills and meadows with tons of wildflowers. It was mostly downhill for quite a while, but not to the point where it’s hard on the knees. This was a relief after having just hiked 1700ft up the last pass. We only encountered one or two other hikers in this section before Frigid Air Pass, and played leapfrog with one of them for the last half of the section.

Between West Maroon Pass & Frigid Air Pass

Looking back at West Maroon Pass


East Fork Crystal River leading into Crystal Canyon
At the base of Frigid Air Pass, there was a dried up pond and a sign indicating the direction of the trail. This pass was much short in distance, but would turn out to be pretty damn steep near the top. Once over this, it was all downhill for the rest of the day.

Frigid Air Pass in the background

Just below Frigid Air Pass
At the top of Frigid Air Pass, we were again presented with unbelievable views, this time of the vast Fravert Basin. We decided to take a break up here before descending, so it was time again to air out the feet and have a snack.

Upper Fravert Basin from Frigid Air Pass

Overlooking Fravert basin

We saw at least 3 marmots up here and this time I was able to get a few good pictures of one up close. Camp for the night was going to be somewhere down in the Fravert Basin, wherever we find a decent site. However, the clouds were really starting to move in, and we weren’t sure exactly how far we’d have to go until we find a good spot. We this in mind, we cut our break short and descended into the basin as quickly as possible. After all, it was late afternoon now, and I’d hoped to be at camp already.

Marmot hanging out on Frigid Air Pass

Descending Frigid Air Pass

We made great time getting down from the pass, and before we knew it we had made it to the forested area near the bottom. I knew there was a river down here and somewhere near it was going to be our best bet for a campsite. Once we got close enough to actually see the river, I left the trail and began to look for potential campsites. I didn’t see any previously used ones, but found a descent site on the opposite bank of the river. It was a tall grassy area situated a few hundred feet from the bank, forming a clearing around 30′ in diameter. I wasn’t too pleased with the site myself, but we we tired and the weather was looking pretty nasty.

Crossing the North Fork Crystal River to find a campsite

Night 2 campsite in the Fravert Basin
The good news about this site was that the ground beneath us was pretty soft, so we should sleep good tonight. Well, as good as you can with a deflated air mattress. It was also much closer to a water source than our site last night, which was a huge bonus. On the downside, there was nowhere to hang food here, not one tree. I climbed up the rocky hillside above our campsite and found a dead tree trunk on which I set our food bag. I didn’t like the idea of letting it sit out like that, but here was nowhere to hang the food near our site. I felt pretty confident that the OPsaks would do their job, and those were stuffed inside the dry sack, so I didn’t feel too bad about it.

Right before we started seeing lightning…
As it got dark, it began to sprinkle a little bit on and off. The rain wasn’t a worry, but the winds were picking up and lightning was flashing all around us. At one point we saw a bolt strike the unnamed 13’er that towered above our campsite. This was the nearest peak and had us a little worried, but after an hour or two the weather calmed down and we were finally able to get some rest.
Day 3 – Wednesday August 1st, 2012
Miles Hiked – 9
Route – Fravert Basin to Snowmass Lake

I woke up around 6am today, determined to get an earlier start than the day before. It was very cold this morning, and everything was wet from the rain last night. Fortunately, all of our gear stayed dry and our food bag was untouched once again. I headed down to the creek to top of our water while Lisa packed up the gear inside the tent. This became our morning routine… I took care of the outside stuff like the bear hang & filtering water while she rolled up the sleeping bags, the air mattresses, etc. I took some of Lisa’s weight when were packing our backpacks so that today might be easier for her. I would have taken more, but there’s only so much room in my pack! After eating a met-rx bar and whole wheat bagel for breakfast, we were on the trail today by roughly 8am.

North Fork Crystal River From Above

As soon as we we back on the trail, we passed several campsites. I knew we had to be close yesterday, but you never know… could have hiked another mile or two before finding a suitable site. We also passed several hikers in the first hour of today’s hike. After about an hour, the trail leads you to a nice overlook of a river in the valley below. A waterfall can also been seen just off the trail. I tried to take some pictures up here, but the lighting wasn’t the greatest at this time of day. Lisa went ahead of me while I took some pictures, and when I was done I caught up with her. After a sharp decent of a couple hundred feet, we were on the valley floor.


Crystal river waterfall
Now looking back up to our overlook spot above, I was tempted to try and get some pictures of that waterfall. this would require a short off trail hike, maybe 1/2 mile. Lisa didn’t want to go, so she stayed behind as I worked my way towards the falls. The vegetation was still covered with last night’s rain, and soon I was too. The route I chose to the falls was much thicker than I thought, but I eventually made it. I took a few quick pictures before heading back. Lisa was waiting for me so I didn’t want to stay too long. Instead of working my way through the woods again, I opted to follow the waterfall down. It was very rocky but it looked like there was less vegetation on the rocks and this offered a glimmer of hope for not becoming completely soaked. However, even here existed thick shrubs that had me drenched by the time I made it to the bottom. Lisa was glad she didn’t go when she saw me!
The next section was fairly flat and wandered though a pine forest with a ton of downed trees before hugging the North Fork Crystal River. There were a few nice campsites through here that I really would have loved to have stayed at had we hiked this far yesterday. This was a really peaceful hike… didn’t see a soul and it wasn’t too difficult. It seemed like we covered some good ground too.

North Fork Crystal River

Heading up Trail Rider Pass. That’s Lead King Basin on the left


Some of my favorite pictures were here, of the Lead King Basin
After crossing the North Fork Crystal River, the trail remained somewhat flat for another mile or so before steep switchbacks led the way to Trail Rider Pass. I think we both agreed that this was the longest and most difficult pass of the trip. Now in direct sunlight, I put on my hat so I didn’t get to burnt. Lisa didn’t have a hat though, and was getting quite red even with the application of sunscreen. The views of Lead King Basin were incredible though!

Trail Rider Pass junction with Geneva Lake Trail

Elk Mountains


The entire way up, we couldn’t really see where Trail Rider Pass was exactly. After a short climb to the top of the hill above the Geneva Lake Trail intersection, we reached a bit of a plateau. There was a small lake up here, and this made me think how awesome it would be to camp up here. However, this didn’t fit with our plans, and knowing that Snowmass Lake is on the other side of the pass I quickly forgot about the idea. From here, we could finally see where the trail was heading. It seemed like a really long way to go still, especially after the long hike up to where we were now.

First view of Snowmass Lake!


Looking south/west from Trail Rider Pass
The “plateau” was a nice break from the steep inclines, but soon the path up Trail Rider Pass became just as steep as any of the passes before it. Once again, I was blown away at the view! Snowmass Lake looked incredible, and we couldn’t wait to get down to it. This was the only pass that we did not share with any other hikers, which was nice. It was very cold and windy up here, even after sweating our way up to the top. We hung out up here for about 45 minutes to air out our feet, eat, and take pictures before heading down.

Descending Trail Rider Pass


Snowmass Peak on the left, and Snowmass Mountain in the middle,
The trail was very visible on the mountainside, and it could be seen for quite a ways here. Some of the gullies still had snow in them, and this was the closest we’d come to them yet. Once we got our first view of Snowmass Mountain, I pointed it out to Lisa. Although we had planned on climbing it together, after seeing it first hand, she decided against it. This was somewhat of a relief to hear because I had a feeling this was a little more than she could handle. I have to admit that I was having second thoughts as well, since I had never climbed anything like this before. Not even close. But, I had my mind set on it and that was that.


Beautiful hike down to Snowmass Lake

Waterfall By Snowmass Lake
We made great time hiking through this next section as we were both pretty eager to get to camp. There were some cool views of the lake as we emerged from small patches of wooded areas. The water was an incredibly vibrant turquoise blueish color that seemed to change every time we looked at it. It didn’t seem like Snowmass Lake was too far, but the hike ended up taking much longer than I thought. I wasn’t exactly sure where the campsites were located along the lake, and I assumed they were scattered along all sides. However, the trail took us to the far end of the lake and past it. Now, I wasn’t sure if we had missed a trail leading to the lake. Eventually we crossed the river and the trail headed up towards the lake again. While there must have been a shorter route, the way we ended up hiking seemed like it added another 45 minutes by the time we passed the lake and had to hike uphill again to get to the campsites. Just before the lake were two good sized waterfalls, and pools filled with Brook Trout. We passed a few guys who had caught some, which I hoped to do tomorrow!

Campsite for nights 3 & 4
Once we reached Snowmass Lake, we were surprised to see how many people there were here. Of course, all of the good campsites were taken now that it was 6:30pm. We settled on a less than prime campsite, which was disappointing knowing that we were spending 2 nights here. We could always move sites tomorrow when others clear out, but is it really worth the time and effort? I’ll be climbing Snowmass Mountain tomorrow, so will I want to move when I get back? Probably not. The site wasn’t all bad though. Being set a little farther back from the lake, it seemed like it offered more privacy than some of the other sites. And, people weren’t walking past our site every 2 minutes since it was off the main path. However, there are no campfires allowed within 1/2 mile of Snowmass Lake, which was another disappointment. There were signs posted warning of a $325 fine for having a fire!

View from Snowmass Lake
Despite being in a wooded area, there is nowhere good to hang food near the lake. My bear hang ended up being maybe 5 feet off the ground, suspended in between 2 trees that were about 12 feet apart. Not ideal, but better than nothing. I saw many others with half-assed bear hangs as well. After setting up camp and finding a bear hang location, we headed down to the river to filter some water and take pictures. There were no colors on the mountains tonight to reflect in the water as I have seen in some pictures online, but I have one more sunset and 2 sunrises still to look forward to here! It sprinkled on and off for the rest of the night, but not hard enough to keep people out of their tents.
Back at camp, I packed my Camelbak for tomorrow’s climb. I had debated on the necessity of bringing the Camelbak, but knew it would be perfect for my climb and was worth the extra weight in my pack. I figured 2 liters of water would be enough, stored in my Osprey bladder. I packed my map, compass, gps, first aid kit, food, and camera equipment. I took out some moleskin so that it was ready for me to put on in the morning to cover the blisters on the back of my heels, which fortunately were not hurting too bad. Packed and ready for tomorrow, I was in bed by 10pm.
Day 4- Thursday August 2nd, 2012
Miles Hiked – 5.7
Route – Summit Snowmass Mountain, same campsite
To be honest, I didn’t sleep much last night. I was pretty nervous about climbing my first 14er, and doing it solo. Sleeping on a deflated air mattress also doesn’t help either. When my alarm went off at 5am, I was having a hard time getting myself up to do this, but after a few minutes I got up and moving. The weather was clear, and I could still see the stars quite well. I retrieved our food from the bear hang, ate some breakfast and packed my lunch into the Camelbak.

Time To Climb!

Snowmass Mountian climbing route

Base of the scree field
I left camp around 5:30-5:45am and began the hike around the lake. This was actually one of the worst parts about the entire climb! The trail was cut through thick vegetation that one could not help but to brush up against, which was still wet. It winds along the lake, sometimes on the shore and sometimes on the hillside. There were many roots sticking up that you either trip over or slip on. After 10 minutes, I was soaked to the bone. My boots were full of water, and at this point I felt like it would have been easier to walk through the lake itself! Near the other side of the lake now, I found it easier to follow the very narrow shoreline of the lake instead of the trail itself. In doing so, I missed where the trail went and I ended up scouring the shore for a route inwards toward the base of the scree field, unsuccessfully. Blocking my path was some very thick vegetation, a stream, and some very soft ground. I had to turn back and find the trail. I saw another group of climbers making their way around the lake as well, so I watched where they went and took the same route out onto the scree field.


Leaving the scree field

Sunrise over Snowmass Lake
There were 2 climbers already working their way up the scree field when I passed another group of 5 stopped at the bottom putting on their helmets and checking their gear. I was able to follow the path of the 2 climbers above me through the scree field, which was not as bad as many people had made it out to be. It was steep and loose in spots, but I was expecting worse. The steepest section of the scree field was near the top, below the grassy area.

The middle section of the climb was the easiest
Now on the grass, I passed the 2 climbers that were above me. We stopped briefly to chat, discussing routes up the mountain. I was planning on doing the typical over-the-ridge route, but now that I was up here I was thinking about the shorter route that people take when there is no snow. I opted for the shorter route, while the other 2 hikers were going to ascend via the standard route.
It was nice to be off that scree field. The grassy area was a nice break, although still a climb. There were many small streams of water flowing through this area, with lots of large boulders dotting the landscape. I made pretty good time going up through this section as it gave way to larger boulders. Now you must hop from rock to rock, and sometimes climb from one to another. Some tilt, move, or shift when you step on them, so being conscious of where you step is crucial. The entire way up, I could hear rocks falling in the distance from Snowmass Peak (not Snowmass Mountain).
Once I got close enough to the top of the ridge to see some detail, I could see that it was pretty damn steep. It got steeper and steeper towards the top, until the last 20 feet or so became almost vertical. This climb definitely had some exposure. Although a fall from this height isn’t likely to be fatal, the terrain below was very steep and rocky. You would certainly tumble down the mountainside along with a ton of rocks, which could easily be lethal. So, I hesitated for a few minutes before attempting this climb. After all, I was by myself, and If I get hurt, who would even know?


View form the top of the ridge

The summit is hidden from this view
My adrenaline was pumping like crazy as I started climbing. The handholds on the rock face were good, but extremely crumbly. Even large handholds would just fall right off, so it was vital to test each hold before committing to it. I made the mistake of looking down once, which made me a little dizzy. I turned around and calmed myself down by concentrating on what’s above me and not thinking about what’s below. This worked well and I made it to the top of the ridge. I was a little shaken, so I stopped here for 10 minutes to plan my final ascent to the top and regain my composure. This was the scariest part of the entire climb for me.
The final ascent along the backside of the ridge looked daunting when I first saw it, but once you start moving you can start to see the lines. There are some cairns here and there, follow them when you see them. The summit itself is hidden for most of the ascent and only visible near the top.
Even at 14k feet, I didn’t feel like it was difficult breathing. I felt perfectly fine, and did not feel any shortness of breath whatsoever. I was really surprised at this, but certainly not complaining. This made me wonder how high I’d have to climb before experiencing any breathing problems. I had never been this high up in elevation, so it was nice to know what my body is capable of for future trips.


I made it to the summit of Snowmass Mountain around 9:30am. My GPS said 14,061ft but I am going to trust the folks at the USGS over Garmin and go with the 14,098ft figure they claim. The weather was surprisingly calm and not too windy, but it was turning cloudy fast. The view was so incredible, I just wish the skies were blue for my pictures and it would have been perfect! Views of the red colors on the mountains contrasting against the greens were especially beautiful, never seen anything like that. I could see Geneva Lake below, which would have been a nice place to camp had I planned my trip to include a night there. Maybe on a trip in the future? I could see myself coming back here!

View from Snowmass Mountain


Snowmass Lake from the top of Snowmass Mountain
About 15 minutes after I reached the top, the 2 climbers I passed earlier had joined me. I was taking pictures at this point, and we exchanged some of each other before moving on to our lunches. We chatted and ate for about 45 minutes before heading down around 10:30am.

The other 2 climbers descending Snowmass Mountain. This is just over the ridge, along the standard route
I didn’t want to down climb that death wall I climbed up earlier to get over the ridge, so I decided to take the longer route that the other climbers had taken. I missed the route up over the ridge going this way and had to backtrack a little to find it, but I was over the ridge by 11am. The next few hundred feet of my descent involved climbing down and jumping from rock to rock, which were surprisingly stable. Once I got the hang of moving on these large boulders near the top, I was flying downhill at a good pace. Before I knew it, I could no longer see the other 2 climbers, who went over the ridge at the same time as I did.
Now at the top of the scree field, I was searching for the route I took up but didn’t see it. The route I ended up taking put me in the scree field higher up than the way I ascended, and this meant steeper terrain and more time in the gully. Parts of this gully had water flowing down it, and it was pretty slippery. At one point I slipped and fell on my ass, and slid about 5 feet down before stopping myself. I’m just glad I didn’t pick up any real speed. Going down the rest of the scree field wasn’t too bad though. The easiest way to move here was to walk downhill “sideways”, and slide down the rocks in a controlled manner.
Near the very bottom of the scree field, I was crossing over a small stream when I slipped on some roots and fell on a boulder, right on my hip. This fall hurt but I was ok. Later on, this would turn into a softball sized bruise. Going around Snowmass Lake was still a pain in the ass, even now that it was mostly dry. I fell once or twice making my way around the lake. It’s funny that the the most treacherous part of the climb wasn’t even up on the mountain!
I made it back to camp early afternoon, around 1pm. Just then, it started sprinkling. What great timing, I thought. I had neglected to bring any rain gear with me since it wouldn’t fit in my Camelbak, which in hindsight was probably a mistake on my part. Especially since I could have used it in the morning when traveling around the perimeter of the lake. My first priority was removing my boots and getting some air to my feet, and secondly, chugging some water. I had only drank about 1.5 liters of water during the climb, as well as a full liter in the morning before leaving camp. I wasn’t feeling dehydrated, but my pee was pretty yellow.
While I was gone climbing, Lisa took a few pictures with the Canon Powershot:


After getting my fill of h20 and filtering more water, I had the rest of the day to relax. Lisa was happy to sleep in and use today as a recuperation day, and had a very laid back morning by the lake. We thought about moving camp to a better site, but decided that it didn’t matter and the time spent moving would be better used fishing, exploring, etc. We headed down to the lake shore, and hung out here for a while taking pictures and getting some sun. It was pretty hot when it wasn’t cloudy, but pretty cool otherwise. Lisa and I laid out on a large rock at the edge of the shore for a while before trying my hand at fishing. I didn’t bring much for gear, and other than a Mepps spinner and a spoon I didn’t have anything for trout. I completely forgot to pick up some worms when we stopped for my fishing license in Aspen. Needless to say, I didn’t catch anything in the lake. Back by the mouth of the river, we saw a mink or weasel, not sure exactly. It appeared to have a mouse in it’s mouth as it scurried along a log protruding into the water.


There are trout in here, but I didn’t get any
I also fished the pool below the 2nd waterfall on Snowmass Creek, heading away from the Lake. I could see several trout in here, maybe 15 or so. There were a few that were 10″ plus, but they didn’t want anything to do with my tackle. After a few snags and no bites, I gave up. I wouldn’t have been able to eat them anyways, since I left my stove behind for this trip and opted for easier to prepare food, and there are no fires allowed by the lake. So either way, it was going to be catch and release.

Closer to sundown, I set up my camera equipment in hopes of capturing some colors on Snowmass Peak reflecting in the lake. There were no colors yet again, but it was still very picturesque! We pigged out on some sour patch kids as the sun went down. Without being able to have a fire, there wasn’t much else to do but go to sleep. We did hear a coyote howl shortly after lying down though. After it’s 2nd or third howl, someone camping near the lake did his own coyote call to mock it. I could have gone without that.
Day 5 – Friday August 3rd, 2012
Miles Hiked – 5.6
Route – Snowmass Lake to Minnehaha Gulch campsite


My alarm went off at 6:15 today. I wanted to catch the sunrise and hopefully capture some great photos. The water was like glass and so far the sky was completely clear. Absolutely perfect conditions! I set up the tripod and got my camera ready while Lisa filtered water. We hung out here for quite a while taking pictures, eating, and just taking in the beauty of this place before we hit the trail at 9:15.

The hike back to the main trail seemed much longer than I remembered. Maybe 20 minutes after leaving camp, we passed a large pile of boulders that housed a family of marmots. These guys were all over the place… I wasn’t expecting to see so many! Finally back on the main trail and heading towards Buckskin Pass, we only passed a handful of hikers, mostly closer to Snowmass Lake.
Today’s hike had us traveling through more forests than the other days it seemed. I was surprised to find out how wide open everything is here, I wasn’t expecting to have huge views almost every step of the way. That’s how it is here though… huge, spanning views everywhere. Seldomly did we find ourselves in a forest area for more than a few hundred feet at a time. Being in the shade was a welcome feeling, especially for Lisa who had gotten quite a bit of sun by this point.

Beaver dam


After crossing Snowmass Creek late in the morning, we saw a beaver dam. We saw the “lodge” off in the distance, but no beavers. A waterfall lies downstream of the dam, but I didn’t stop to explore. The trail follows the creek a short ways before splitting off in a V. The funny thing is that in between the fork lies a tree with a sign on it that just says “Trail” and doesn’t point in either direction. It’s placement in the fork doesn’t indicate which direction to go, so the sign is completely useless! I chose the one that went up, and apparently I chose wisely.

The trail worked it’s way up the mountainside for a while before emerging from the tress and once again exposing us to intense sunlight for the ascent of our final mountain pass. On the bright side, Buckskin Pass was probably the easiest one of the four, at least in the clockwise direction we hiked it.

Pika


Buckskin Pass
We saw several more pikas and marmots on the way up. The marmots had burrowed into parts of the trail, leaving large holes in places. We still couldn’t see where the trail was taking us, or where exactly the pass itself was. By the time we could see where the trail was taking us, we were almost at the top. It didn’t seem as long or steep as the other passes, and we made it to the top by midday.
Of course, there were several other hikers up here already. We ate lunch and chatted with a woman who was by herself. She told us that a climber had died on North Maroon Peak the week before. This made me feel glad to have returned from my solo climb unscathed. Very sad to hear though. We saw a man descending Buckskin Mountain as we sat eating lunch, who eventually came over our way. I asked him about his climb and he on his way rather quickly.

Snowmass Peak & Snowmass Mountain viewed from Buckskin Pass

North Maroon Peak viewed from Buckskin Pass

Pyramid Peak behind me
The cool thing about this view from Buckskin Pass is the different perspective you get of Snowmass Mountain and Snowmass Peak. From Snowmass Lake, Peak looks taller than Mountain. But from here, you can clearly see that Snowmass Mountain is taller. North Maroon Peak can be seen to the south and Pyramid Peak dominates the landscape to the southeast.

Rain over Pyramid Peak
The east side of Buckskin Pass was much steeper, thankfully we were going down it. The weather was threatening to rain on and off like always, so we were trying to hurry up and get to our intended campsite at Crater Lake asap. However, after descending about 1300ft we camp across a campsite that had a pretty badass view, and was only a few hundred feet from a small stream. I knew Crater Lake was going to have a ton of people, and if you haven’t guessed yet, I like my solitude. Tomorrow’s hike was only going to be 2 miles back to the car, so adding 2 more miles of downhill hiking wasn’t really an issue. This is it, our final campsite of the trip.
It was 3pm when we stopped for the day, which was our earliest time yet. It sprinkled briefly as we set up the tent. While we were setting up camp, a group of 3 or 4 people passed by on horseback, with about 10 horses total. We had seen piles of horse shit here and there, but this was the first time we’d actually seen people on horseback. This site had a rope tied between 2 trees about 15 feet up, so this was the easiest bear hang of the whole trip. We really wanted a fire tonight since we only had one on our first night. We gathered some wood and stored it under the base of a pine tree to keep the wood dry, just in case it rains. We filtered water from the creek, which would be enough for tonight and tomorrow since it’s an easy hike back to the car. Filtering water always seems like it takes a long time, but as clean as the water was here in the Maroon Bells Wilderness, it went a lot faster not having to stop every other liter to clean the filter.

Night 5 campsite

Looking towards Buckskin Pass from our campsite
Back at camp, we were sitting around on a log when an overly territorial bird started messing with us. We later found that it was a Grey Jay. Just as it did in a previous campsite, the bird would circle us, hopping or flying 10 feet or so at a time. It would look at us for a few seconds before moving to another position. After making a complete circle, the bird stood on a stump facing away from us. It then proceeded to do a 180, stared at us for a few seconds, then flew directly at us! It turned away only 6 feet from our heads. We must have been near it’s nest or something, but I had never seen a bird act like that. It was pretty comical!
Sometime later, the thong piece on my sandal had come off and it was now almost impossible to walk in them. The thong had separated from the foam body of the sandal, taking with it a chunk of the foam. I sliced a narrow hole through the body of the sandal underneath the area of foam that was missing, just large enough to force the foam chunk attached to the thong through. I was skeptical of the longevity of this solution, but it felt great and was still intact by the end of our trip. Good fix, but now I’m in the market for another pair of sandals before my next trip.

Sleeping Sexton & North Marron Peak on the left
Our campsite offered excellent views of Pyramid Peak, Sleeping Sexton, and North Maroon Peak. We spent most of the evening lounging around, just enjoying the view. Below our campsite, it was evident that an avalanche had been through this area at some point. All of the trees were uprooted and a path was cleared through the forest. We didn’t get a direct view of the sunset, but there were some cool colors going on in the sky behind Pyramid Peak. It was actually fairly dark when all of the sudden the sun, which was behind Buckskin Pass somewhere, started shining on the clouds behind Pyramid Peak somehow. This seemed to defy all logic, but gave us a 5 minute window of some beautiful reds and oranges before finally going down for the night.

The stars came out very bright tonight as it was mostly clear. However, the moon was almost full and drowned out the stars by around 10pm. I was really hoping to see the night sky with great clarity on this trip, but between the weather and moonlight, that never happened. Being from the city, I don’t get to see very much of the night sky, so I always look forward to it when I go backpacking. Next time, I might try to plan a trip concurrent with the phases of the moon for best results. We stared at our campfire for a little while longer before calling it a day.
Day 6 – Saturday August 4th, 2012
Miles Hiked – 4.2
Route – Camp to car

This morning I awoke at 6:30 with the hopes of viewing the sunrise, but again there was no direct line of sight as it rose behind a ridge blocking my view. I’m sure the Maroon Bells would have looked spectacular this morning viewed from Crater Lake, but I was not regretting my decision to avoid the crowds. The weather was cool and clear as it was every morning here, and looked like a gorgeous day. As beautiful as it was here, we were ready to go back to the car and have a taste of civilization. We packed up camp and were en route back to the trailhead by 9:15am.

North Maroon Peak

Below Sleeping Sexton & North Maroon Peak
After leaving camp we hiked through the avalanche area that we overlooked yesterday. It’s pretty amazing to think that snow can literally wipe out everything in it’s path like this. The rest of the hike to Crater Lake was downhill from here, and mostly covered by trees once we passed the avalanche zone.

View of Crater Lake

View of the Maroon Bells from Crater Lake

Crater Lake
Once we neared Crater Lake, you could see how dried up it was from above. This must be a far cry from last year, which I was told had near record snowfall, so I’m sure the water level was much higher then. There weren’t any other people around yet, but that’s because it was still a little too early. After leaving Crater Lake, we were once again confronted with an army of day hikers. They come in by the busload at the visitor’s center, and seem to hike no farther than Crater Lake for the most part.


Approaching Maroon Lake
It seemed that the trail in between Crater and Maroon Lakes was much shorter this time around. Our large packs gave us away to the day hikers, who frequently stopped us to ask about our trip. I don’t mind stopping to chat, but after 6 days, we were ready to get back to the car, with a shower as our ultimate goal for the day. That, and a hot meal.

The Maroon Bells behind Maroon Lake

This sign was near Maroon Lake
By the time we reached Maroon Lake, the day hikers were out in full force. We stopped for a minute at the lake for few final pictures. I couldn’t help but look back at the Maroon Bells and reflect upon the most amazing backpacking trip of my life.
The hike back to the car seemed much longer from here though, despite being downhill this time. We made it back to the car around 11am, just in time to avoid the heat of the day. It felt great to finally change into shorts and sandals, and to sit on a comfortable seat instead of a log.
On the drive through Aspen, there were even more cyclists than I remember. We passed over a small bridge that had so many bikers that they had to get off their bikes and walk them across. There must have been 50 bikers on a bridge that was only 100 feet long! It was a biker traffic jam, pretty ridiculous if you ask me. There also seems to be a shortage of gas stations in this town. The ONE we stopped at was cleaning it’s bathroom so we had to look elsewhere. We ended up going to the King Sooper’s “City Market” grocery store again. I saw a few bikers almost get clobbered by cars backing out of parking spaces, and I almost hit a few myself. This place is a nightmare with all the pedestrians!
I was relieved to be out of Aspen, but we weren’t out of the woods yet. There were still tons of cyclists on the narrow mountain roads going all the way up to Independence Pass. After going over the pass they seemed to disappear from the roads and I felt much more comfortable driving.
We stopped in Leadville again for some food, and there was some sort of festival going on. We parked a few blocks off the main strip and headed towards a cool looking place called the Silver Dollar Saloon. The place was packed because of the festival, but a busboy showed us to a seat right away. The atmosphere was very cool in here, very old looking with lots of cool artifacts on the walls. There were several guys in here with handlebar mustaches, cowboy hats, and had pistols holstered on their side. We sat there for about 20 minutes and didn’t see ONE waitress anywhere in the entire restaurant. The only employees we saw were the busboy and one bartender, and nobody came by to give us a menu or take our drink order. We left and went to another place down the street called the Pasttime Bar. We were served immediately here, despite them being very busy as well. The food was great and the service was so-so.
We got back to the Denver area by late afternoon and immediately jumped in the shower. Finally, the moment I had been waiting for! After getting clean, we headed to downtown Denver for dinner before going to bed around 10pm. Tomorrow we would drive straight through to Detroit, but for now, it was time to get some good sleep on a real bed.
Final Thoughts
The Maroon Bells Wilderness is absolutely beautiful! This was easily the best hike of my life, no questions about it. This is the trip that all others will be measured against in the future. On top of the non-stop postcard perfect views, abundant wildlife, and sense of real adventure, the weather was pretty damn good. We didn’t get rained on once during our hike, only light rain at camp and slightly heavier rain our second night. No injuries, no altitude sickness beyond a bit of acclimation woes our first day, and overall just a smooth trip. Everything went according to plan, which is always a great feeling.
The downside is that there were a lot of people hiking here, which takes away from the whole experience in my opinion. At this time of the year though, crowds are to be expected, so I wasn’t holding out hope for a whole lot of solitude. Still, there were many more people than I had anticipated.
Climbing my first 14er, and doing it by myself was a huge thing for me. Just a great feeling that I really can’t describe. So glad I did it and hoping to do another someday soon!
I was disappointed with the fishing aspect of the trip, which is becoming the norm for me unfortunately. I don’t pick my trips with fishing as the main goal though, so when it doesn’t pan out it’s not too big of a deal. I didn’t get to see the stars like I’d hoped, nor was I able to photograph any good sunrises or sunsets. You can’t win them all though, and I still got some great pictures.
Complete Maroon Bells Photo Gallery
As always, questions and comments are welcome!
If you found my trip report useful, please don’t hesitate to leave a comment! Alternatively, if you feel you have any information you’d like to share with others regarding this hike, please feel free to leave that below in a comment as well.
[tcb_comment_count]
Dolly Sods Wilderness, WV Backpacking – June 2012
Dolly Sods Wilderness Backpacking Overview
Complete Dolly Sods Photo Gallery | Dolly Sods Wilderness Video
- Location – Dolly Sods Wilderness, West Virginia
- Park – Monongahela National Forest
- Trail Hiked – Custom Route
- Miles Driven To Destination – 920 miles roundtrip
- Length Of Time Hiked – 4 days, 3 nights
- Trail Type – Loop
- Miles Hiked – 21.9
- Trail Difficulty – 4.5/10
- Fires Allowed – Yes
Get a printed topographical map of the above GPX route here: Dolly Sods Wilderness Topo Map
Download this map without my writing on it here: http://www.fs.usda.gov/Internet/FSE_DOCUMENTS/stelprdb5152038.pdf
Only three weeks after returning from the Gila Wilderness, NM I decided that I wanted to take my father somewhere for his birthday instead of getting him another crappy gift that we’ll both have forgotten about by the next year. He’d never been on a hike over 4 miles and that was without a pack, so for a guy turning 61 this was going to be an adventure. I picked the Dolly Sods Wilderness because it looked like it had a lot to offer in a small area, and was not going to be too physically demanding for dad. Also, it was “only” an 8.5 hour drive from home.
Getting There
We got up at 5am and cooked breakfast, and headed out the door by 6am. We were able to beat the morning rush hour traffic and get past the worst of it without delays. Ohio’s toll road got us for $10.50, and the PA toll road totaled nearly $10 as well. Nothing like paying to drive on roads that are always under construction! Glad we don’t have toll roads in my home state. Ohio is a pretty boring drive, but once we got into Pennsylvania the landscape was much more to look at. Maryland and West Virginia were both beautiful drives, the kind you don’t mind driving through at all.
We got to our planned trailhead at around 3:30pm. We parked at the Blackbird Knob/Big Stonecoal/Breathed Mountain trailhead off Public Road 80 (aka Freeland Rd or hwy 37). We expected to have been able to drive all the way up to the trailhead itself, but deep puddles and rough road ahead were signs that my small car wasn’t to go any farther. We ended up having to hike an extra mile to the trailhead itself from where we parked our car. Even if you have a truck, you could have only gone a few hundred yards farther before large rocks block the path from here from any vehicle traffic. So, add an extra mile if you plan to start here.
Day 1 – June 4th, 2012

Cairn On The Rocky Ridge Trail
From the moment we got out of the car, we noticed how the climate was different here. It was fairly cool out, maybe in the upper 50’s and windy. Once you finally reach the actual trailhead itself, you’ll see signs for several trails that branch off from this area. We hiked north on the Rocky Ridge Trail, number 524. This was a really nice hike, and great way to start our trip. There are excellent views to the West, but since this trail is right on the Wilderness boundary at this point, you can still see many signs of civilization down below… houses, roads, farms, etc. We pretty much followed the perimeter of the park’s Northwestern corner on our first day, constantly hugging the boundary line. This area was covered with large boulders and rocky outcrops that I would have loved to climb, but we didn’t have a lot of time to spare. Today, we were trying to make it to the junction of the Raven Ridge Trail and Beaver View Trail, trail numbers 521 and 524.

Hiking The Rocky Ridge Trail

Dad on the Rocky Ridge Trail

Northern section of the Rocky Ridge Trail
We made it to our planned destination around 6:30, which ended up being a little over 6 miles. Not bad for 3 hours, with a 61 year old first timer! Camp was a small clearing under some pine trees along the Raven Ridge Trail. I helped my dad set up his tent (my spare one-man, an Alps Mountaineering Zephyr 1) since it was his first time using it. The weather was looking cloudy, so we put our packs in the vestibules and headed down the trail to find a place to cook our dinner. Usually on my first or even second night in the backcountry, I’ll eat a nice meal like burgers or italian sausages. If you freeze them and keep them in a cooler until you reach the trail, these types of foods can be kept 1-2 days depending on the temperature and how well you keep them insulated in your backpack. I know many people don’t do this, but I like to eat GOOD! Unfortunately, I forgot the cheese for our burgers. But that’s the only thing I forgot for this entire trip, and seeing how as I planned it in such little time, I’m ok with that.
It was nearly 9pm by the time we finished cooking and cleaning, and by this time my old man was worn out. He was off to bed, and I did the same about 30 minutes later. This night was eerily quiet… I don’t ever remember having such a quiet night in the woods. When I was trying to get to sleep, I couldn’t hear one cricket, bird, anything. It was so quiet, all I could hear is a slight ringing/buzzing in my ears.
Day 2 – June 5th, 2012
My alarm went off at 7am and it was time to get out of bed. My dad is an early bird, and was already up on his own without an type of alarm. It was pretty overcast, and looked like rain in the distance. It looked like this the whole afternoon/evening the day before though and we didn’t see rain then, so we hoped today would be the same. We hit the trail around 8:30am and headed East on the Bear Rocks Trail, number 522. This area had nice views of rolling hills and meadows, with low rain clouds at the tree tops in the distance. The openness of this terrain was a welcome sight to my last hike in New Mexico.

Raven Ridge Trail just south of the Bear Rocks Trail
Upper Red Creek along the Dobbins Grade Trail
Shortly after turning hitting the Dobbins Grade Trail, number 526, we crossed our first stream, the upper portion of the Red Creek. After hiking a bit farther, we passed the river again, which was deeper and wider at this point. We decided to drop our packs and try fishing some of the small pools. I usually bring a collapsible rod strapped to the outside of my pack and store my reel inside. My dad brought his fly rod, in a case strapped to the side of his backpack. A few minutes after throwing our lines in the water, an older man walked by on the trail above us, and asked if we caught anything. This was the first person we’d seen, but not the last. After a half hour, we weren’t getting any action and we called it quits.

Red Creek along the Dobbins Grade, near Raven’s Ridge Trail intersection
Eventually this area became very wet and boggy as we made our way down the Dobbins Grade Trail. This was probably my least favorite section of our hike. Everywhere you stepped was wet and muddy, sometimes mid shin depth and probably much deeper in areas we avoided. If I were to hike this area again, I’d follow a ridge on higher ground rather than trekking through this swampy area. I can’t complain though, because my boots did keep my feet dry. My dad’s brand new thinsulate water proof boots did not keep his feet dry, but once again my Zamberlains served me well. Before I left for this hike I applied some Sno-Seal on them to treat the leather and water proof them. At first, the water was beading off pretty well, but eventually the wax wore off and although the water didn’t bead up, they still didn’t leak.
Once we hit the Upper Red Creek Trail, number 509, we followed it South and left the sinking mud pits of the Dobbins behind. This trail was much drier and pleasant. After 1.25 miles, the 509 ends at the Blackbird Knob trail, number 511. We followed this west for 1/3 mile and continued south on the Red Creek Trail, # 514. Our plan for today was to stop at a campsite along this trail, explore the river and it’s waterfalls and maybe get some fishing in. We found a great campsite along the river by 12:30pm, probably the earliest I’ve ever stopped hiking. We’d covered 6 miles already so this was good enough for me. I had to keep in mind that my dad is not used to this kind of activity, and I tried to keep the hike as easy as possible for him. His only complaint so far was that my crappy High Sierra backpacking was hurting his hip. If anything, I was expecting a back problem… if you could see how this backpack sits on your back, you’d understand. The straps at the top have a buckle that prevents the weight from being pulled right up to your back, leaving a gap between your back and the backpack. I put the pack on and could feel the weight of it just wanting to pull you backwards.

They don’t call it Red Creek for nothing
It still looked like it was going to rain, so we promptly set up camp. We then headed up the river a few hundred feet to check out a small waterfall. After snapping some pictures here, we headed downstream through the river, hoping rocks and following the banks past our campsite. There were several other groups of people camping just a few hundred yards downstream from us near another small waterfall, at the forks of the Red Creek and another stream. We hiked upstream of one of the forks for a ways, but didn’t see any waterfalls here.

Waterfall on the Red Creek with a cave behind it

Adjusting the shutter speed to blur the water. Still practicing!

View of the waterfall from higher ground
We headed back to the forks and downstream along the other direction. It was starting to sprinkle now, but we kept going as there we encountered numerous waterfalls that became more impressive as you progressed downriver. With the added beauty came increasingly difficult terrain. We came up to a waterfall that was 15 feet or so in height that had a good sized cave behind the falls just as it began to rain harder. The cave provided excellent shelter from the rain, but after 2 hours it was still coming down. I suggested that we make a fire to warm up a bit and to give us something to do. Even though there were plenty of sticks in this cave, they were pretty damp and we had no dry tinder. We spent a good 20 minutes trying to get this fire lit but it did not want to catch. I flipped over a large rock and there was a small, wet piece of birch bark underneath. This was all we needed to get it going, and soon we had a roaring fire. But wouldn’t you know it… the rain stopped 10 minutes later!
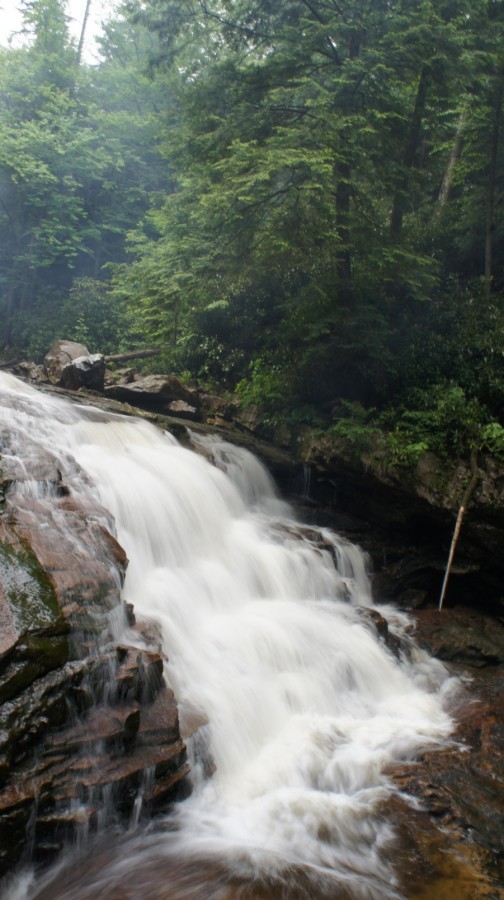
Waterfall on Red Creek

Dad tending to the fire
Taking advantage of the break in the weather, we headed back to camp. We had planned on cooking hot dogs over the fire tonight, but the weather didn’t look like it was going to cooperate for long. All the firewood we gathered earlier was already soaked. Fortunately, there were a lot of birch trees in the area and with a few handfuls of bark, we just might be able to have a fire after all. We gathered more “dry” firewood and tinder from areas underneath pine trees and rock overhangs, and started a fire with the birch bark once again. Once lit, even the wet stuff was burning. However, the fire was requiring a lot of attention and we didn’t have many large pieces of wood, so we ate our night 3 dinner tonight, 2 tortillas each with cheese and pepperoni. Hopefully tomorrow night will be dry so we can cook the dogs over a fire.
I went to bed around 10pm tonight, and it wasn’t raining at the moment. Minutes after I laid down, I heard a small animal moving around very close to my tent. VERY close. I shouted at it but whatever it was would not go away. I got up and out of the tent to make my presence known, but didn’t see anything. I laid down again and didn’t hear anything else, and eventually fell asleep.
Day 3 – June 6th, 2012
I woke up around 4am to the sound of rain. It wasn’t heavy, but it the fact that it was raining at all was disheartening. Today we were supposed to hike to Breathed Mountain and visit the Lion’s Head. I went back to sleep and woke up at 7 when my alarm went off. It was still raining, and my dad was up walking around with his rain gear on. I opted to stay in my tent, and figured we’d wait a few hours to see if the weather clears up before breaking camp. We only had to hike about 4 miles today, so there was no hurry.
Eventually, the rain let up after 11am and I crawled out of my tent. When I reached into my backpack to grab breakfast, which was in my vestibule, I saw evidence of the animal that had been rooting around near my tent. I had a ziplock bag with hot dog buns and bagels that was chewed open and had mouse crap all around it. I usually don’t hang my food, because I use these OP Saks, which are advertised to block the scent of anything inside. I’ve tested these bags by putting food inside it and putting it under my dog’s nose, and the dog had no interest in it. However, my bread was in a separate ziplock bag that was not stored inside the OP Sak, and it fell victim to the mouse. Fortunately only 1 bagel and a few hot dog buns were affected, and it wasn’t a total loss. Lesson learned.
The weather appeared to be clearing up at this point so we decided to pack up and head out. And by clearing up, I mean becoming only 95% cloudy. Seeing a little patch of blue in the sky was a glimmer of hope as broke camp around 12:30 and headed South on the Red Creek Trail. I was disappointed that this trail had no view of the river below, as this is where I saw some nice waterfalls the day earlier. Not having the chance to push farther downstream yesterday and now not having a view from the trail was killing me! You could rear the roar of the water for a ways, before the trail curved away from the river. The trail was muddy, but still not as bad as the Dobbins Grade Trail.

Hiking the Rocky Point Trail
Between the Breathed Mountain Trail, 553, and the Rocky Point Trail, 554 was a relatively easy hike. There really wasn’t much to see here though, so we made good time through this section and took the Rocky Point Trail. I had read there was a campsite near Lion’s Head, a rock formation on Breathed Mountain, so my plan was to camp up there for our last night. I had considered camping here the first night and doing the loop in the opposite direction, but am now glad that I chose to do it this way. The weather was looking better and just maybe we’d get a chance to take some pictures of the sunset and sunrise here without cloud cover. We found the side trail near the Southern end of the Rocky Point Trail, on the West side. After a short scramble up some rocks, we found a small campsite right on the edge of a wooded area. It was barely large enough for our two one-man tents, but we made it work. My tent was sopping wet when I set it up and after it had rained several more times that afternoon, I noticed it was now completely dry thanks to the pine tree above. Usually when it rains at camp, I’ll just hang out in my tent. My area was dry enough to just stand out in the rain, which was really nice.

Campsite near the Lion’s Head

View from our campsite on Breathed Mountain

Me on the rocks of Breathed Mountain
We spent the afternoon exploring the open rocky area surrounding the Lion’s Head and snapping pictures. That is, of course, in between the frequent rain showers. Navigating these rocks required jumping over deep cracks ind gullies form time to time, but nothing too extreme. The rocks were not slippery, even when wet. In fact, they had a sandpaper-like grip which was nice for once. There were tons of pinkish flowers up here which I was not expecting to see on an exposed rock face, but added to the beauty of this already amazing vista. I had an elevated view of my surroundings in a 270 degree field of view, and could hear the distant roar of Red Creek below. No wonder this is known as the best view in the Dolly Sods Wilderness!
Breathed Mountain View
Breathed Mountain View

The infamous Lion’s head

The last of the nasty weather rolling through
There were two other guys up here who we ended up talking to for a while. They were locals, both in their early 20’s. One of them had never been to the Dolly Sods Wilderness or backpacking at all for that matter, but I if I remember right they both frequent Seneca Rocks nearby for rock climbing. They were taking pictures on the Lion’s Head and wanted to “trade” pictures with us. My dad and I stepped out onto the Lion’s Head as they took a few pictures of us together, and then we returned the favor. They were busy climbing so I set their camera on one of their backpacks and I noticed one of them had the same backpack as the one my dad was using, the High Sierra 75. Do yourself a favor and spend a little more money on a better pack if you plan to use it more than once…this thing sucks. Check my gear section for the complete review.

We had an awesome view of the sunset as the weather cleared
Again, finding dry firewood would be a challenge. We gathered even less than the night before but enough to cook with. My dad gathered some birch bark earlier and had it stuffed in his pocket. This got the fire going rather quickly and it was time to grill some hot dogs! Since that damn mouse ate some of the buns, I had to “double up” the meat in each bun. This was another meal where I wish I remembered to bring the cheese… I always put shredded cheddar on mine, it’s great! But to anyone in the backcountry, a couple of plain hot dogs is as good as it gets. They must have smelled great, because I saw another mouse on the rocks below while we were eating. I grabbed a 20lb rock and hurled it at the mouse, and I still don’t know how he didn’t get crushed… it looked like it landed right on top of him! It scurried away and we did not see any more animals in the area or hear any throughout the night.
Day 4 – May 7th, 2012

Setting up the tripod shortly after 5am
Moon and the mist

Sunrise in the Dolly Sods Wilderness
I woke up at 5am today to watch and photograph the sunrise, and I’m glad I did because the weather had cleared overnight and the sky was as clear as you could get. Immediately after leaving the cover of the trees near camp and making my way onto the exposed rocks, I could see the intensely thick cloud cover in the valleys. I’ve never seen anything like this before… it was awe-inspiring. While waiting for the sun to come up, I set up my tripod and fooled around with my new camera, a Sony Nex-5. I have to admit though, I’m a complete novice when it comes to photography. I really need to educate myself more but haven’t had the time before this trip. Regardless, I was going to fool around with it and see what I could do. This really just consisted of adjusting the aperture and shutter speed manually. I had a polarized filter which I used for most of the trip as well.

Wow!!


The sun rose around 6am, and the rapid changes in lighting offered many photo opportunities. The fog had an orange glow to it as the sun climbed higher in the sky. The moon was still very brightly visible as well… a stark contrast to the vividly blue sky. Shortly after sun rise, my dad got up and joined me. He took a few pictures with his camera, but I easily snapped over a hundred this morning.


We headed back to camp around 7:30am to pack up and head back to the car. Today’s hike would be around 5 miles. We were almost out of water and began to ration it to last us to the car. I had eaten a Met-rx bar earlier, around 7am, but this is not enough for me. I was pretty hungry by the time we hit the trail at 8:30, but I didn’t want to eat without having enough water to drink, so I skipped a full breakfast this morning.
Back on the Rocky Point Trail, it became less rocky as we headed North. After reaching Big Stonecoal Trail, number 513, it’s a straight shot back to the trailhead we started at. From this point, it’s about 3 miles to the trailhead, and another mile to the car from there. Now on the 513, the two hikers we saw up by the Lion’s Head the night before passes us. For the rest of the morning, we’d play leap frog on the trail, passing each other several times. Not long after, we passed a cascading waterfall about 20 feet in height. I climbed down to get some pictures, and then it’s back to the trail.

Another waterfall on the Red Creek
The next section of the trial consisted of multiple meadows separated by patchy wooded areas. It was pretty wet through here, but there was almost always a rock or log to hop your way past anything that looked deep. There were a few campsites through here that would have been nice, but we didn’t bother to investigate. We were both ready to get back to the car, and didn’t stop for much. After passing through a pine forest, the trail became rocky again and was wreaking havoc on Dad’s endurance. He doesn’t complain though, and before you know it we were back at the trailhead. Only 1 mile left to go! This section seemed twice as long coming back. When we got within sight of the car, there were three people on horseback coming our way. One of the horses got spooked by the sound of our trekking poles hitting the rocky ground and looked like he was going to bite us!
Final Thoughts
The Dolly Sods Wilderness has it’s own little climate pattern. It’s a wet region, bring good water proof boots and your rain gear. Also, a tarp would have been nice so that we had something to sit under when it rains. I’ve carried one before but have opted not to recently due to weight and bulkiness… I’d have carried it this time but the weather forecast looked good before we left so I chose not to. Be prepared to start a fire in wet conditions, or have no fire at all. If you choose to hike that route we took, leave your fishing pole at home. We didn’t see any fish anywhere, and had no luck fishing.
This hike wasn’t particularly difficult, and is suitable for most people. There were some ups and downs, but never anything real steep and nor was it for longer than a tenth of a mile or so.
I’m really glad I did this hike. Dad had a good time, and I know this trip will be something he’ll never forget. Watching the sunrise on Breathed Mountain was incredible, and worth the drive alone. I highly recommend camping up by the Lion’s Head and spending some time up here.
Complete Dolly Sods Photo Gallery
As always, questions and comments are welcome!
If you found my trip report useful, please don’t hesitate to leave a comment! Alternatively, if you feel you have any information you’d like to share with others regarding this hike, please feel free to leave that below in a comment as well.
[tcb_comment_count]Mogollon Mountains Backpacking – Gila Wilderness, NM – May 2012
Gila Wilderness, NM – Mogollon Mountains Backpacking Overview
Complete Gila Wilderness Photo Gallery | Gila Wilderness HD Video
- Location – Mogollon Mountains in the Gila Wilderness, New Mexico
- Park – Gila National Forest
- Trail Hiked – Custom Route
- Miles Driven To Destination – 3700 miles roundtrip
- Length Of Time Hiked – 6 days, 5 nights
- Trail Type – Loop
- Miles Hiked – 45
- Trail Difficulty – 8/10
- Fires Allowed – Yes

When I went to order topographical maps to use in the Gila Wilderness, I realized that I’d actually need to buy 6 maps to cover all the quads that my route was passing through. Instead, I ordered a custom printed map that covers only the area I will be hiking in, allowing you to pick sections of quads and print them. This is what I ordered for this trip:
If you plan on hiking the same route as me, you can order the map I bought here: Mogollon Mountains Topo Map
Here’s another map of my route, showing you where I camped and where the forest fire was (read about that later):

Soon after getting back from my hike in Big Bend National Park, TX I started planning a spring trip. I had my hopes set on somewhere mountainous, like Colorado or Northern New Mexico, specifically The Pecos Wilderness. However, the weather in May just doesn’t allow for snow-free access in those regions this time of year, so I either had to move farther south, or lower in elevation. The Truchas peaks, at 13,000 feet, would have been awesome… but I after checking snotel and word of mouth from those who’ve hiked it this time of year, I realized that early June is the earliest access to that region. However, I was told about the Gila Wilderness in Southwestern New Mexico. After a little research, I concluded that the Gila (pronounced hee-la) would be a perfect place for me to go at this time of the year.
The Gila Wilderness is part of the Gila National Forest, which is only separated from the Aldo Leopold Wilderness by one small 4×4 road. Combined, the two areas cover around 750,000 acres. I chose the Mogollon Mountains region of the Gila Wilderness, which is on the extreme West side of the park, close to Arizona. The temperature was forecast to be anywhere from 50-80 degrees during the day, depending on elevation, and around 35-65 at night. Temperature wise, I figured this would be perfect. May is also the driest time of year here, so I also figured that rain wouldn’t be a problem. The rivers should also be lower, making stream crossings easier. And, campfires are allowed as long is there is not an alert in place… check the Forest Service website here http://www.fs.usda.gov/alerts/gila/alerts-notices. There was no alert or fire ban in place when I went, however, lightning caused 2 fires in the Mogollon Mountains while I was in the park. This fire has now grown to be the largest wildfire in New Mexico’s history! We had some excellent views of the fire from the top of Grouse Mountain, of which I have some nice pictures and video, but I’ll get into that later.
Getting There
With an 1,850 mile drive ahead of me, I left home in southeastern Michigan at 7:30am on Friday, May 11th and headed for Springfield, IL to pick up my hiking partner. I made it all the way to Springfield around 2:30pm on one tank of gas, 462 miles. We promptly ran out of gas looking for a gas station, but luckily I plan ahead for most things, and it was as simple as getting the gas can out of the trunk which I filled ahead of time, just in case. This got us to the next gas station, and we drove until 11:30pm. We stopped at a crappy Budget Inn type of motel in Pratt, Kansas and got the best room $55 could buy.
The next morning we got on the road at 7:30am, and began the long boring drive through Kansas. At this point, we figured we’d arrive at the trailhead at around 6pm today. We were making such good time that we had a decision to make: stop in the last town that has a hotel (which looked like Socorro on the map, which was a 3 hour drive from our destination) and head to the trailhead in the morning, or camp at/near the trailhead somewhere and leave early morning to hit the trail. We choose to drive all the way to the trailhead, and ended up making it there around 7pm. We camped in a small campground on highway 180, literally right across the street from the entrance to the Whitewater Picnic Area. There is NO CAMPING at the Whitewater Picnic Area, it’s day use only. This is where you park your car, which will run you a whopping $3/day. Not bad since there are no other fees or permits required to hike or camp in the Gila Wilderness. Just park your car and go.
Notes
There are 2 main trailheads in the Gila Wilderness and several smaller ones. For the Mogollon Mountains region, the Whitewater Picnic Area is the most popular. The other is the Gila Wilderness visitor center on the East side of the park, which is at the end of State Hwy 527 (also called Hwy 15), which is near the Cliff Dwellings. There are several other trailheads along Bursum Rd on the North side of the park, and many more. These are usually marked on a topographical map, which you should have if you are hiking here anyways.
Day 1 – May 13th, 2012

Catwalk Trail
We hit the trail around 8:30am on Sunday May 13th.The first mile of our hike was on the Catwalk trail, a developed area with paved trails and a metal catwalk that allows you to walk over the rugged terrain without getting your feet wet. This area was pretty cool and easy to see why it was a popular day hike. At the terminus of the Catwalk trail, we thought we’d be at the junction of the Whitewater Trail #207 and the South Fork Trail #212. Instead, the end of the Catwalk Trail becomes the beginning of the Whitewater Trail, and we had about another mile to go before we reach the above junction.

Our plan was pretty loosely formed at this point… I had picked a point on my topographic map that we determined to be about 10.5 miles away where the Golden Link Trail crosses Big Dry Creek. We would hike the Catwalk trail to the Whitewater trail, to the South Fork Trail, which later becomes the Golden link trail after you pass Camp Creek Saddle. Our plan was to hike to this point today, set up a basecamp, and spend the next 1-2 days exploring Big Dry Creek, Spider Creek, and Spruce Creek as there are numerous waterfalls in this area. I found an awesome site that tells you about all of the waterfalls in New Mexico, including many in the Gila Wilderness. It has pictures, descriptions and even GPS coordinates of the falls. It’s http://www.dougscottart.com/hobbies/waterfalls.htm and the falls in the Gila Wilderness are numbered K4 – L3, just to save you some time plotting them on the map. After this, we had no plan… to be determined as we go!

After leaving the Catwalk trail behind, we saw a handful of other hikers, maybe 4 between 2 groups before hitting the South Fork Trail. At this point, my hiking partner, Dan, began to slow down quite a bit. It got got to the point where we’d hike for 3 or 4 minutes and then take a 2 minute break. I was getting agitated with the stop and go pace we had adopted, and I told Dan we need to pick up the pace. His response was “What’s the rush? We have until 9pm.” This was Dan’s 2nd hike ever, and he thinks it’s not going to be a big deal hiking until complete darkness and then trying to find a campsite. He was totally fine with this. Well, not me. “I’d rather cover my mileage in as few hours as possible, and have the rest of the day to explore and relax as I see fit,” I said. Dan snapped, “Well, I don’t want to be rushed. Go ahead and get to the campsite then, I’ll get there.” Even though I know I shouldn’t have, I left Dan behind and continued on the trail at my own pace. We both had a map and knew where to meet, and as long as he followed the trail, we’d meet up. That was my thinking at that point.

South Fork Trail… basically, the stream is the trail


Hiking solo, I pushed on for another hour and a half before stopping for lunch. A pastrami and cheese sandwich was on the menu, which I ate as I air dried my feet near the creek. They were already soaking wet with sweat, but were dry after 25 minutes. I figured after 25 minutes, maybe Dan would have caught up to me, but he didn’t. I hit the trail again, and was really enjoying the hike along he South Fork Whitewater Creek. The canyons were very steep on both sides, and the trail criss-crossed the river many times. It was easy to hop rocks across the river in nearly every crossing because the water level was lower, so that made it easier. It was about 30 minutes after eating lunch that I began to feel like crap. I think t was a combination of dehydration and maybe that sandwich. I know I didn’t drink enough during the car ride, didn’t want to stop every hour to take a piss. So, I found a comfortable spot on the rocks beside the South Fork Whitewater Creek and laid down for 45 minutes. I hit the trail again once I felt a little better, but still no sign of Dan. At this point I thought he may have turned around and went back to the car, and planned on camping across the street at the campground we stayed at the night before. Or, he’s just incredibly slow!

I now realized that I was not going to make it to our planned destination today. My new plan was to continue hiking the South Fork Trail until I passed the junction of the Little Whitewater Trail/East Fork Trail, and start looking for a campsite. After passing the above junction, I found a campsite a few hundred yards down the trail. It was within view of the trail, so if Dan was hiking by here, he’d definitely see me. By nightfall, I still hasn’t seen him. Now, I though for sure he’d turned around. My dilemma was to continue without him or to turn around and make sure he was ok. Knowing he had everything he needed to get by on his own, I decided that I’ve driven too far to call off the hike. I really enjoyed my only prior solo hike, a 25 mile loop through the Porcupine Mountains in the Upper Peninsula of Michigan in October of 2011 and did not mind at all doing another 5 days here by myself if need be. With that in mind, I started a fire and cooked some italian sausages that I kept frozen (well, partially frozen) in my cooler on the car ride here. I always opt for something good my first night such as a burger or brats, since they keep just fine for 1-2 days if kept frozen until you hit the trail… and DAMN, were they delicious!
Day 2 – May 14th, 2012
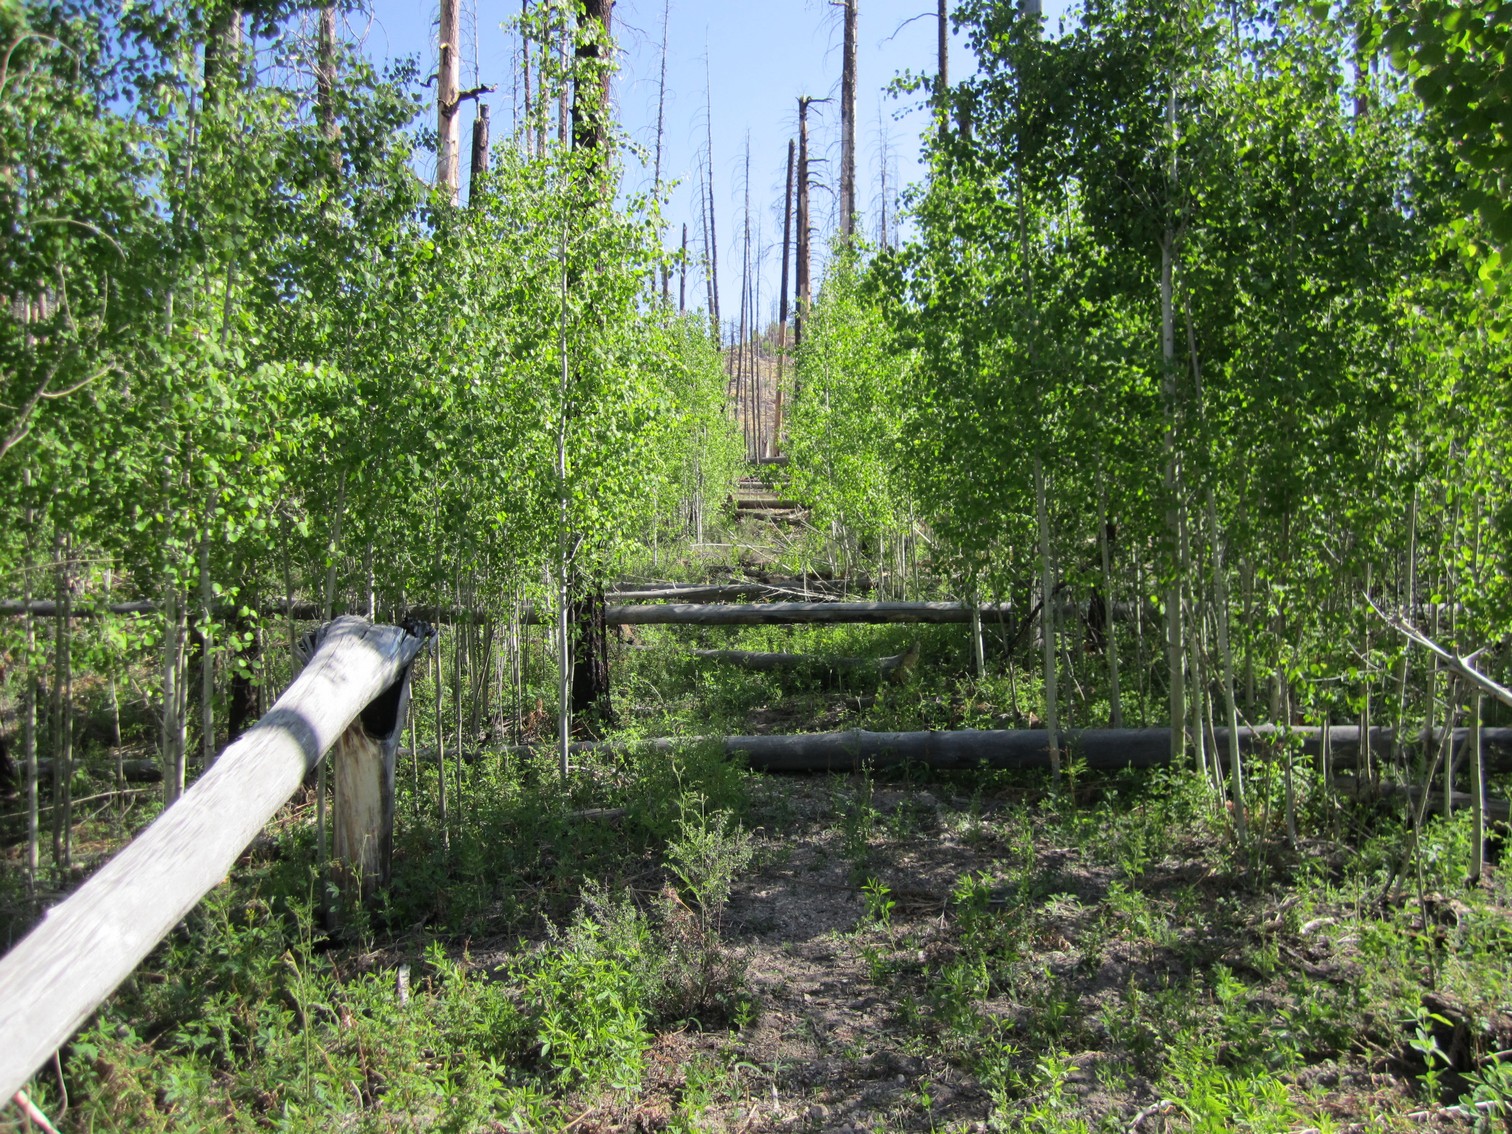
Junction of the Holt-Apache Trail and the South Fork/Golden Link Trail

After filtering some water and refilling my water supply, a 2L Osprey hydration bladder and a 1L water bottle, I hit the trail at 8am. I was making good time and made it to Camp Creek Saddle about 1.5 hours later. I stopped and dropped my pack to climb a small hill to get a view of my surroundings and snap some pictures, then proceeded down the Golden Link Trail towards yesterday’s original destination at the junction of the Golden Link Trail and Big Dry Creek. Little did I know that this was going to be an all day adventure… what was supposed to only be a hike of 3 miles max ended up taking me the entire day! The Golden Link Trail was very difficult to follow in the section Southeast of Camp Creek Saddle, and I was constantly losing the trail and trying to find it again. If the trail was on one of the hillsides next to Camp Creek, I didn’t see it. They were pretty steep anyways, so I opted to hop down into Camp Creek and hike through the river bed. This was very slow going due to huge boulders, flash flood debris, and tons of downed trees. I knew the trail followed the creek, so I wasn’t too worried about finding it again, which I eventually did.

Upper Camp Creek, all dry!

Quite the logjam here

Where the Golden Link Trail crosses Spider Creek, I dropped my pack to air out my feet and have a snack. Knowing that there are a few waterfalls farther up Spider Creek, I hiked upstream for about 15 minutes. I had planned on exploring Big Dry Creek and Spruce Creek the next day, without my pack, so I decided to turn around and cover more ground today. Now, this is where things began to get really interesting for me. After crossing Spider Creek, I could not find the Golden Link Trail for the life of me. There were cairns stacked on the other side of Spider Creek, so I hopped up there to look for the trail but simply could not find it. I followed several little foot paths on this steep hillside, only to find dead ends and dense shrubbery. I spent about an hour looking for this trail with no luck.I decided to follow Spider Creek downstream to the point where it meets Big Dry Creek, and this point was only a half mile or so from where I was planning on meeting up with Dan.

Hiking Spider Creek

The top of Lower Spider Falls
I really enjoyed following Spider Creek as it felt very remote. There was no trail here, just following the river. Actually, hiking through it in spots. The canyon walls around me got steeper as I progressed downstream until eventually I was stopped in my tracks by a waterfall that appeared to be 40-60 feet. This was Lower Spider Falls. From my topographical map, I could see this as a potential problem before I began hiking this way, but couldn’t be sure if it was passable of not. Well, it was definitely not passable as sheer cliffs came together in one small point for the water to flow over the edge. I had no choice but to backtrack the way I came. I hiked about halfway back to the Golden Link Trail before finding an area that seemed to have the “least steep” slope, and decided to just hike to the top of the hill that towers over Spider Creek, as I knew the Golden Link Trail was on top of that hill somewhere. If I hike straight up this thing, I have to hit the trail. This was a bitch… having a 50lb pack and hiking through dense vegetation was not helping. I don’t remember how long this took, maybe 45 minutes or an hour, but it was a 700 ft elevation gain. I tried to follow little game trails where I could, but no matter which way I went I was getting scratched up by all the thorn bushes. Finally, near the top of the ridge I hit the Golden Link Trail and was back on track.

View from the Golden Link Trail

View from the Golden Link Trail near Big Dry Creek
By this time, it was mid to late afternoon. The trail was now descending into Big Dry Canyon via steep switchbacks. This section of the trail was very beautiful, with excellent views of sheer canyon walls all around. I eventually made my way down to Big Dry Creek, which is where Dan and I planned on meeting up the night before. I was planning on camping here tonight regardless, but to my surprise, Dan was already there and had set up his camp just a few minutes earlier. Honestly, we were both surprised to see each other, as he thought I was way ahead of him, and I thought he’d gone back to the car. Although Dan had reached our destination before I had, he did not lose the trail as I did and was hiking the whole day to get to this point.

Camp for nights 2 and 3
From the topographical map, this area looked like it would be a good place to camp as the banks of the river looked wide. In reality though, like everywhere else in the Mogollon Mountains, there were no flat areas to camp, at least not like I had expected. Dan found a small area on the hillside that was just large enough to fit his tent, while I set mine up on a large, semi-flat rock that sat about 8 feet above Big Dry Creek. However, it was not as flat as it looked and no matter which way I positioned the tent, it was pretty slanted. I found some flat rocks to put underneath my tent to level it out, and it was almost comfortable. Good enough, now it’s time to start thinking about a fire. There was a bit of an “island” in the center of the creek with just rocks and gravel, and this is where we made our fire.
We began to plan out our next move on the map as we ate and enjoyed the fire. Tomorrow, we’d stick to our original plan, which was to have our 3rd day as an “exploration day”. The plan was to follow Big Dry Creek and find some waterfalls, and explore off trail.
Day 3 – May 15th, 2012
We woke up around 7am, ate breakfast, and headed up the Big Dry Creek by 8am. I chose to wear my hiking boots while exploring upstream over my water shoes. Most of the time we were hoping rocks and hiking right through the creek itself because the banks were either too steep or covered with thick vegetation. As rocky as this creek was, my feet were sore as hell from trekking a 1/4 mile in them the night before, so I opted for comfort. I’m glad I did, because I don’t think my feet could have taken that kind of beating for an entire day. Sure, my boots got soaked as they were occasionally dunked in the water halfway up my shins, but at the end of the day it was a good decision. Dan chose to wear his Vibram FiveFinger shoes, which were a lot more sturdy than my water shoes. Although his feet were sore at the end of the day, I know they provided a lot more protection than my cheapo Walmart water shoes would have. Maybe I’ll pick up a pair before my next trip.

Hiking upstream through Big Dry Creek

Dan climbing his way up Big Dry Creek

Posing in front of a waterfall. Later, we’d swim here
Hiking up Big Dry Creek was awesome. We encountered several smaller sized waterfalls, with the largest being around 15 feet or so. The farther we went upstream, the more rugged the terrain became. Every so often, we’d run into something we weren’t sure we’d be able to get around, such as some extremely large boulders or steep canyon walls. At one point we had to squeeze through a narrow opening at the end of a small cave to continue up river. We took our time and enjoyed this relaxing day, because tomorrow we’ll have to hike up to Black Mountain, a 4,000 ft elevation gain from our current campsite.

Dan squeezing through a small opening in a small cave
We turned around sometime in the early afternoon and headed back. We stopped at one of the waterfalls we passed earlier in the day and were tempted to swim in the pool at it’s base. We were both filthy from 3 days of backcountry travel, and although the water was freezing, the warm weather and beauty of the waterfall proved to be irresistible. Dan jumped first after taking a few minutes to build up the courage. As soon as he resurfaced, he quickly swam ashore. I laughed at his reaction to the icy water, but it was my turn next. My feet hit bottom, and I guessed it was around 8 feet deep. I lasted no longer than Dan, and instantly got out. That water was numbingly cold, but it felt great to be somewhat “clean” again.
We got back to camp in the late afternoon, and after a quick break, we headed downstream on the Big Dry Creek. I wanted to get to the bottom of Lower Spider Falls, the waterfall that stopped me in my tracks the day earlier. I had scouted this area earlier, and only made it a few hundred feet from our camp before the canyon walls narrowed and the water dumped into a pool that appeared to be 6 feet deep or so, even at the edges. We found an area on the hillside that looked manageable to climb up and go over the canyon wall, but it was steep. We made it over and only a few hundred feet downstream, we were again stopped by a similar situation. Another deep pool with no way around it. I found another way around, but this hill was steeper and much taller than the last. It was maybe 200ft up, and it was getting a bit hairy. I used a stick as an improvised “ice axe” to keep from sliding down which really helped. After making it to the top of this ridge, we could see Lower Spider Falls. However, the ridge we were on appeared to get very steep and we didn’t see an easy way down to the river again. It was around 6:30 at this point and we decided to turn around.

Trying to progress downstream on the Big Dry Creek

View of Lower Spider Falls. I wish we could have gotten closer!
For dinner I thought I’d try one of those freeze-dried meals. It was the Natural High brand, honey lime chicken. After pouring boiling into the bag, it says to wait 10-12 minutes or so. Mine was in there for a half hour or so, next to the fire keeping it warm, and it never absorbed all the water. Yuk. Dan, however, was really impressed with his Mountain House meals, especially the lasagna. We sat by the fire and ate some sour patch kids and watched the stars for a while before turning in around 10:30.

Enjoying a fire at camp
Day 4 – May 16th, 2012

Exploring an old mine along the Golden Link Trail

Today is the day Dan has been dreading. A 4,000ft elevation gain up to Black Mountain on the Golden Link Trail, and then we’ll push on to Spruce Creek Saddle via the Holt Apache Trail. After hiking for about a half hour, we passed an older man with his dogs camping alongside the trail. This was the only person we saw out here our entire trip, beside people near the trailhead and along the Whitewater Trail. A little farther down the trail we passed the Golden Link Cabin. It’s always amazing to me seeing something like this in such a remote place. The next section of the trail offered some great views, but the switchback were relentless! We also found a old mine which was not blocked off, so we decided to explore inside. We dropped our packs and with our headlamps on, entered the mine and were only able to make it a few hundred feet in before it dead ended. There was nothing of interest to see in here so we hit the trail again.

Hiking the Golden Link Trail up to Black Mountain

Heading up to Black Mountain
By late morning, we made it to the point where the Golden Link Trail crosses Big Dry Creek. We had hoped to filter water here, but at this altitude, the creek was nothing more than a trickle. We were almost out of water and there wasn’t going to be any water for quite a while, so it as imperative to fill up here. We followed it “downstream” a ways and found a small pool that was suitable for drawing water from. After loading up on H2O and eating lunch, we headed for the top of Black Mountain. On our way up, we noticed a fire not far in the distance, over the next ridge. We did not see any flames, but plenty of white smoke billowing up from the forest and staying somewhat low in the valley. Because of it’s small size, I thought it may have been a controlled burn. We moved on eventually made it to the summit, but we were sorely disappointed to find that there was no view as it was blocked by thick tree cover. Nothing to do now but push on to Spruce Creek Saddle. Now on the Holt Apache Trail, the terrain was not as steep which was a nice break. We hiked another hour or so before reaching our destination. Camp Creek Saddle is a large open meadow, a welcome sight in the Gila. Everywhere we’ve been so far was steep, rocky, and covered with thick fauna. Although we were not near a water source, there was a large fire pit area and plenty of firewood at hand.

First view of the Gila Fire on our way up Black Mountain

Spruce Creek Saddle
Although we were a good ways away from the fire we saw earlier, it was still on my mind. I turned on my cell phone and was surprised to have signal, albeit only one bar. FYI, I have Sprint. I was able to search google for “gila fire” and the first result was from the forest service’s website, and in the description it mentioned a prescribed burn scheduled for May 9th that was postponed. I tried to click on it to read more but apparently I did not have “enough signal”, as the page would not load. So, I optimistically assumed that this fire was a controlled burn. This was comforting and helped us sleep a little better.
Day 5 – May 17th, 2012
Today we will hike the Holt Apache Trail to Spider Saddle, then take the Deloche Trail through Winn Canyon and finally to the Whitewater Creek Trail. This day was going to be almost all downhill, which was a relief after a hard day yesterday. We would also cover more ground than any other day, 13.8 miles.

View from the Holt Apache Trail between Indian Peak & Grouse Mountain
I woke up at 6am as I have been doing most days on this trip. Like every morning, I walk over to Dan’s tent and wake him up since he doesn’t have a watch with an alarm. And, like every morning, he says “Ok, I’m up”, but continues to sleep until I wake him again in a half hour. Eventually, we get moving and hike the Holt Apache towards Grouse Mountain. The topo shows a clearing near the summit, and we were hellbent on getting some mountaintop views one way or another. We dropped our packs on the trail, put on our Camelbaks, and hiked the 1 mile trail to the summit. The trail was difficult to follow after a certain point, and we ended up just bushwacking our way to the top. Even up here, there were remnants of an old cabin or mining operation. Pieces of metal bed frames and other objects littered the summit .


Helicopter flying through the smoke of the fire

When we got to the top, we found ourselves on the edge of a cliff with a spectacular view of the Mogollon Mountains. We saw another forest fire burning in the valley below, which appeared to be in Lipsey canyon near Redstone Park along the Whitewater Trail. We spent a good hour up here scrambling down to various ledges to get pictures of ourselves and the fire below, eating lunch and relaxing. We even saw a helicopter flying through the smoke surveying the fire. Little did we know that this fire would grow into the largest fire in New Mexico state history! It’s still burning as of June 10th 2012 and is now 278,000 acres, or 434 square miles.
With a lot of ground to cover, we descended Grouse Mountain and jumped back on the Holt Apache. Shortly thereafter, we made a wrong turn and headed down a side trail to Nabours Spring instead of staying on the main trail. We were going down steep switchbacks for a while and eventually the trail just ended. We found ourselves on the side of a steep slop with a long way to go to the top. We stopped and I consulted my GPS and topo, and discovered our mistake. If we continue to head down, this will put us in a canyon with no trails and difficult terrain. Our only choice was to head back up the way we came. This probably set us back an hour, but it happens.

Filtering water from Whitewater Creek

Whitewater Trail
Back on track, we found the Deloche Trail and hiked towards Whitewater Creek. Somewhere along this trail, we both ran out of water. We didn’t have much farther until we reached the creek so we kept a good pace all the way there. Once we hit Whitewater, we began to see a steady flow of other hikers in the area. We passed a group of guys who had just left Redstone Park the day earlier, and asked us if we saw any rattlesnakes. We hadn’t but he said he’d seen three. With all the climbing we did, we were surprised to hear that, and lucky we hadn’t. We stopped along the creek to filter water and cool off. Down in the bottom of the canyons was much hotter than it was a day earlier at 10,000+ feet.


Smoke from the forest fire behind us

Night 5 campsite along Whitewater Creek
We were worn out now, but needed to cover a few more miles today so that our hike back to the car tomorrow morning is a short one. We hiked another 4.3 miles until we reached a campsite at the junction of the Whitewater Trail and South Fork Trail. After making camp, we filtered more water and tried to rehydrate. I had been pissing dark yellow for a while now and chugged a few liters over the course of the night. We had a fire going, but it was pretty warm out and we were too tired to keep it going. Our last night in the Gila Wilderness was pretty low key. We both passed out around 9:30 or so, maybe earlier.
Day 6 – May 18th, 2012
I don’t think it matters where you are, but for me, I am ready to go home on my last day anywhere. Today was no different, and our car was only a 2.8 mile hike away. I ate the last of my food for breakfast, something I’ve never done before. Usually, I pack a little too much food. In all fairness though, I did plan this trip for 5 days, but since we made such good time driving we were able to get a sixth day in. Now foodless, we hit the trail and embarked on what seemed like a much longer trek than when we hiked this stretch on our first day.

Whitewater Trail nearing the Catwalk Trail

I hadn’t noticed hiking through here a few days earlier, but the the two sides of the canyon seemed to have very different types of ecosystems. One side was dry and looked like a desert, complete with cacti, while the other was forested and more lush looking. Looking back the way we came, we could see the smoke from the fire we saw earlier over the mountains.

Near the Whitewater Trail/Catwalk Trail junction
Now on the Catwalk Trail, we passed an older couple on a day hike. They asked if that was my “small black car” in the parking lot, and I said yes. Apparently we were now the only ones here. When we finally reached the car, there was a forest ranger there who told us they had just sent in rangers on horseback to look for any hikers still out there, as they have closed all the trails in this area due to the fire. He told us that lightning caused the fires and that it was around 400 acres as of this morning.
After changing out of our dirty clothes and packing our gear into the car, we left the Whitewater Picnic area around 10:30am. On our way back home, we thought it might be cool to check out the Mogollon Ghost Town nearby. Supposedly the town was abandoned in the 1940’s when WWII broke out. After the price of silver plummeted, the town went under and it was abandoned. Heading north on hwy 180, make a right on Bursum Rd and go down about 10 miles. The drive in was more impressive than the ghost town though. The road was steep and had no guard rails, and had great views of the land below. There were farms that butt upp to this road that had no fences, and there were cows wandering in the road at times. Once we got into the “ghost town”, we saw at least 3 houses the were inhabited. One guy had his sprinkler on and had a green lawn. There was a small museum and some other types of shops here, among a few old buildings like a saloon. From what I had read though, it was supposed to be abandoned, but clearly it was not. We turned around and headed back to hwy 180 and began the long drive back home.
Final Thoughts
The Gila Wilderness is an ass-kicker! The terrain is rocky and rough everywhere you go. The trails can be difficult to follow, and it would be easy to get lost here without a GPS or a topographic map (and knowing how to use it). It’s a very rugged place with a real feeling of solitude everywhere except for the Catwalk and Whitewater Trails, as this is where all but one of the people we encountered were. There are opportunities abound for those wishing to explore off trail, but in doing so you will find that the terrain can be a real challenge. Although we were able to hop rocks across every stream we encountered, other times of the year you would certainly need water shoes for stream crossings.
All in all, it was an excellent trip and I would love to visit another area of the park someday. Hopefully the forest fire doesn’t destroy the entire park, as it would be a shame to see this beautiful place scarred on such a massive level. I’m glad I got to see it before (and during) the fire, and I hope they are able to contain it soon so that others can enjoy it in the future.
Complete Gila Wilderness Photo Gallery
As always, questions and comments are welcome!
If you found my trip report useful, please don’t hesitate to leave a comment! Alternatively, if you feel you have any information you’d like to share with others regarding this hike, please feel free to leave that below in a comment as well.
[tcb_comment_count]